About Verilobi Hotel
📄 Contents
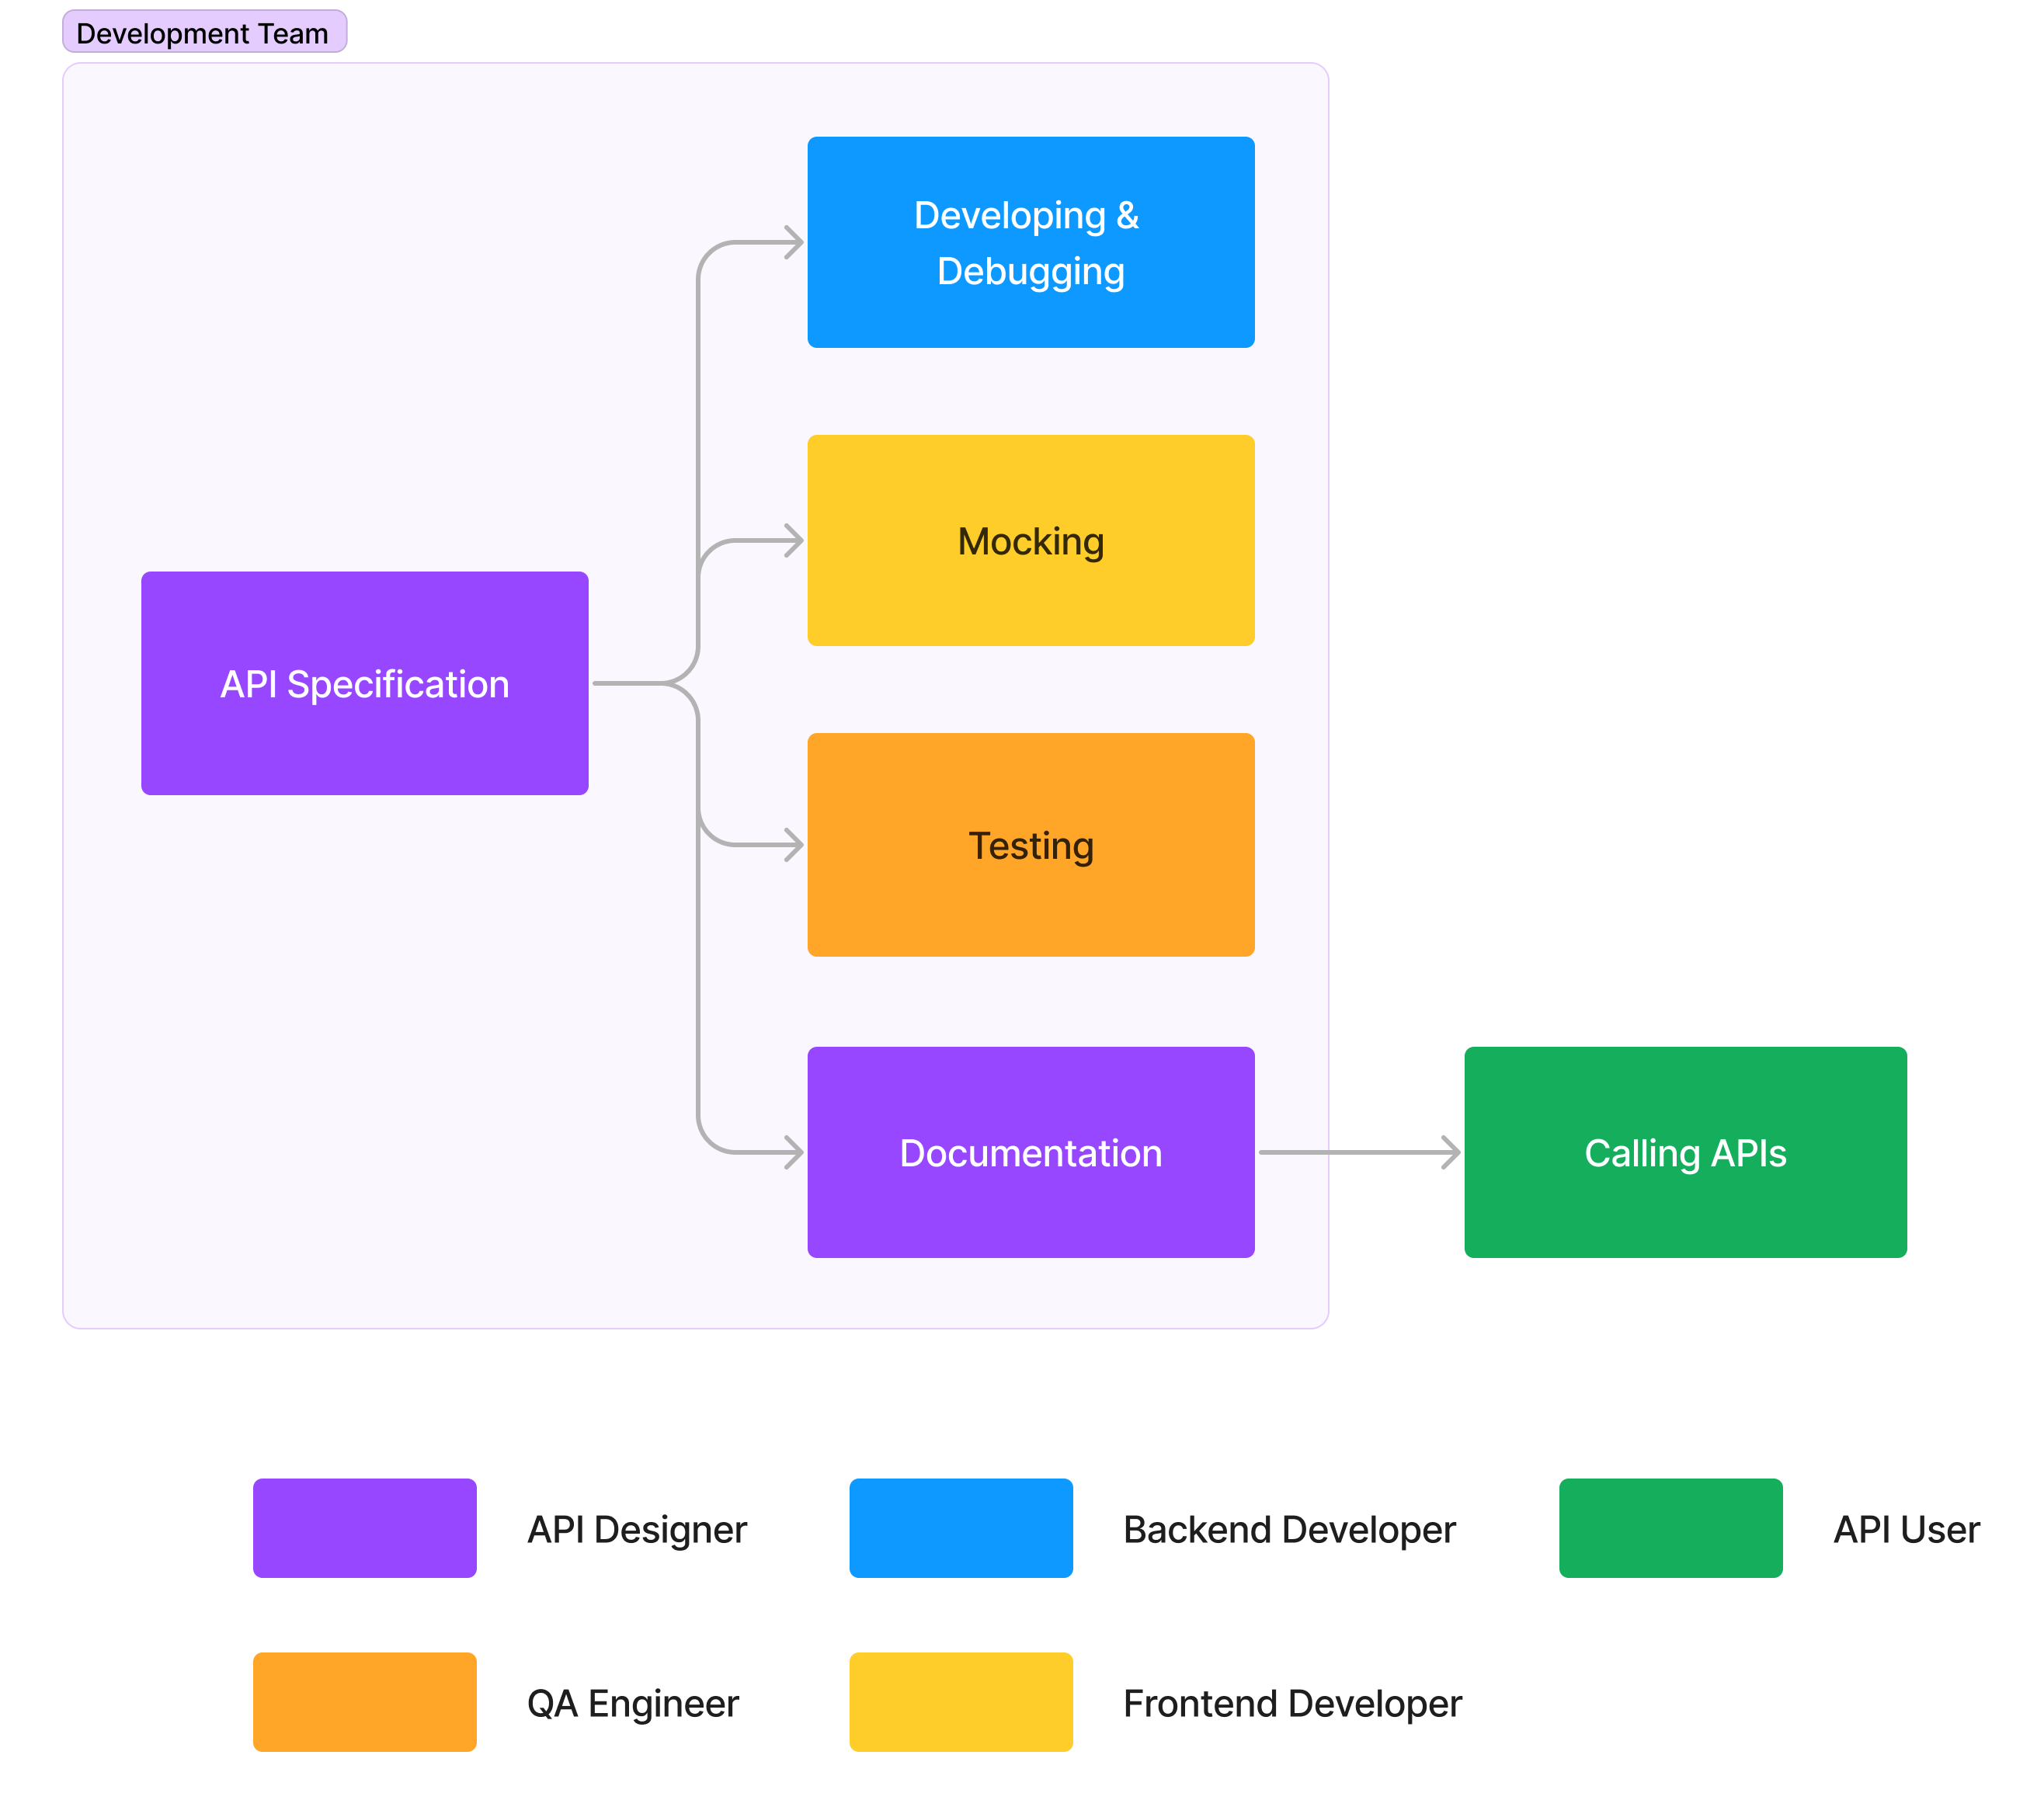
What is Apidog Why Apidog API Designers: Specify APls Back-end Developers: API Developing & Debugging Front-end Developers: API Mocking QA Engineers: APl Testing API Designers & API Consumers: APl Documentations Best Practice
What is Apidog
1.
2.
3.
4.
Why Apidog
API Designers: Specify APIs
Import from OpenAPI specifications
1.
Import in an Apidog project.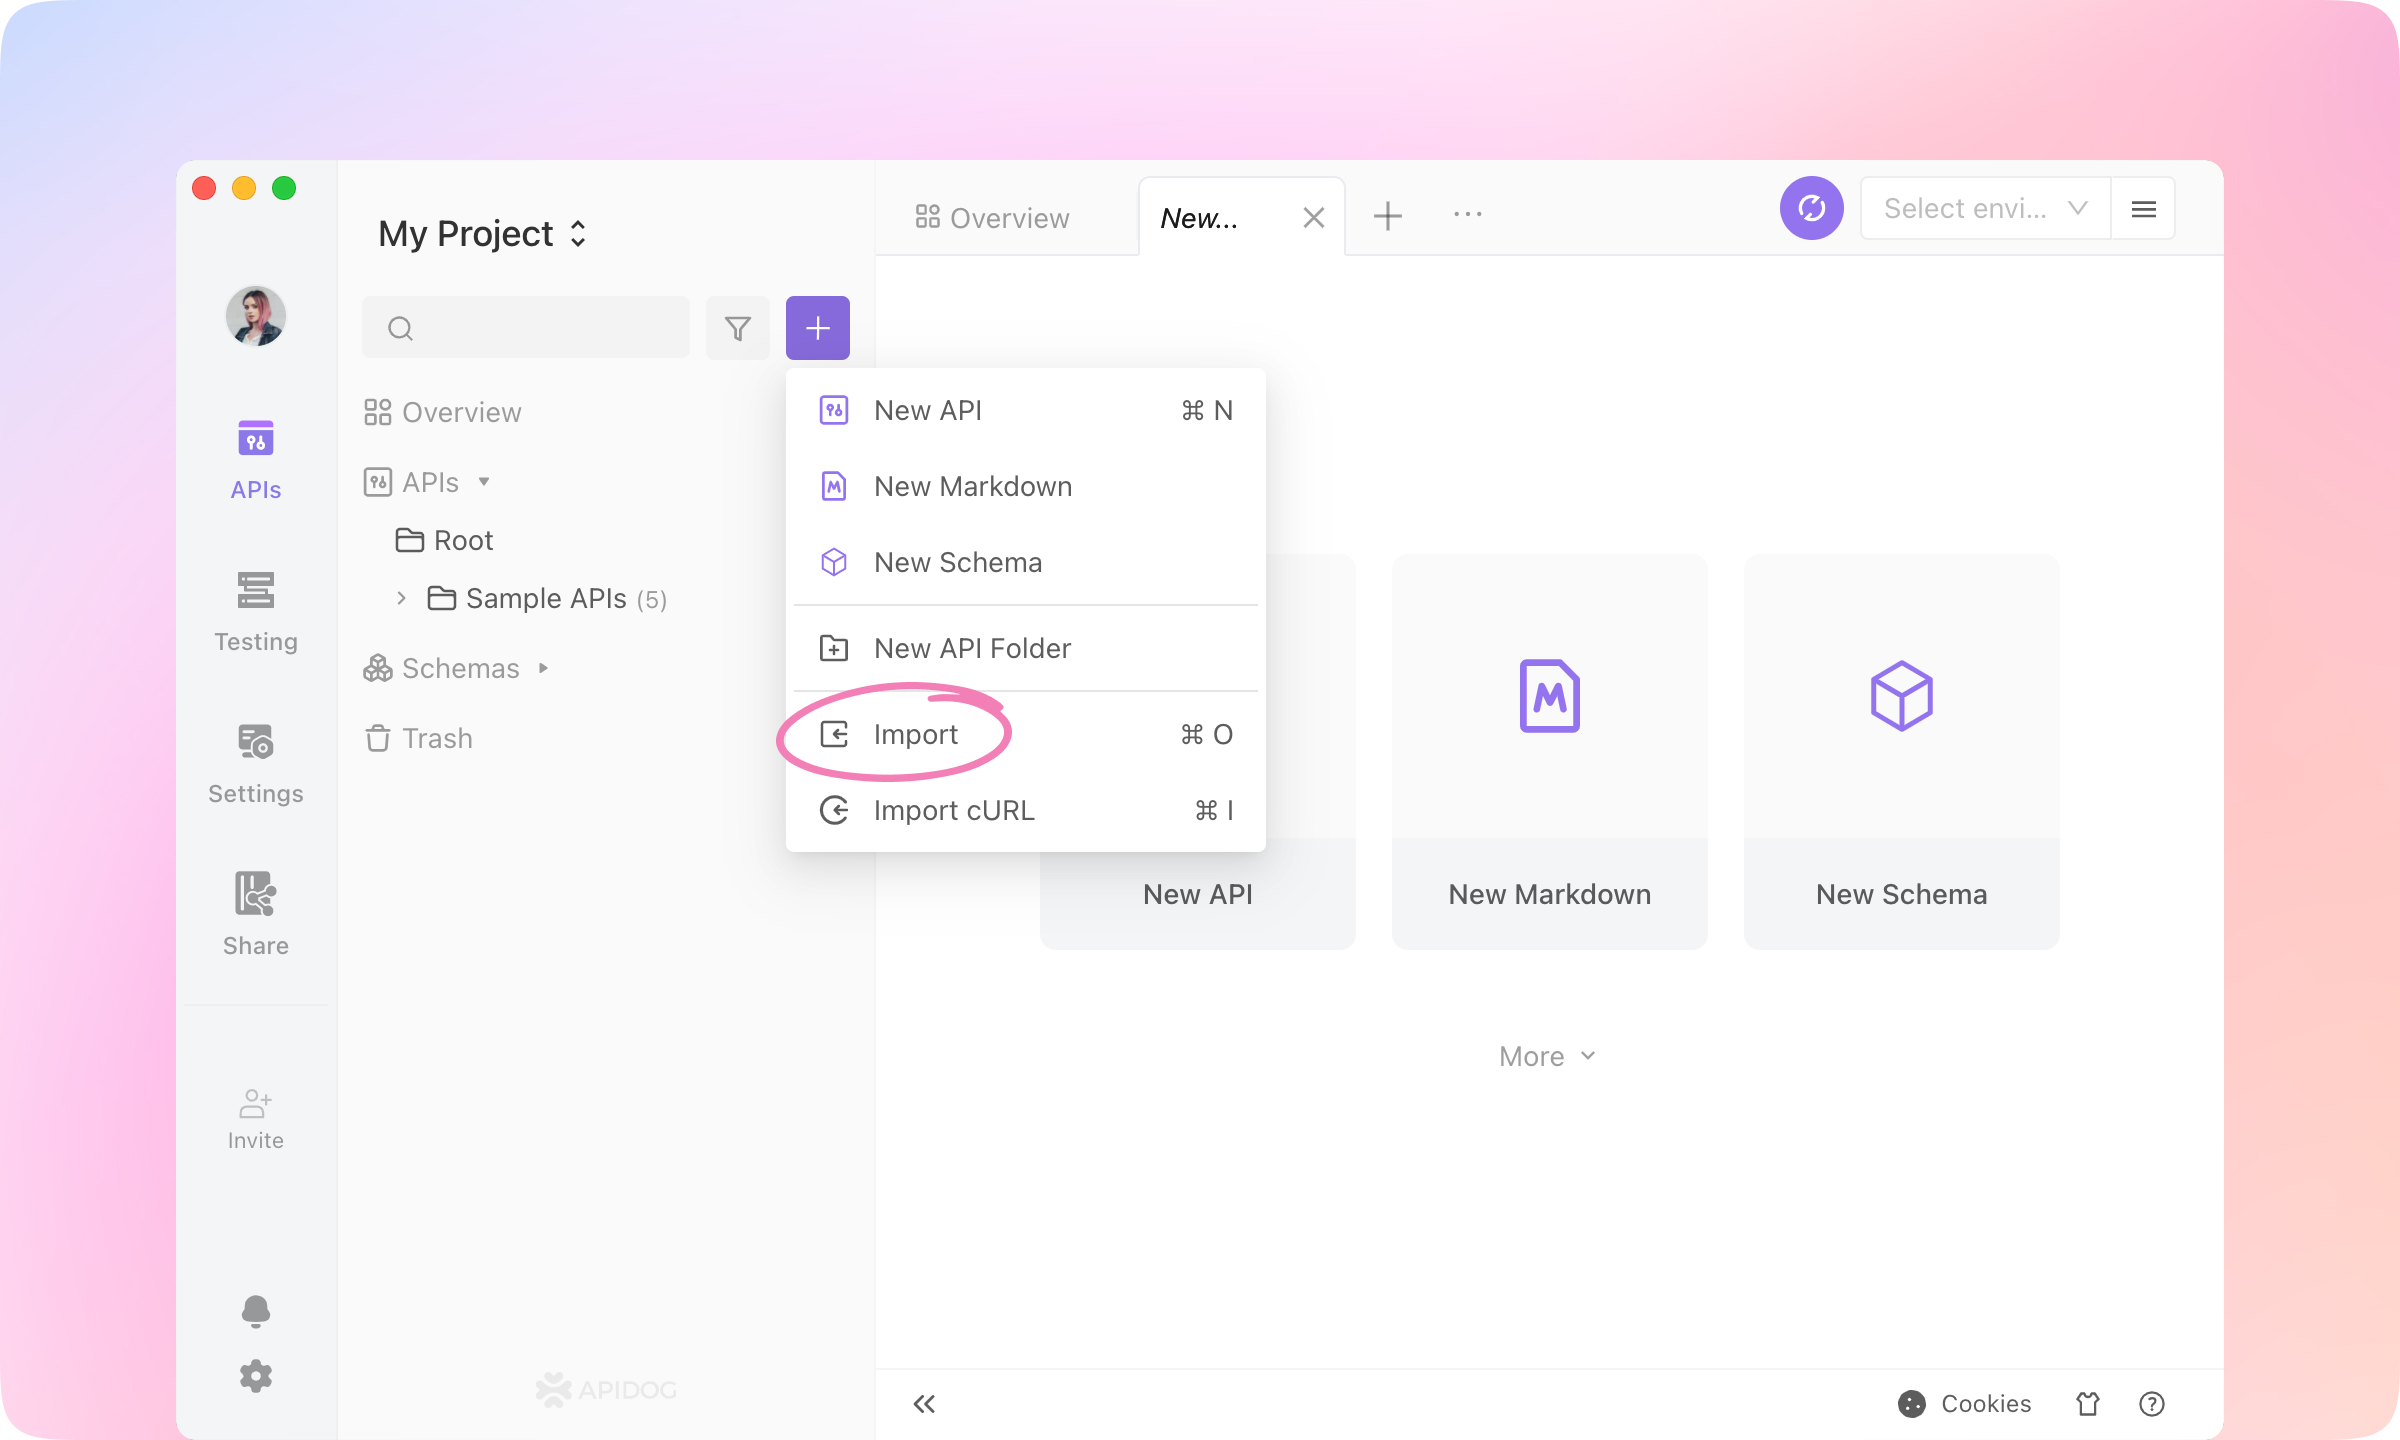
2.
URL Import, paste the following URL and click Submit.https://petstore.swagger.io/v2/swagger.json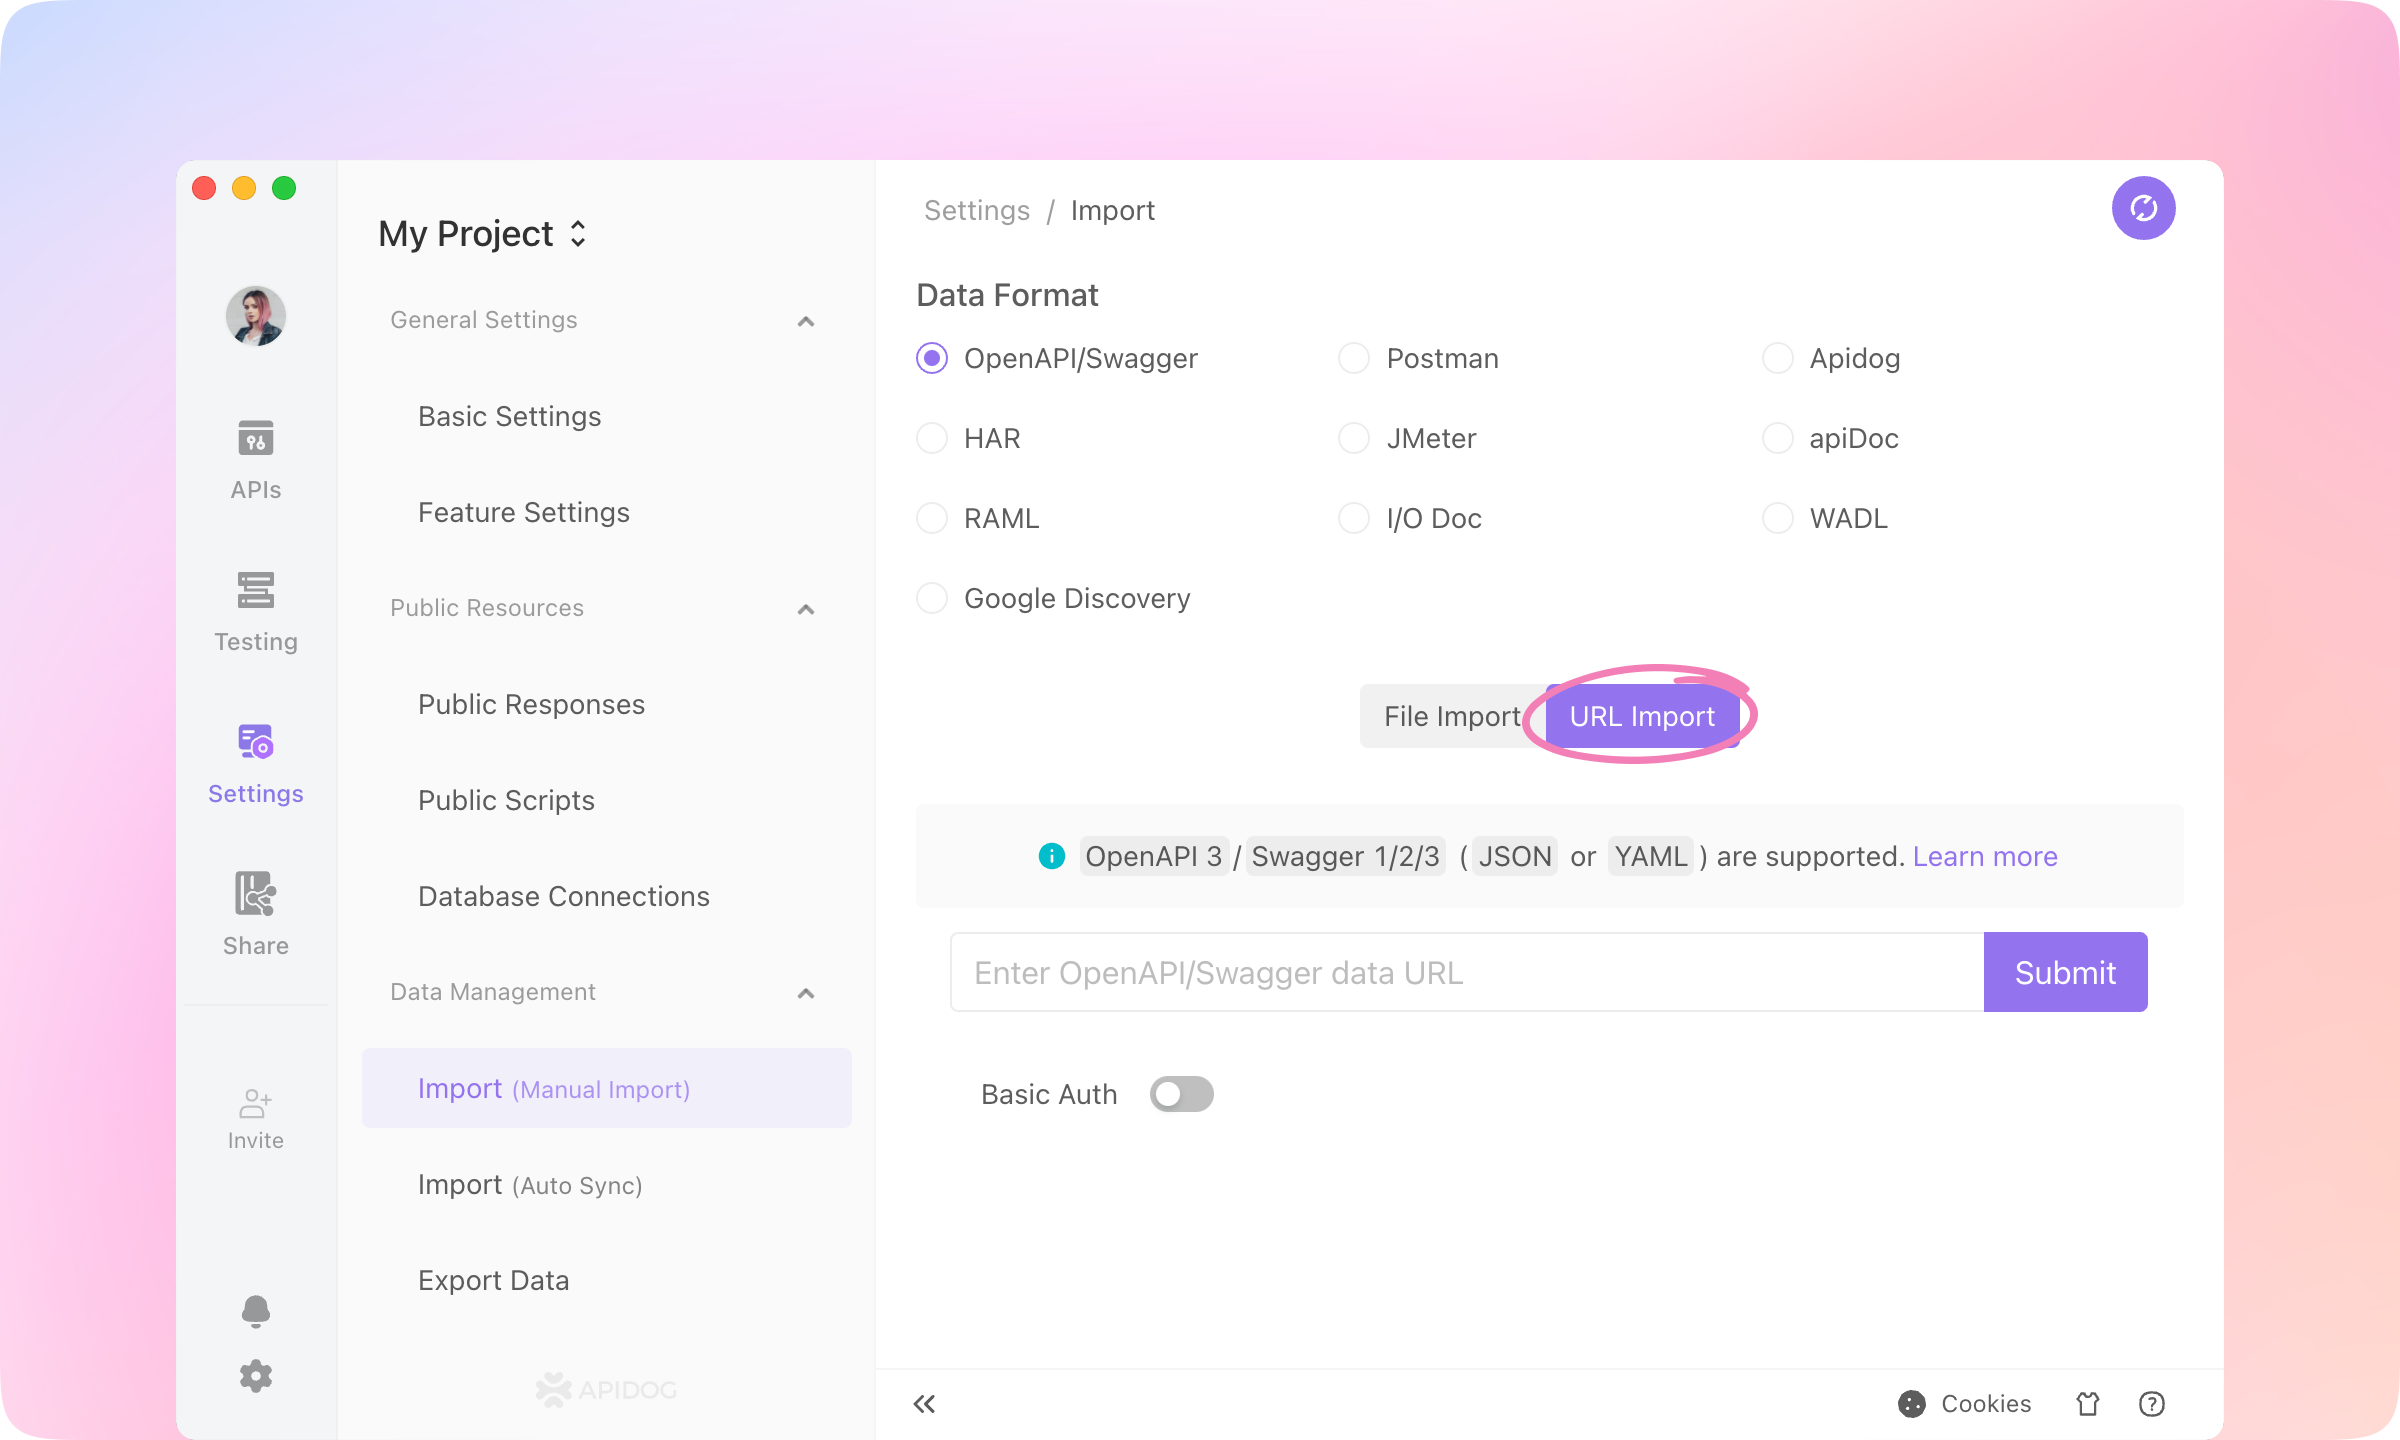
3.
Confirm to import.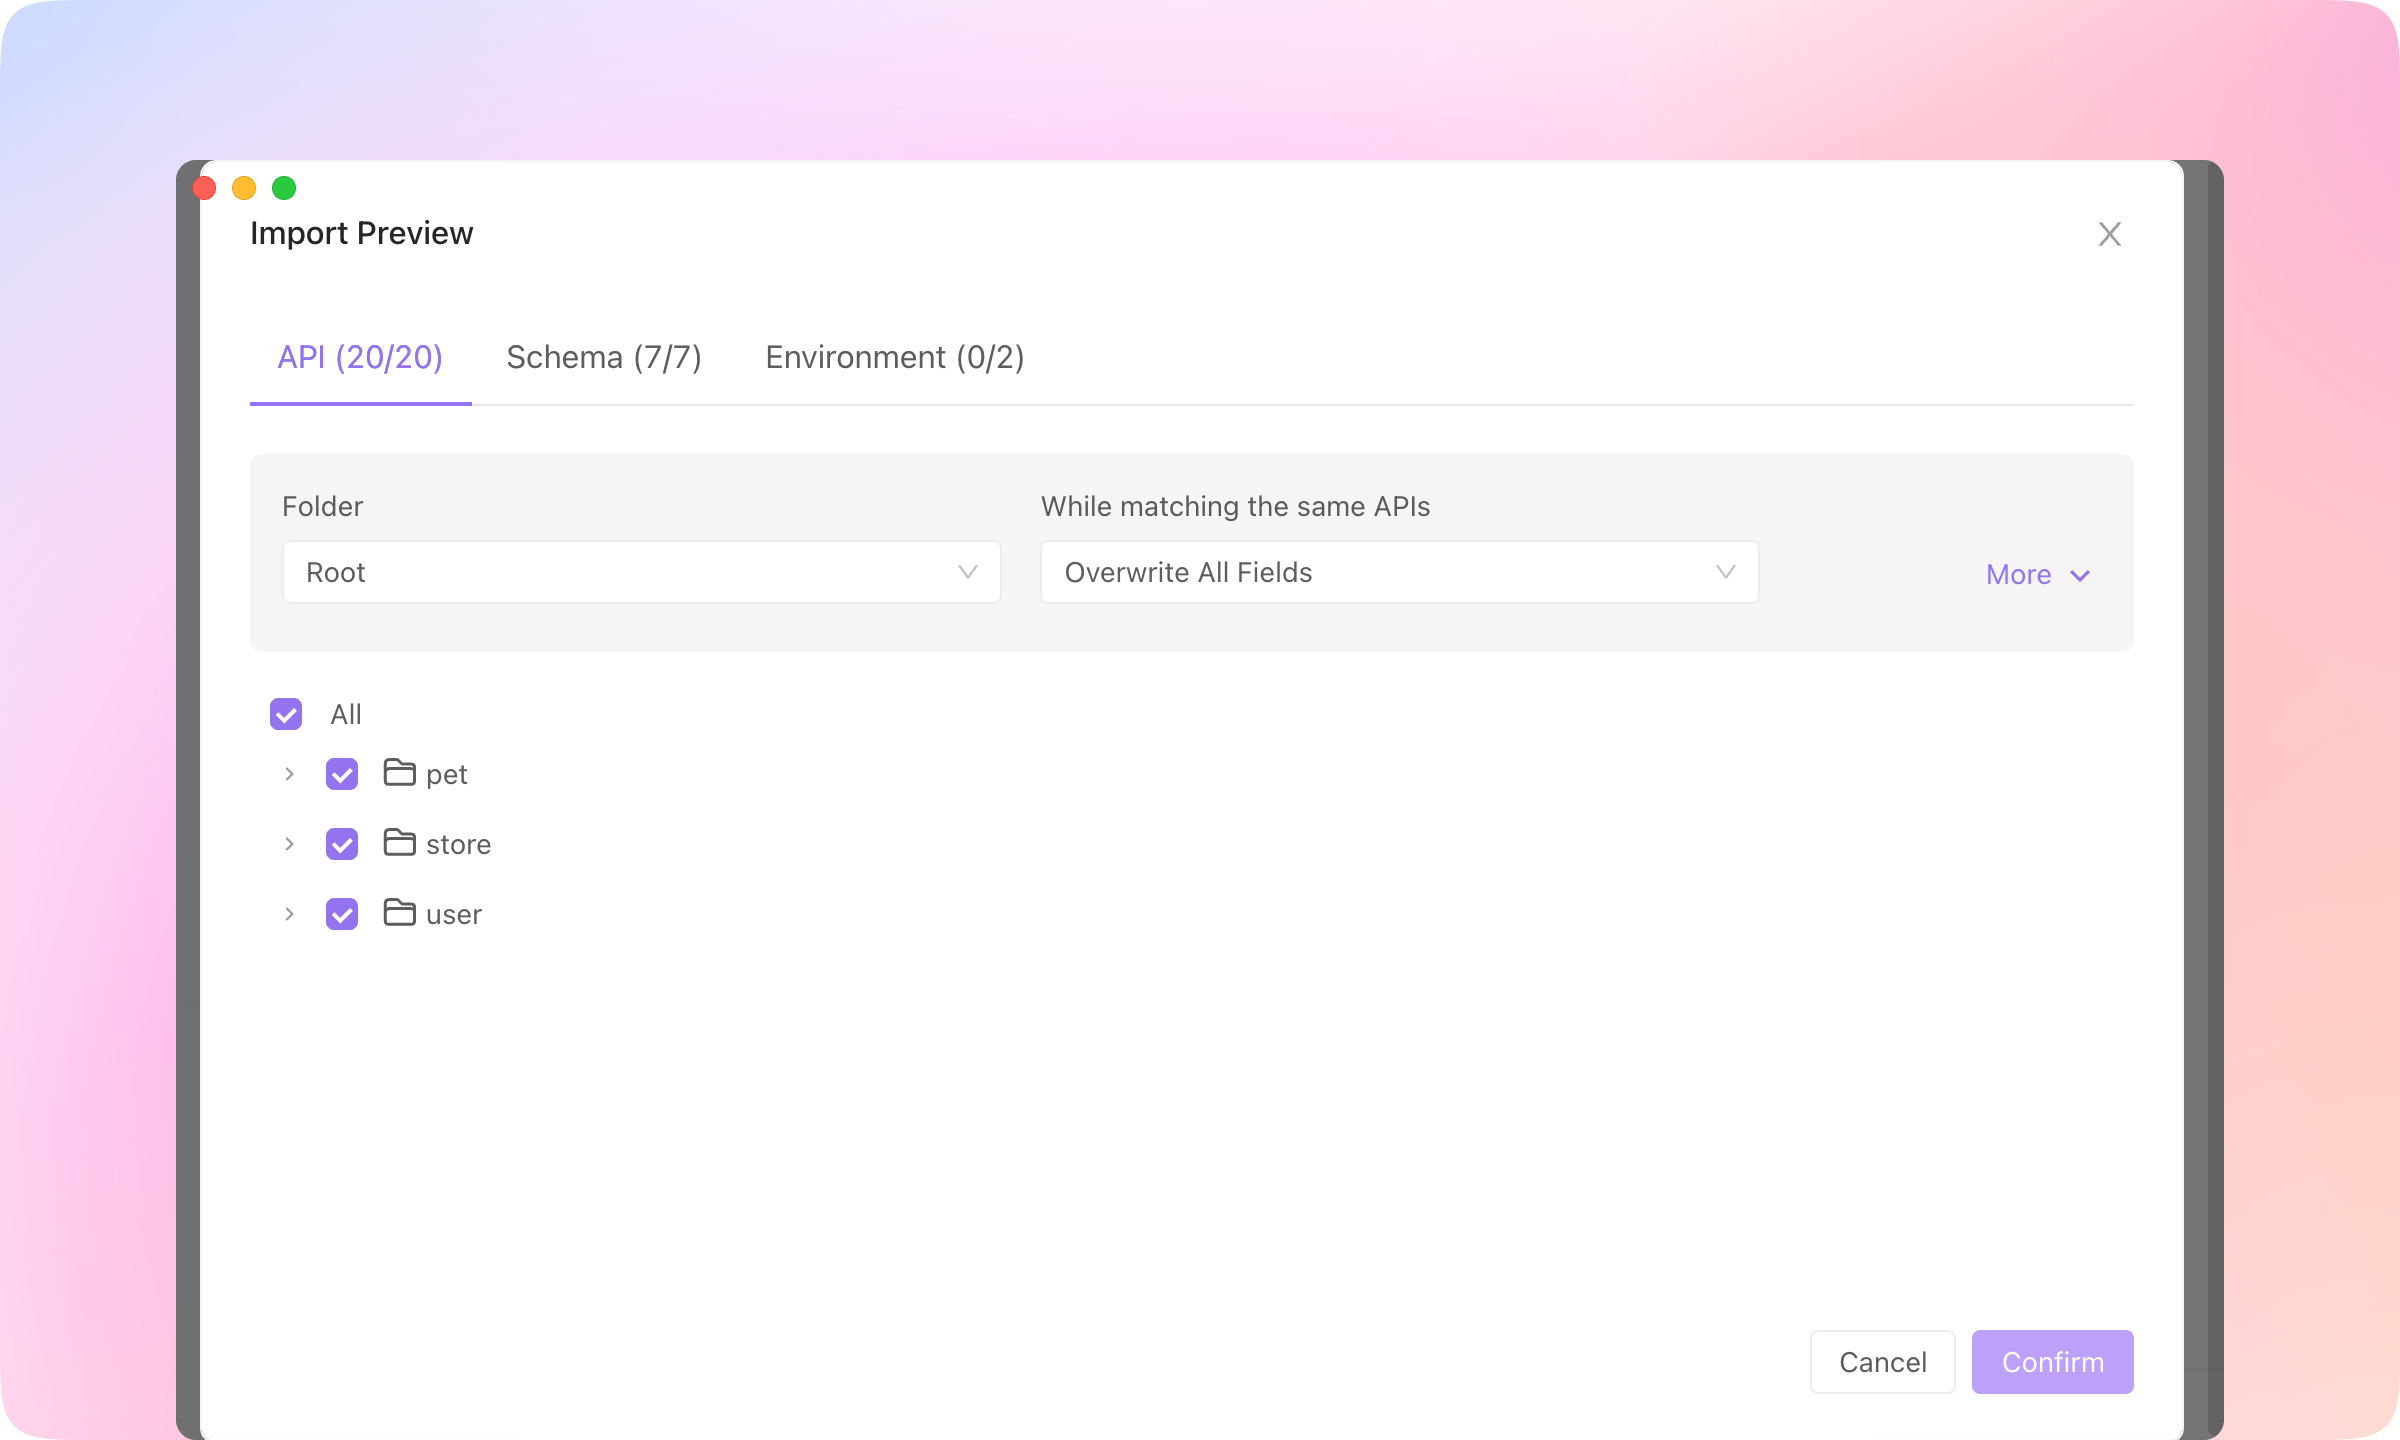
4.
TIP
Specify a new API
1.
New API to create an endpoint.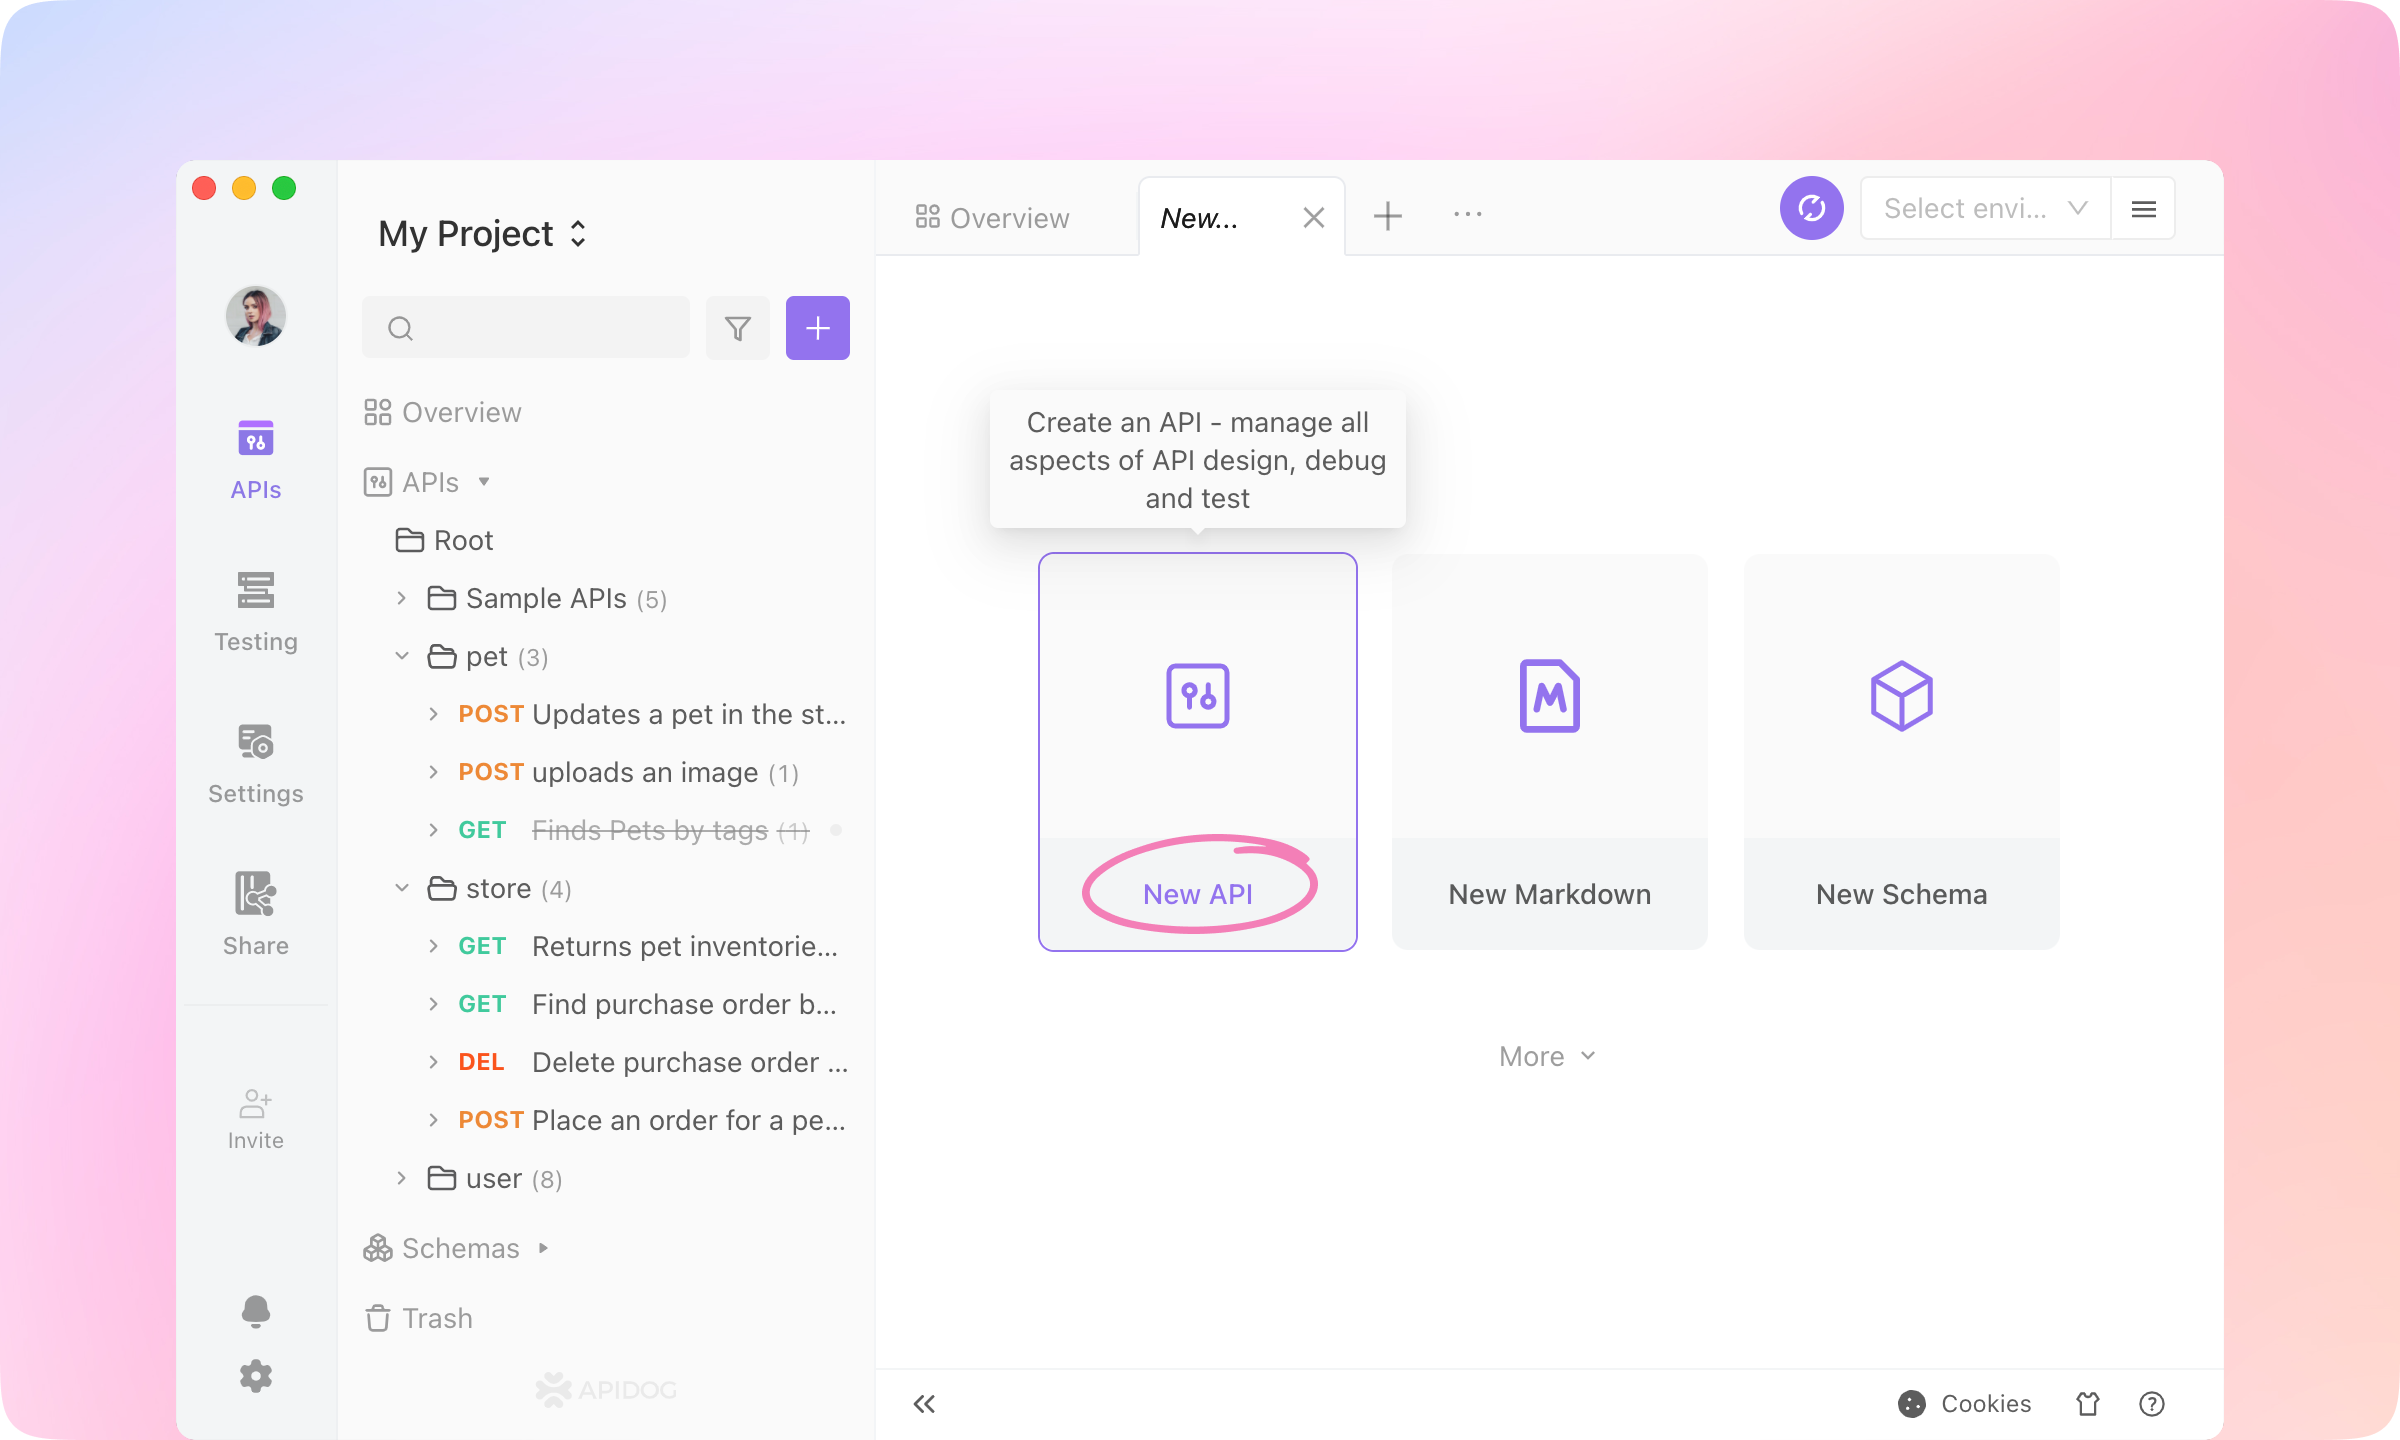
2.
/users/{id}Get user by id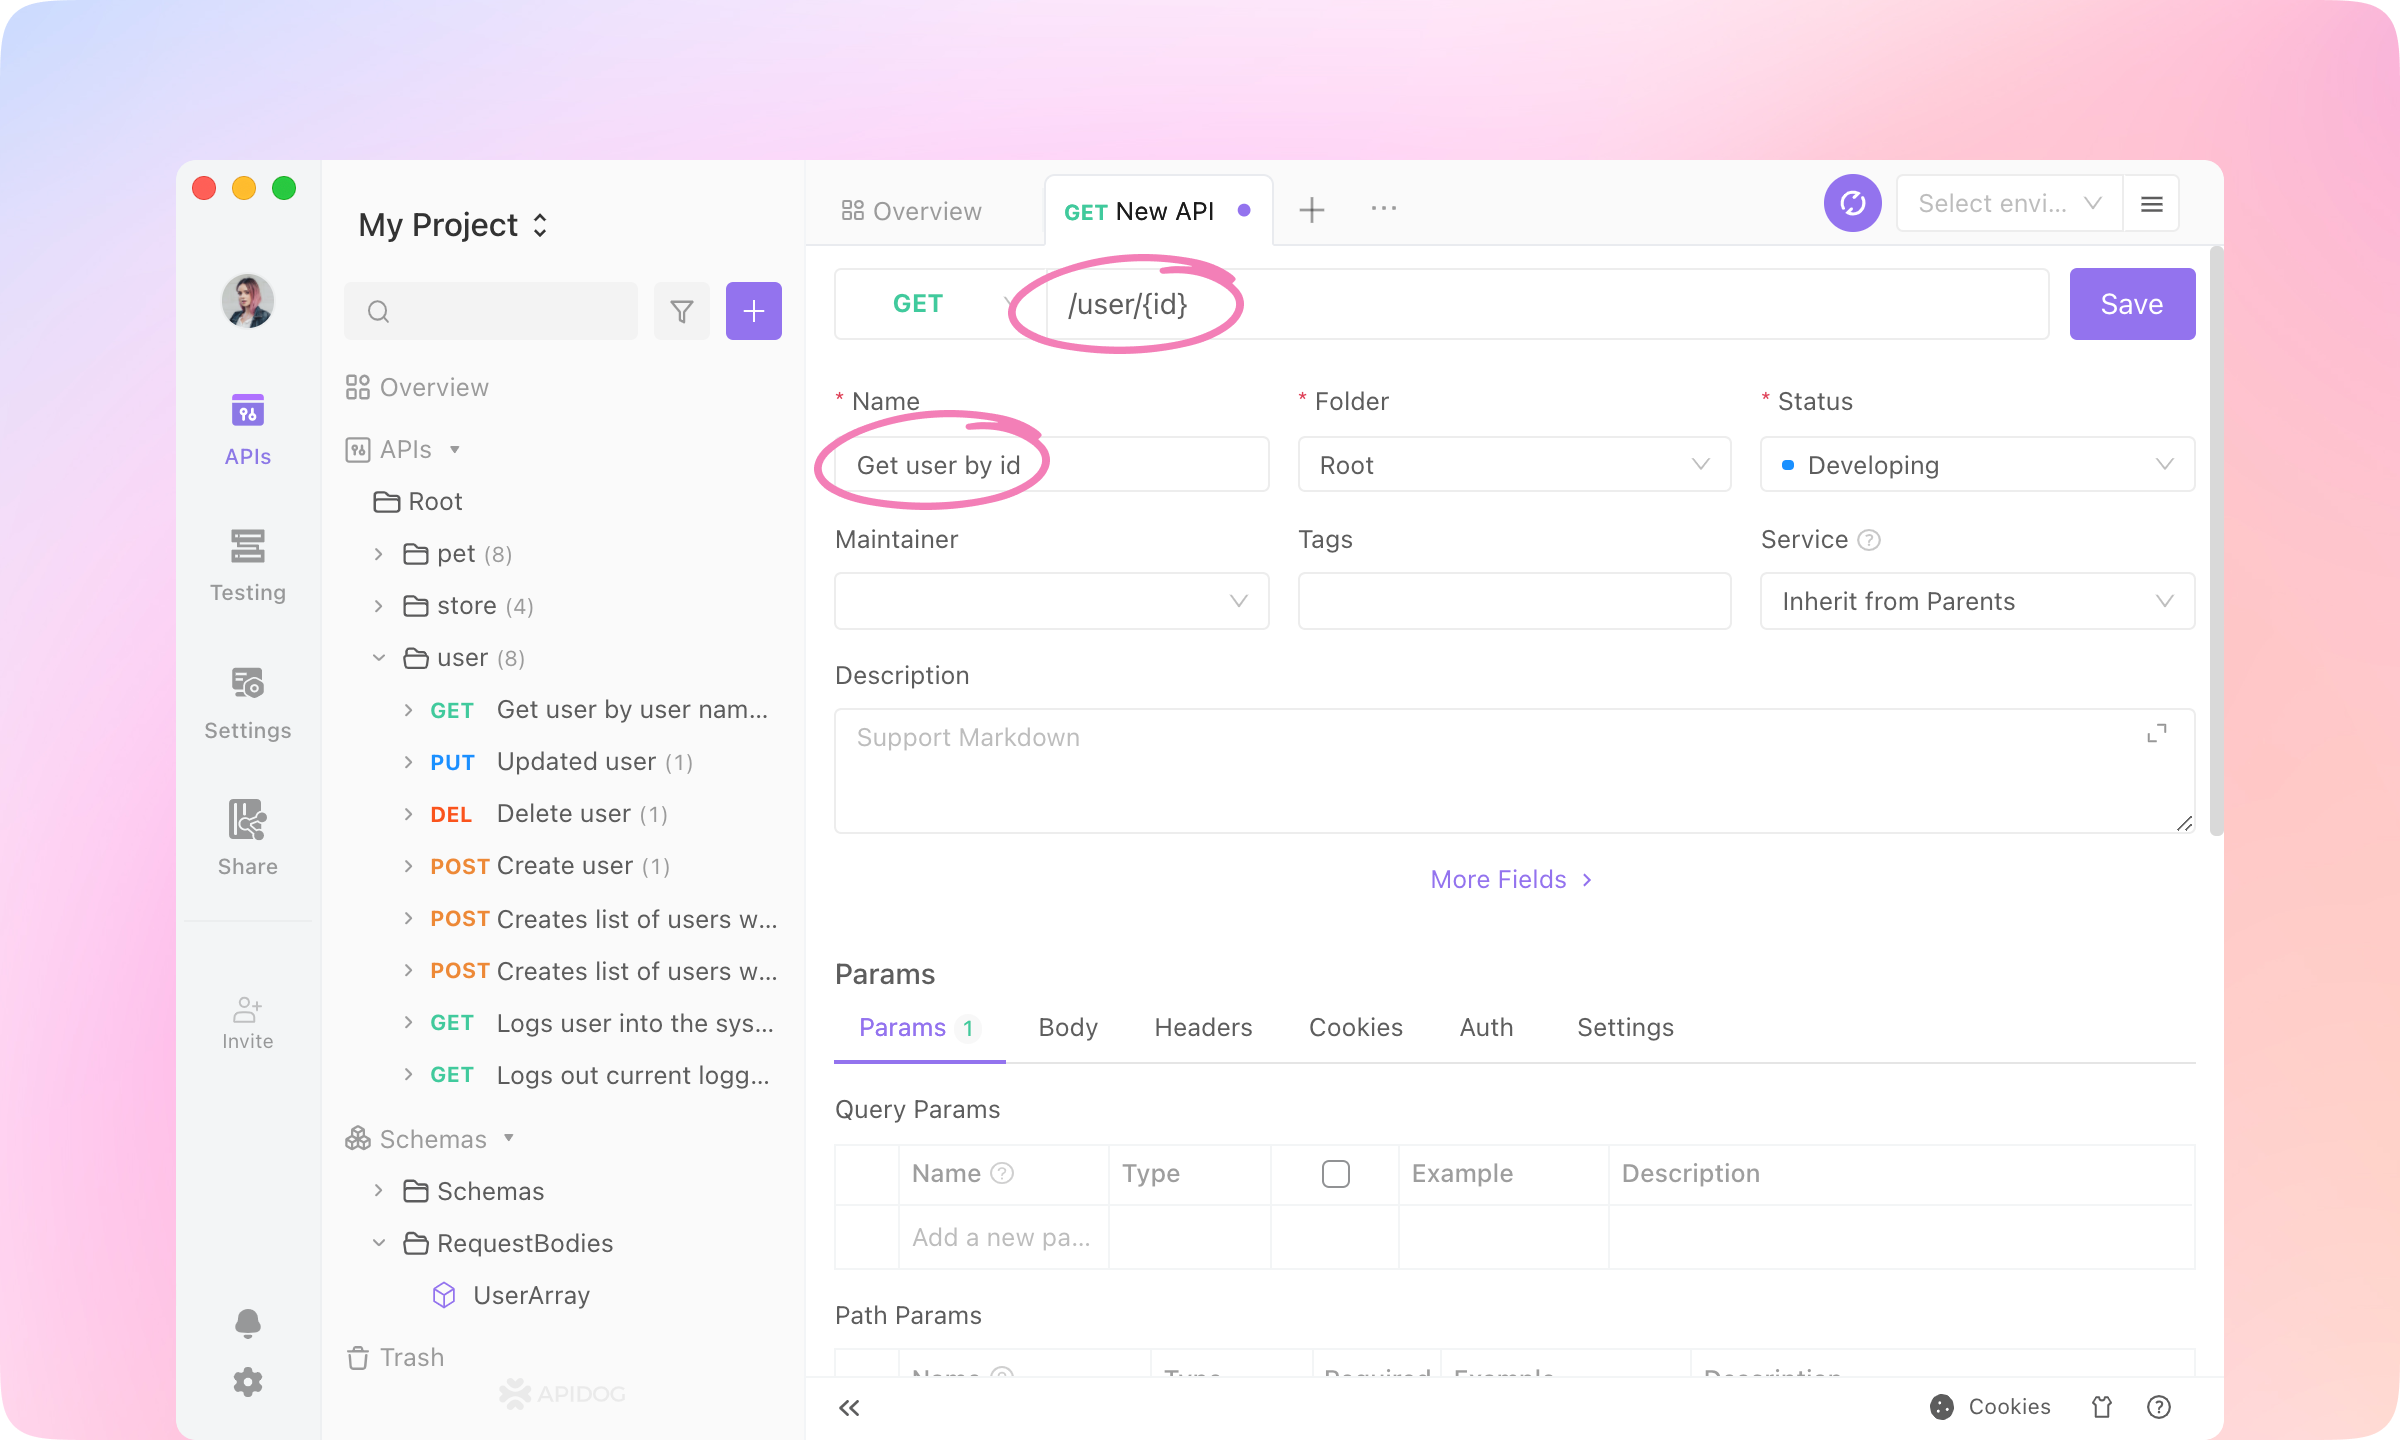
3.
Request part is finished.4.
Responses part. In the 'OK(200)' response, change the field type of the root node to 'Refs Model - Schemas - ApiResponse'.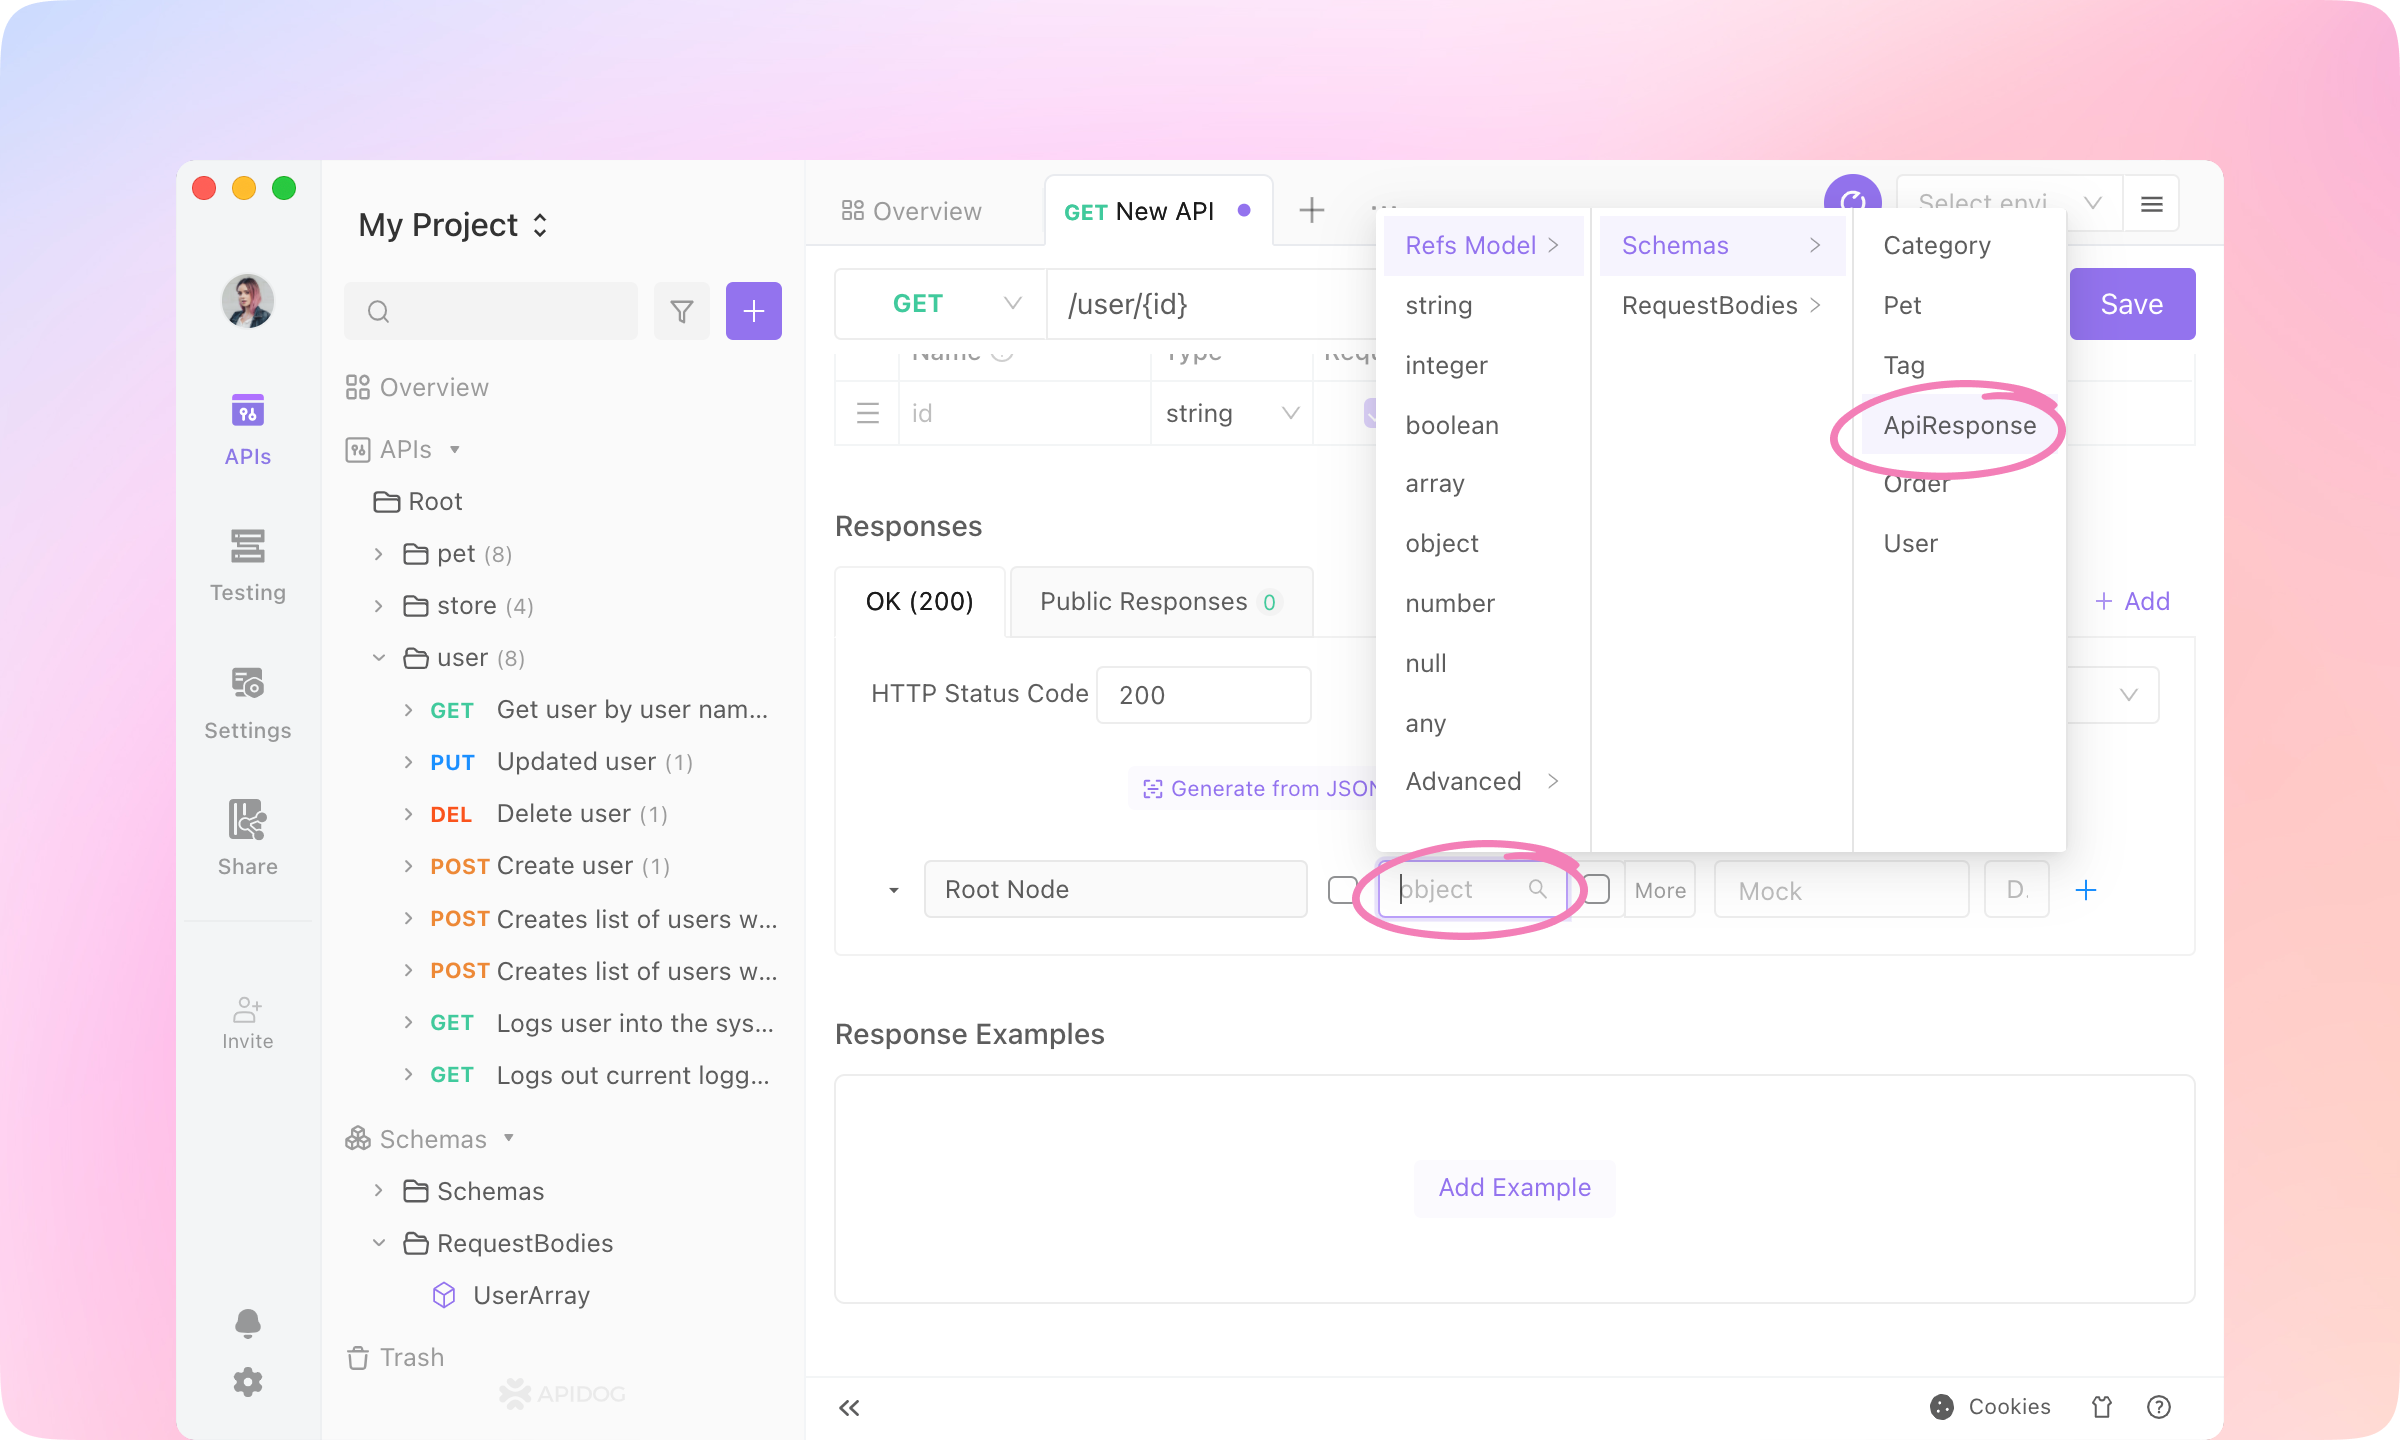
5.
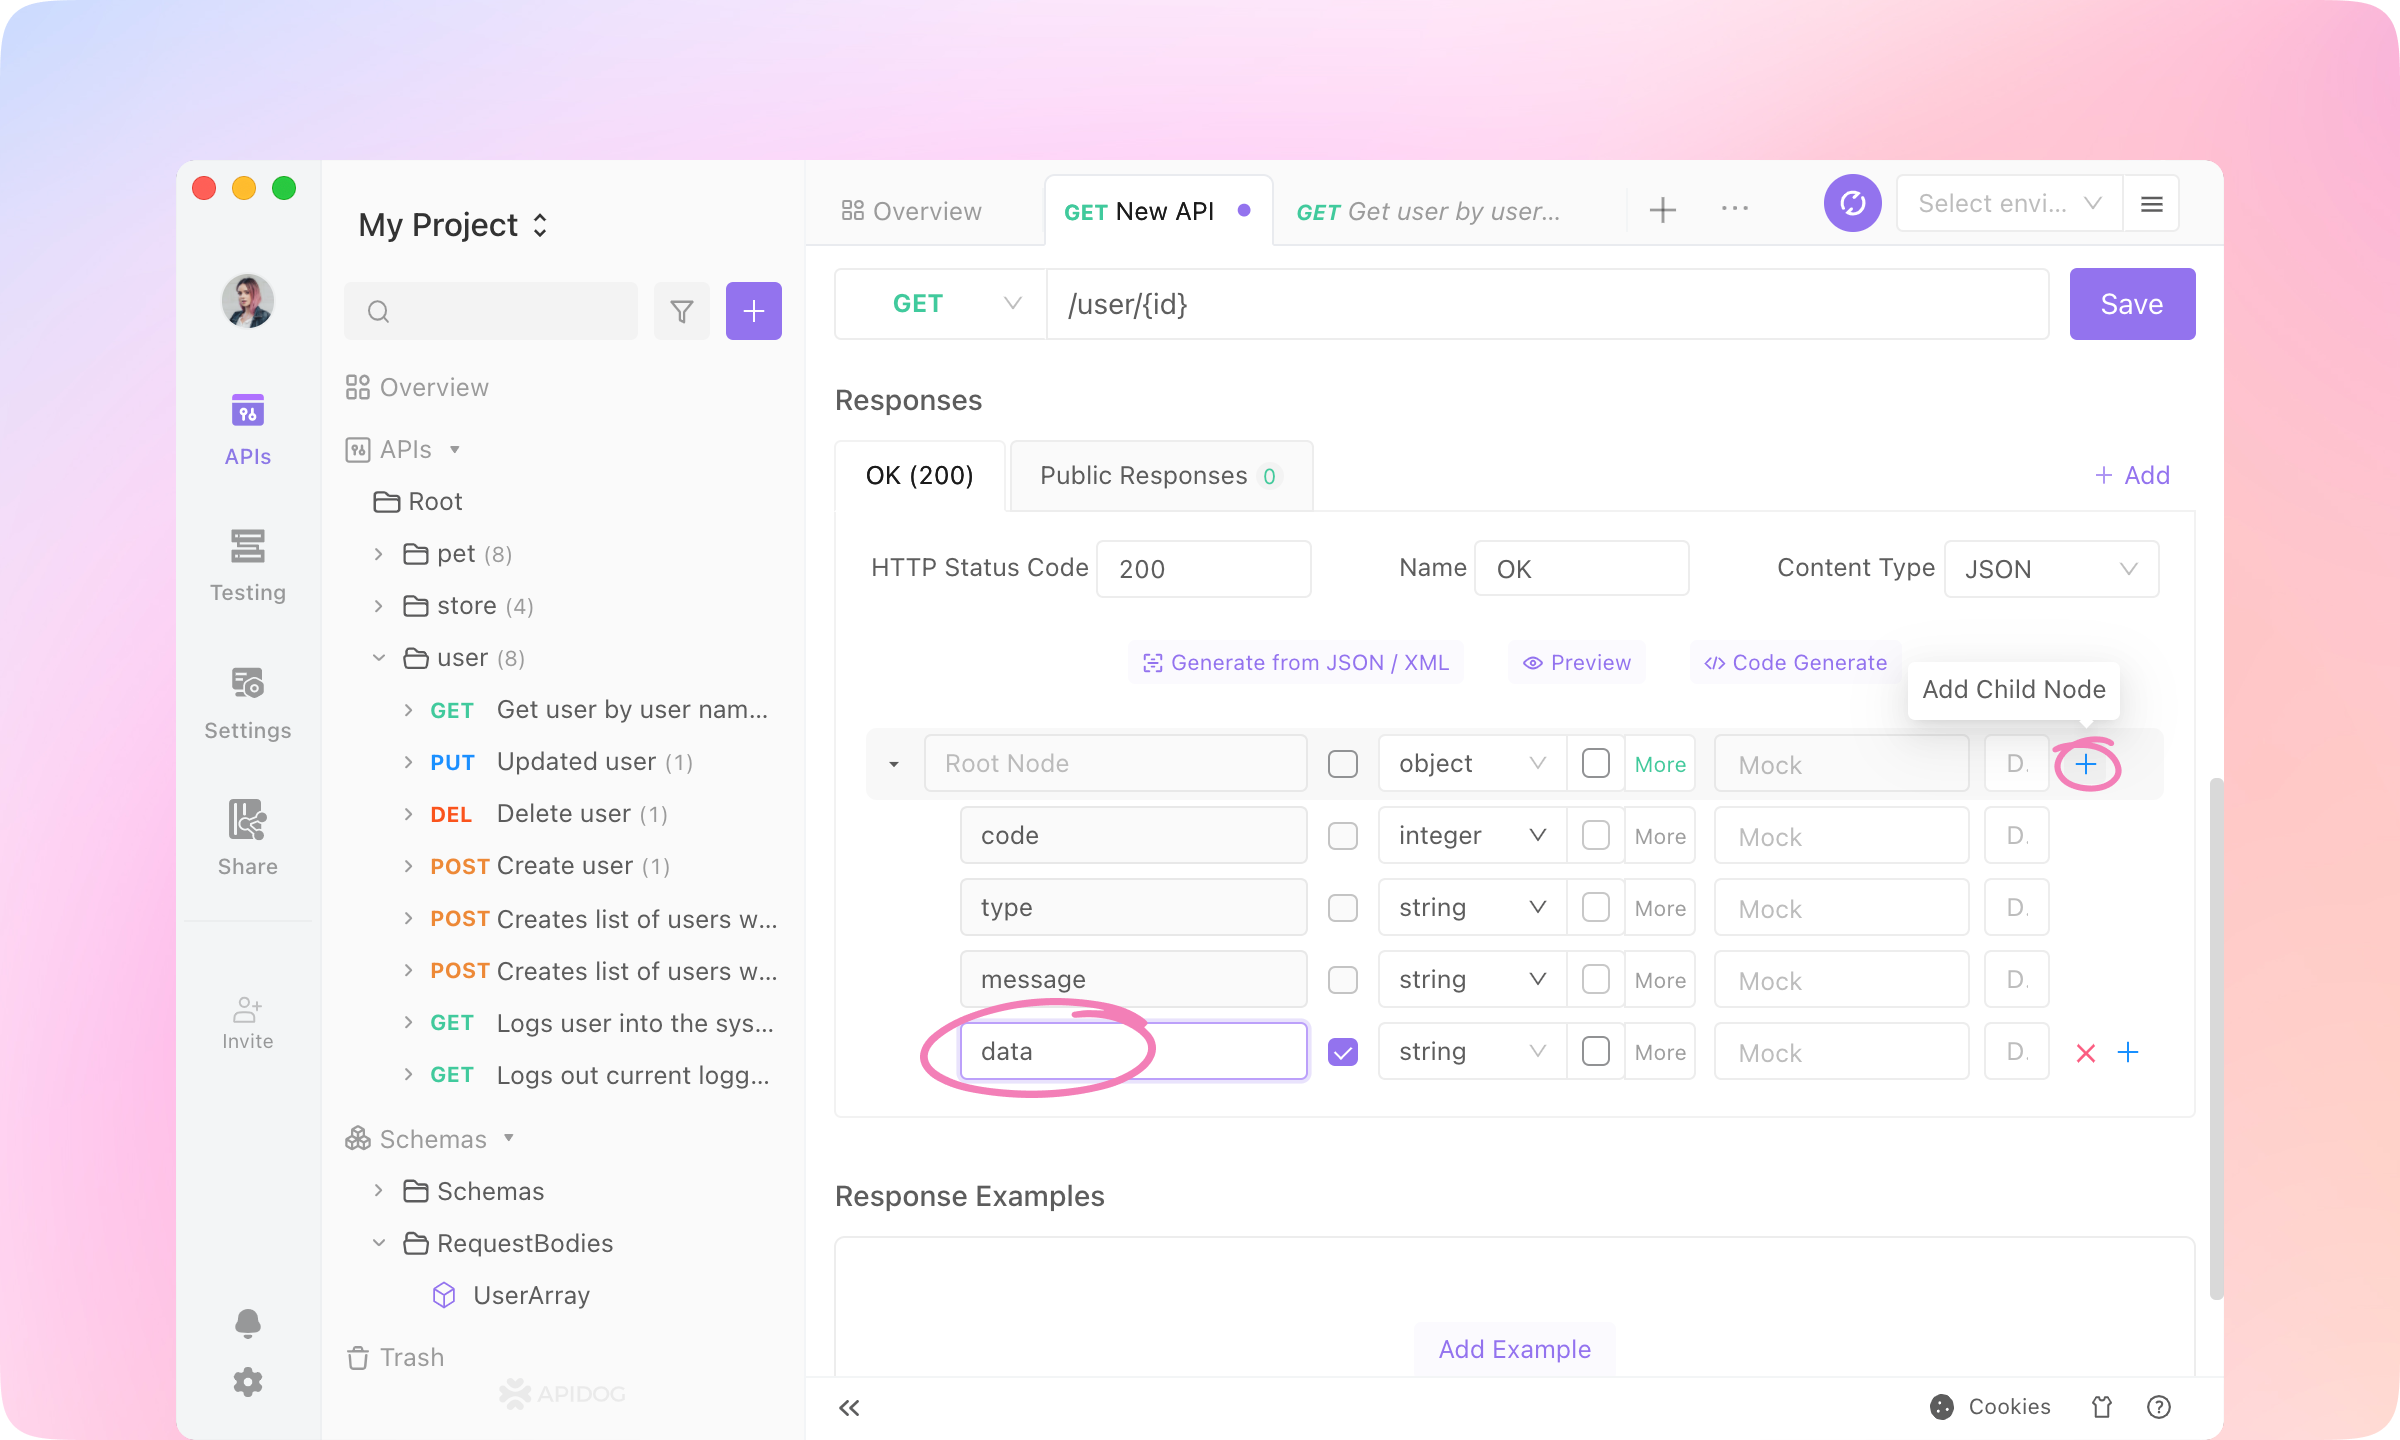
6.
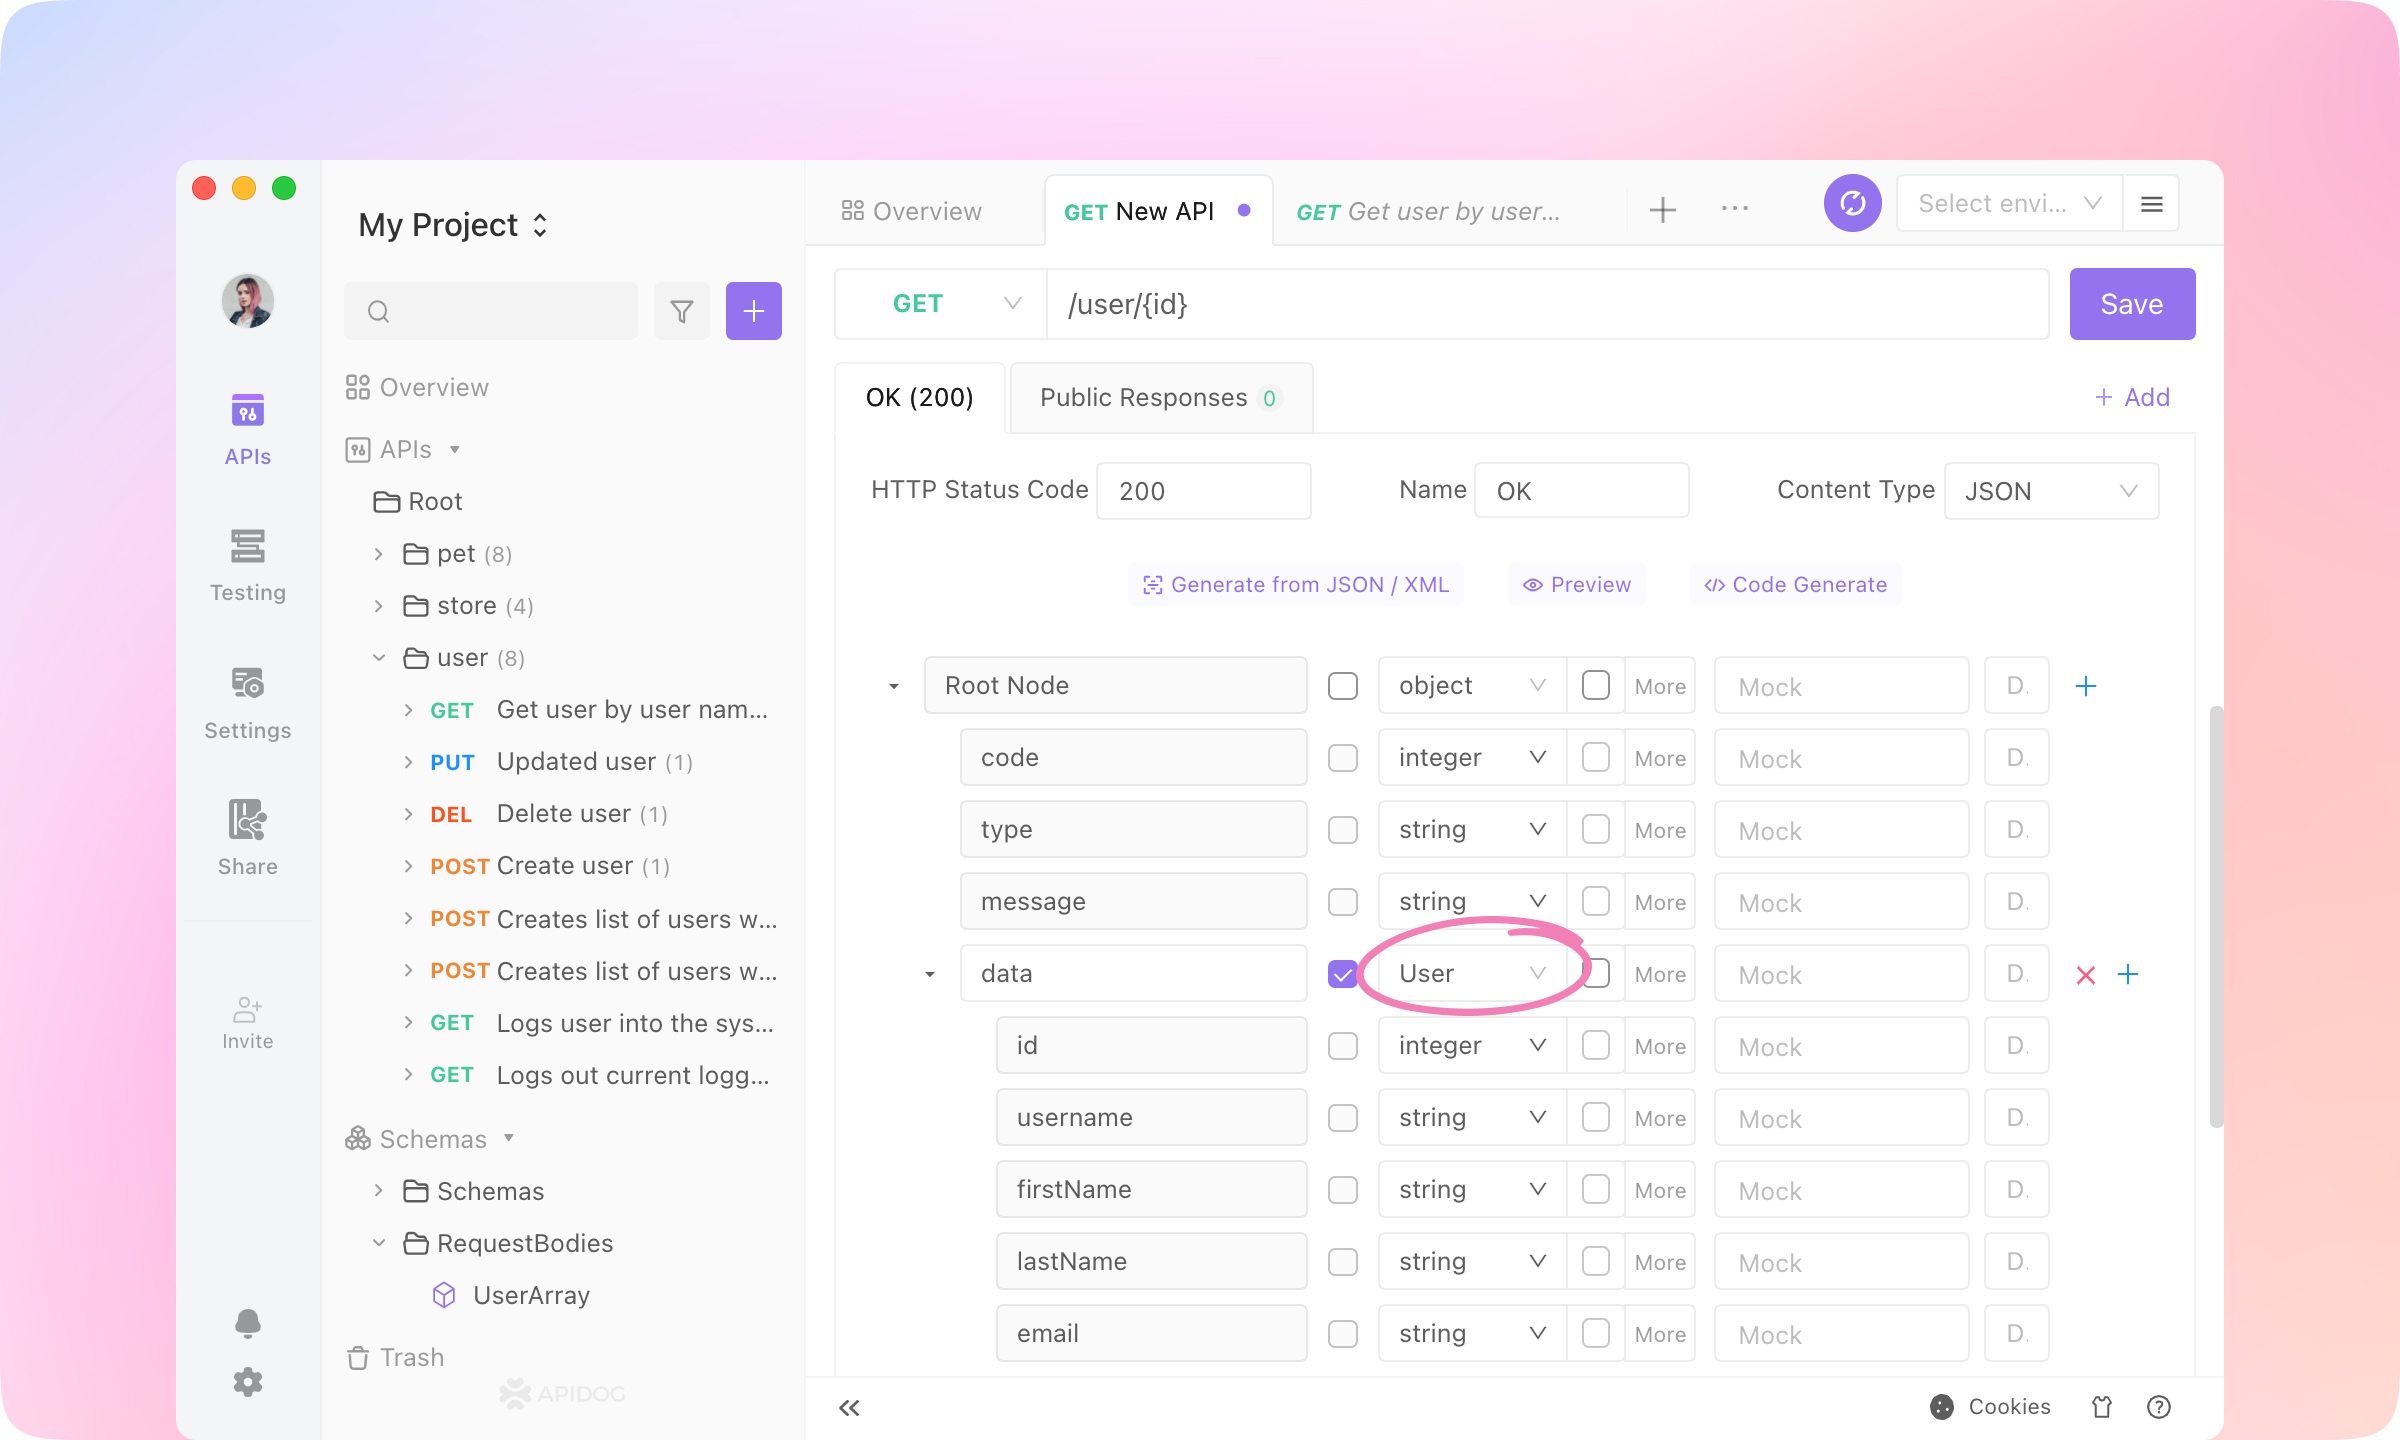
7.
TIP
8.
Response Examples part. Click Add Example.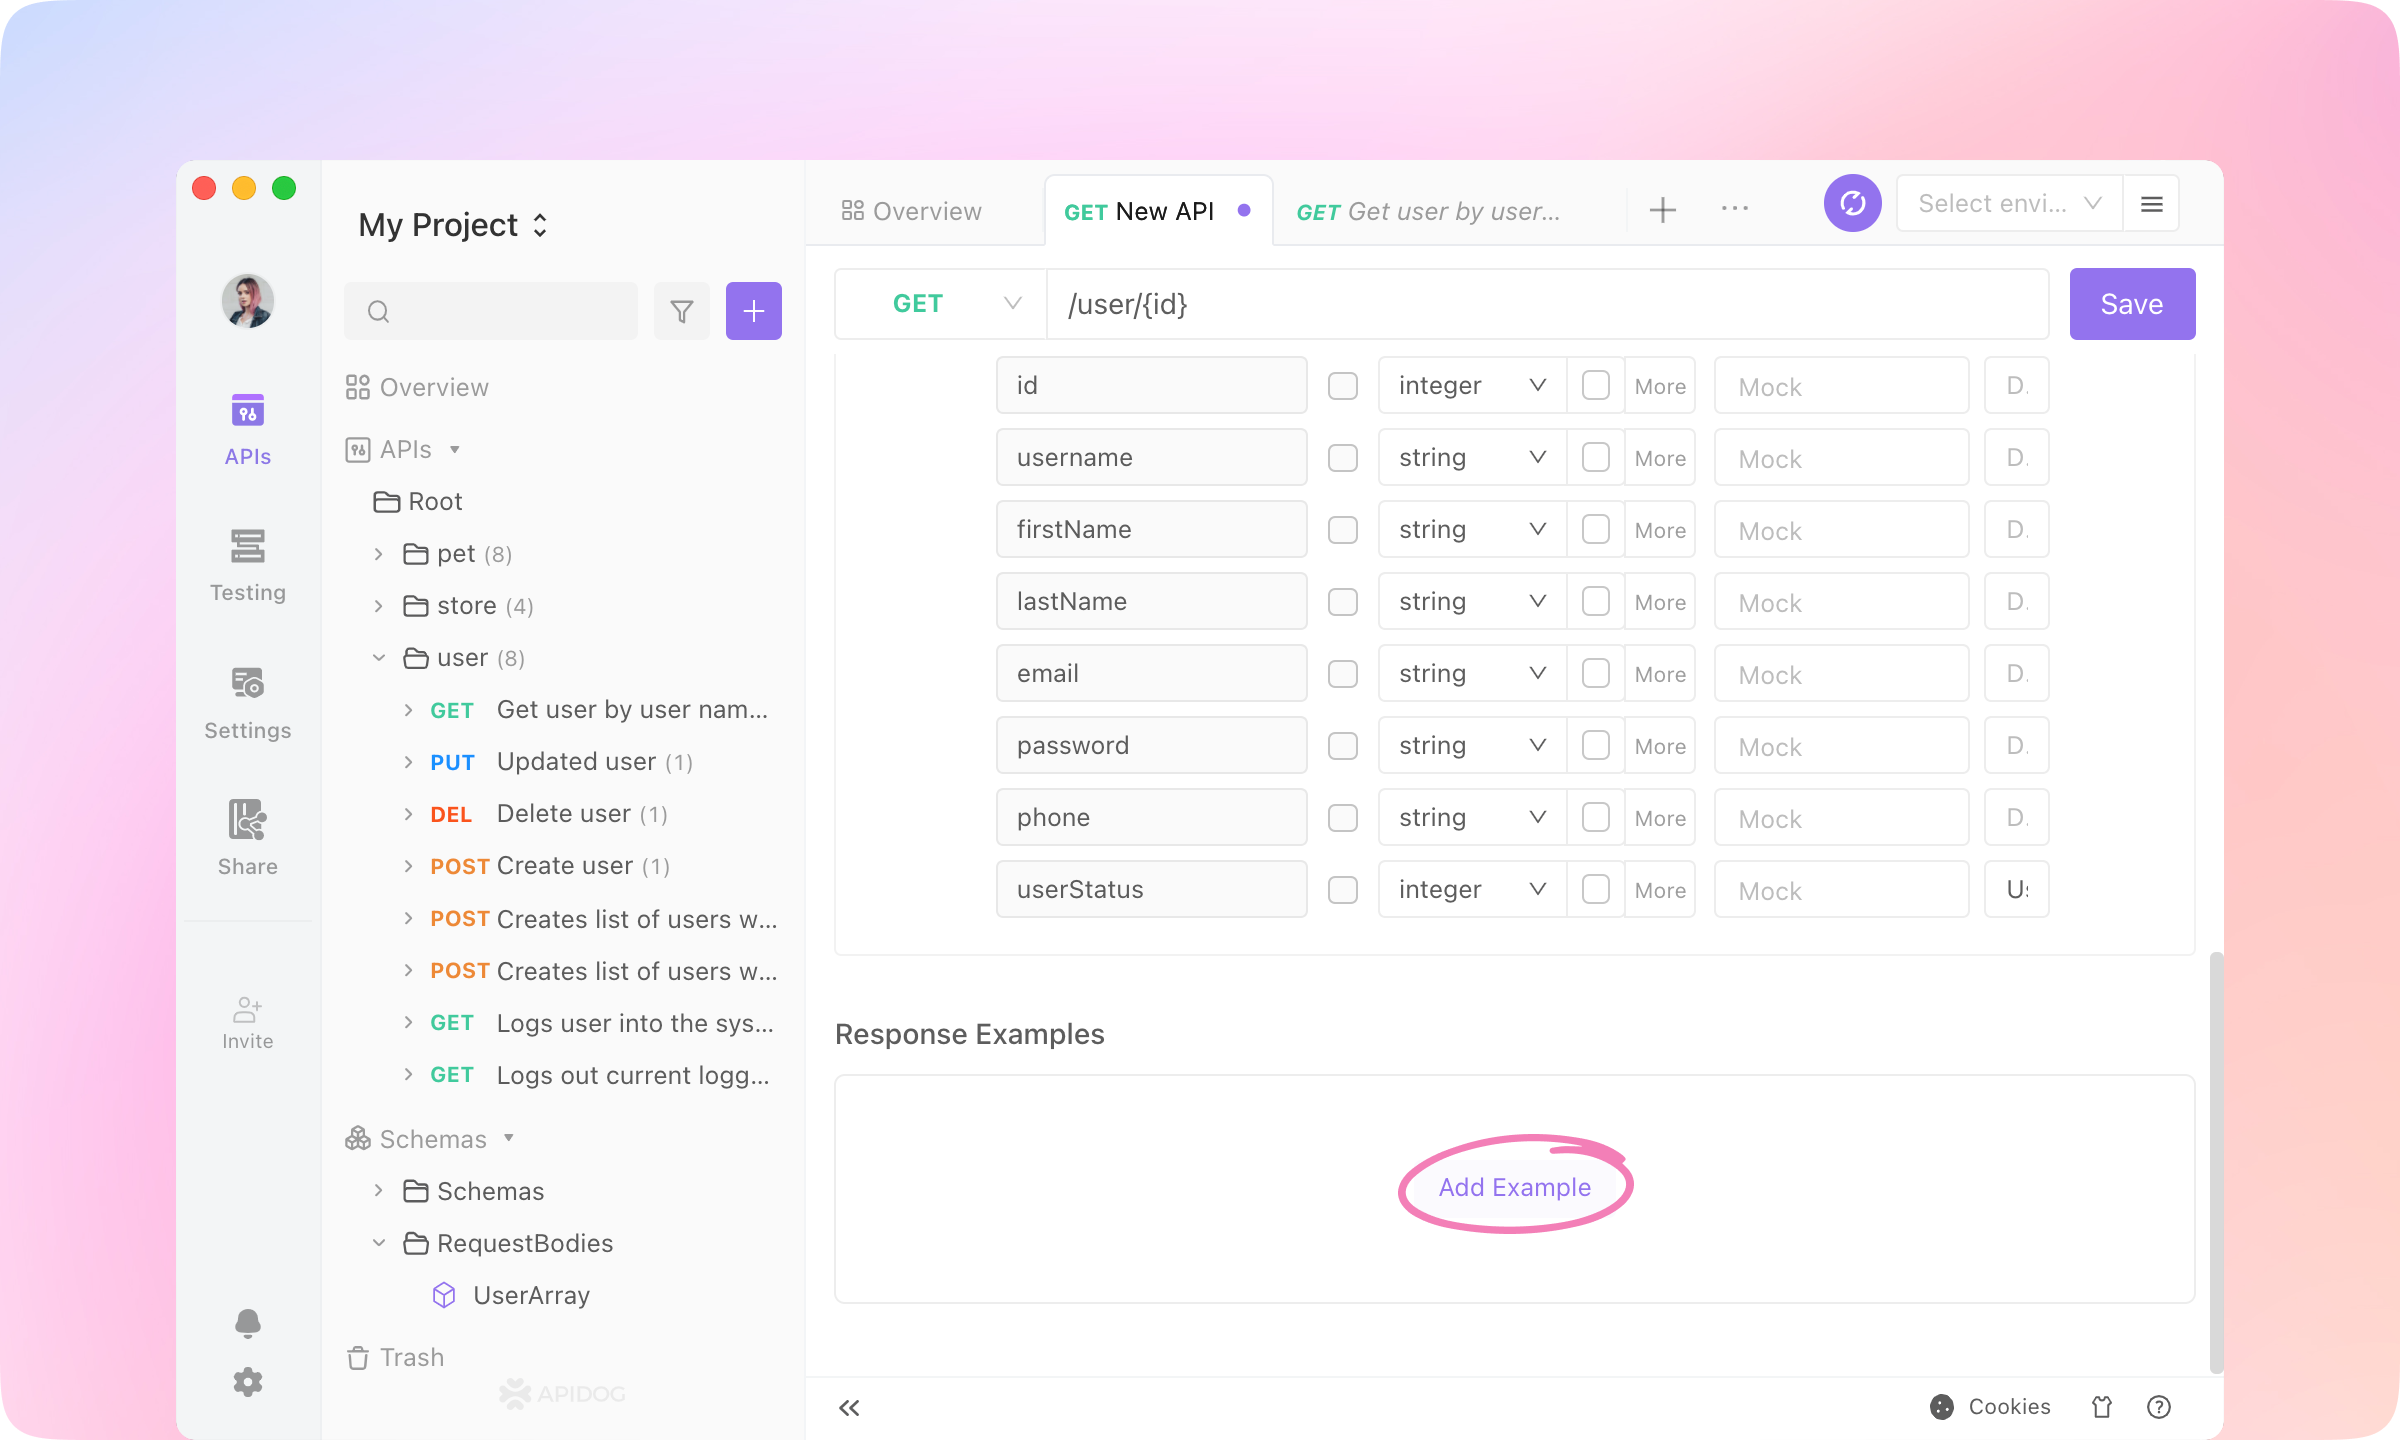
9.
Generate Automatically, and the response data will be generated according to the response structure. Click OK to add the example.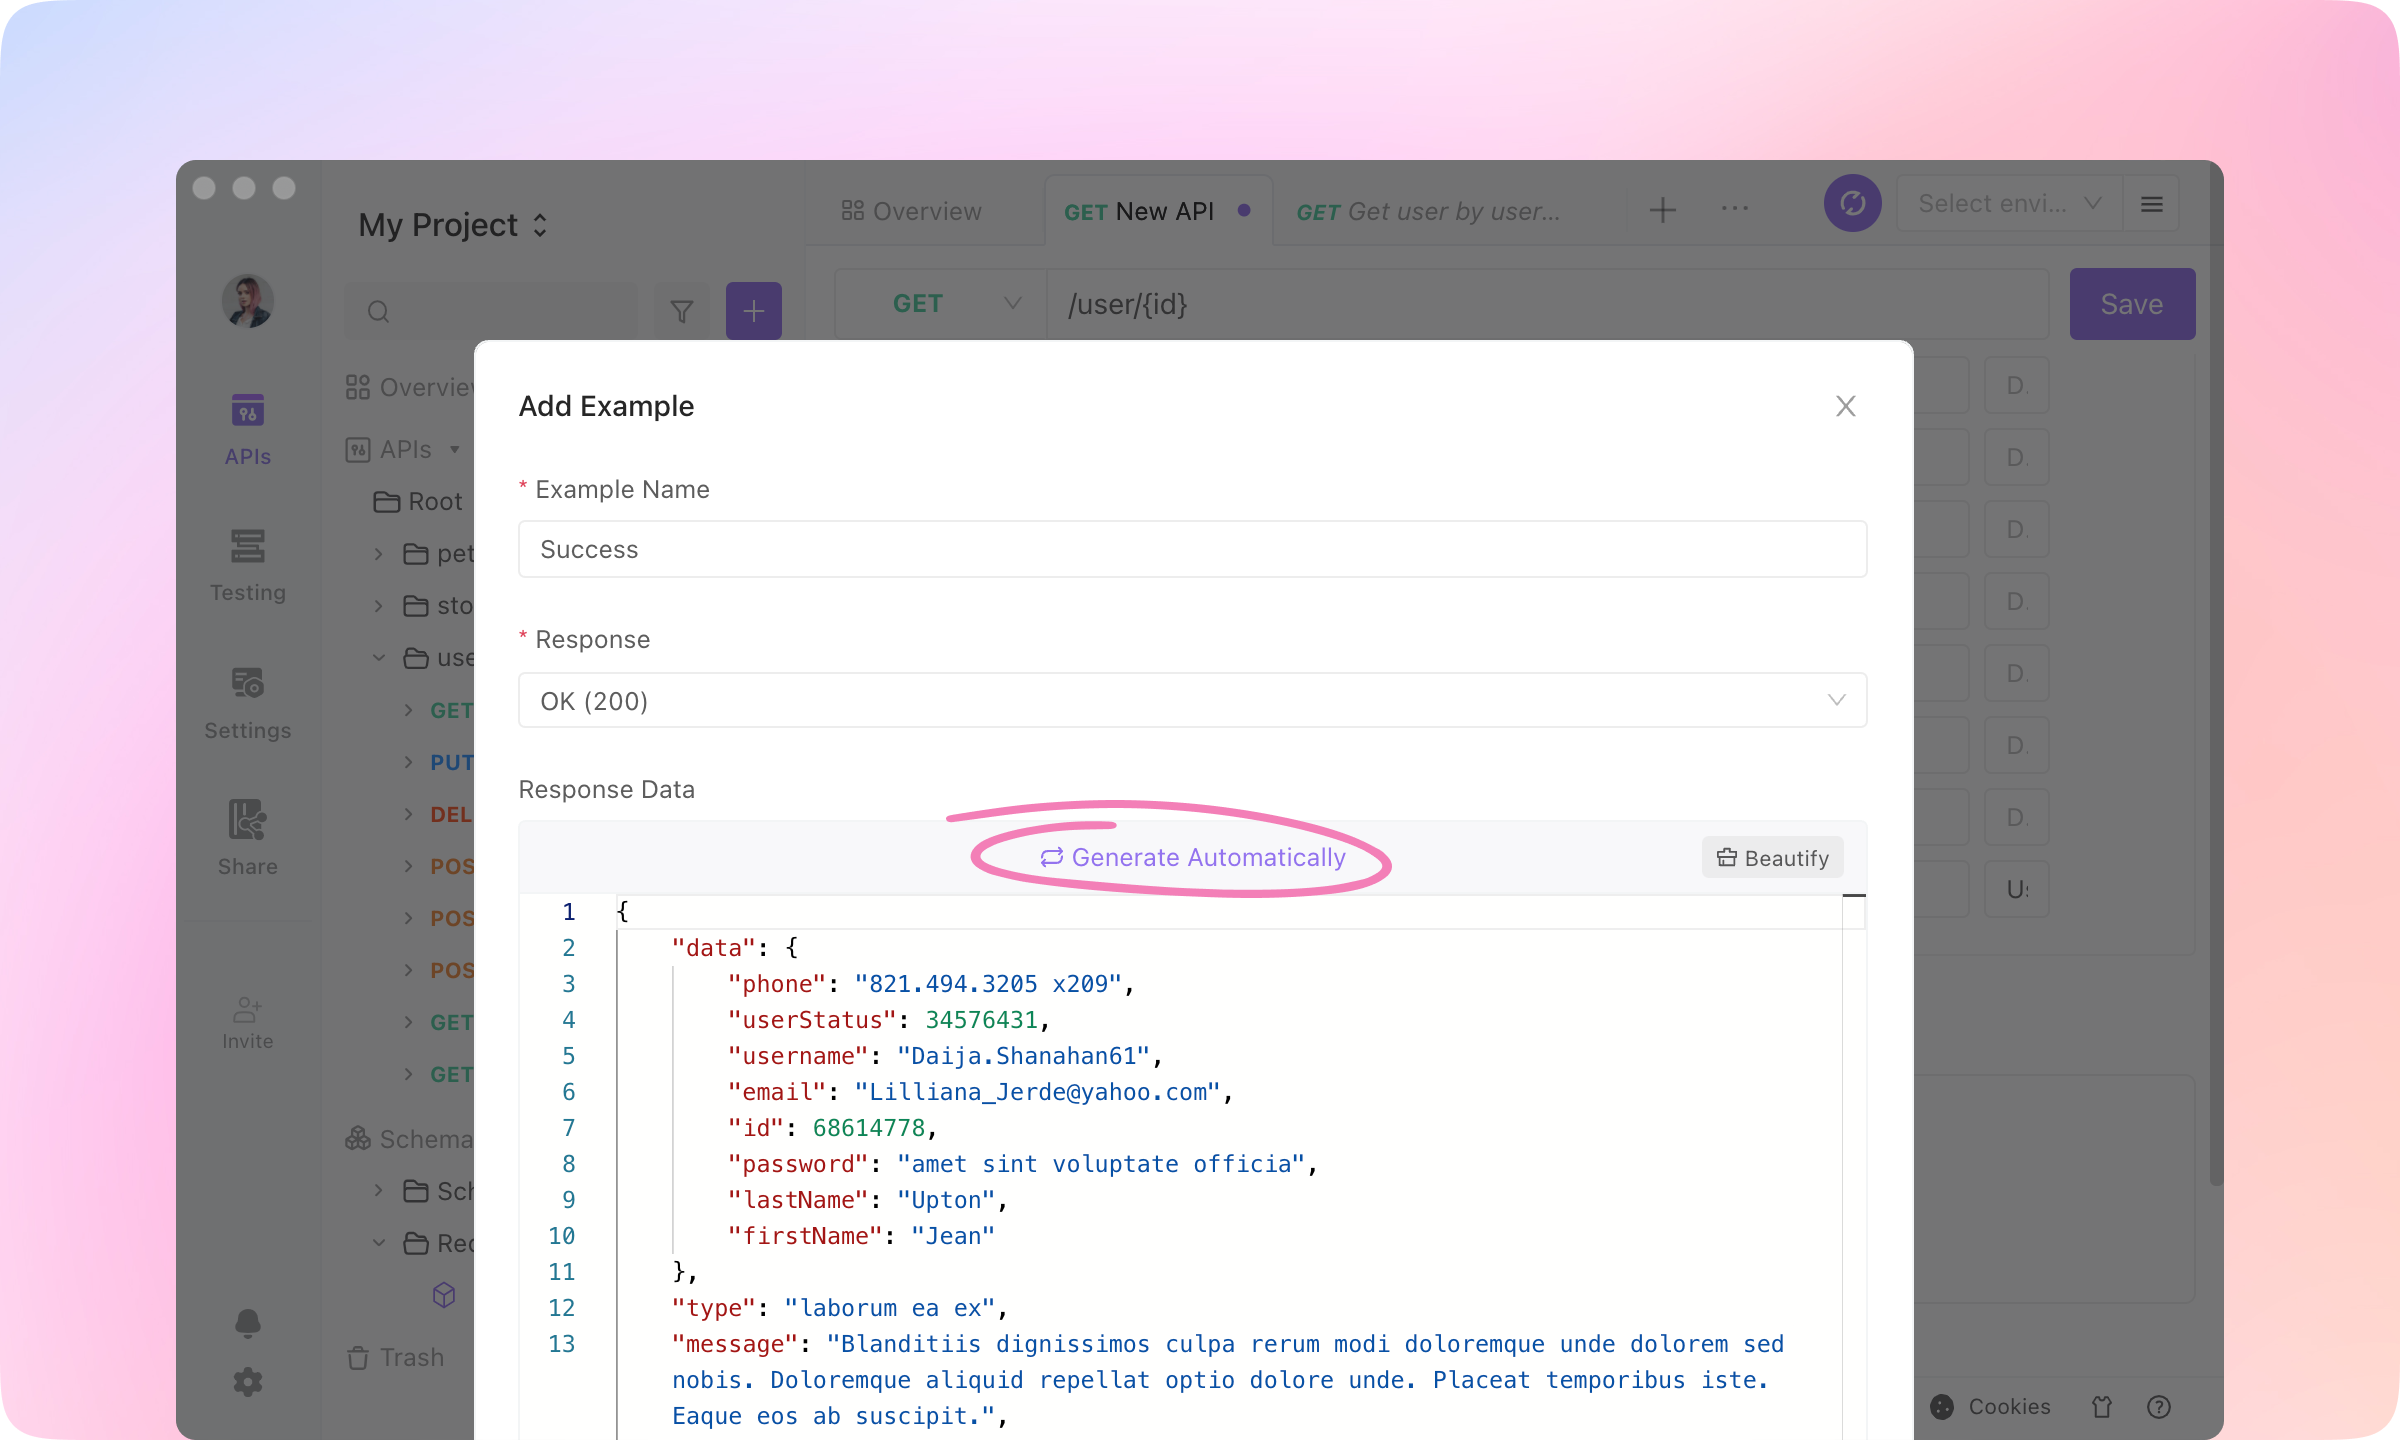
10.
Save to finish the API specification. You'll get a well-designed API.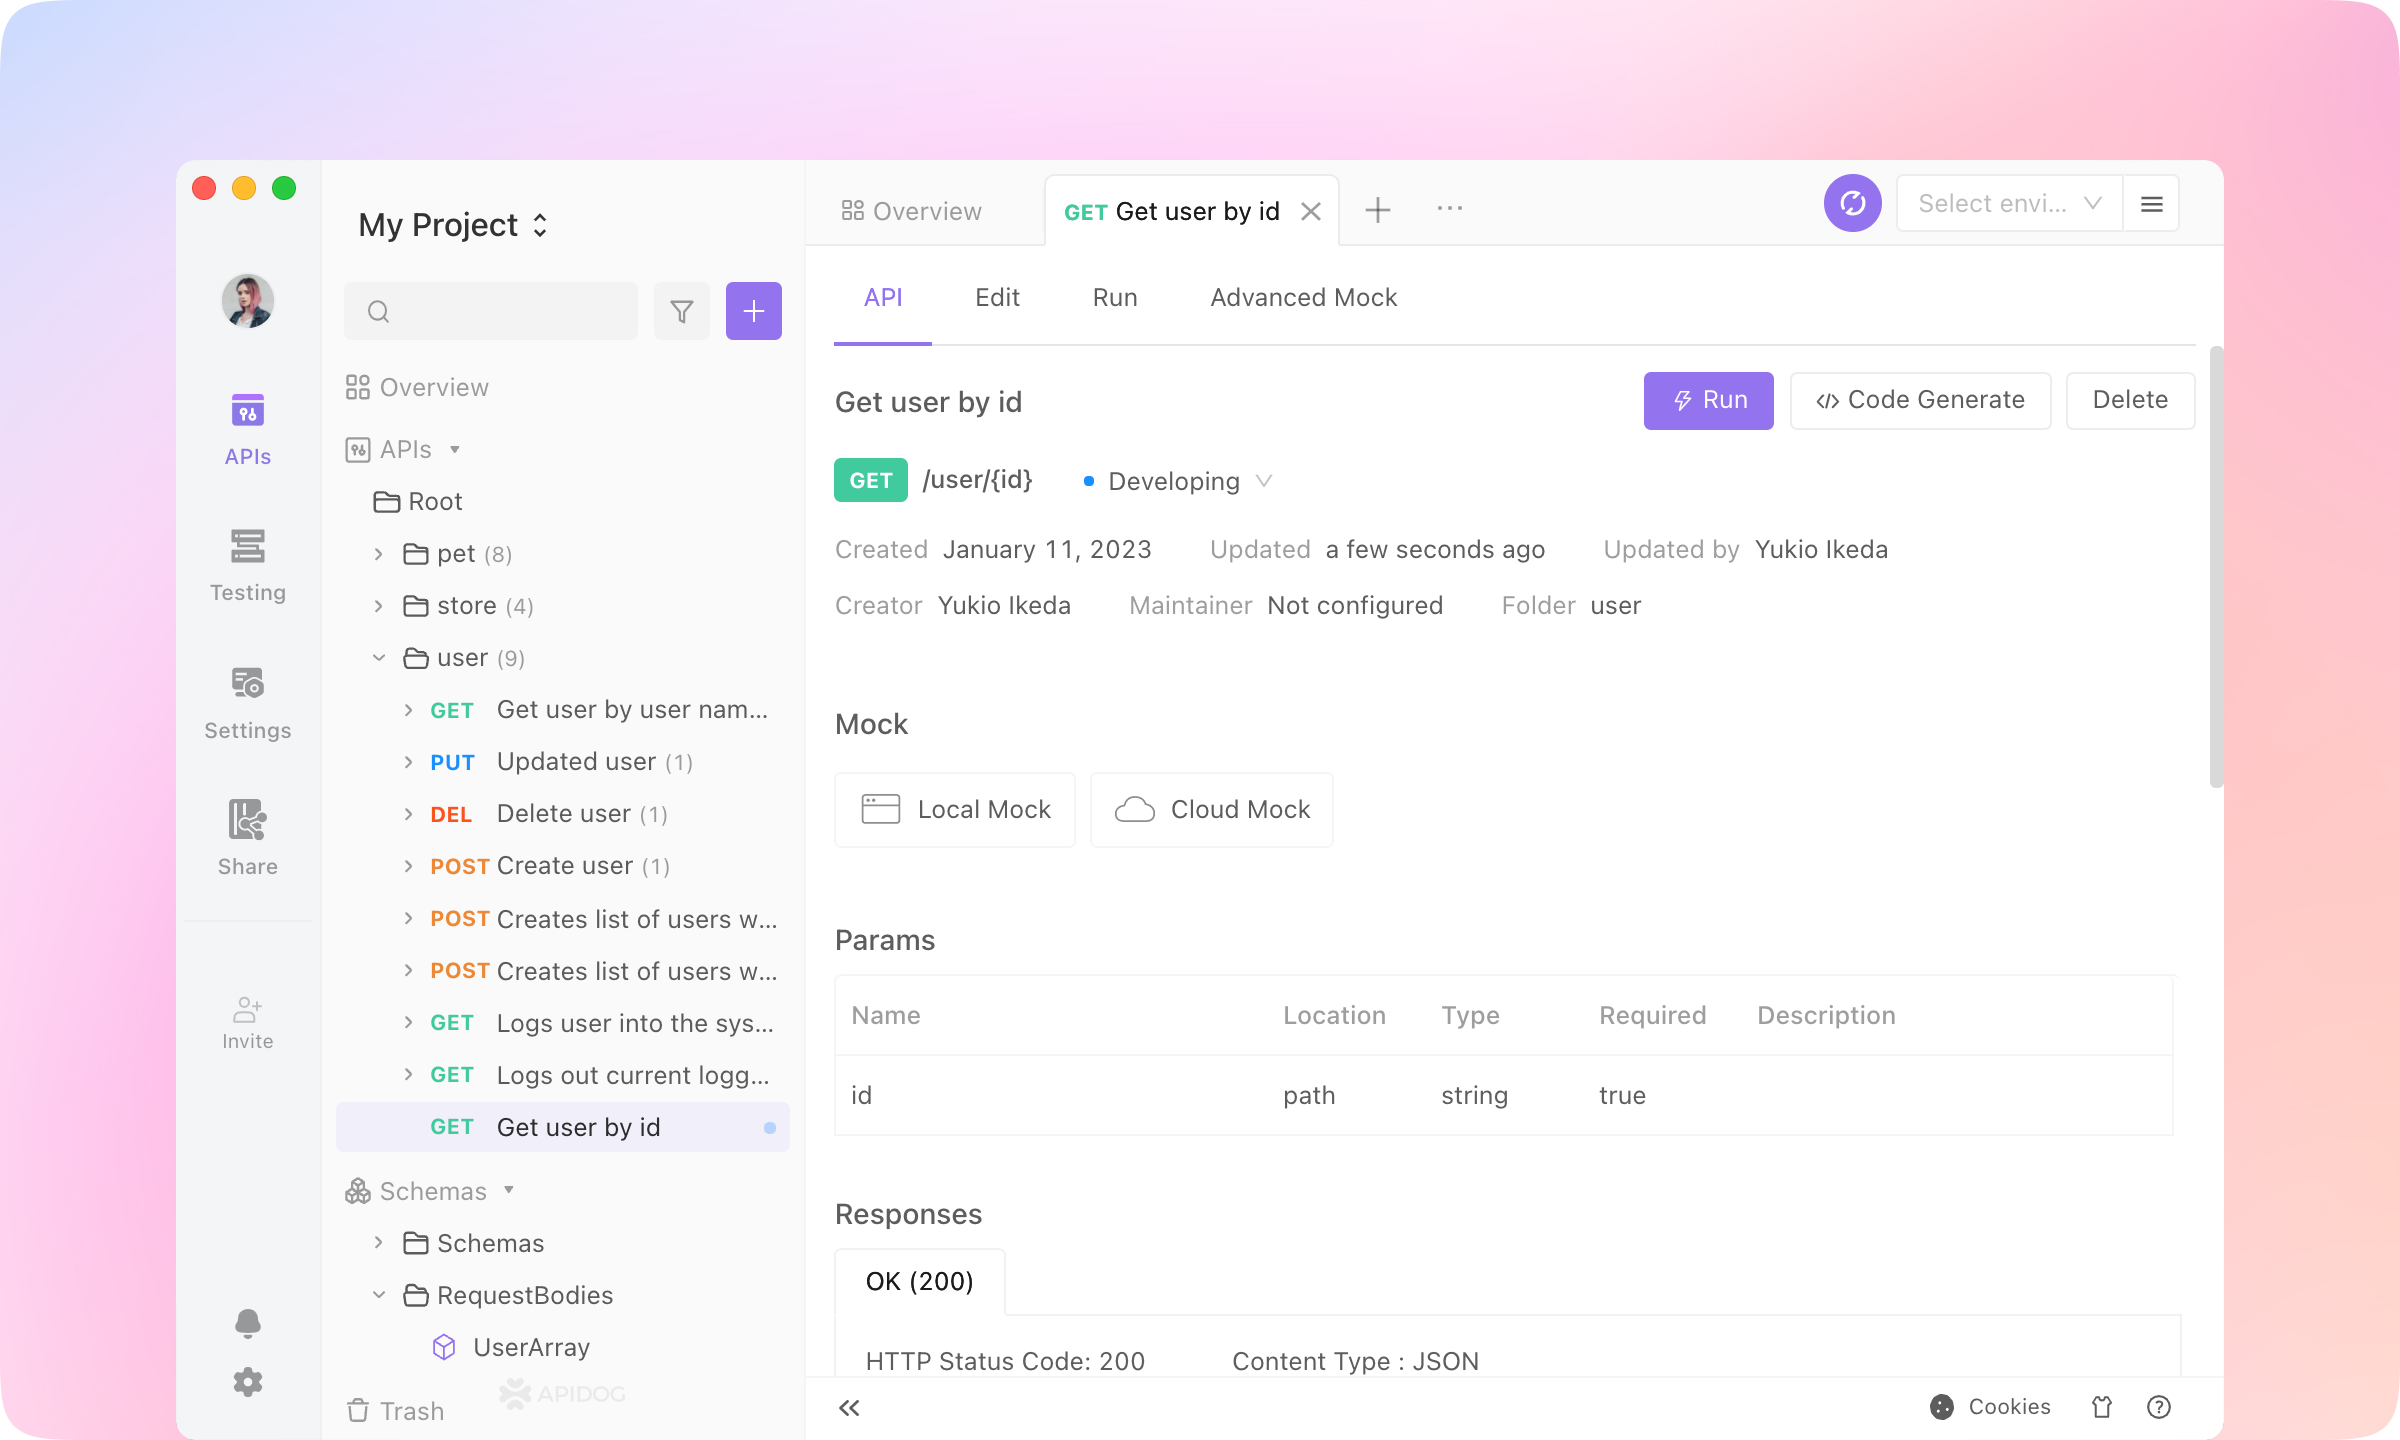
Back-end Developers: API Developing & Debugging
Generate Code
1.
Generate Code on the API page and select Generate Server Stubs & Client SDKs.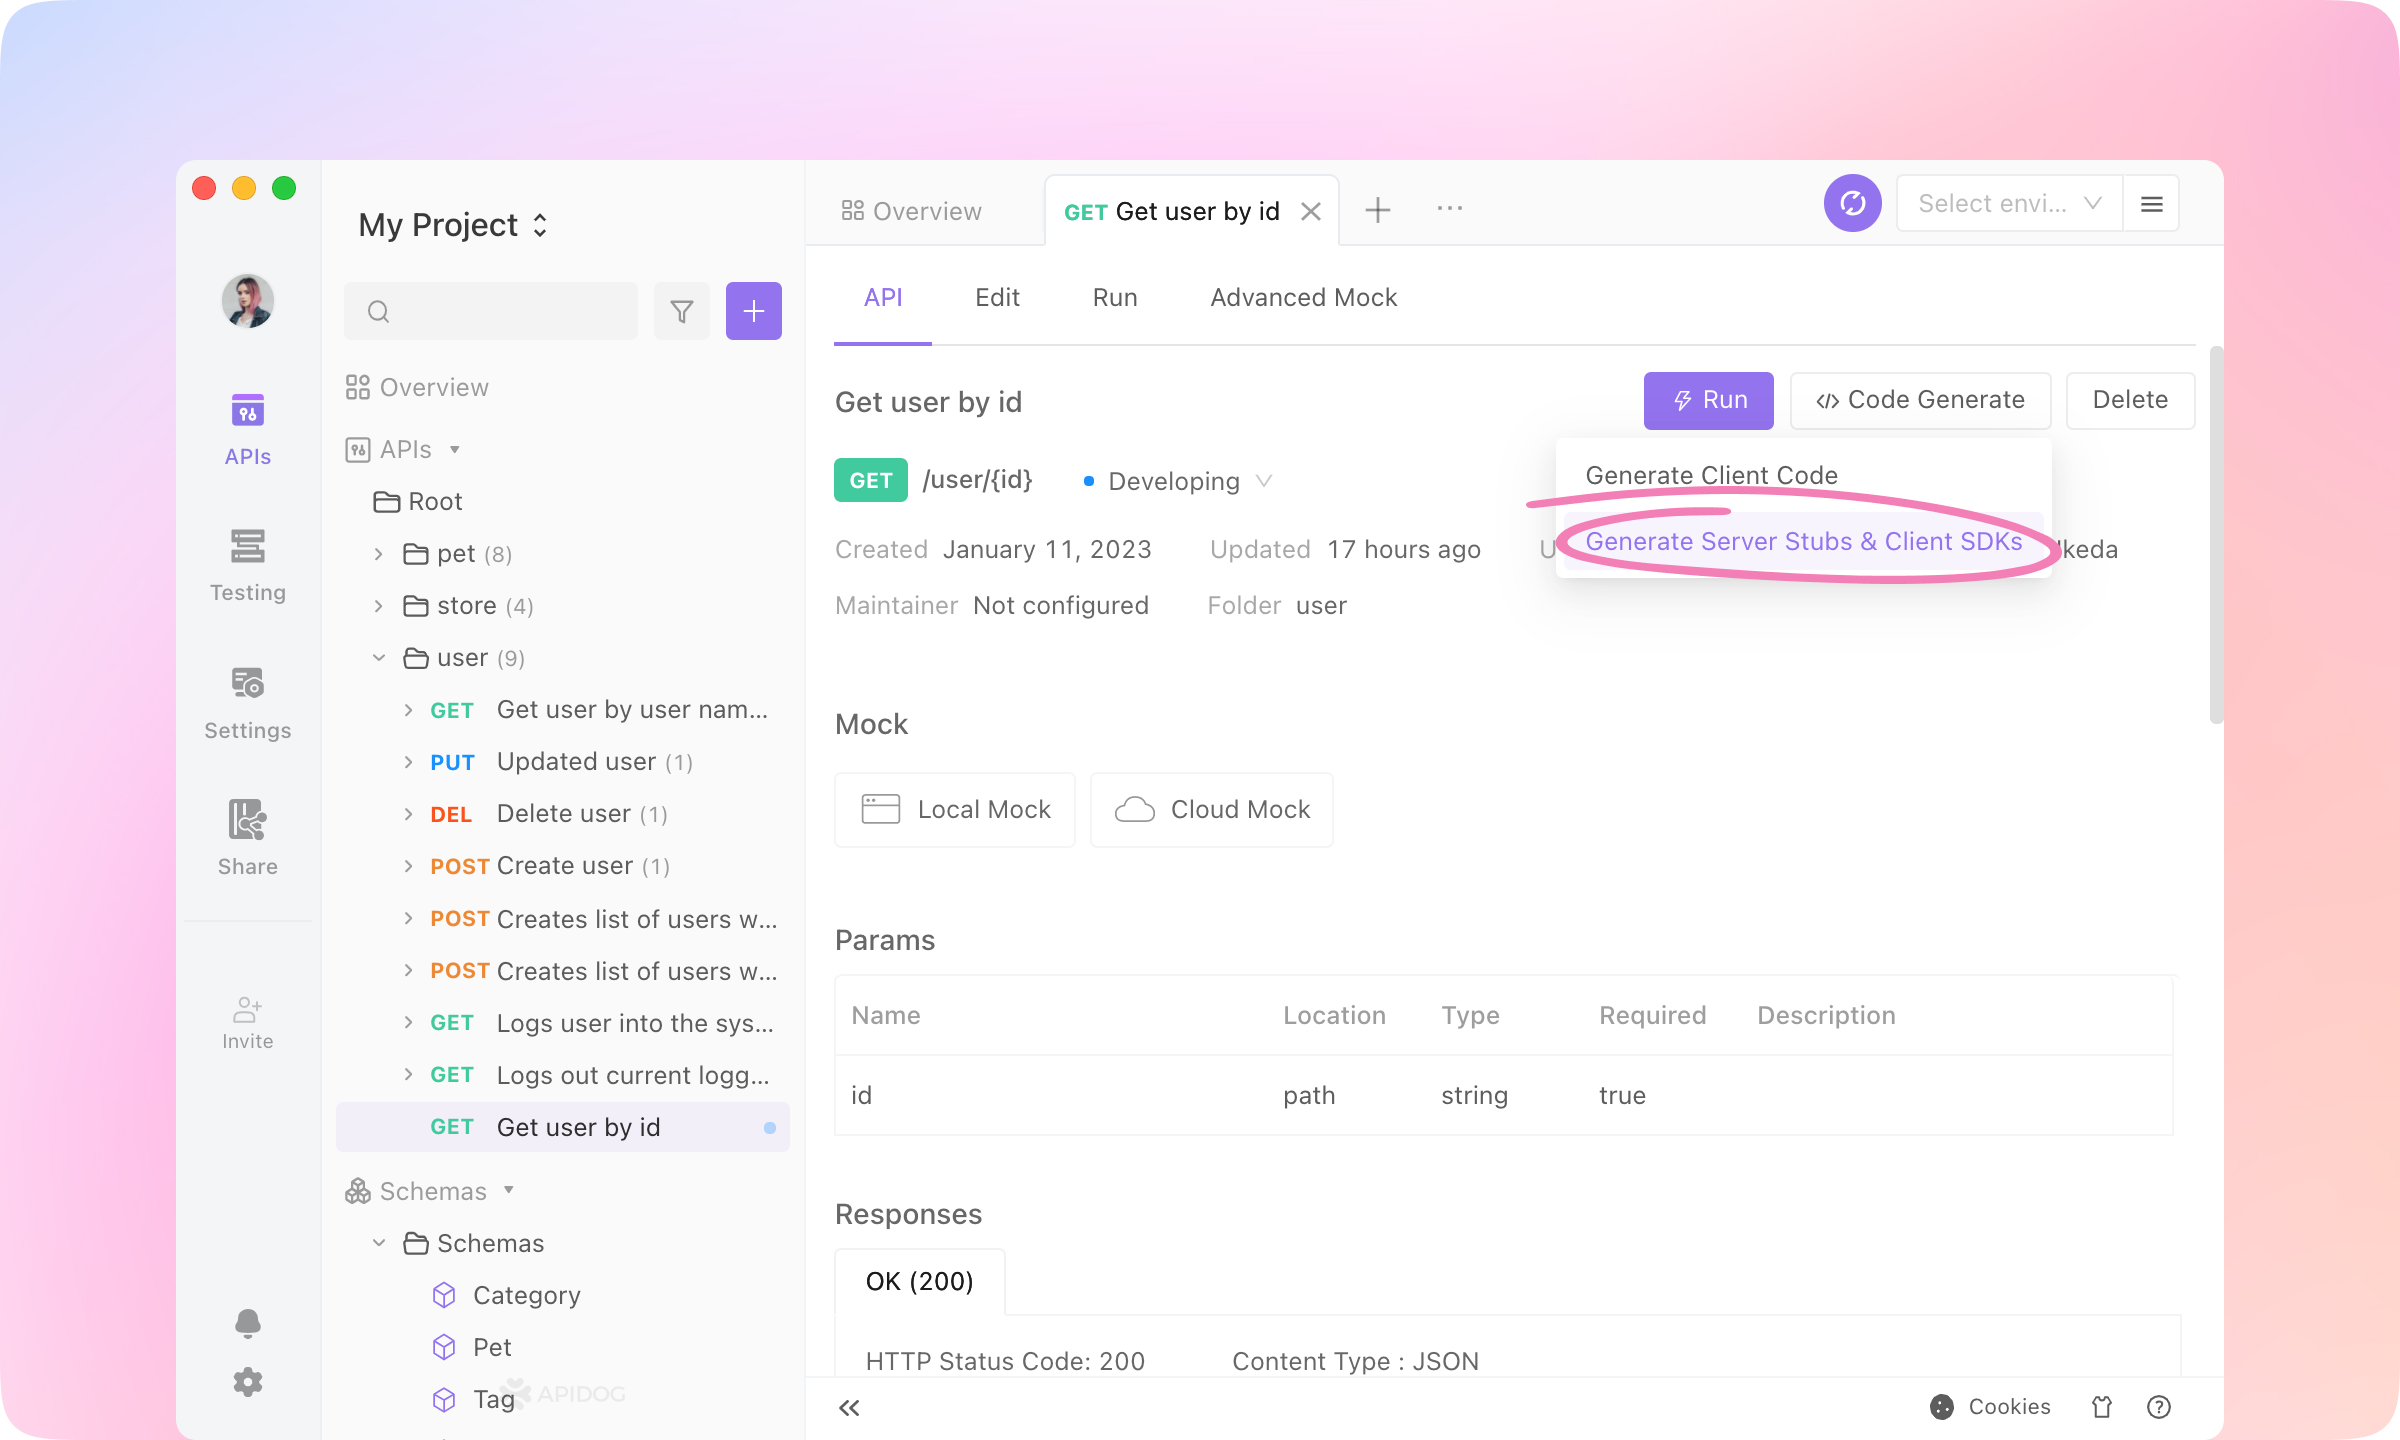
2.
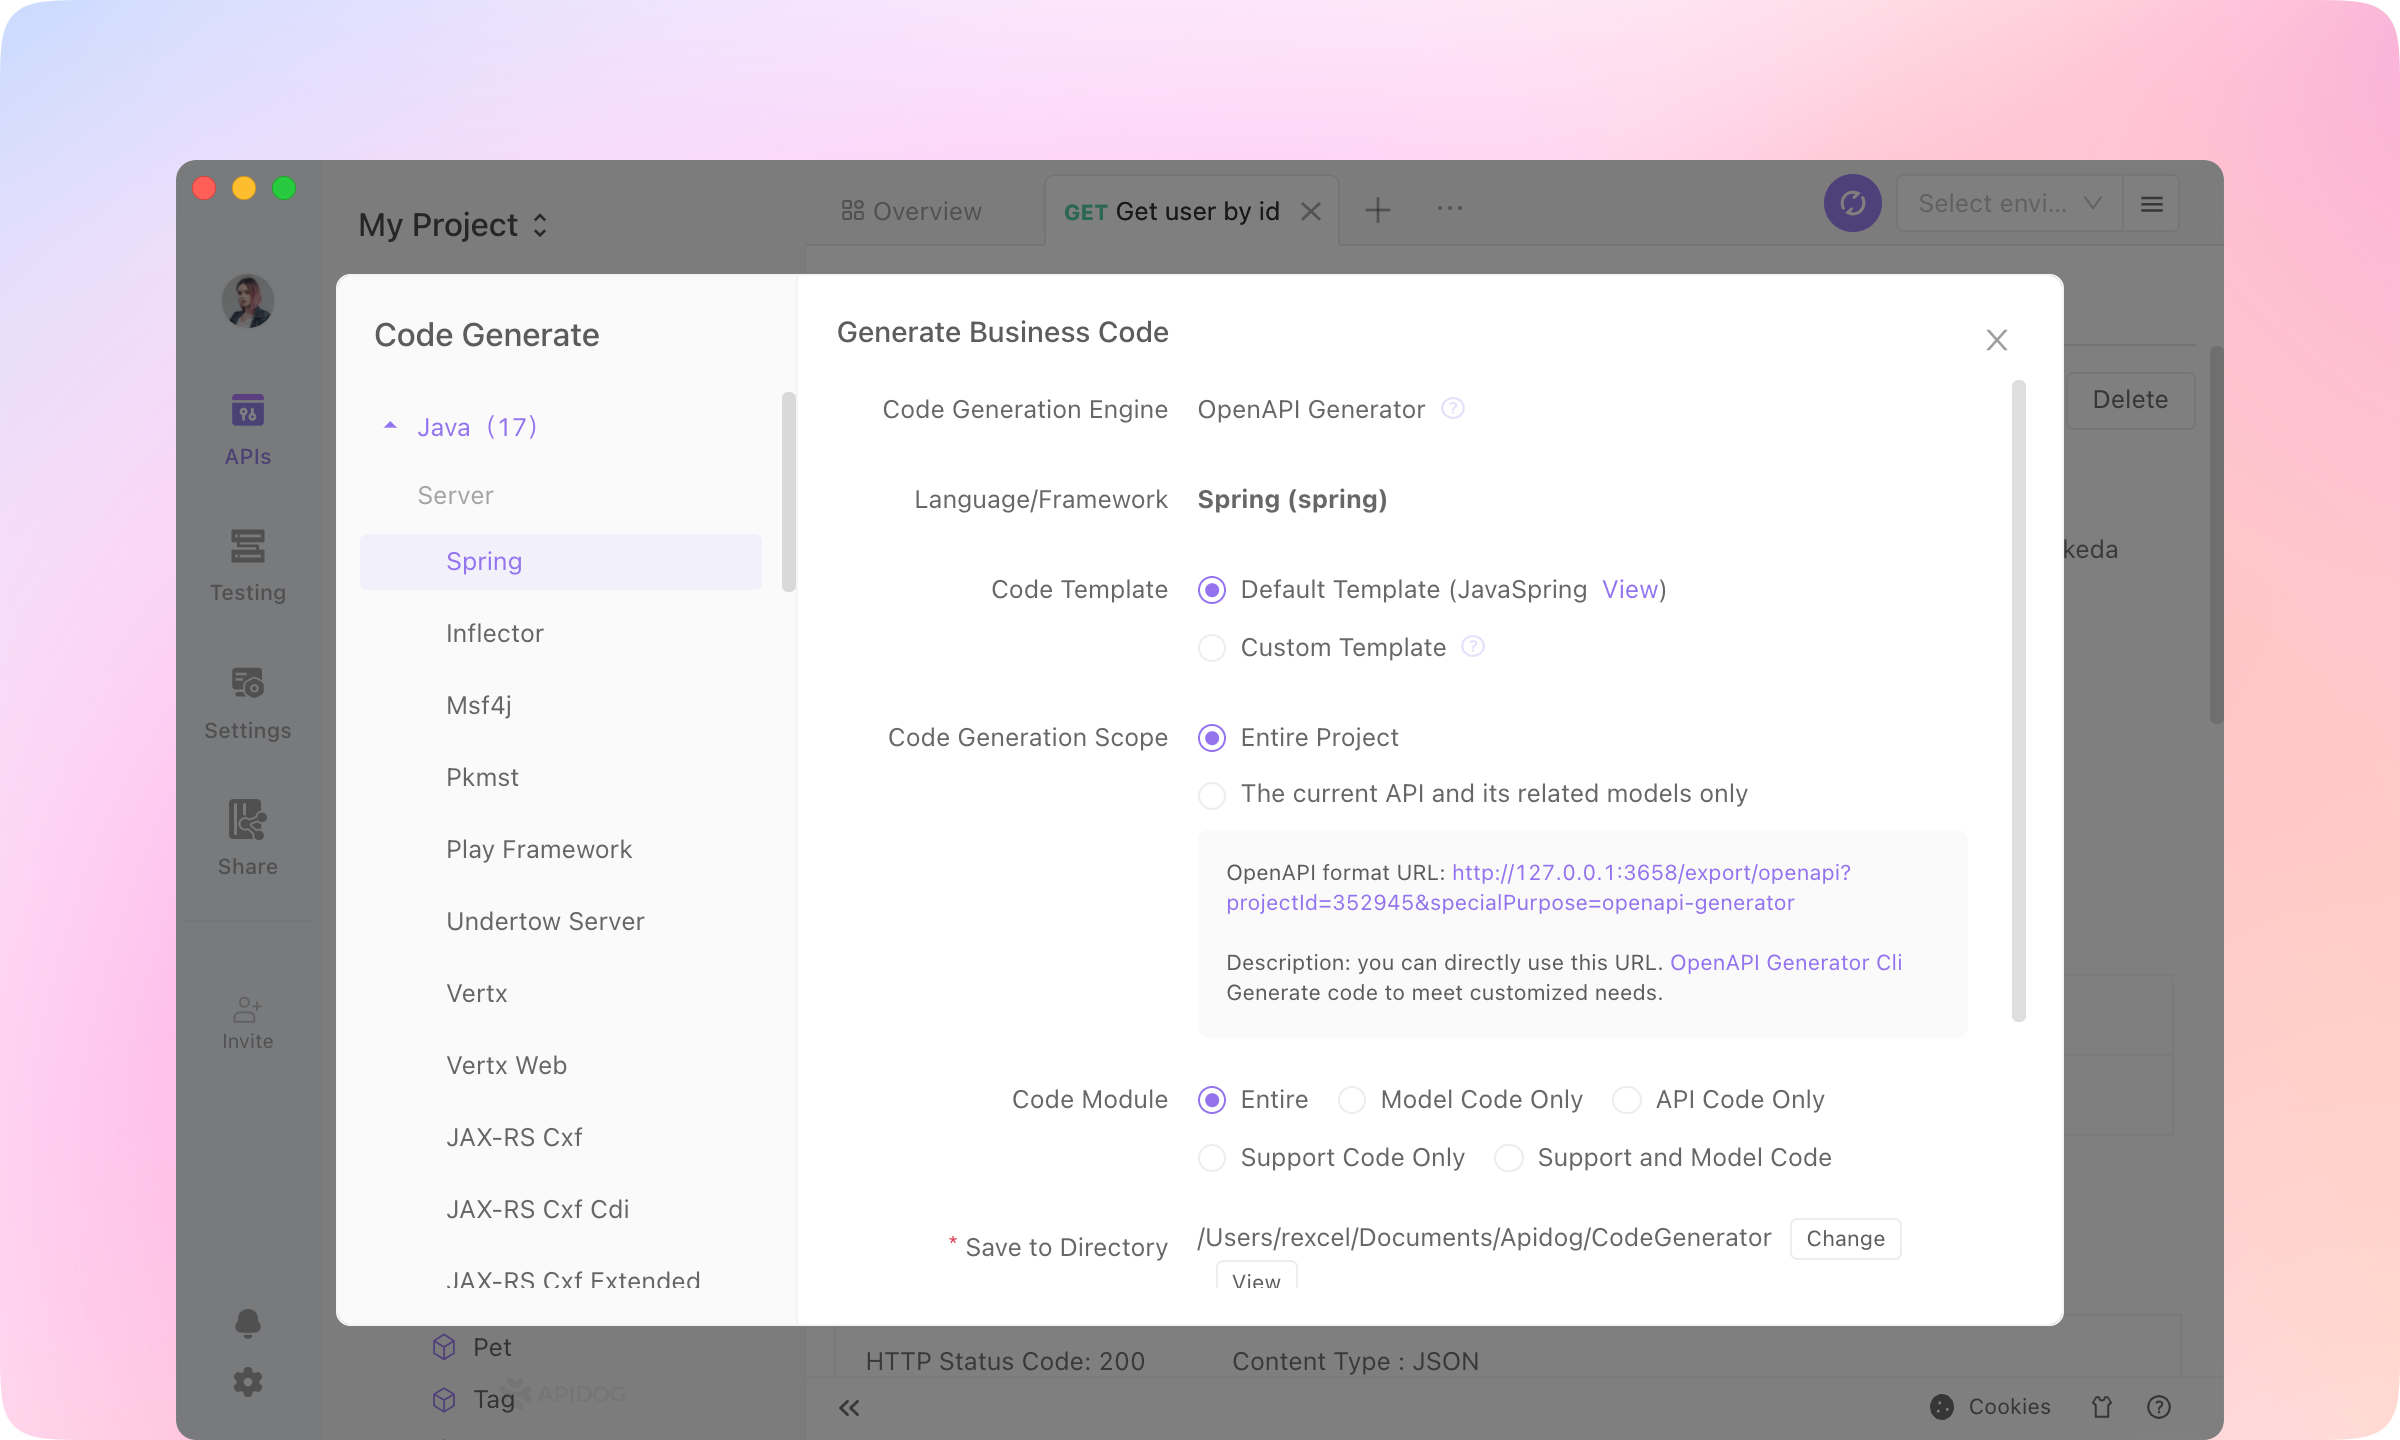
TIP
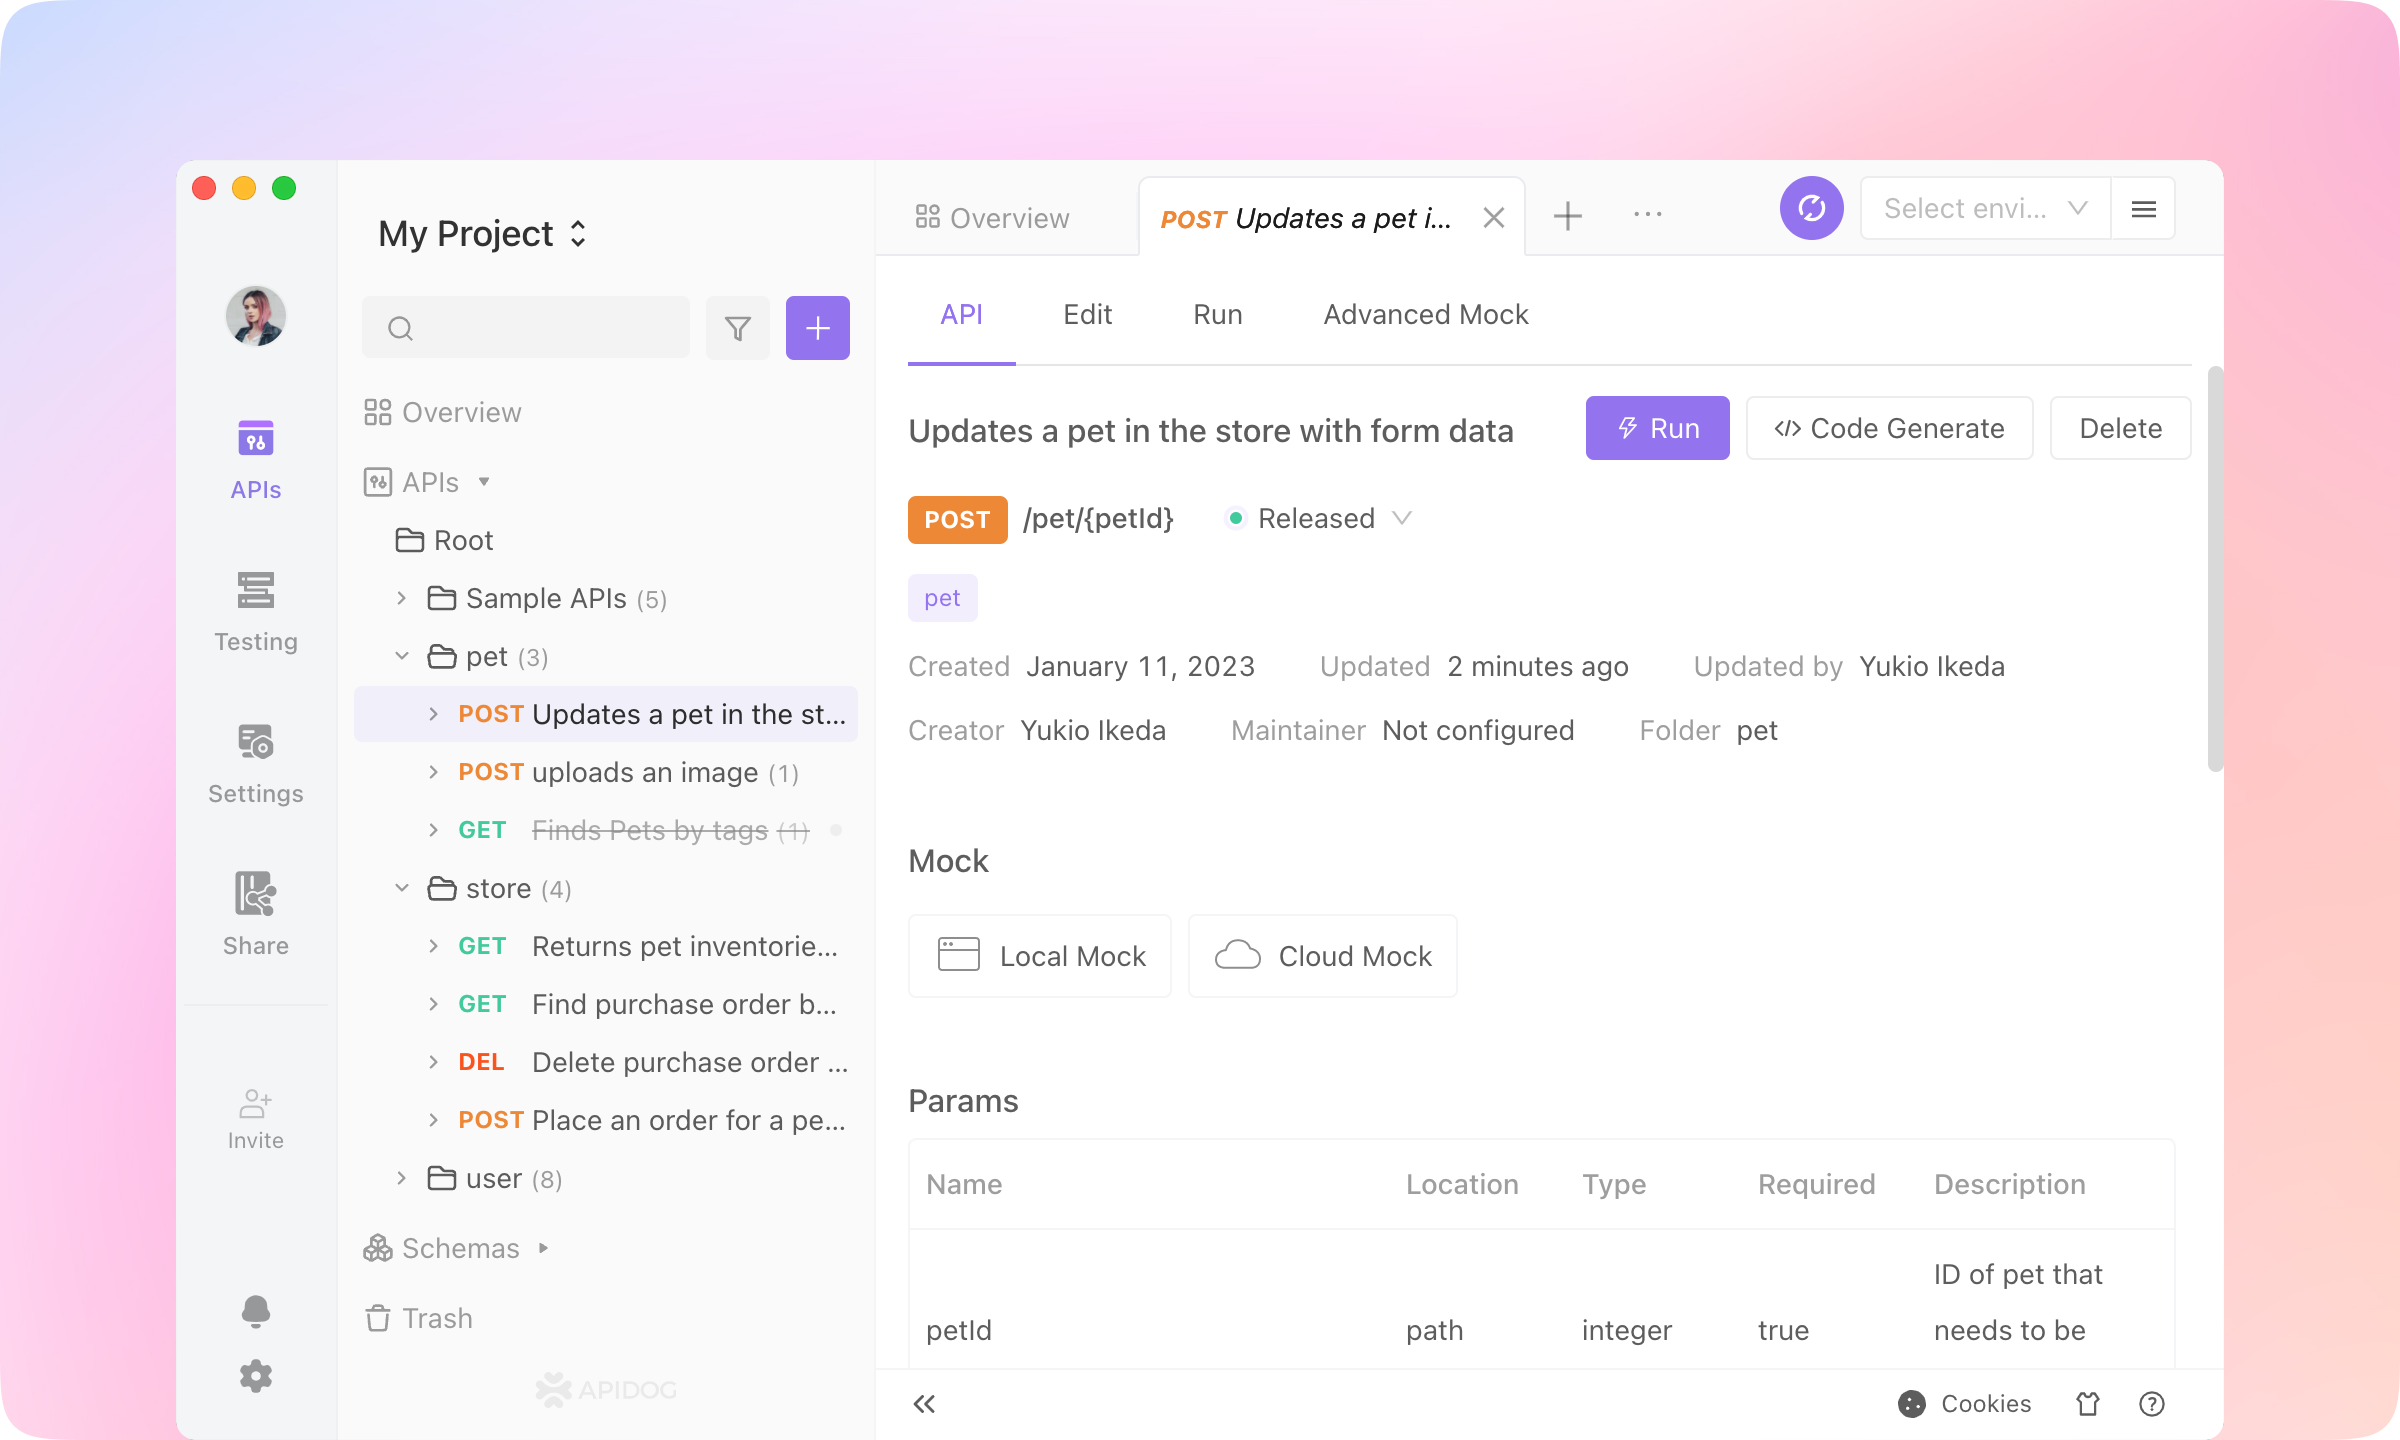
Run the API
1.
Run button to enter the Run tab.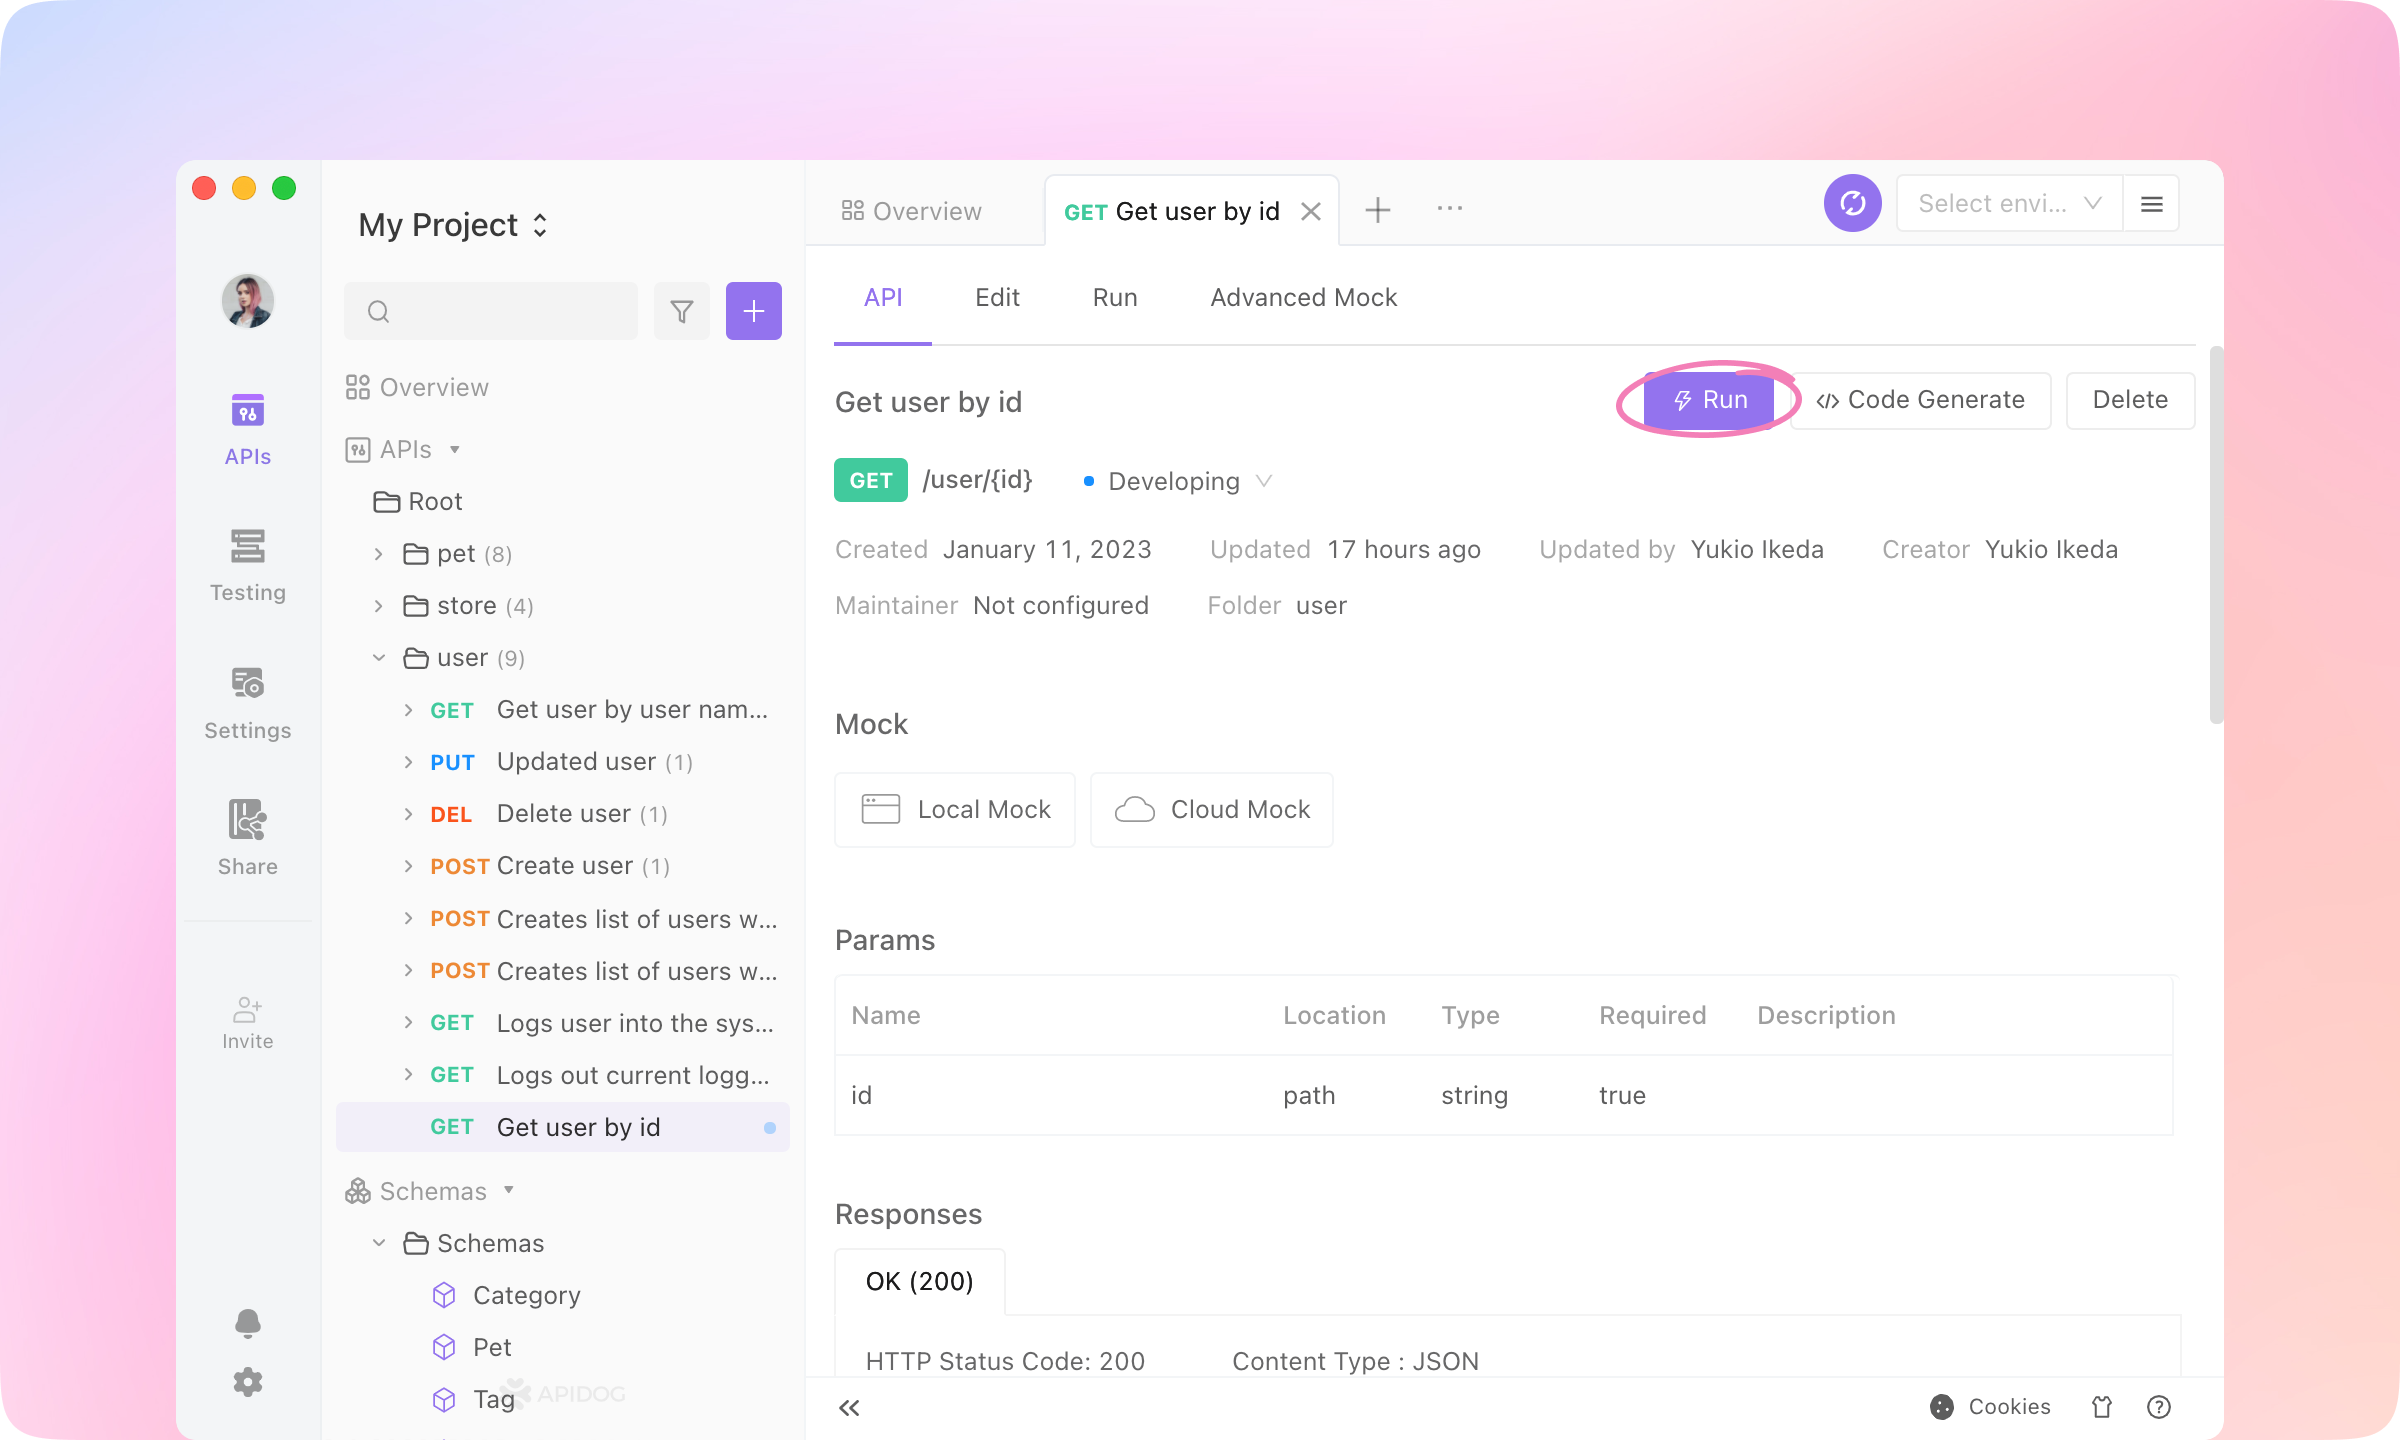
2.
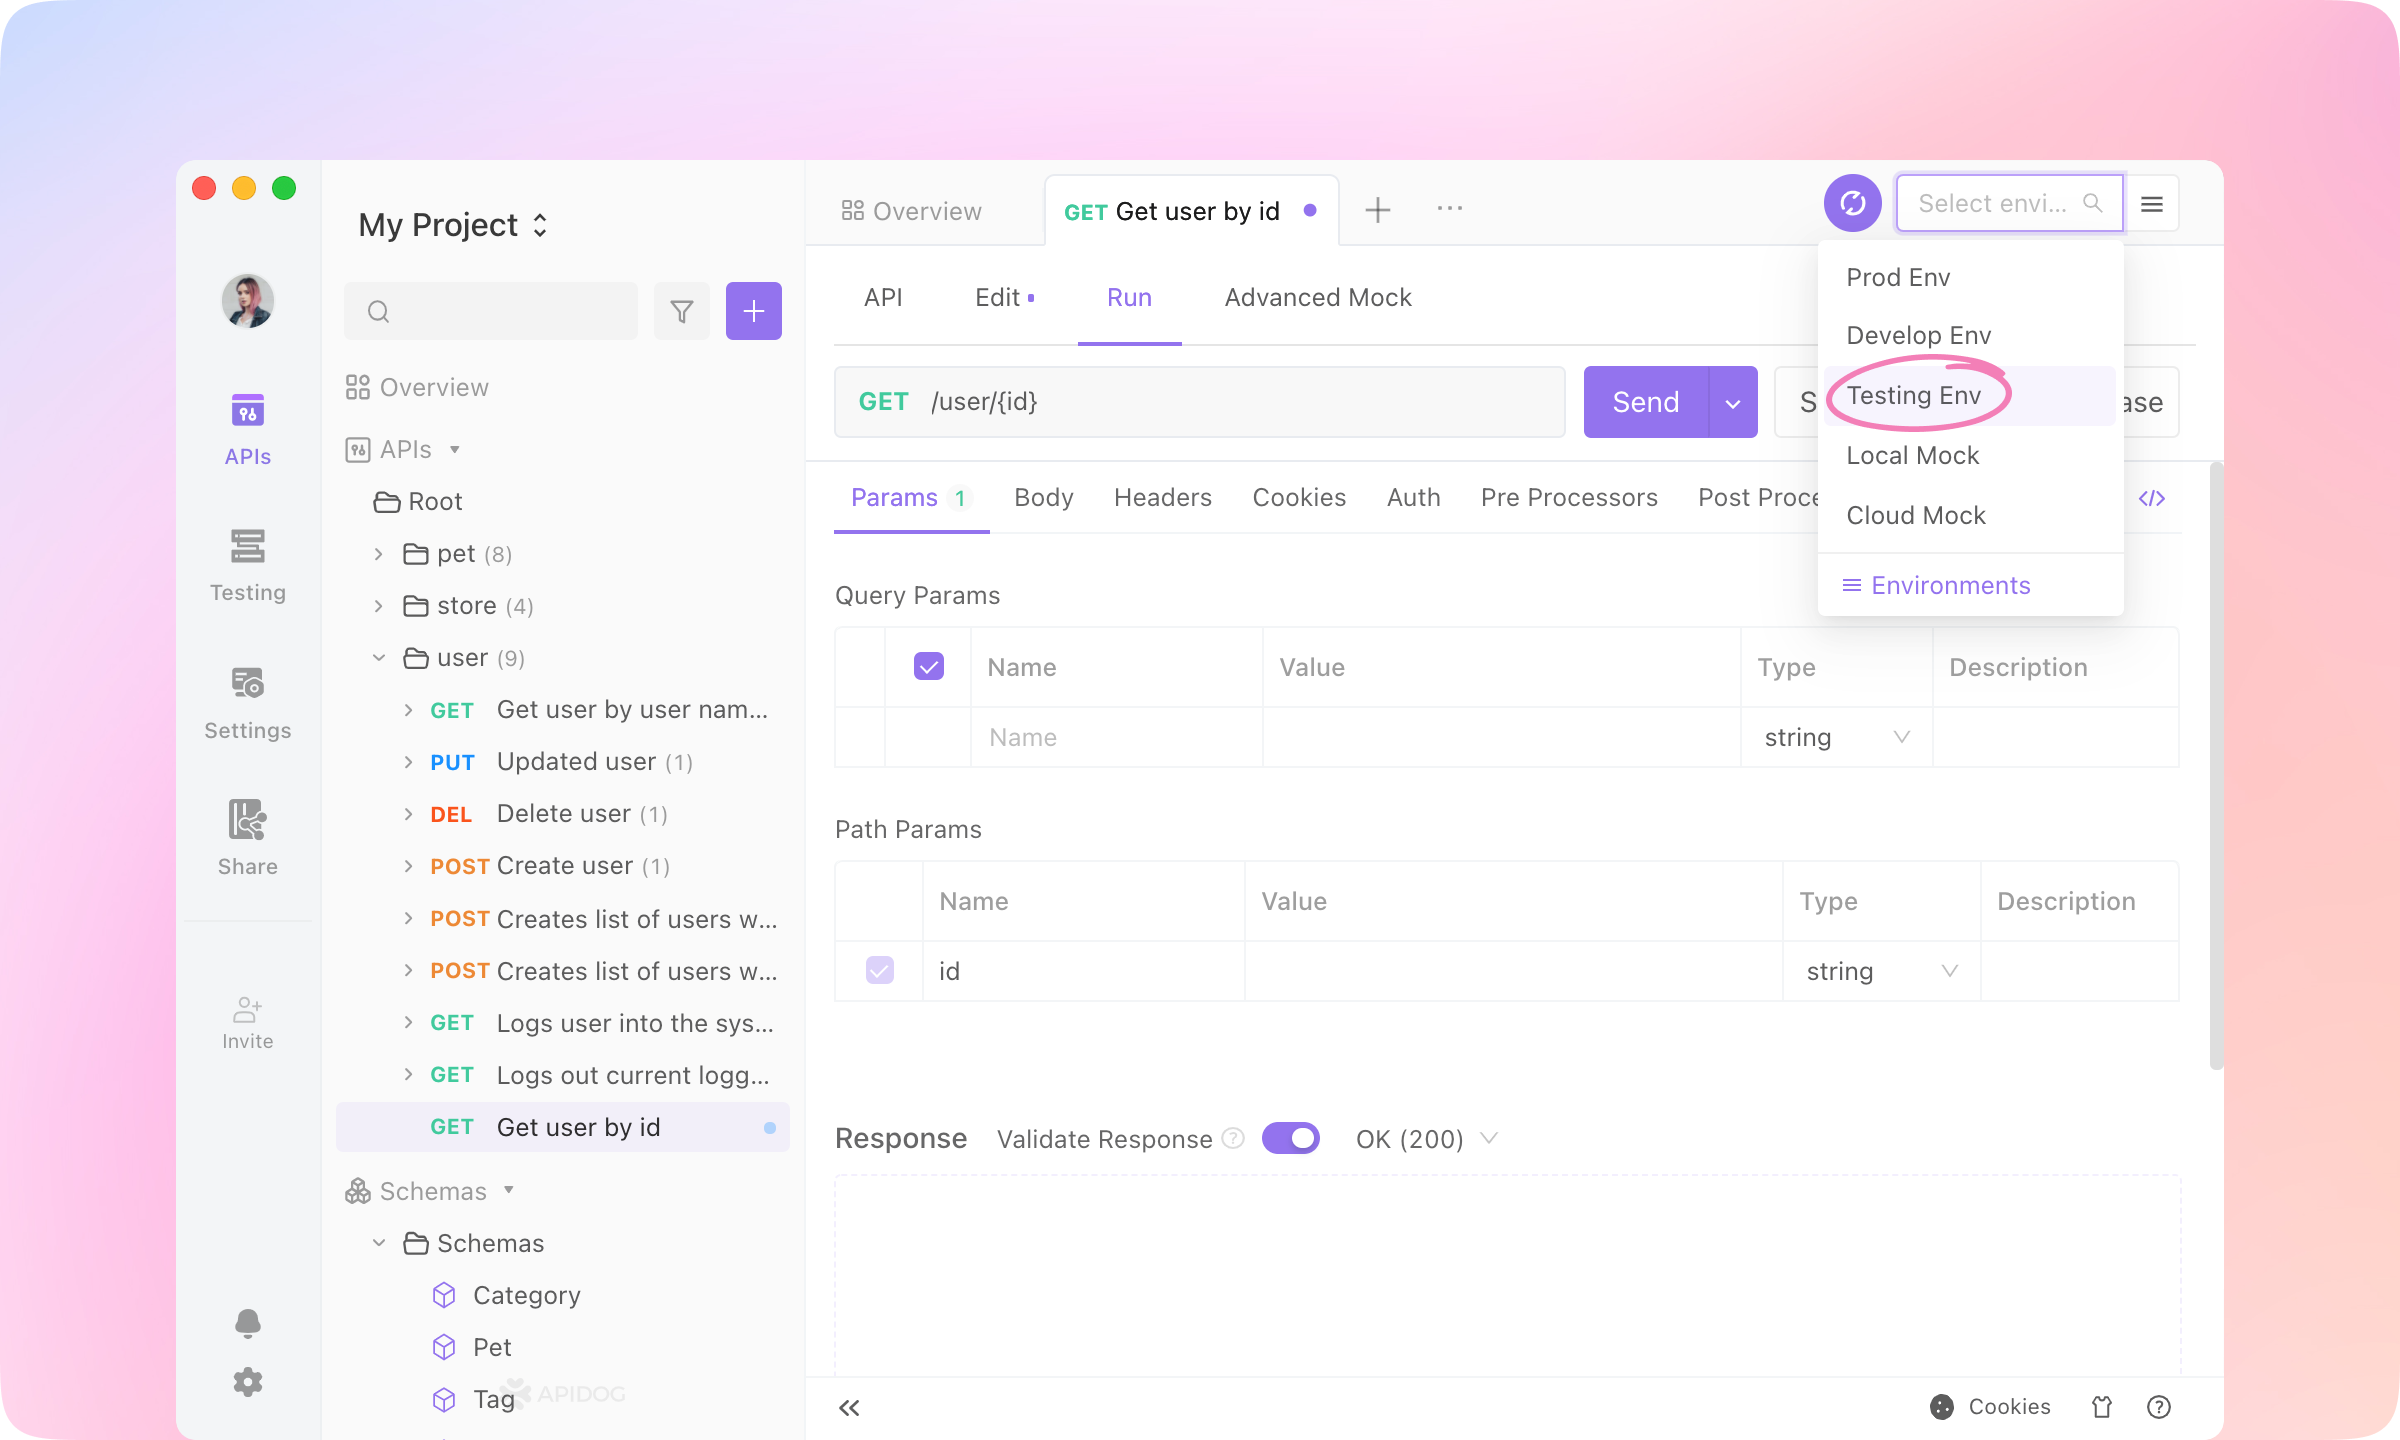
3.
Manage Environments button at the top right.
4.
https://mock.apidog.com/m1/352945-0-defaultTIP

5.
6.
Send to send the request. The response of the API will be displayed below.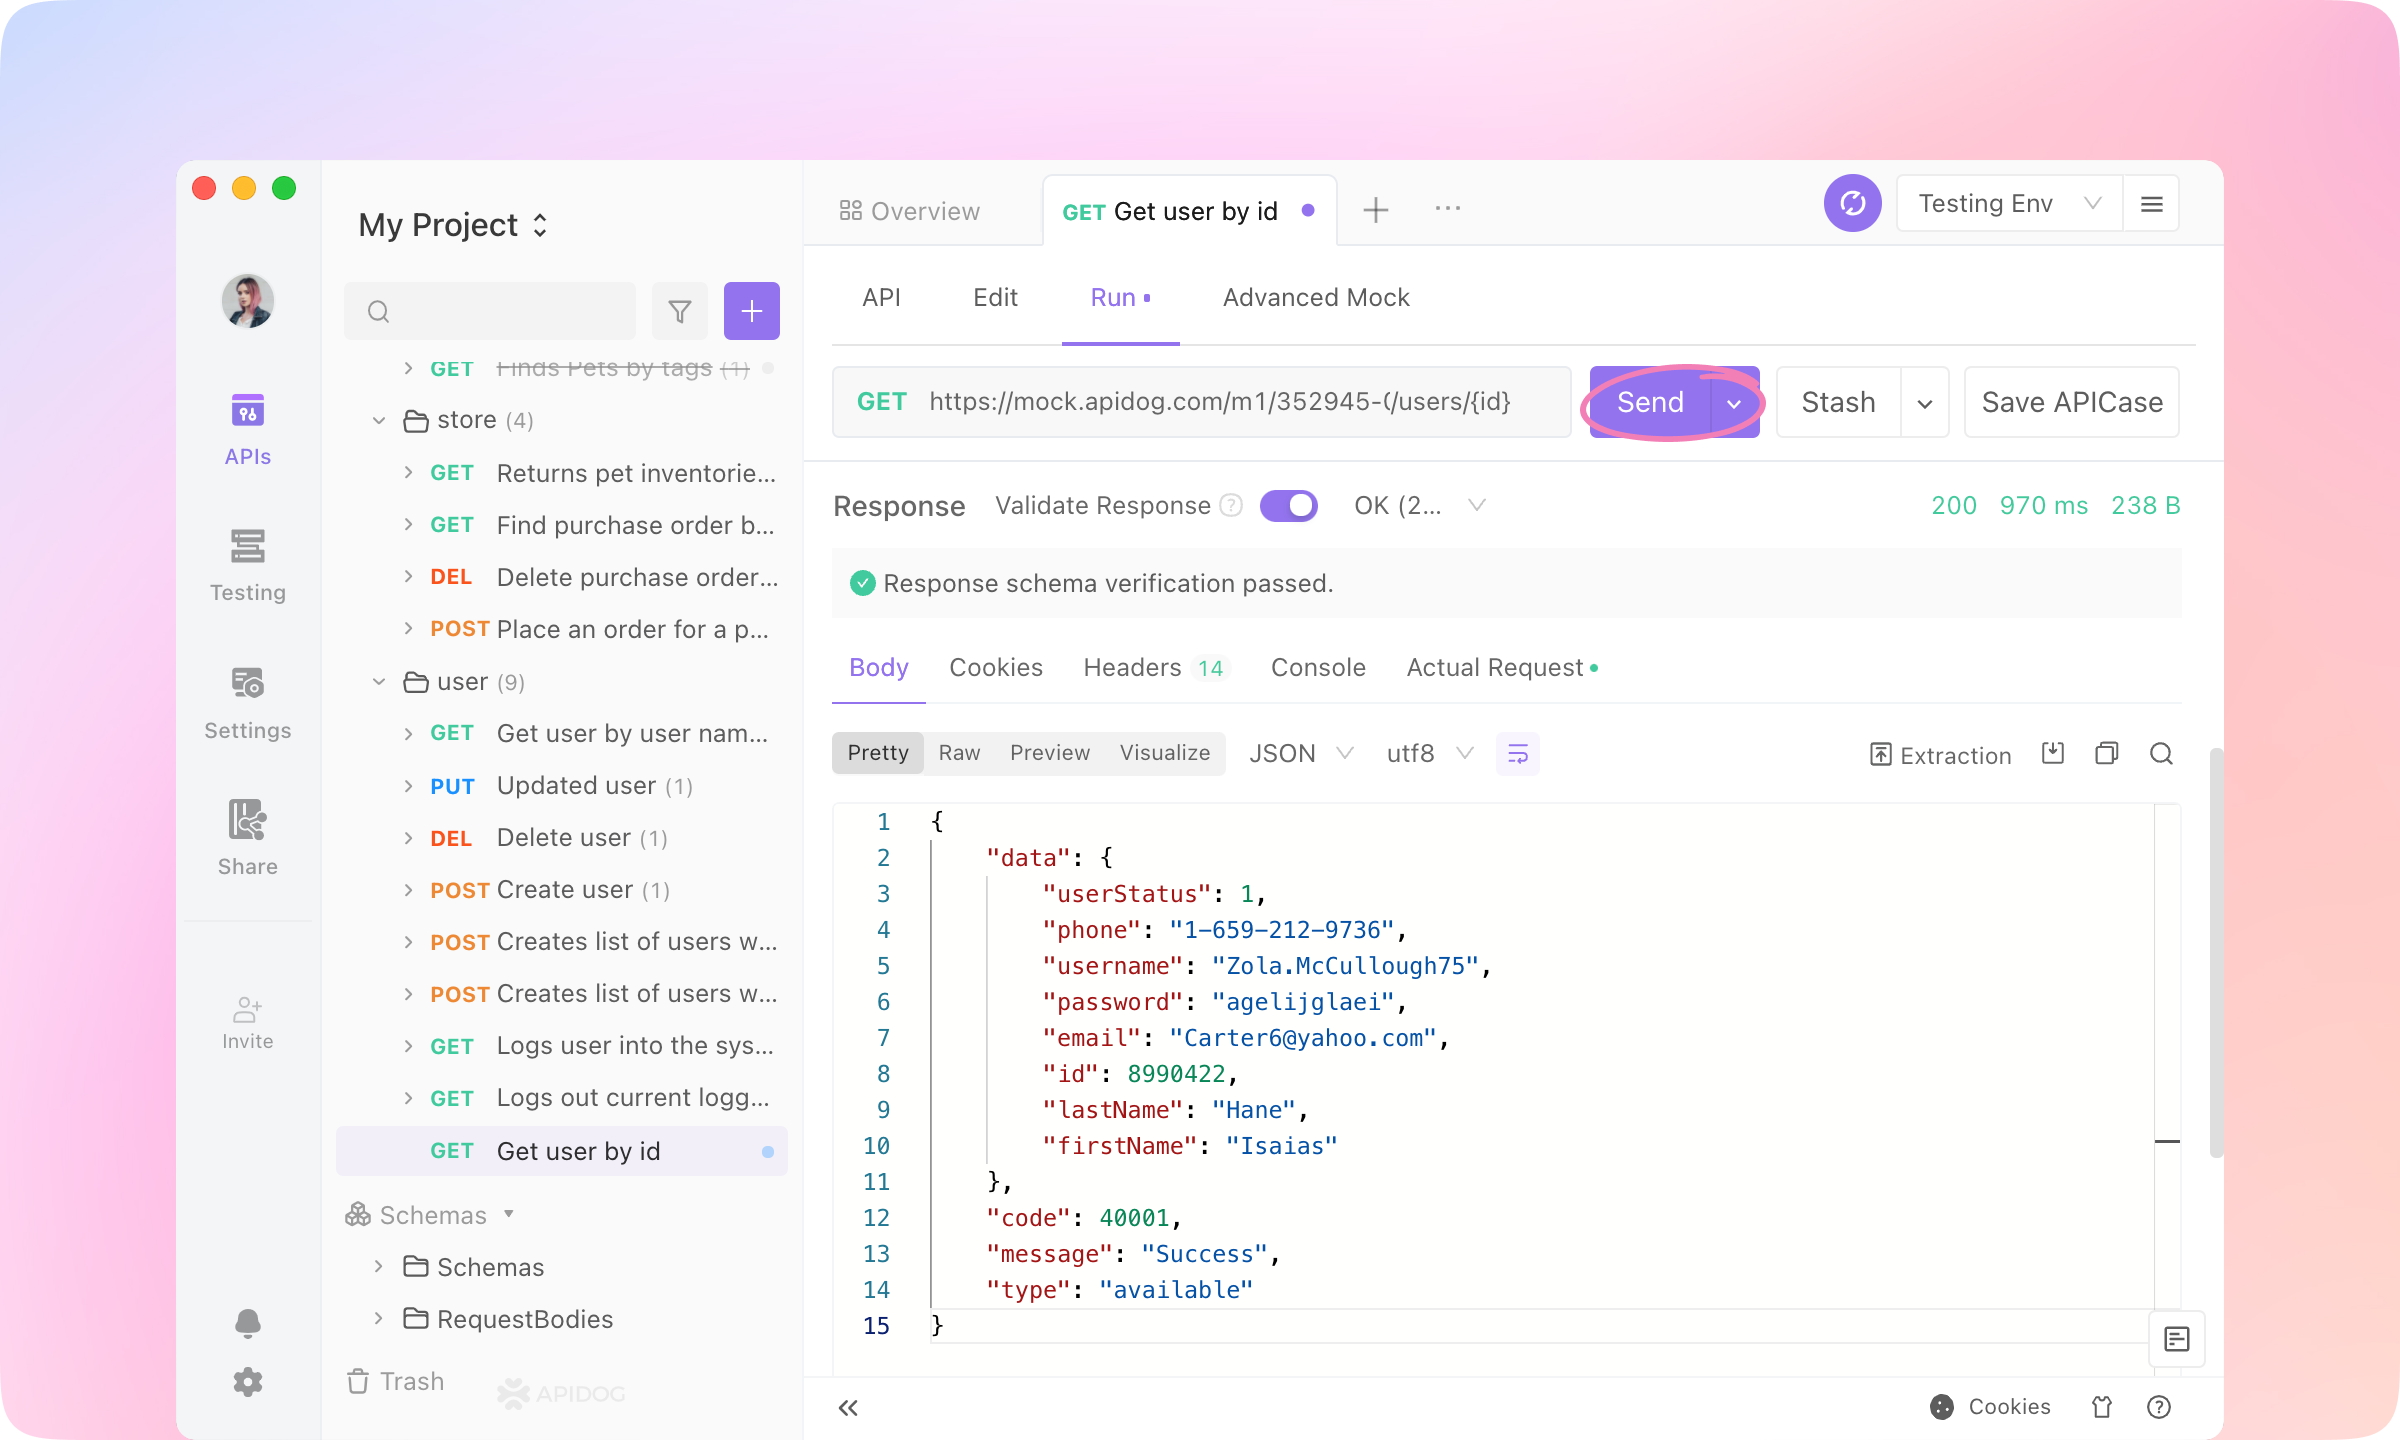
Debugging
1.
Send the request.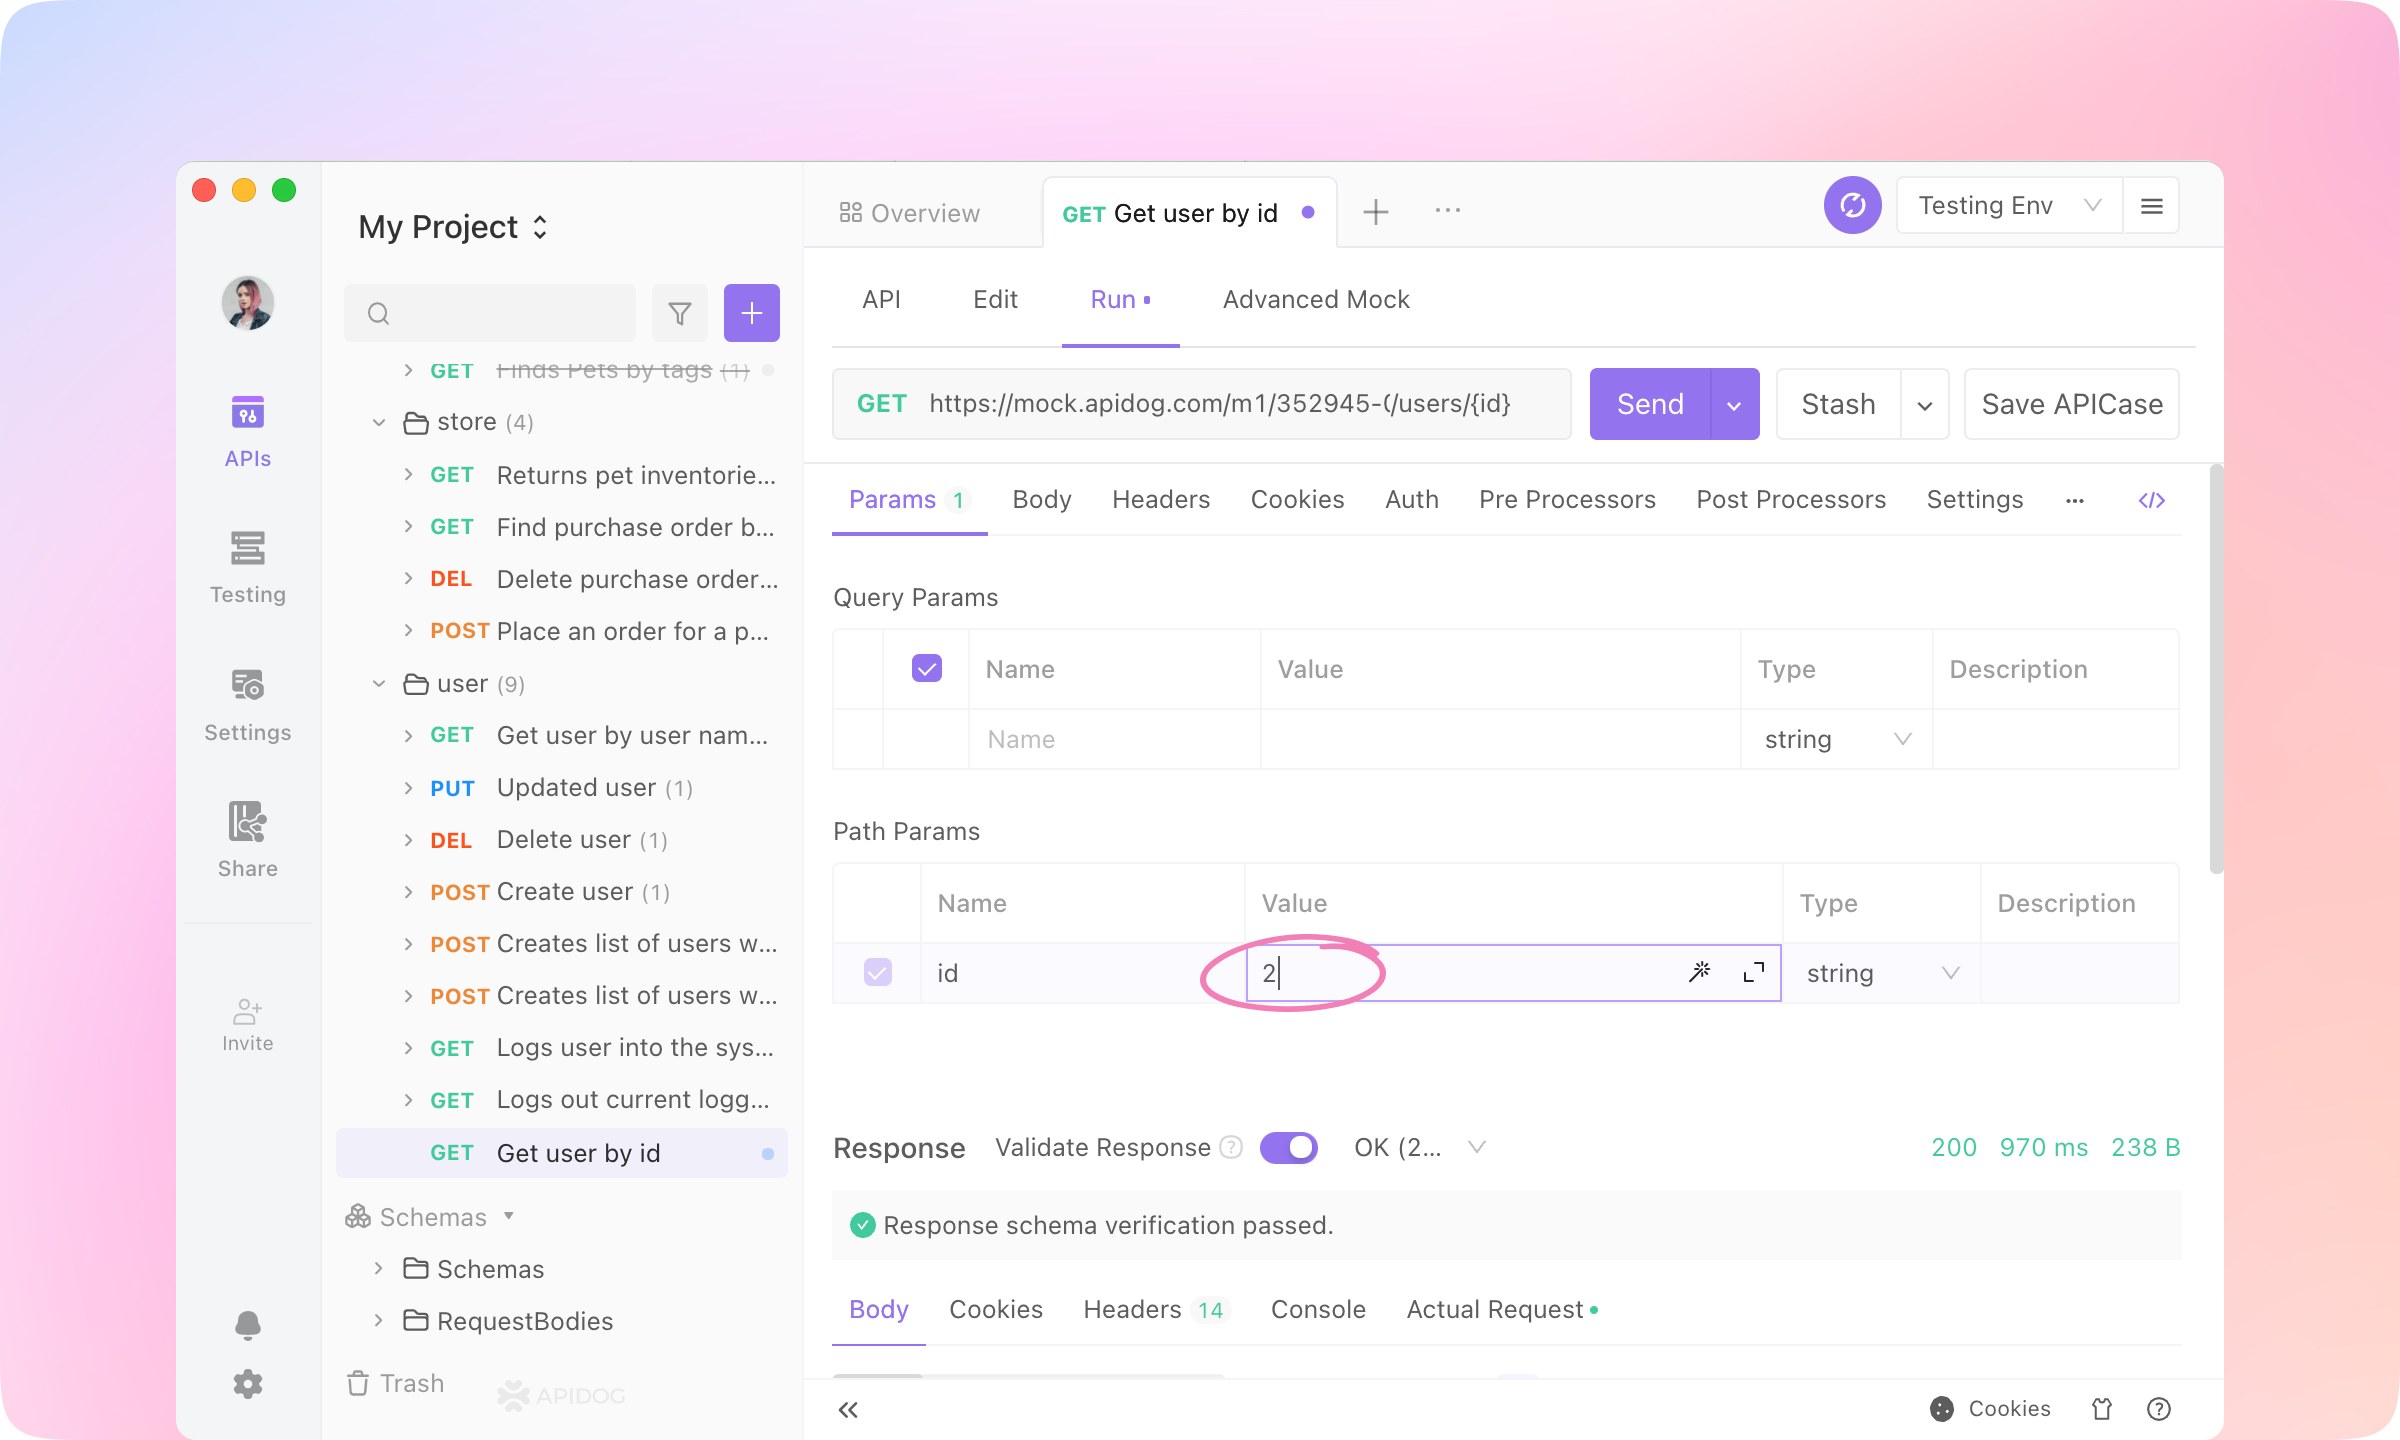
2.
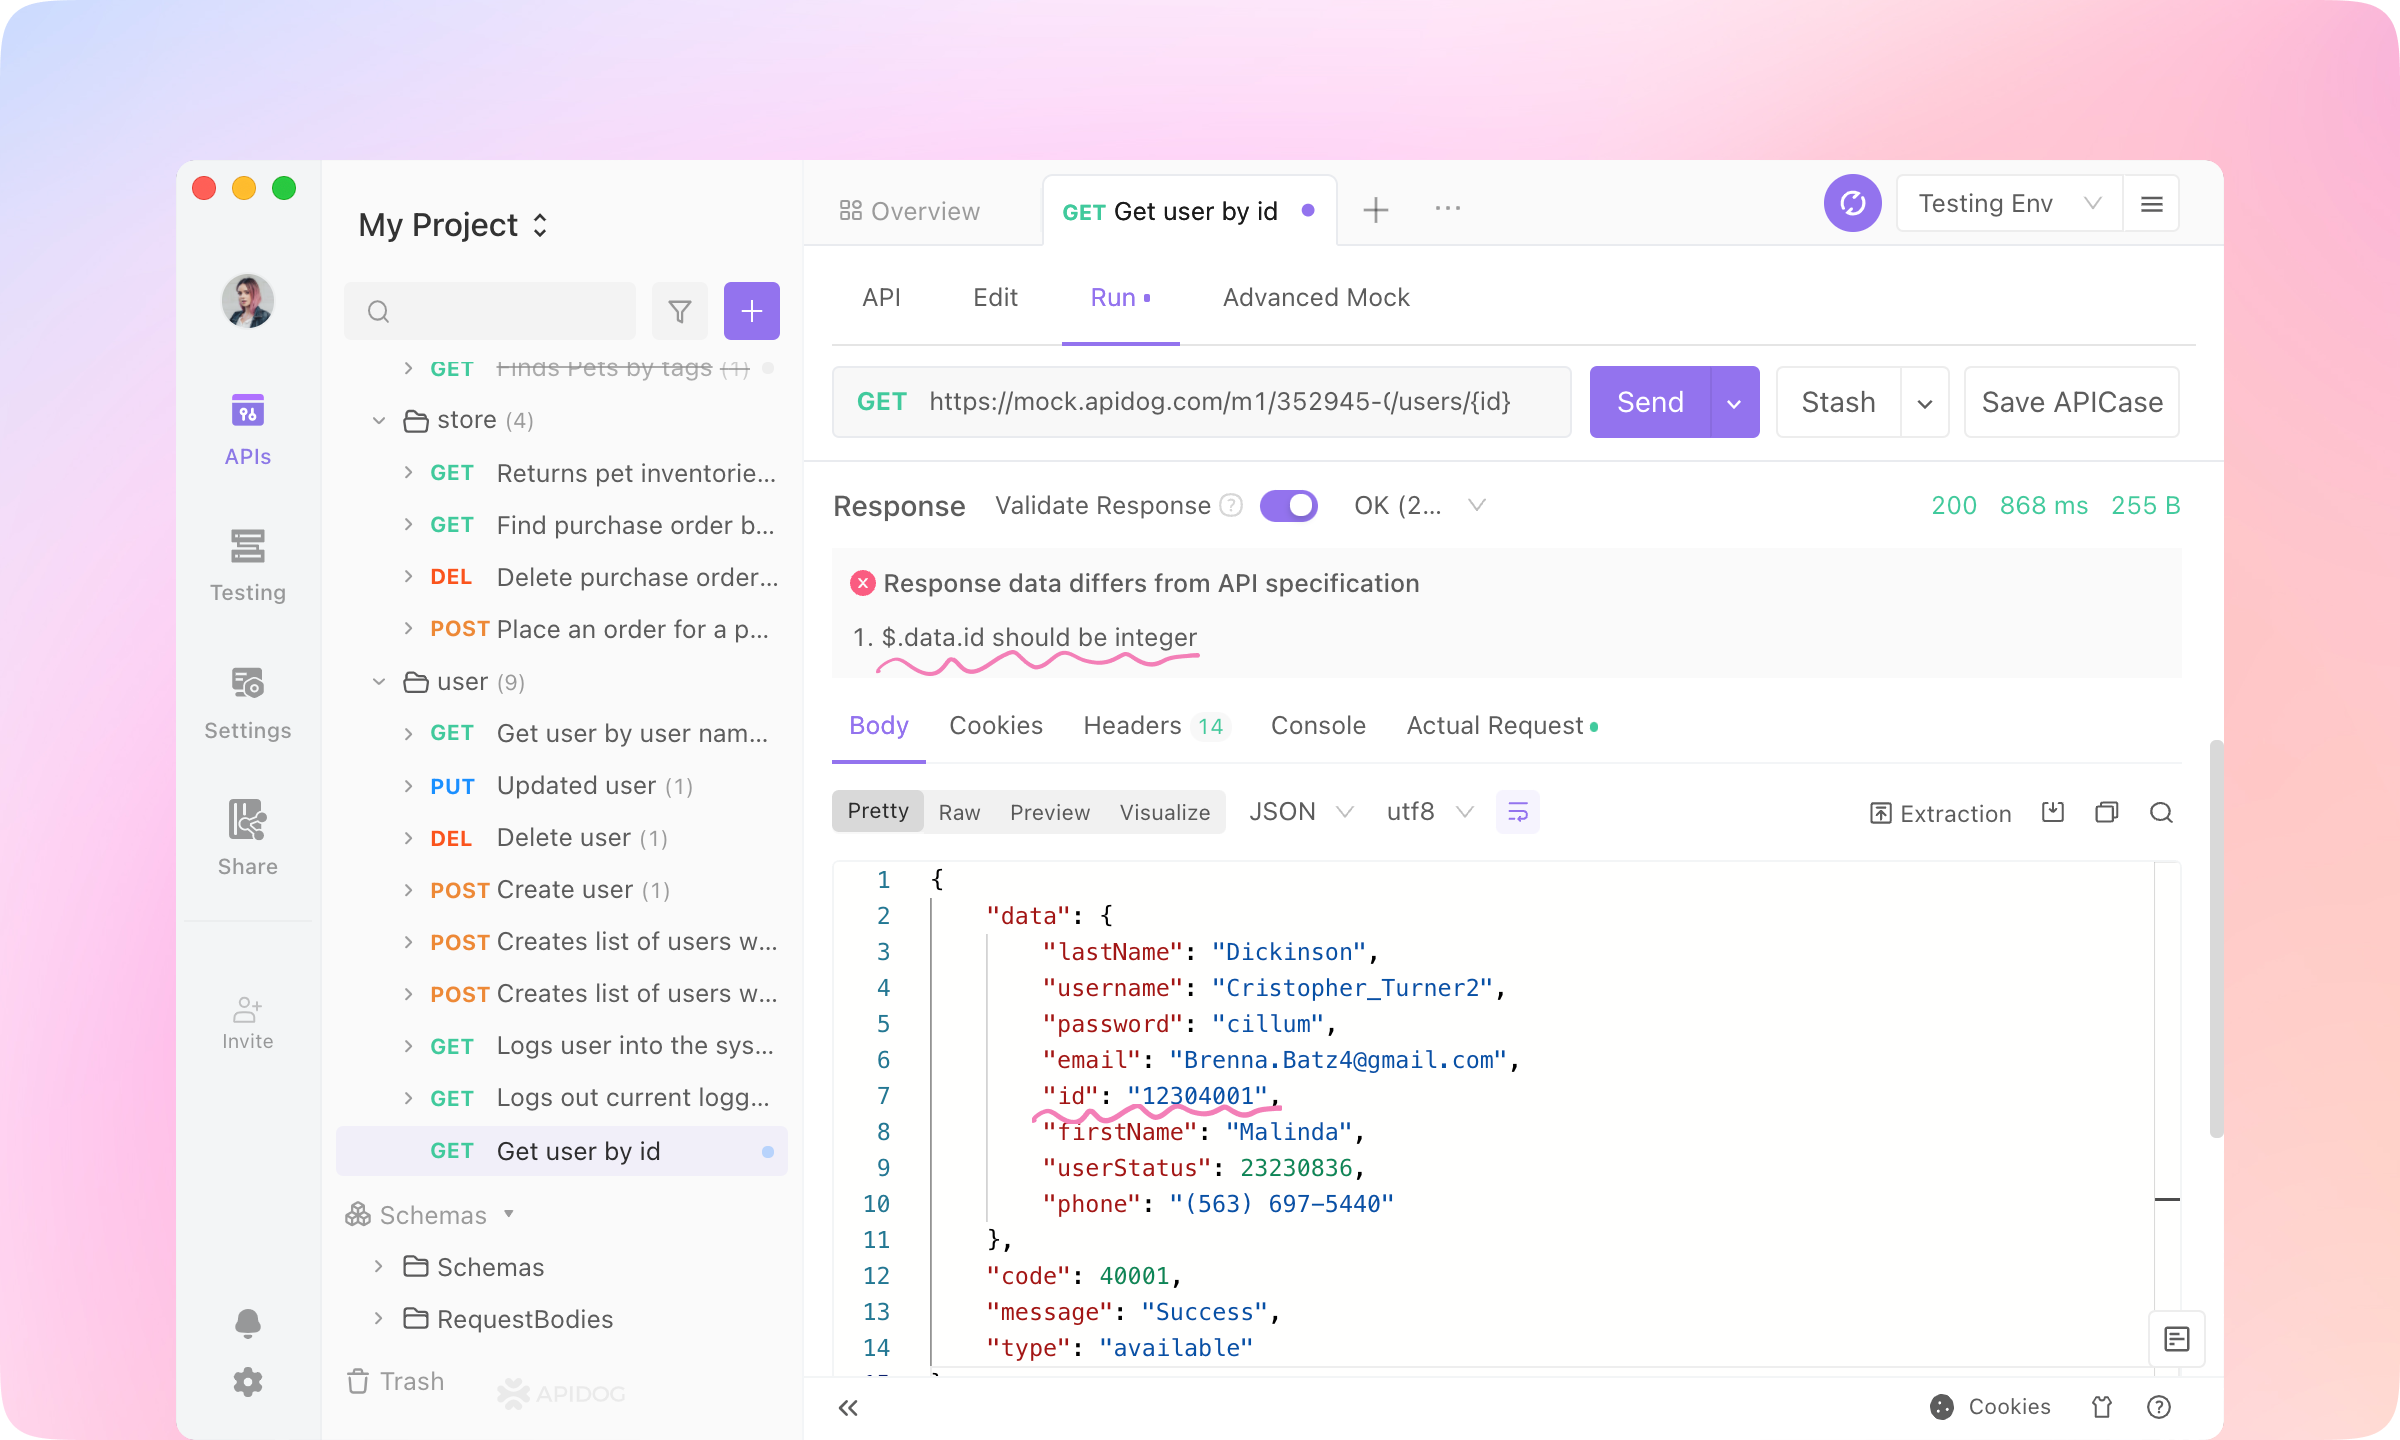
3.
4.
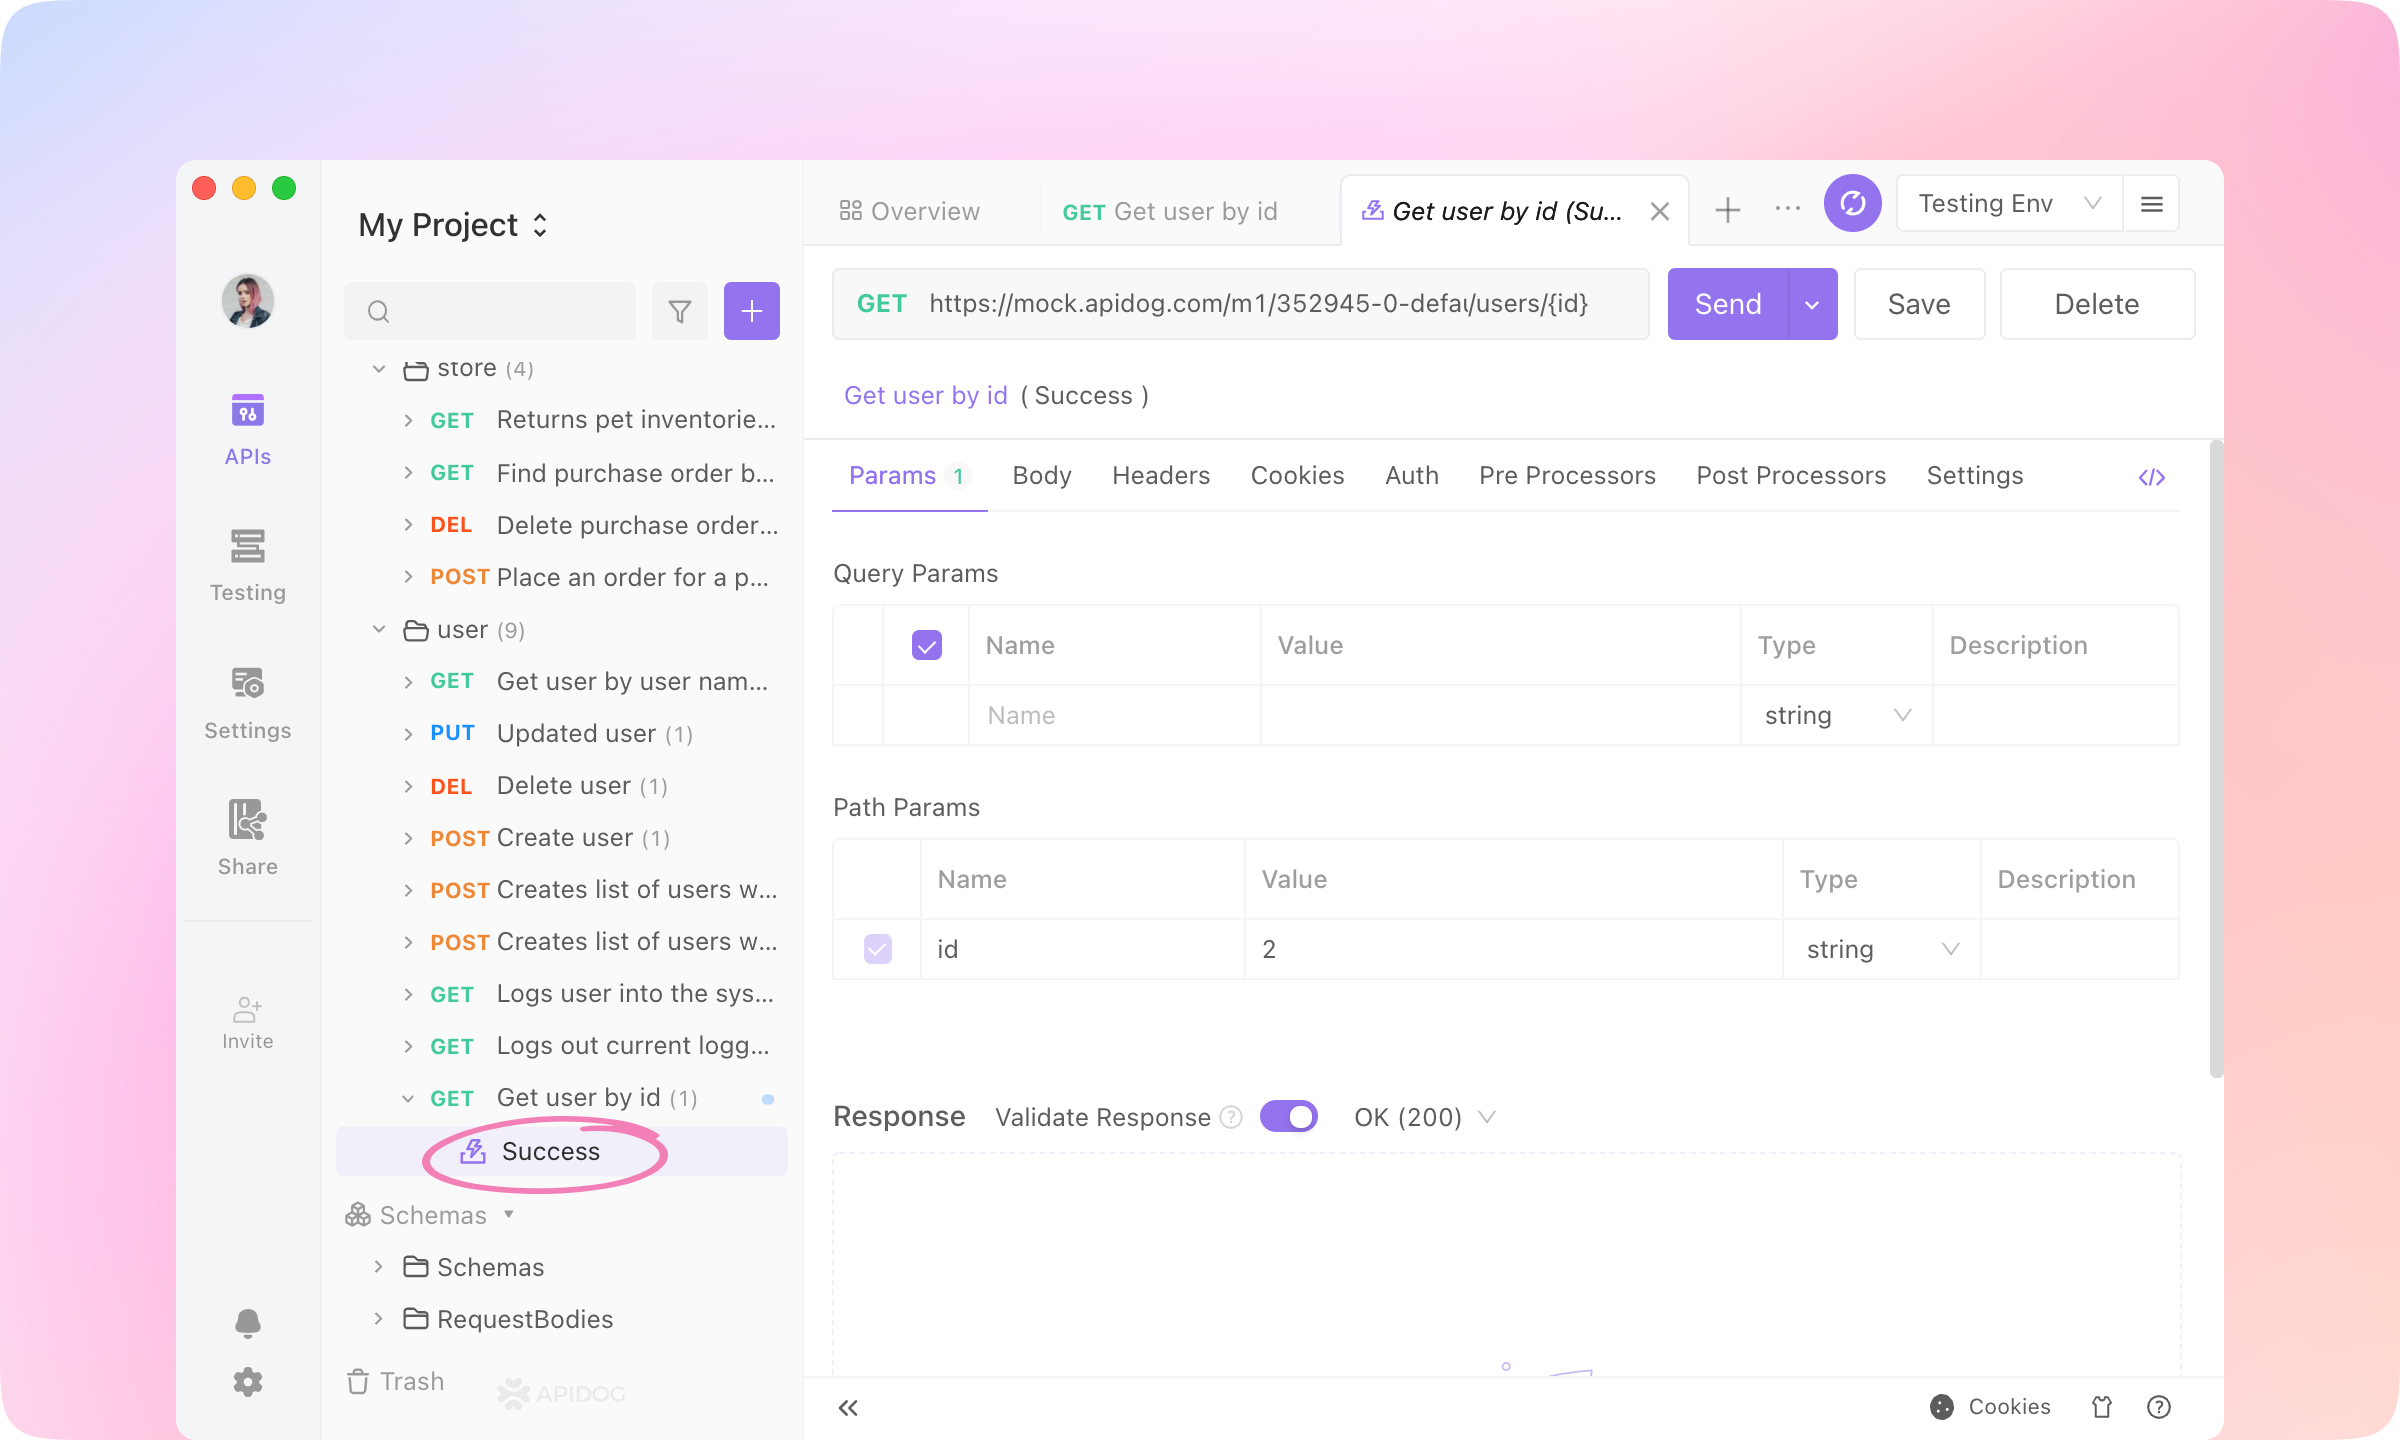
Save APICase to save the request. The requests will be saved as children of the API and can be referenced in the testing module.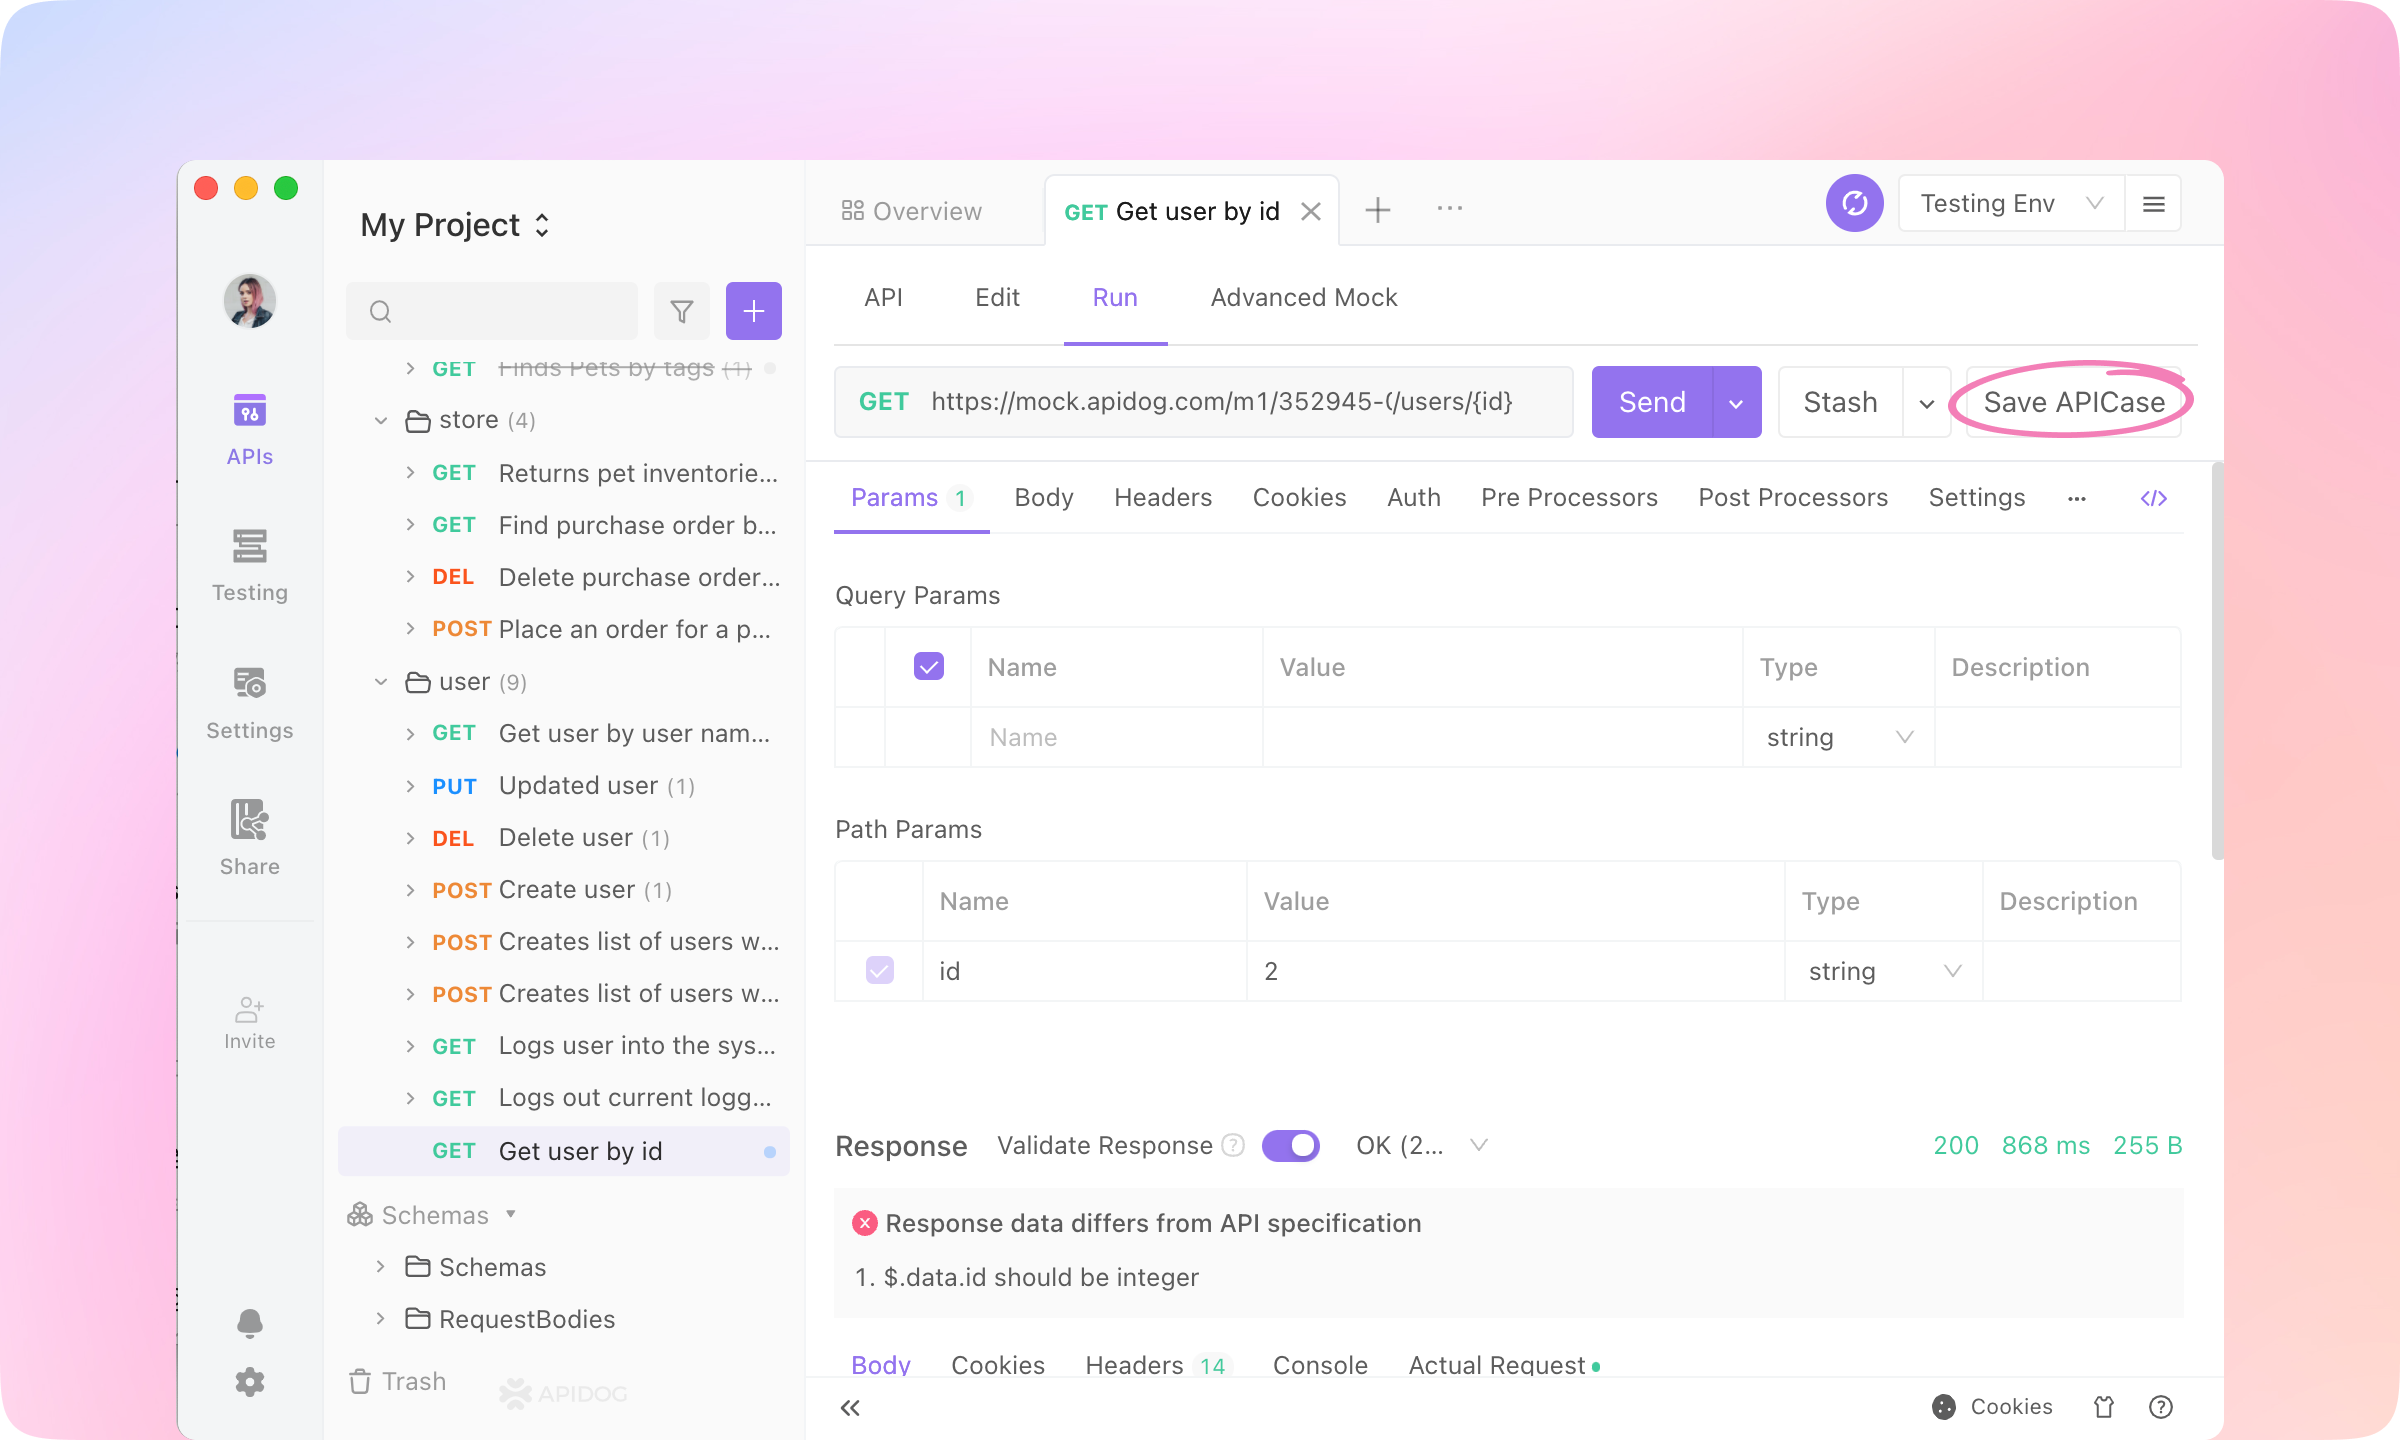
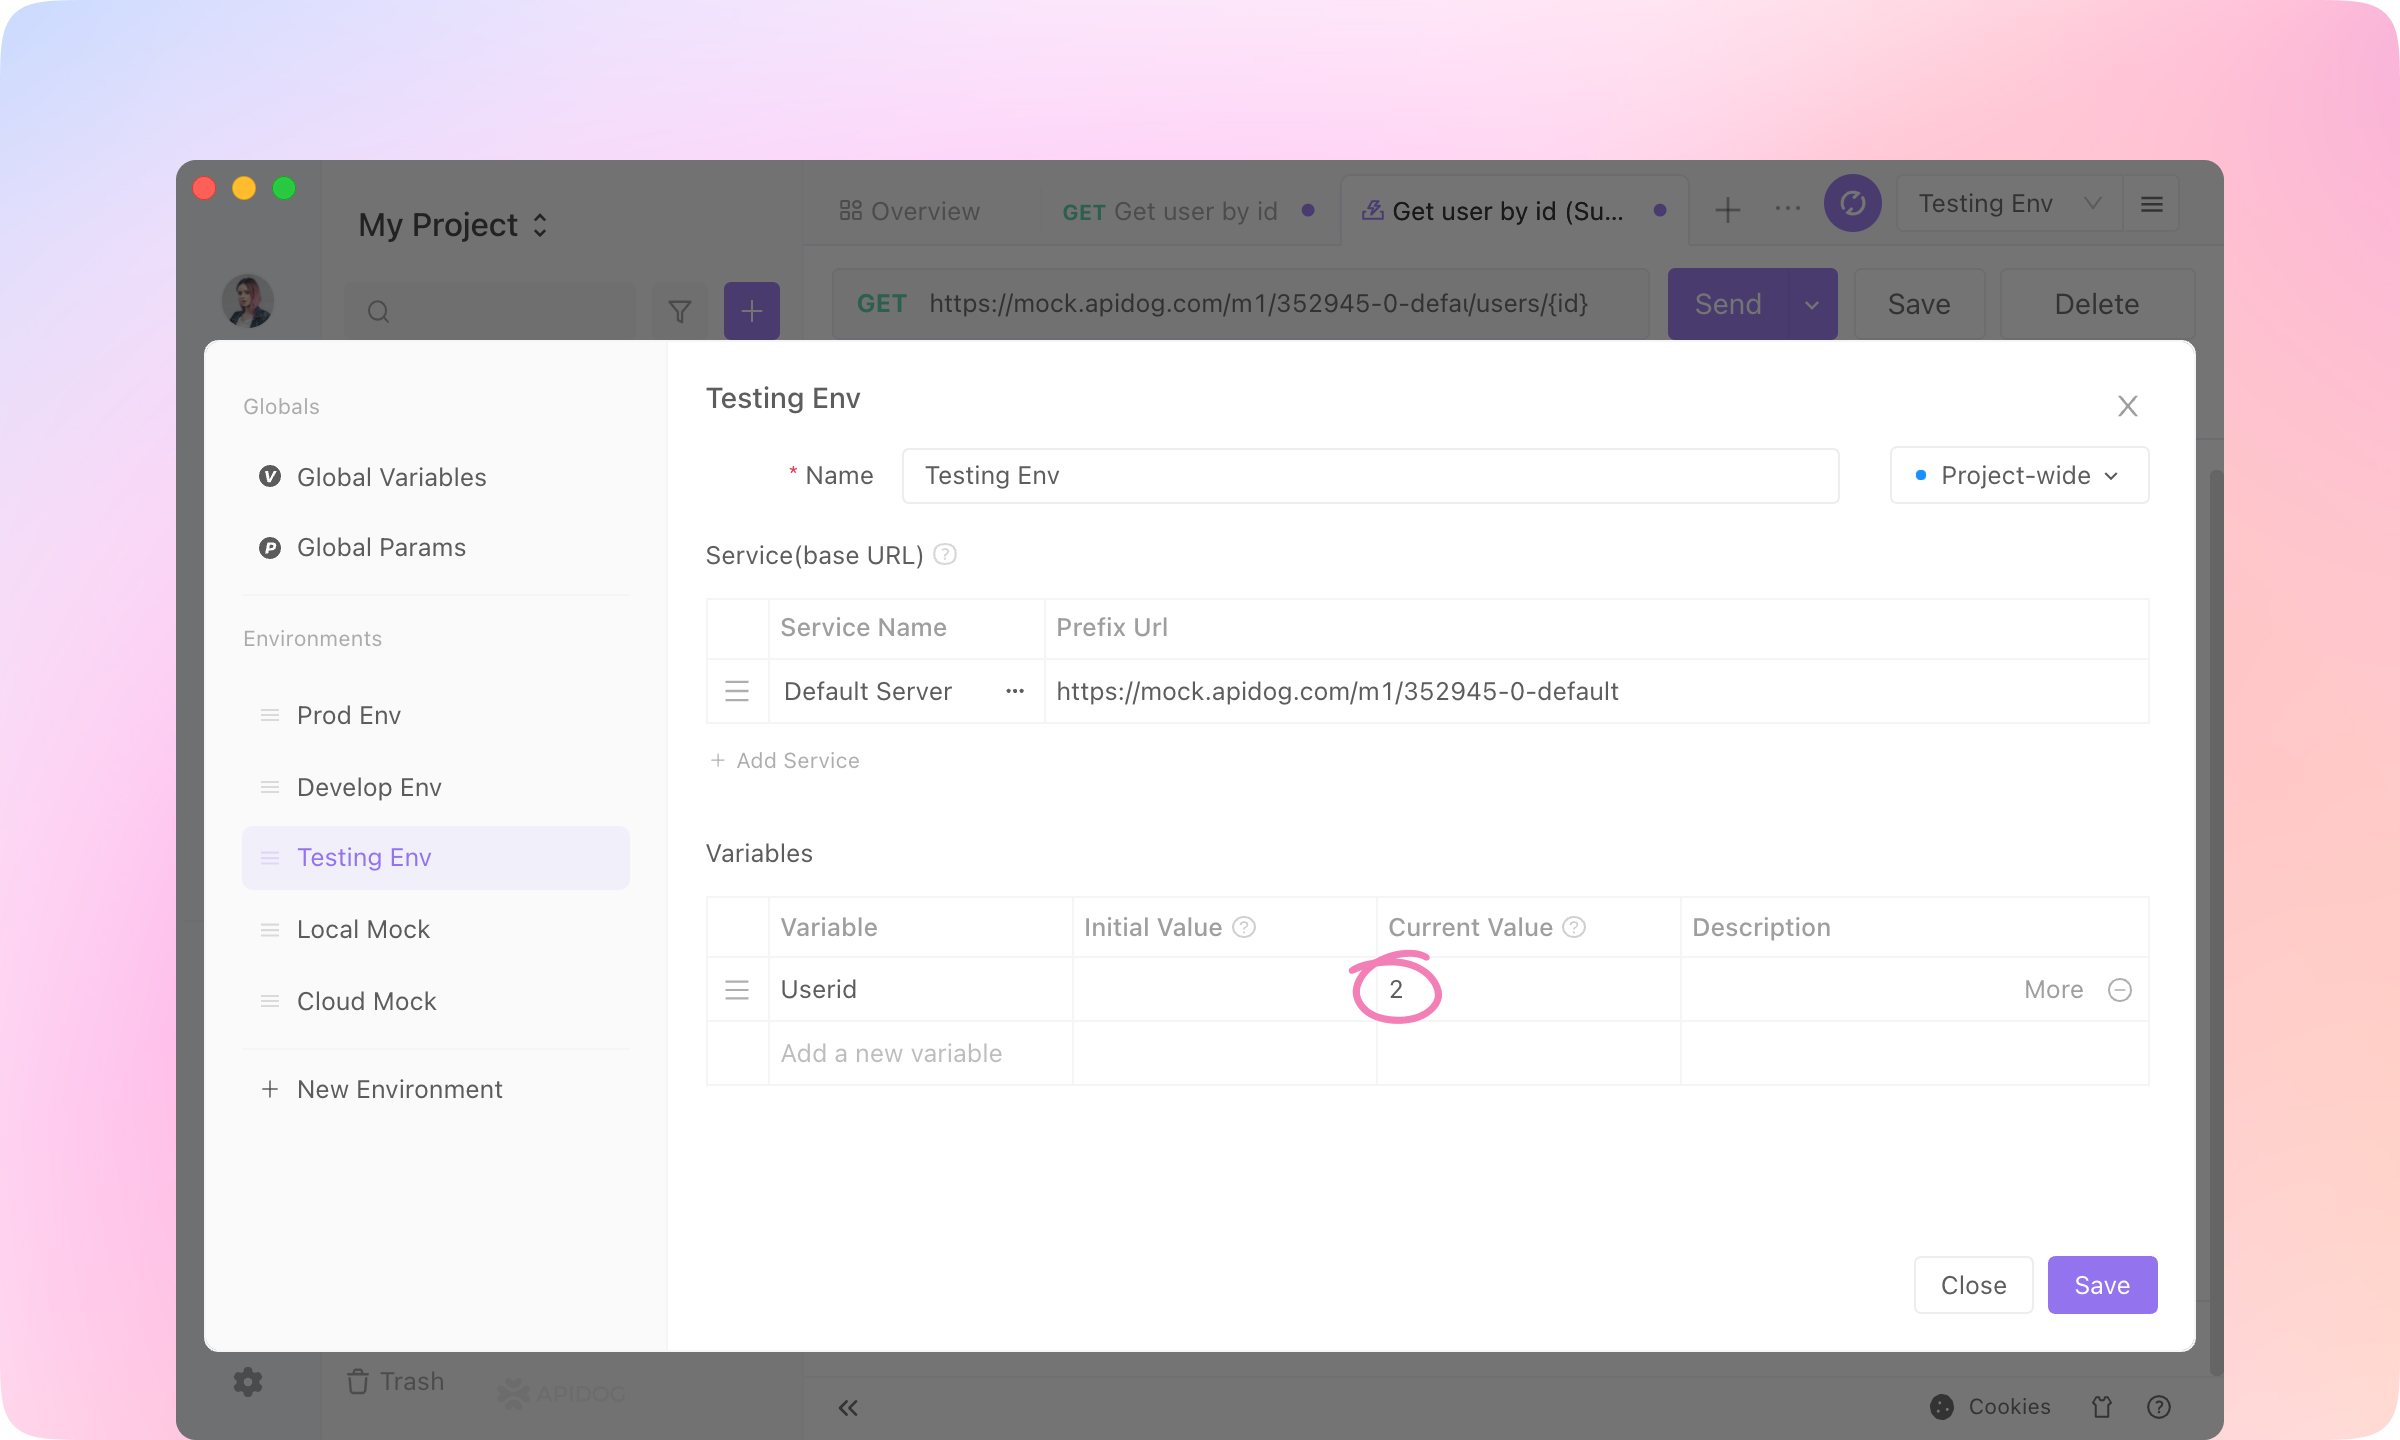
Use Variables
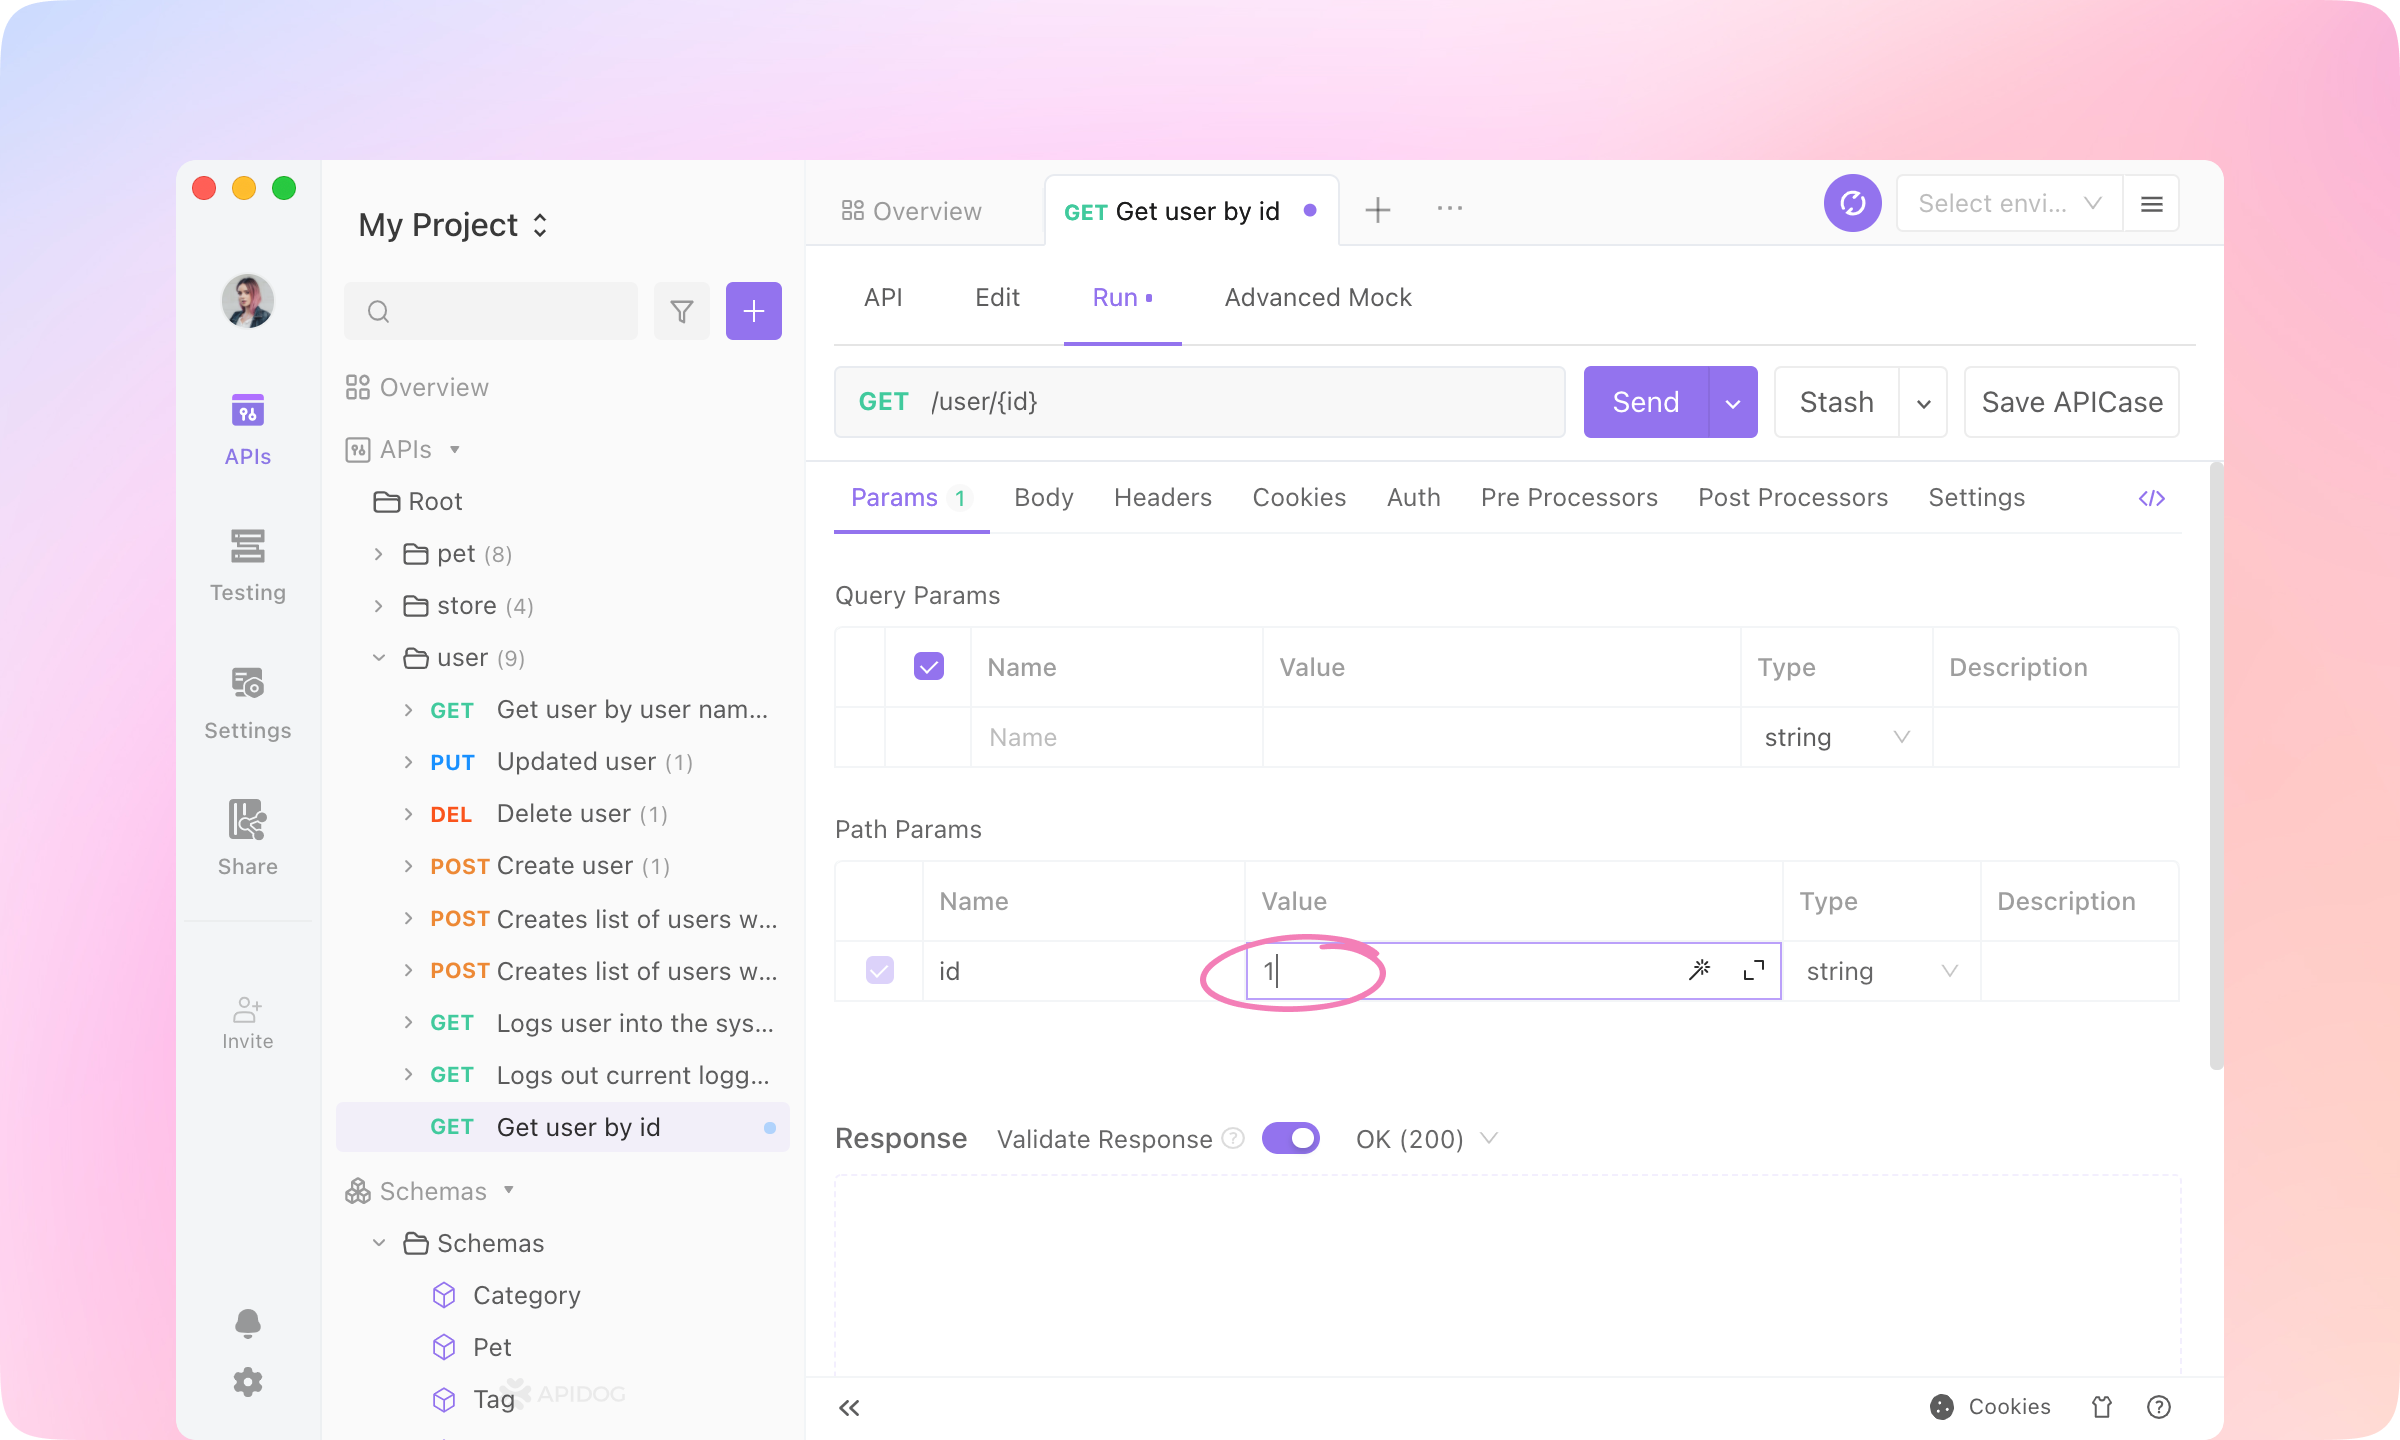
1.
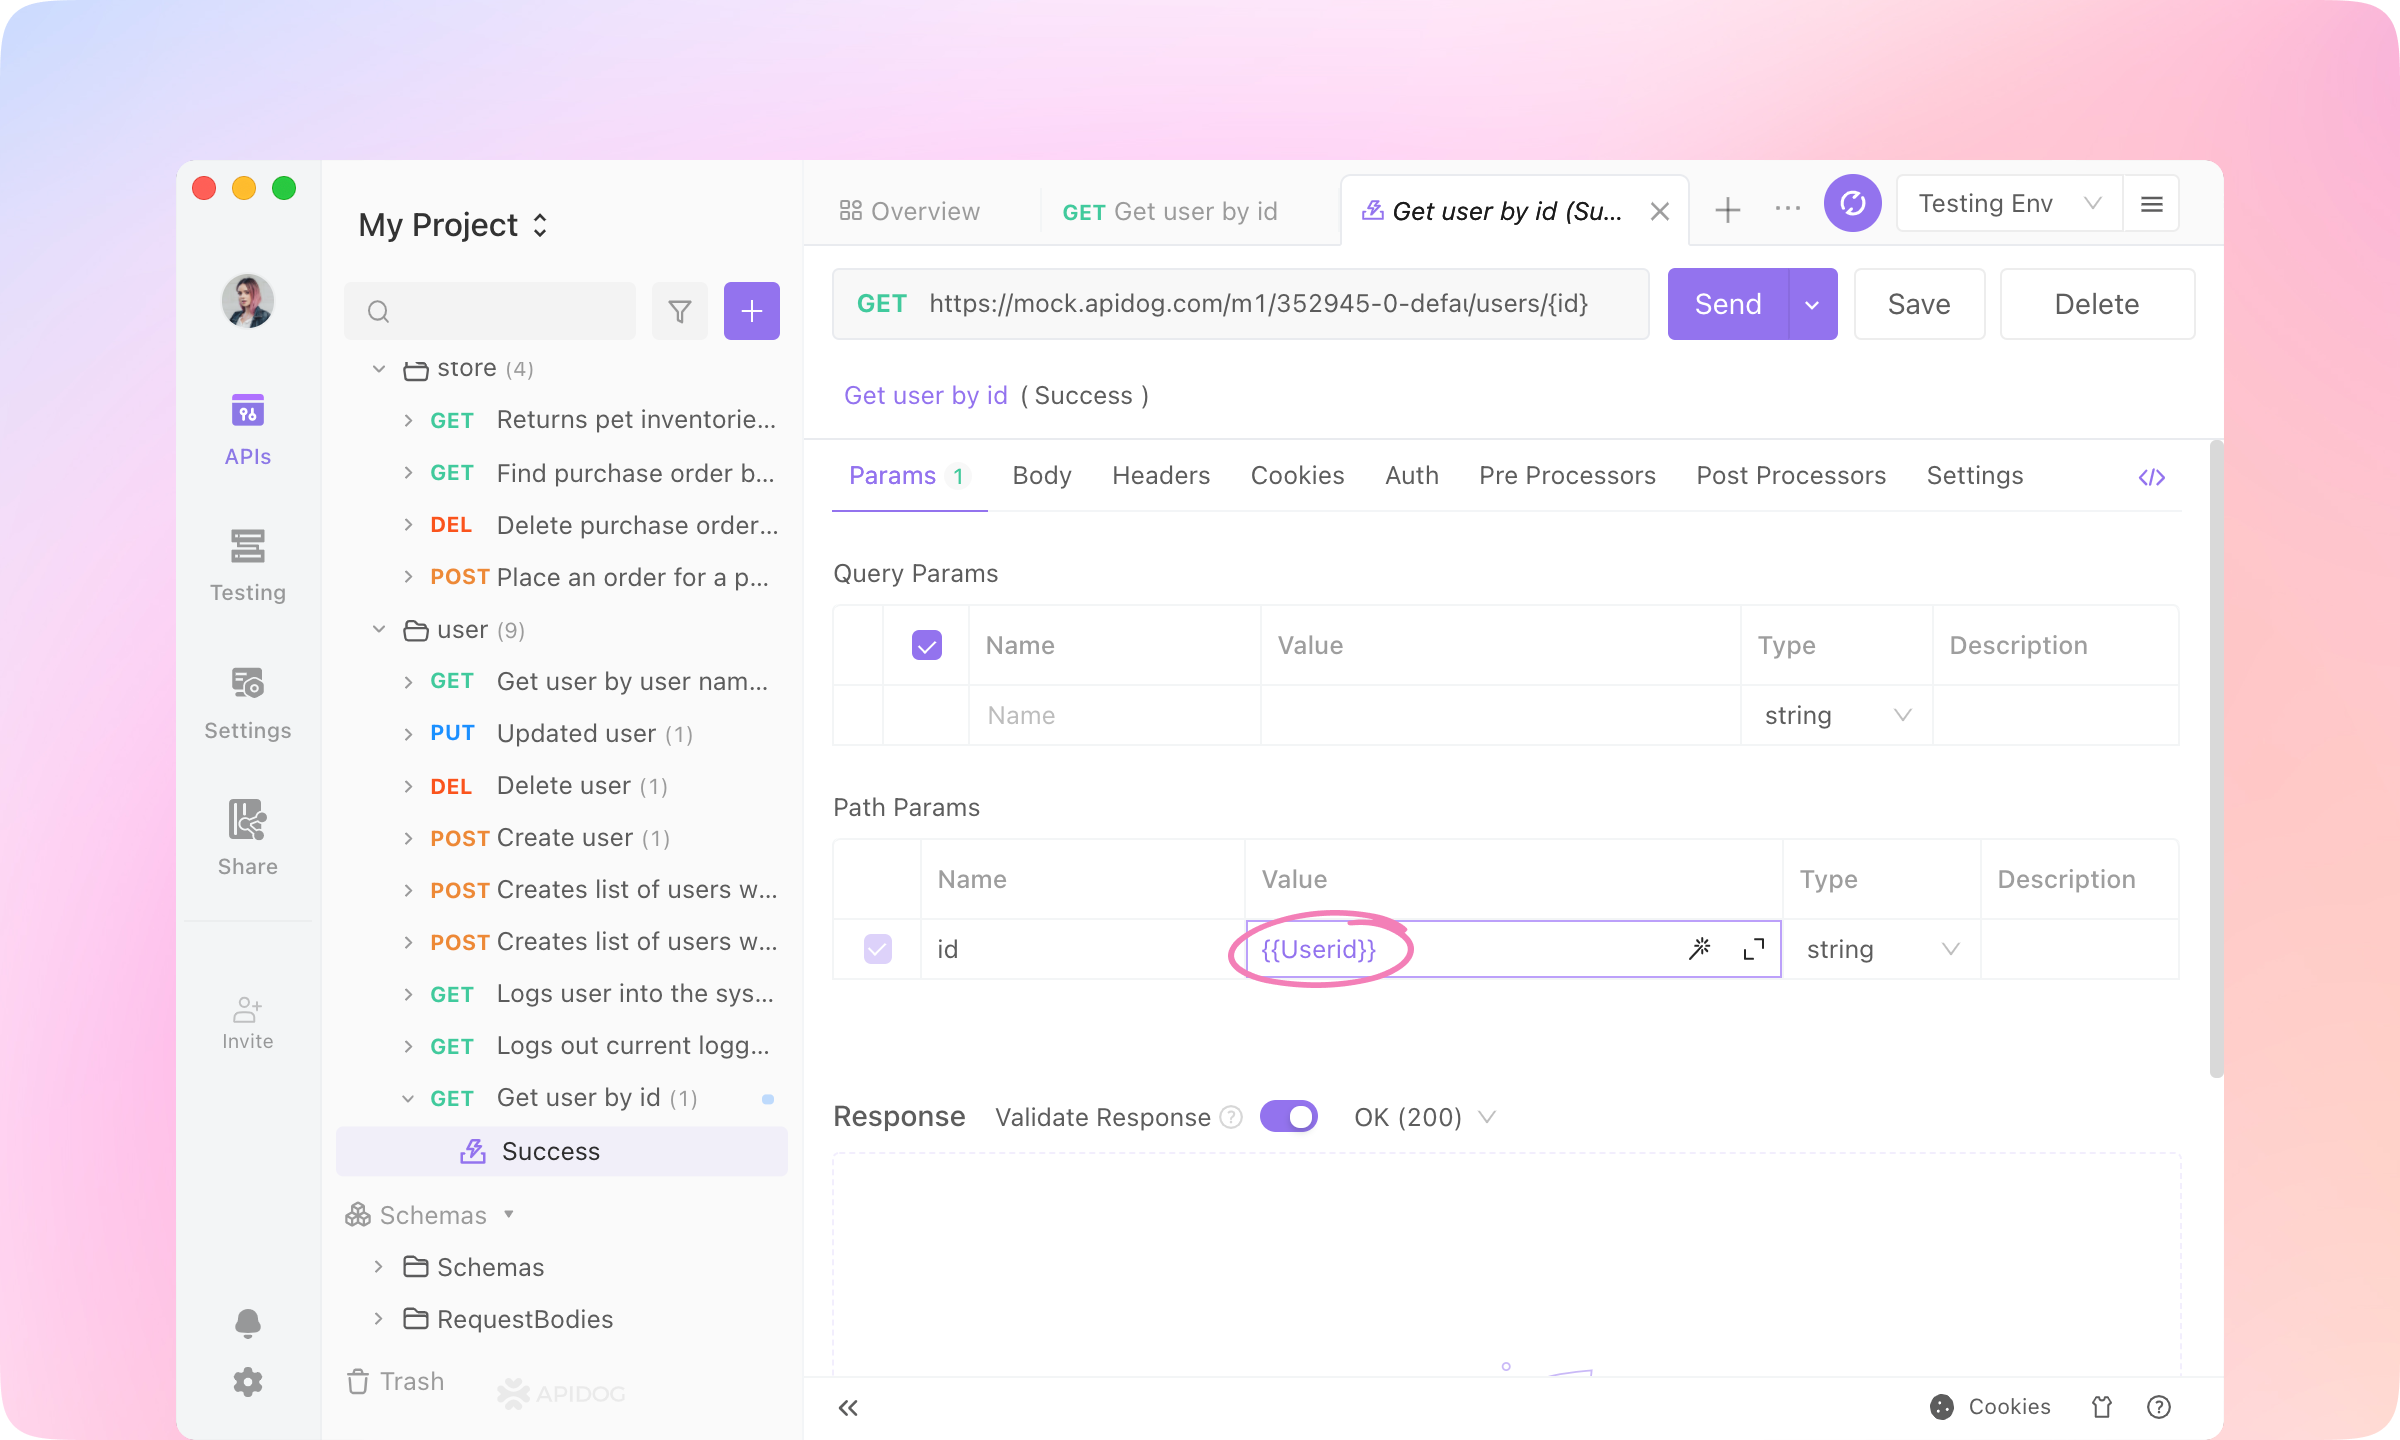
2.
Userid, and fill the Current Value with '1'. Save the Variable.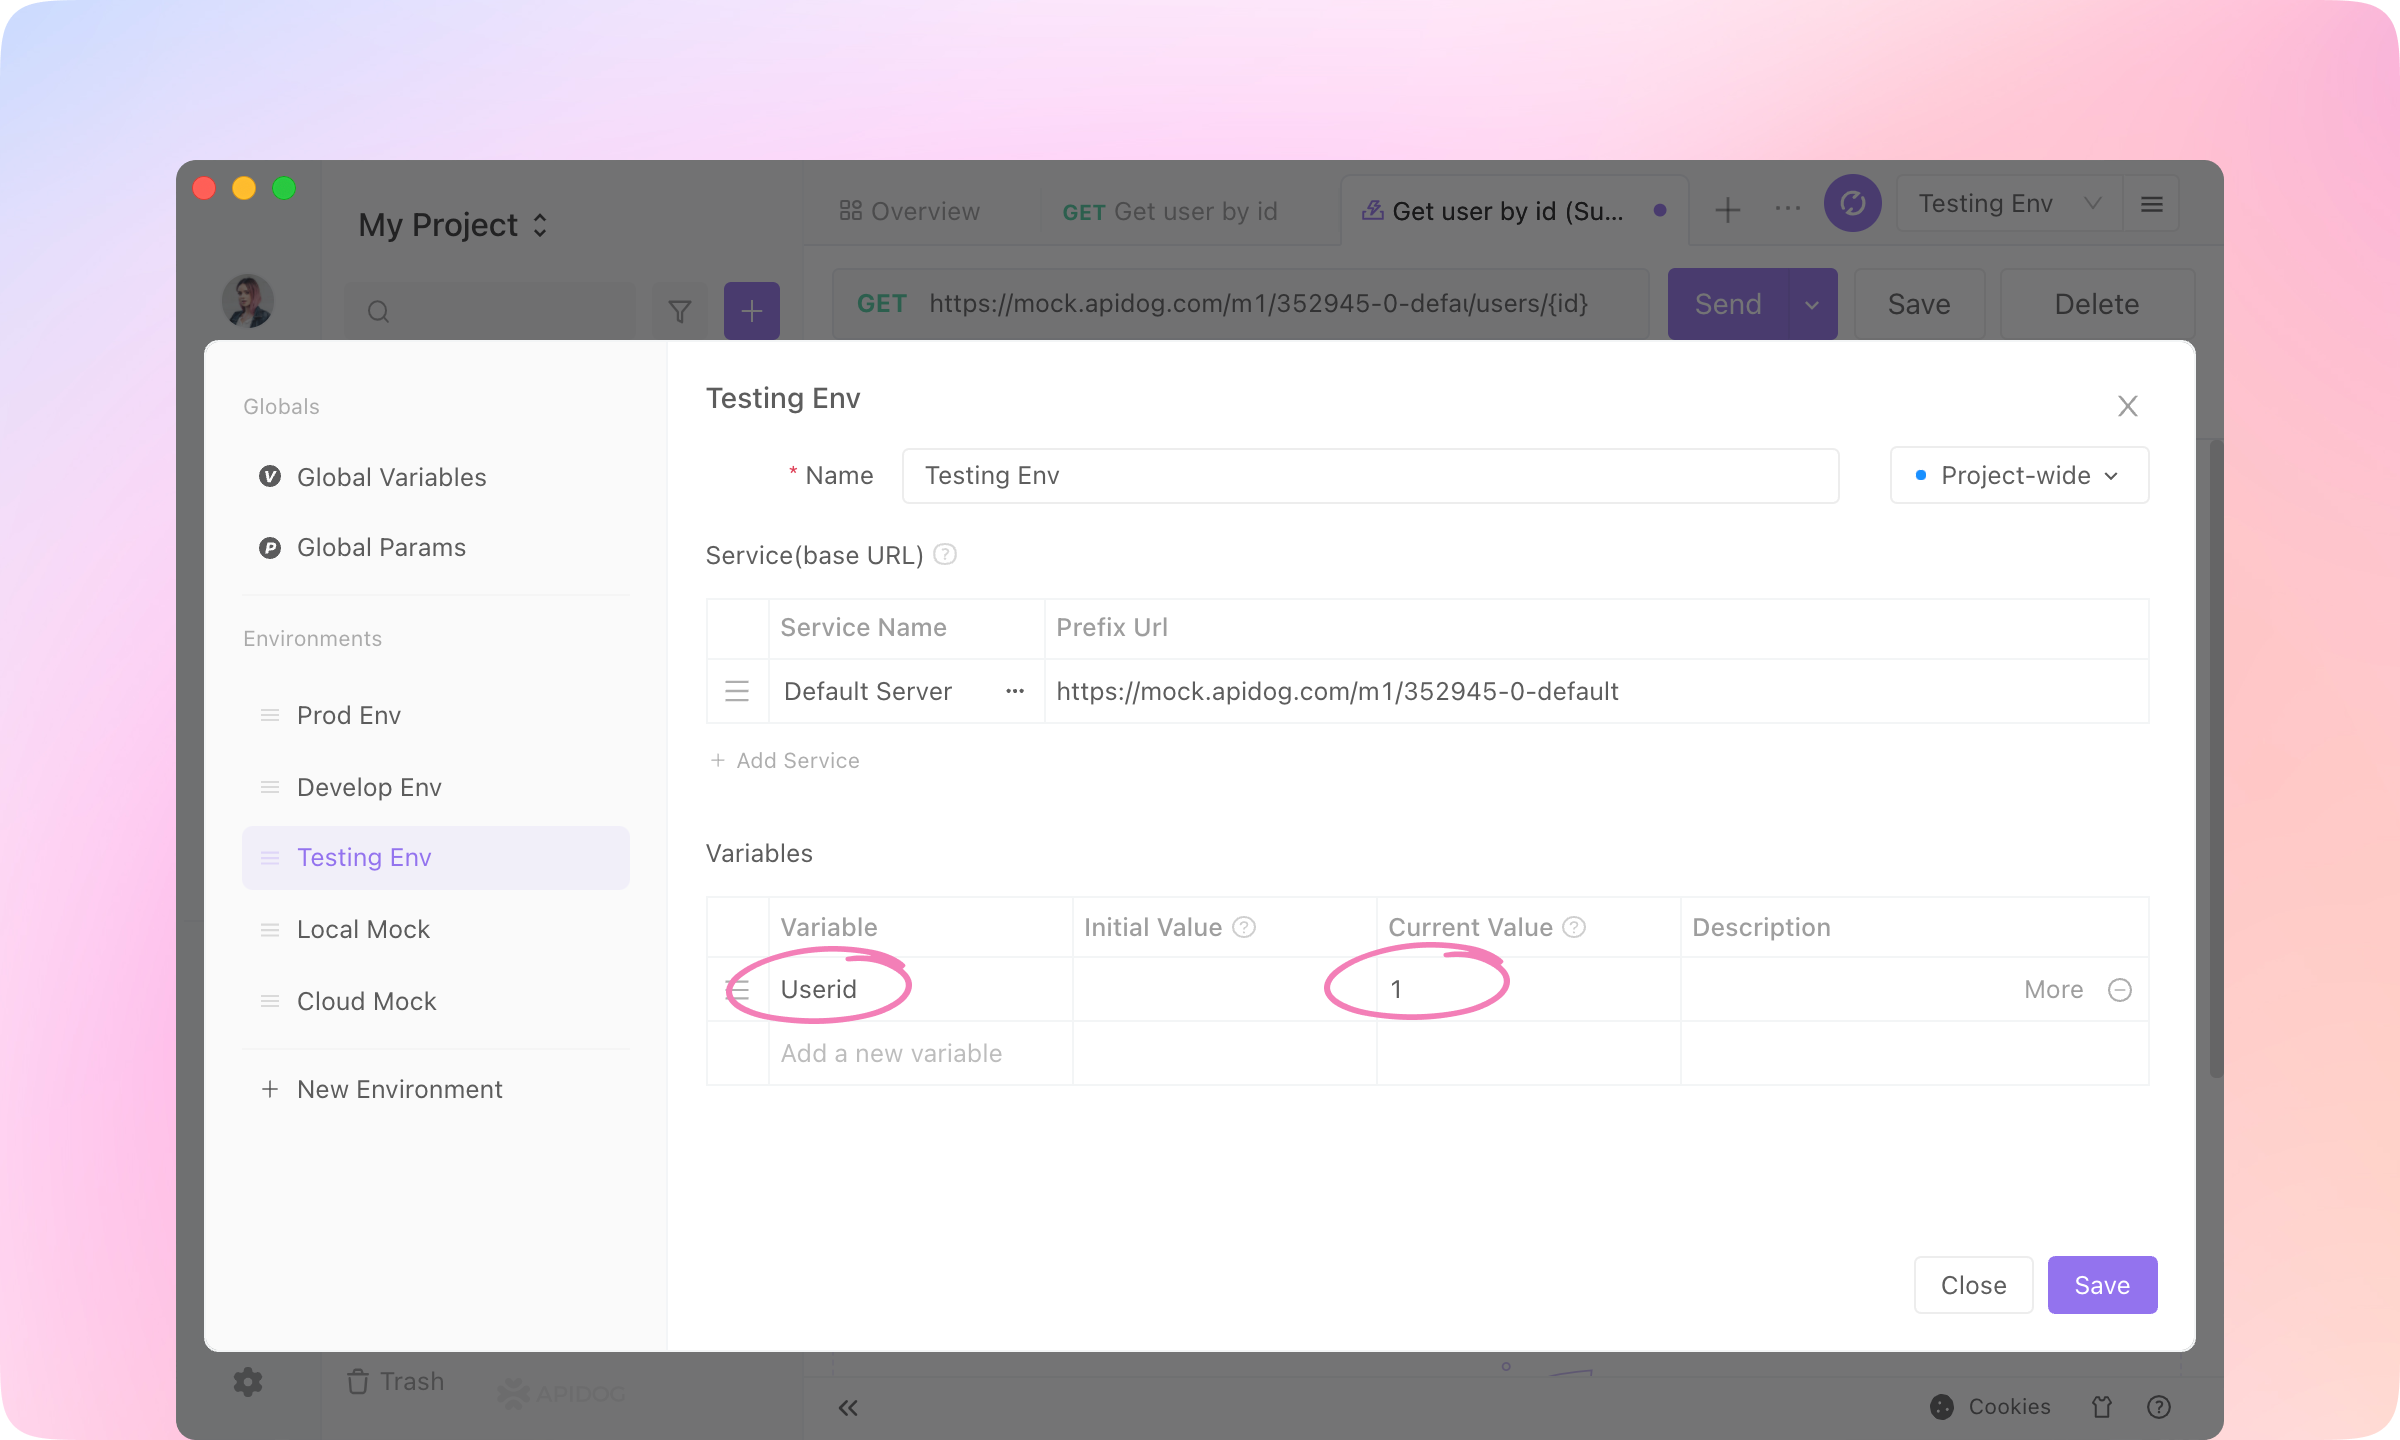
3.
Response - Actual Request to see the request URL, and you'll find the {{Userid}} is replaced by the current value.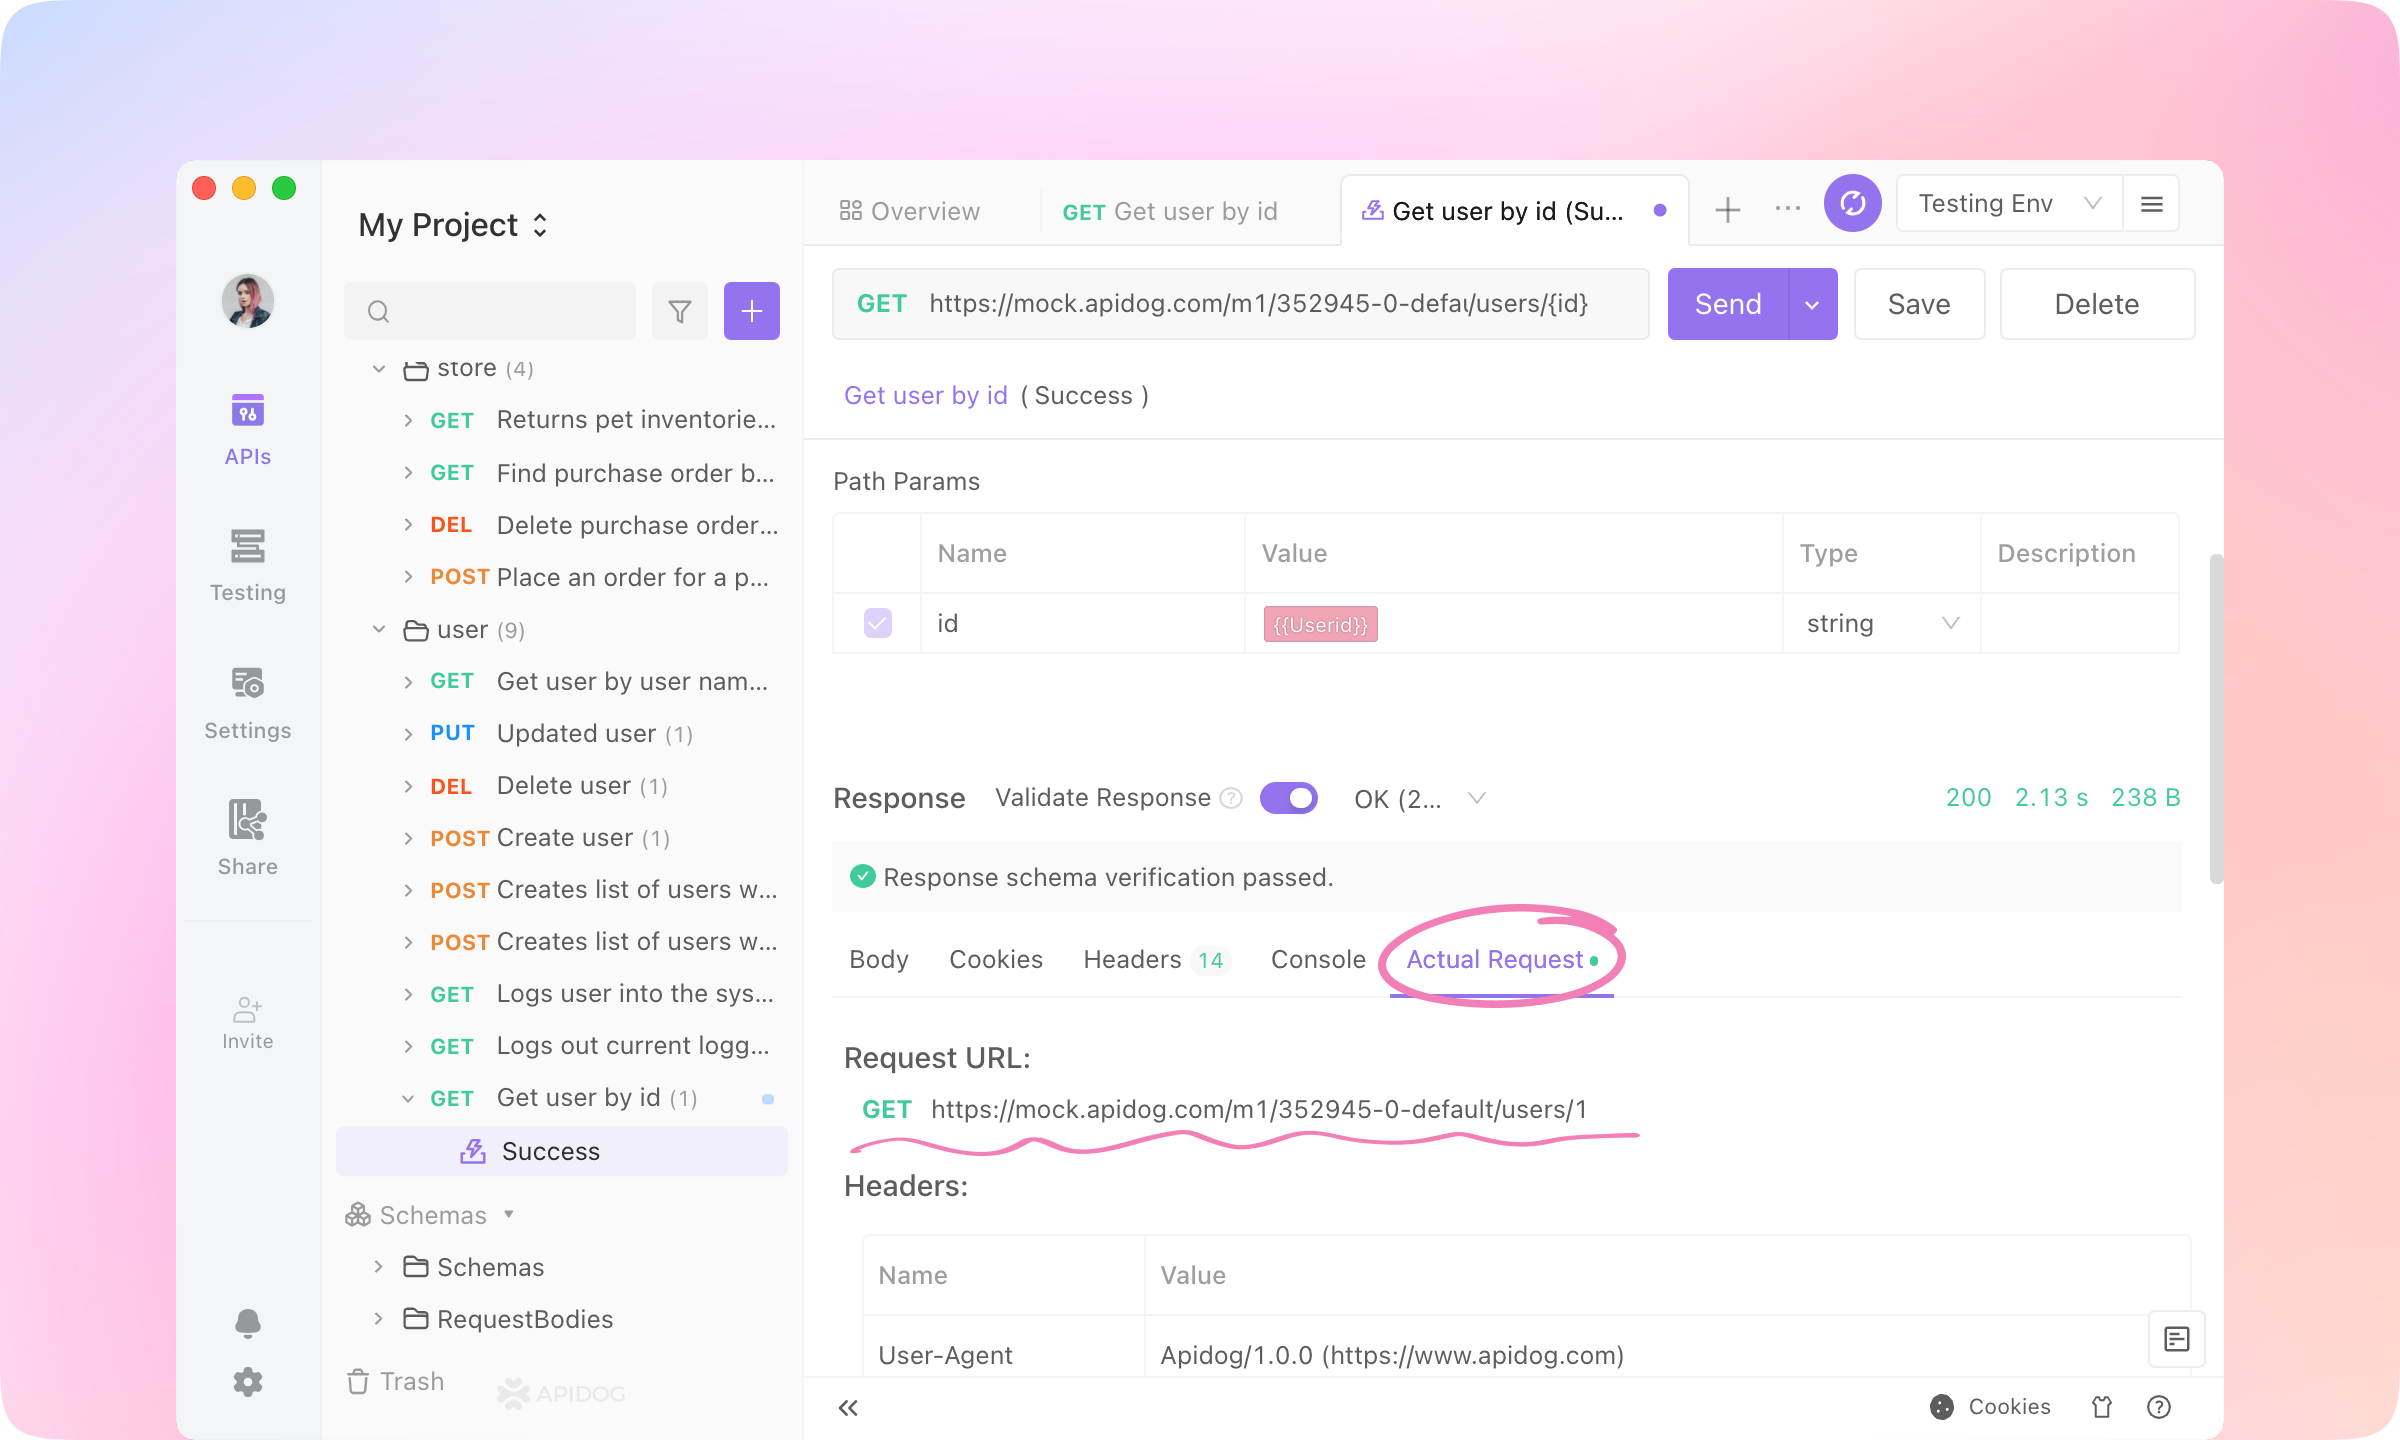
TIP
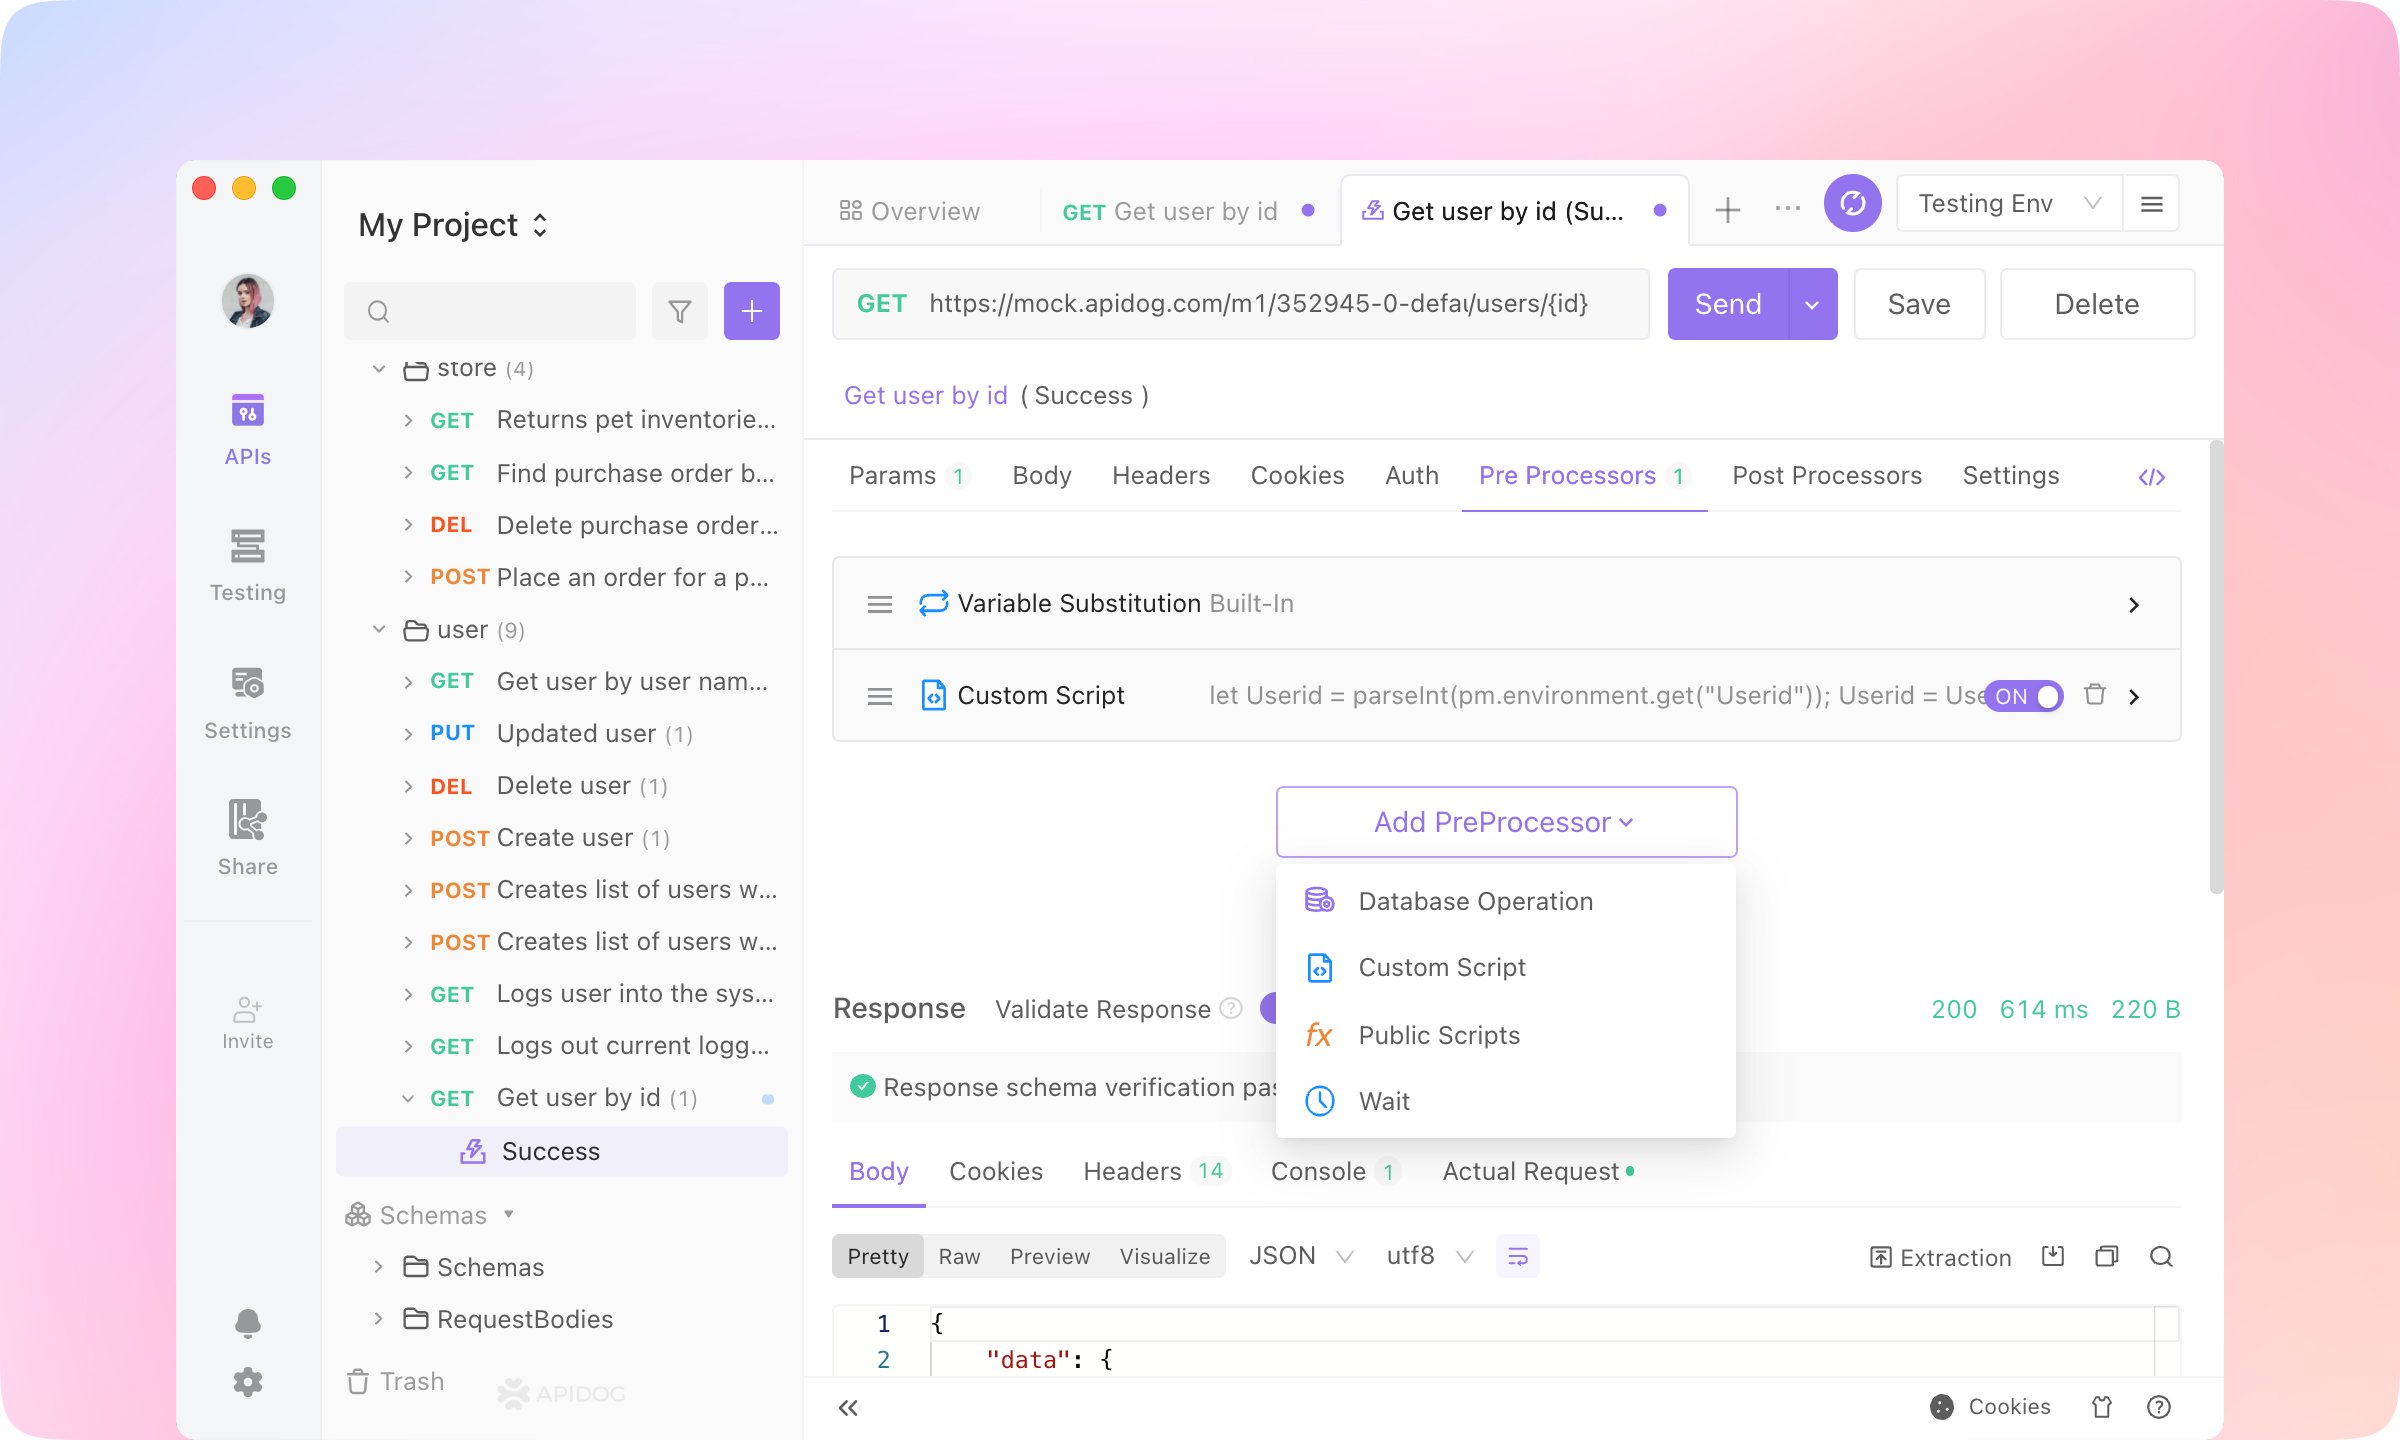
Pre Processors
1.
Pre Processors tab, and click the Add PreProcessor button. Add a Custom Script.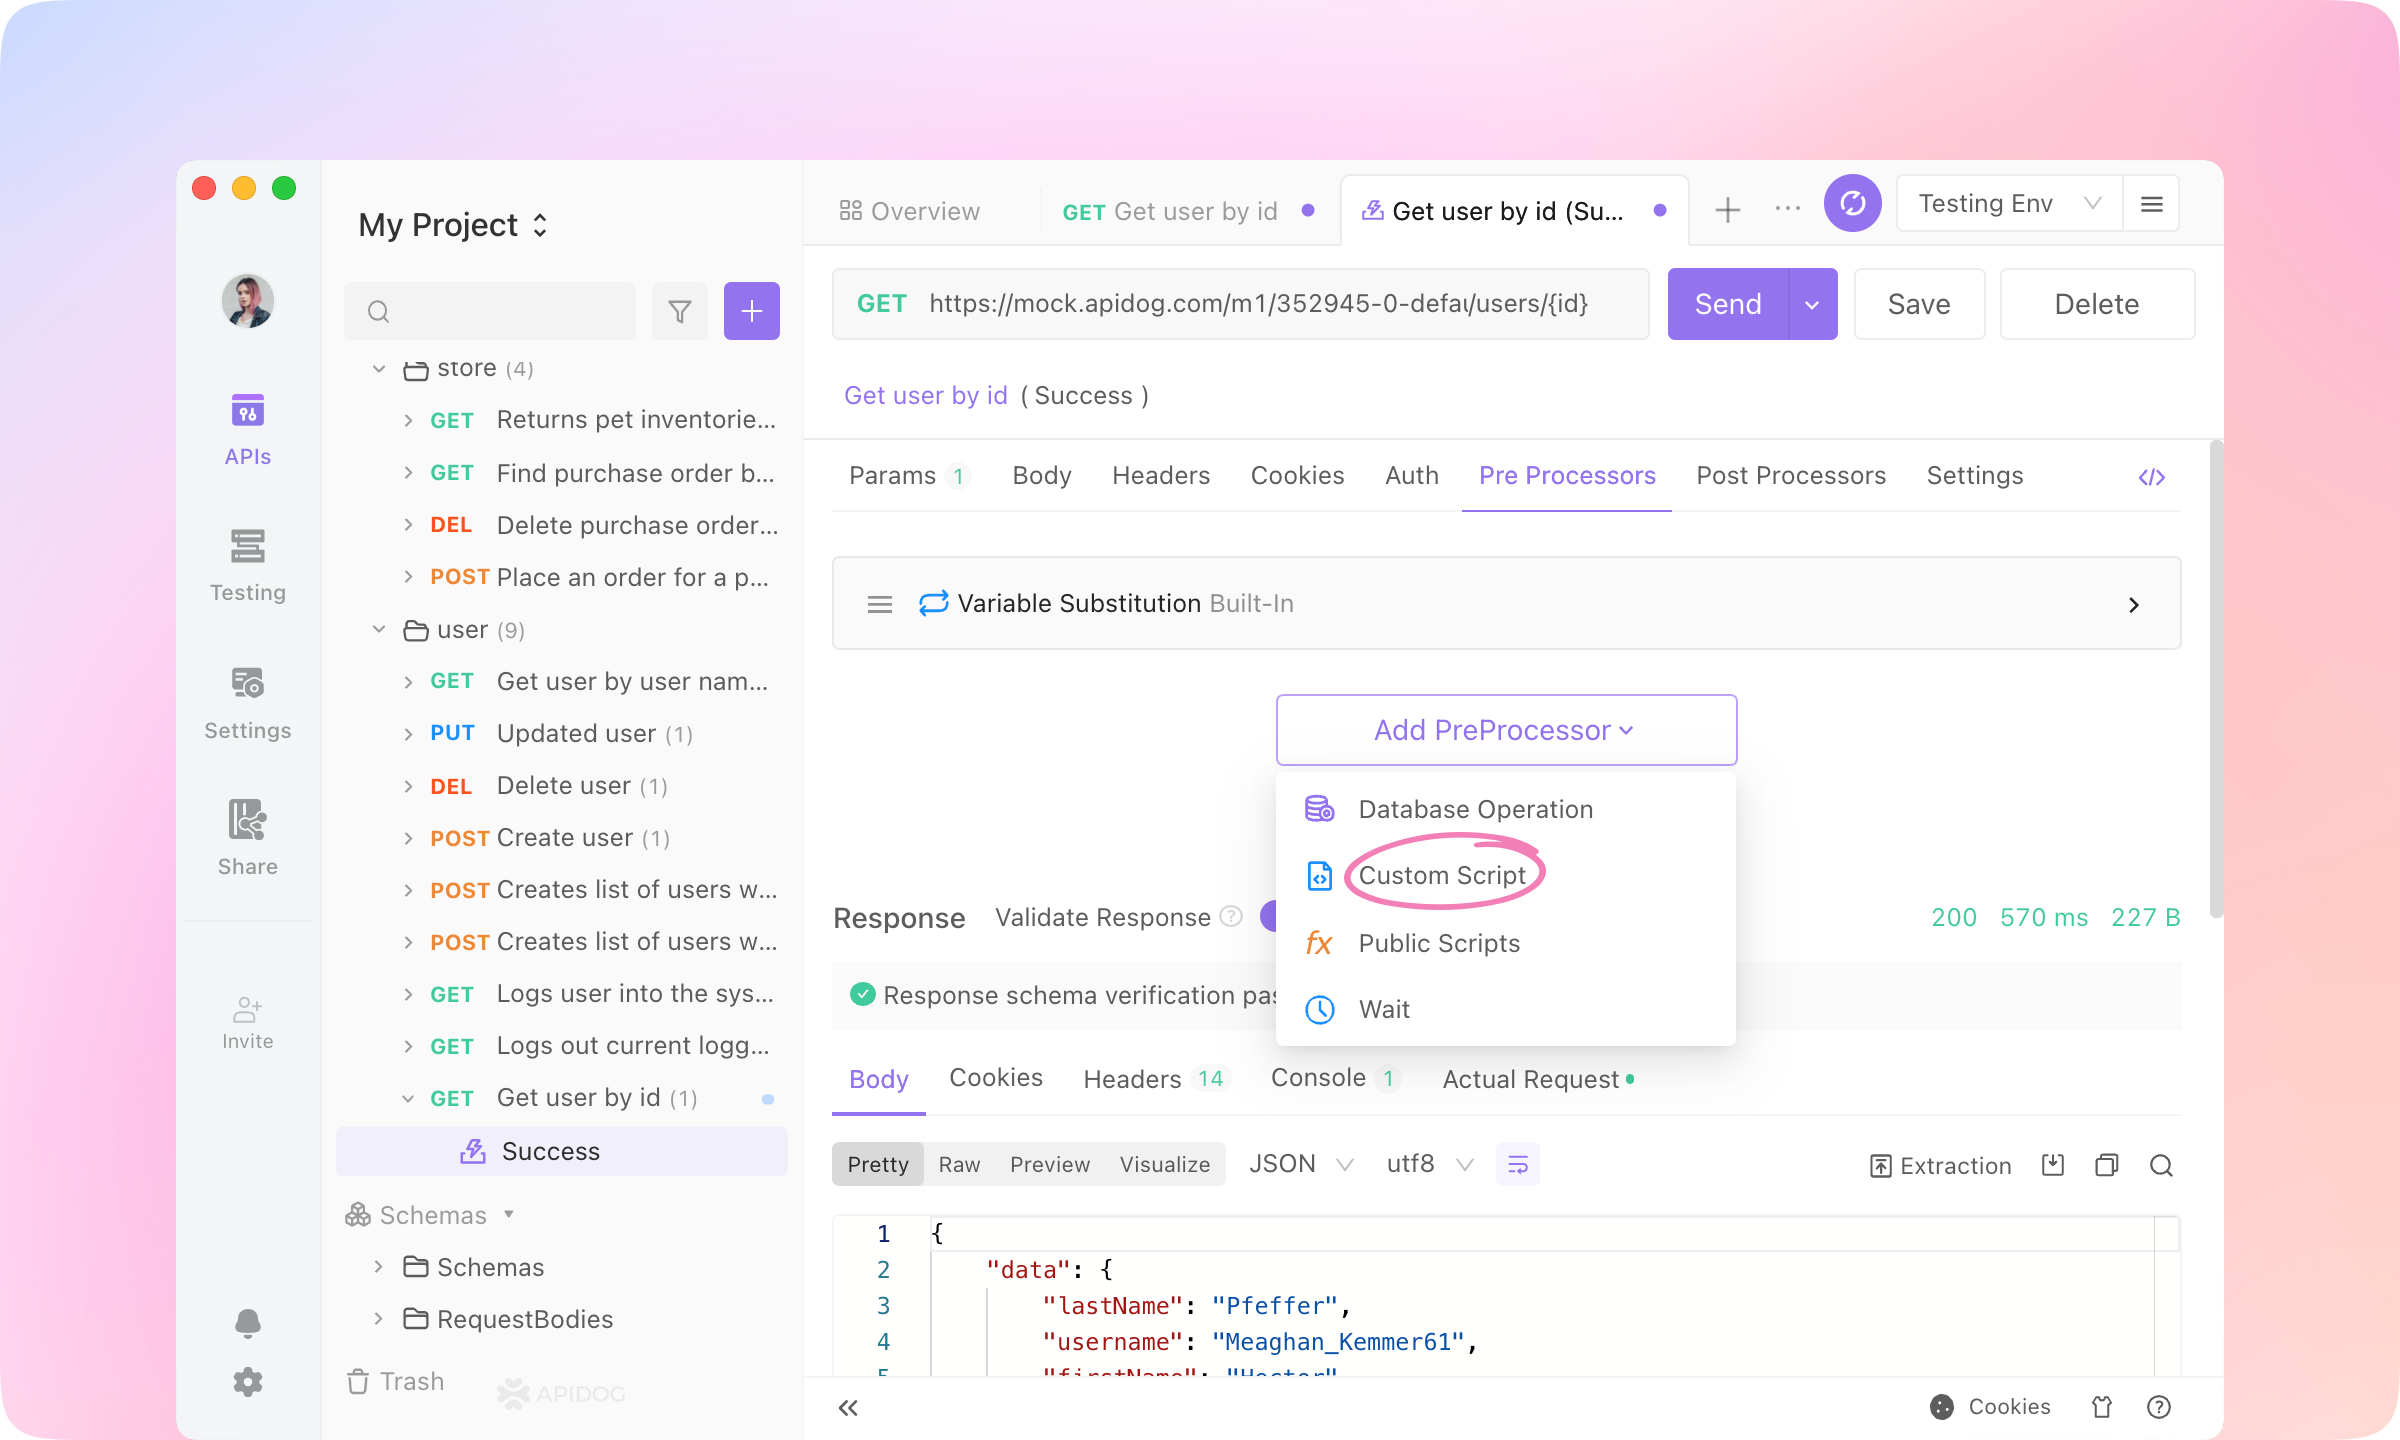
2.
Custom Script area.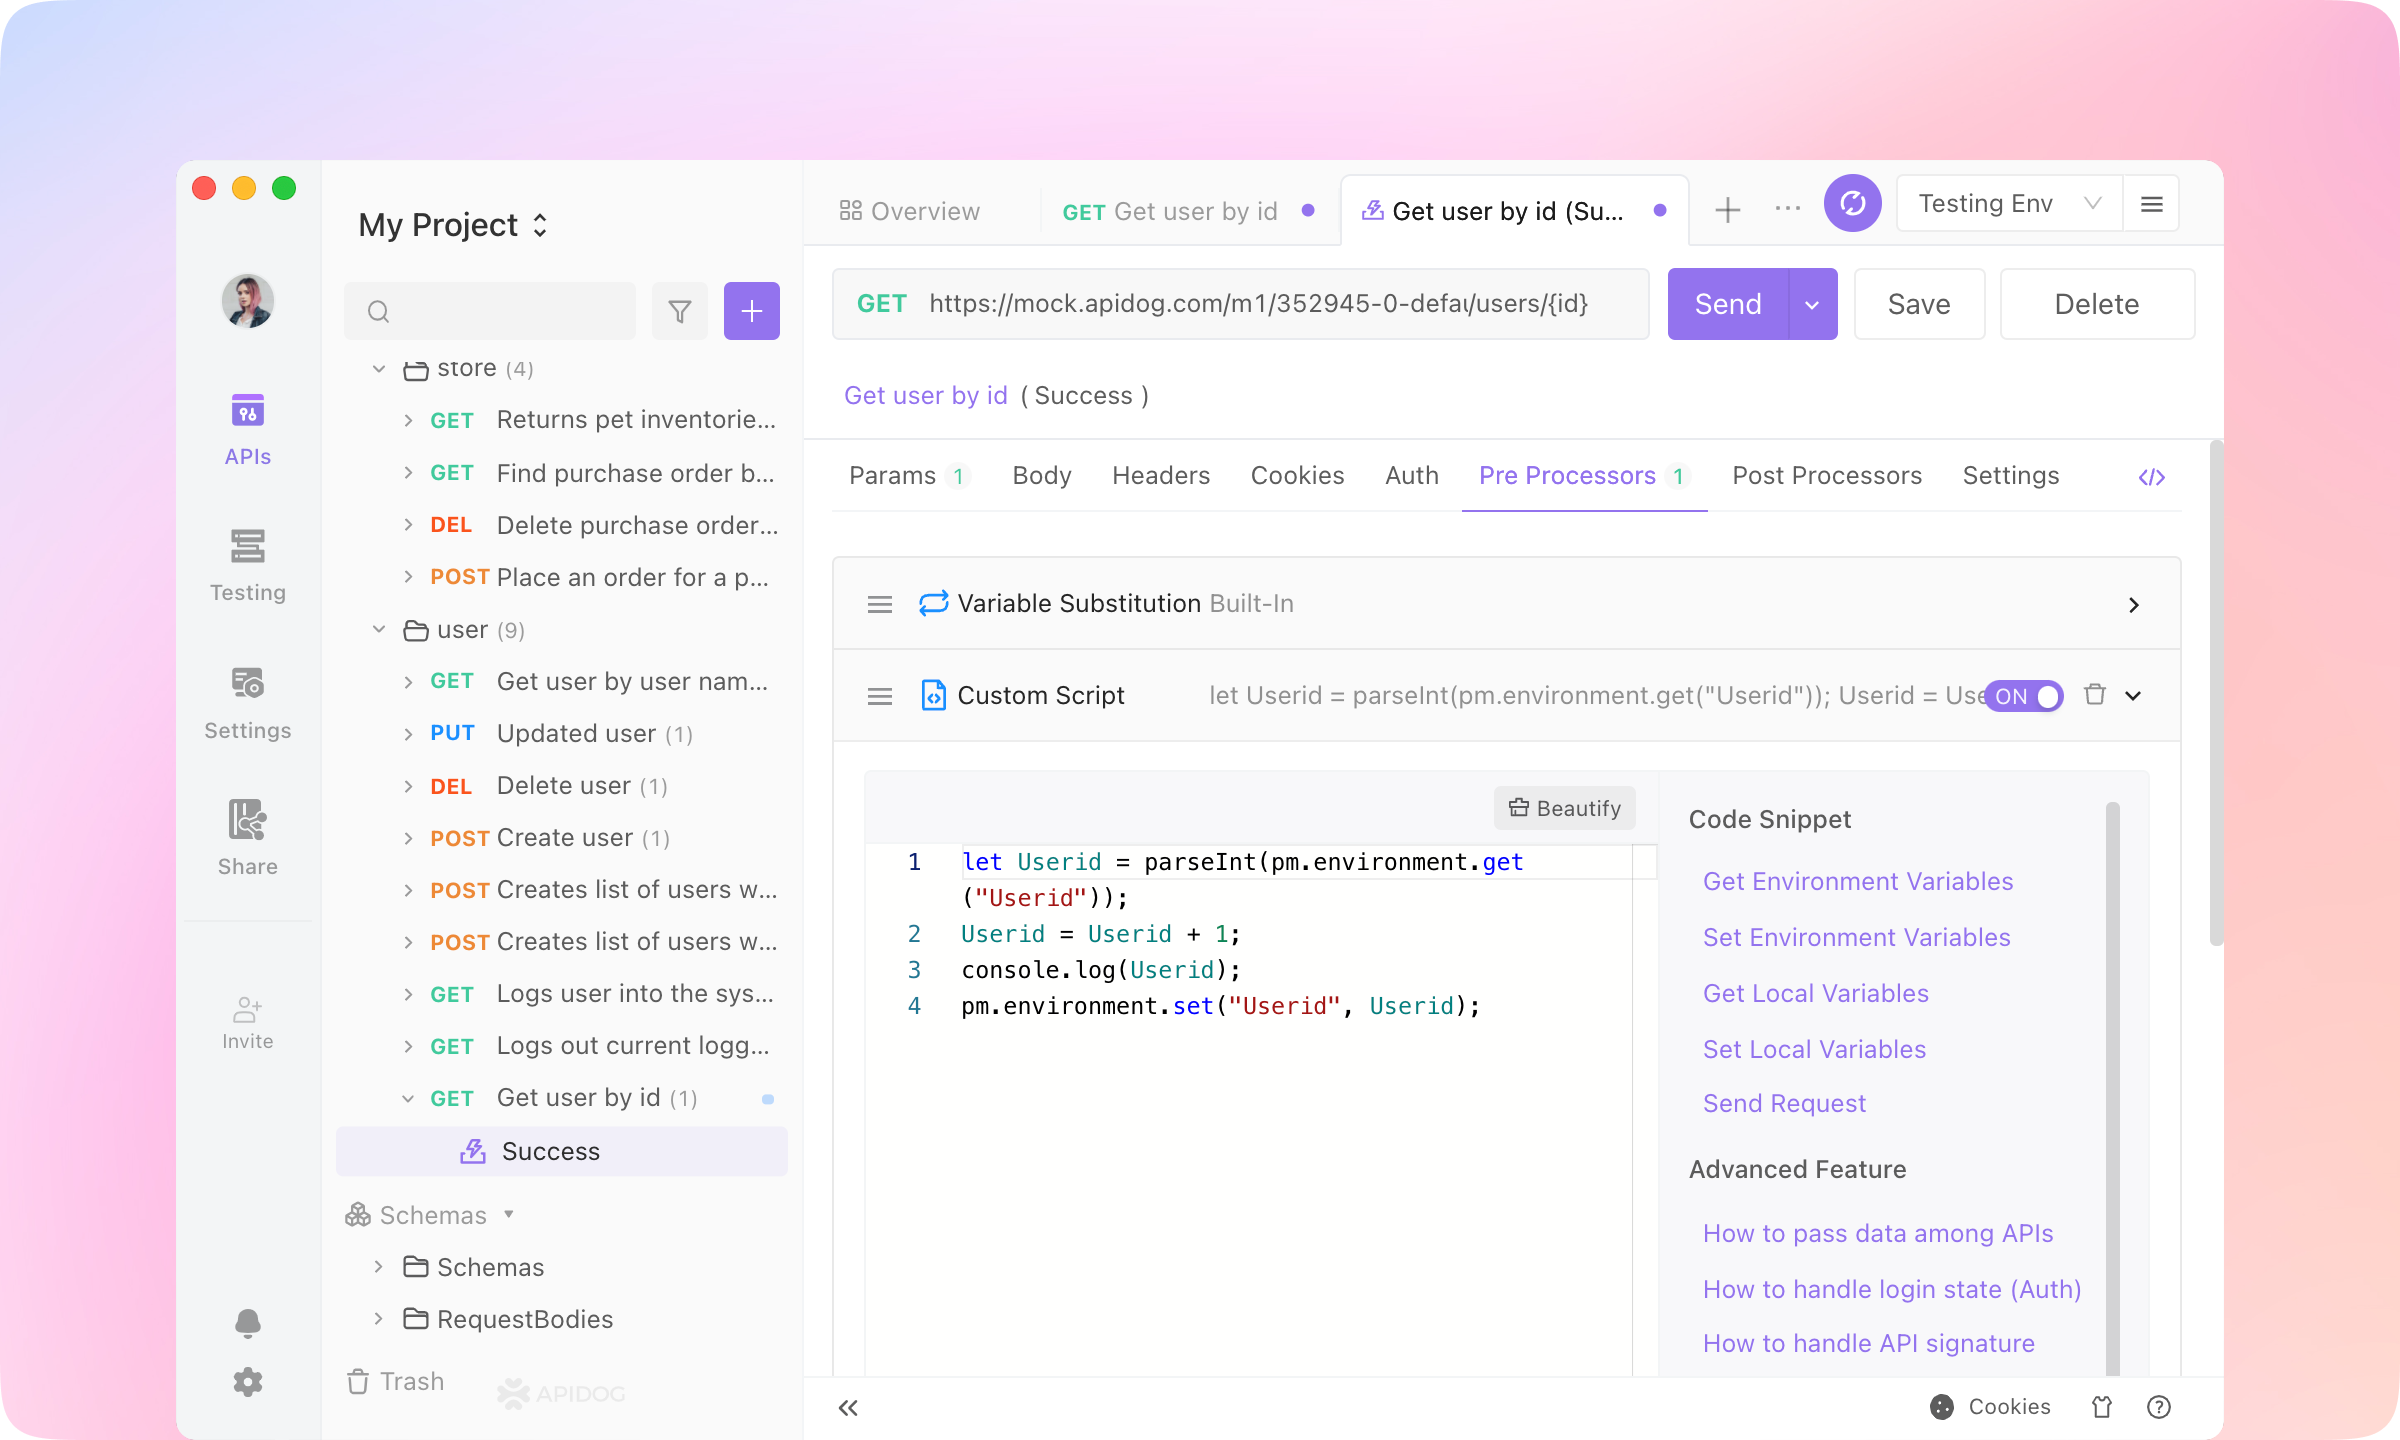
3.
Custom Script before the Variable Substitution operation. Send the request.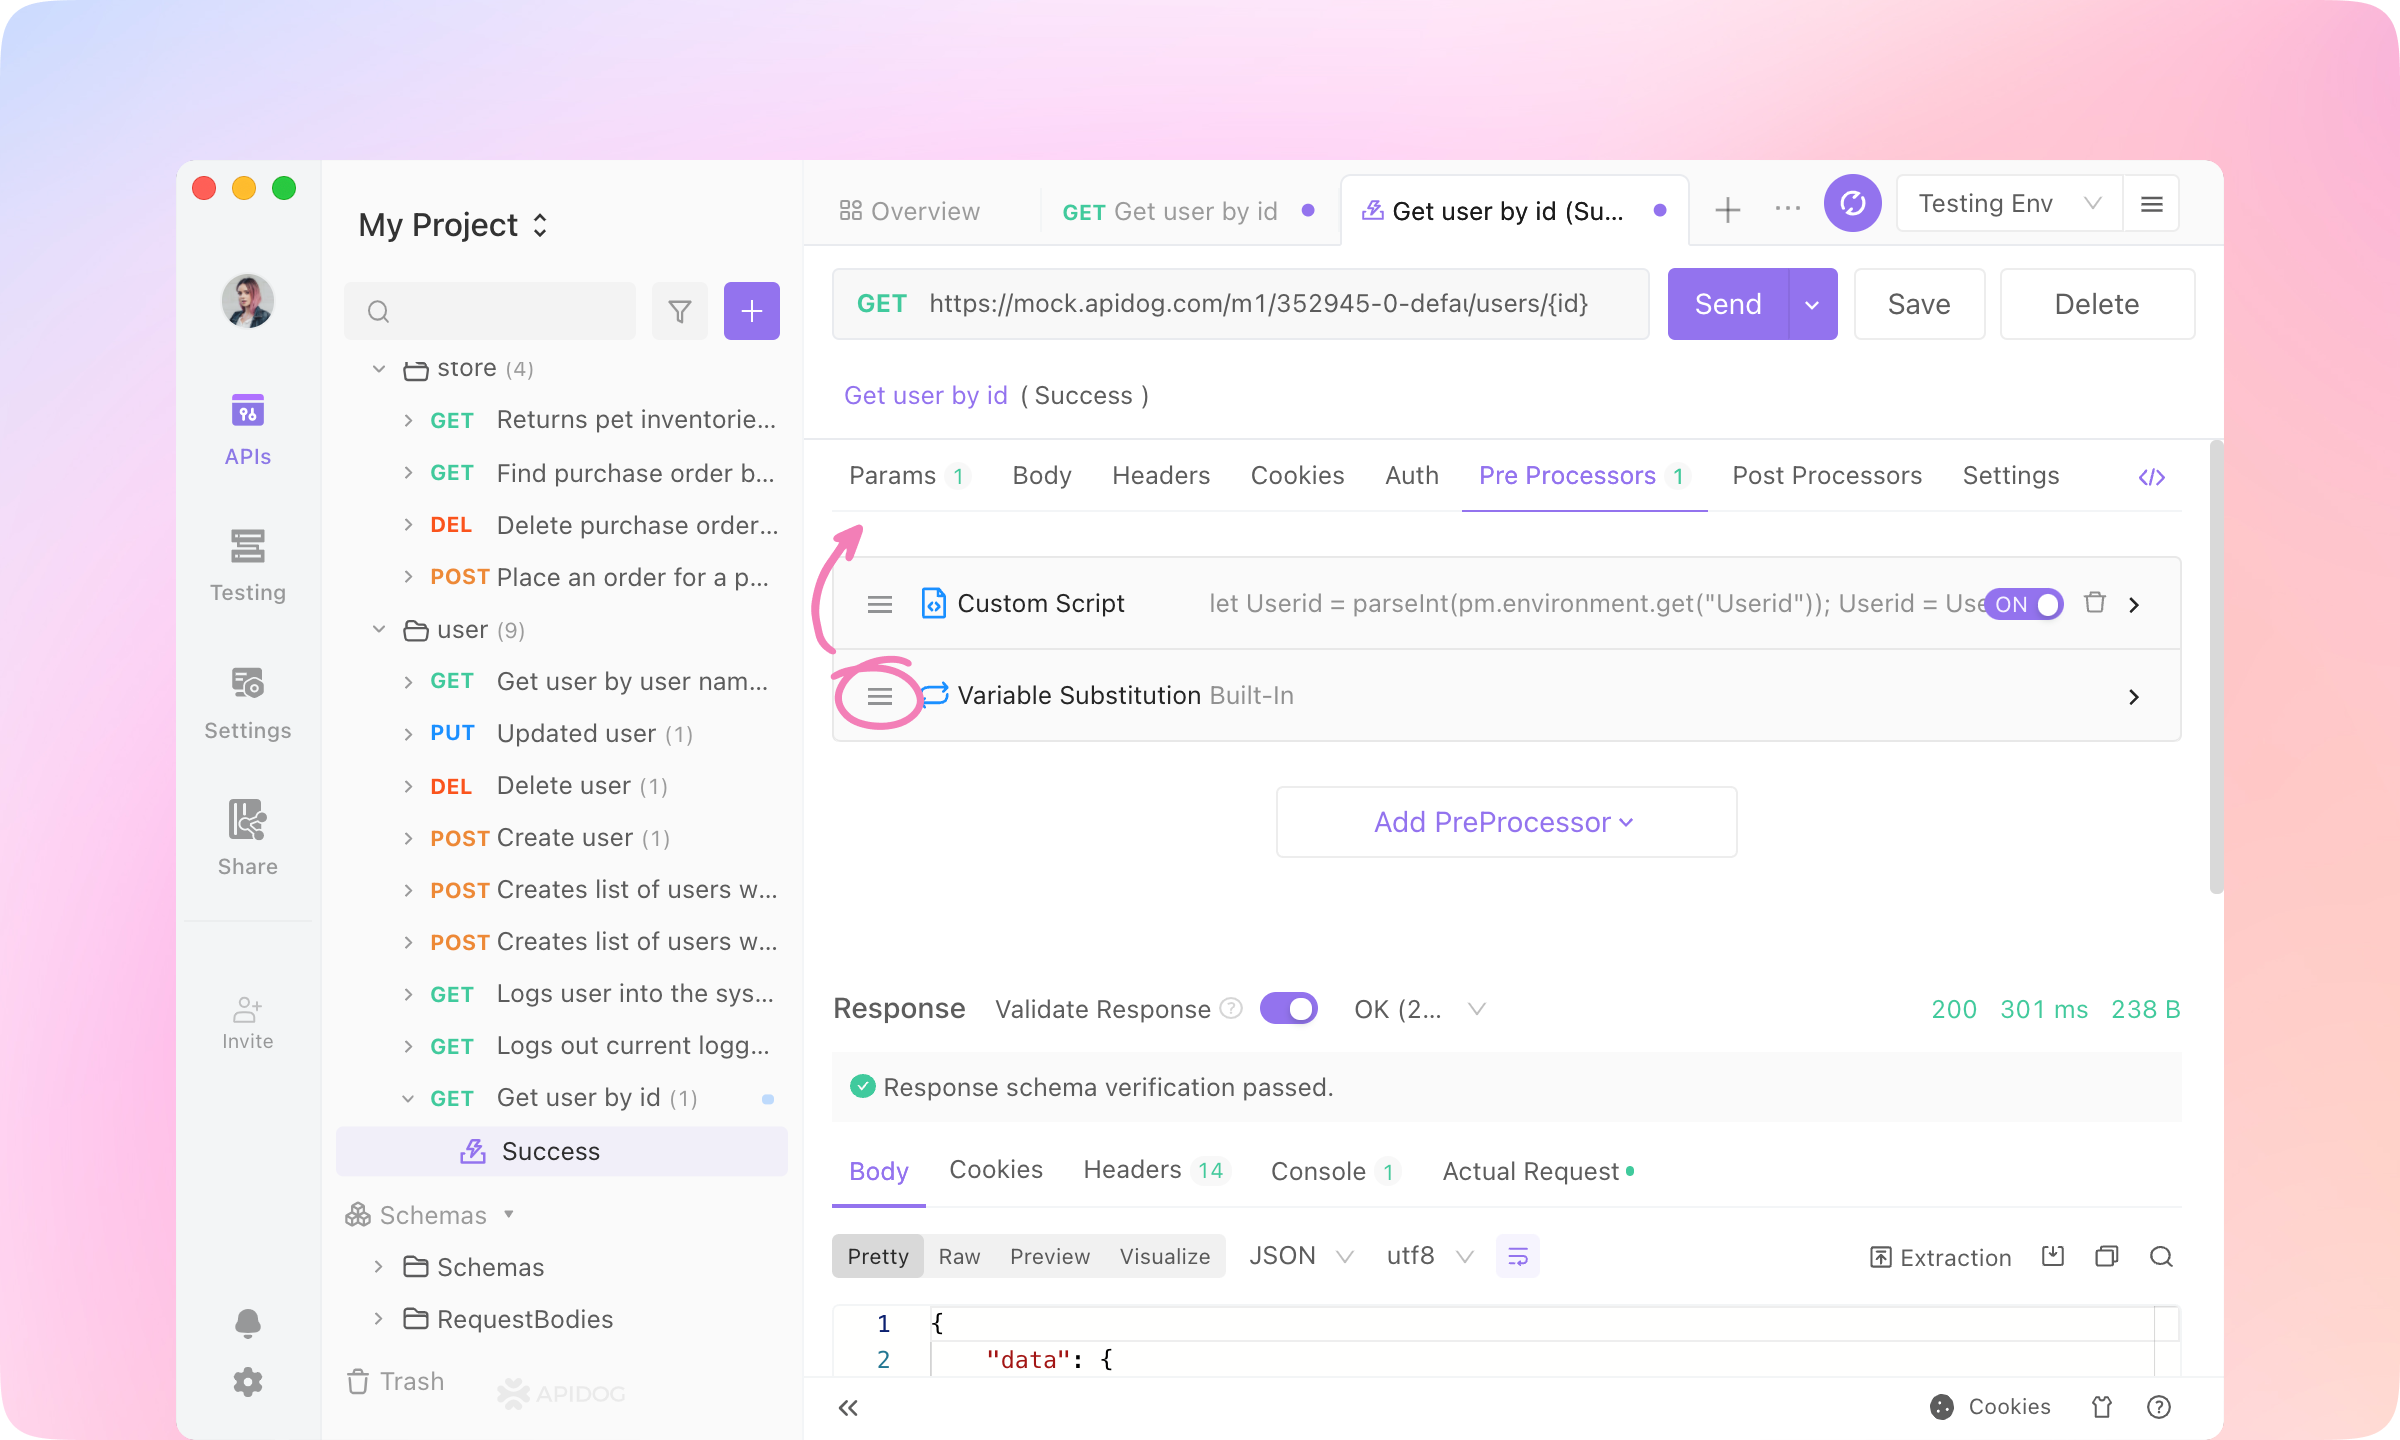
4.
5.
TIP
Front-end Developers: API Mocking
1.
API tab and click Local Mock. Click the URL & Params of 'OK(200)' to copy to the clipboard.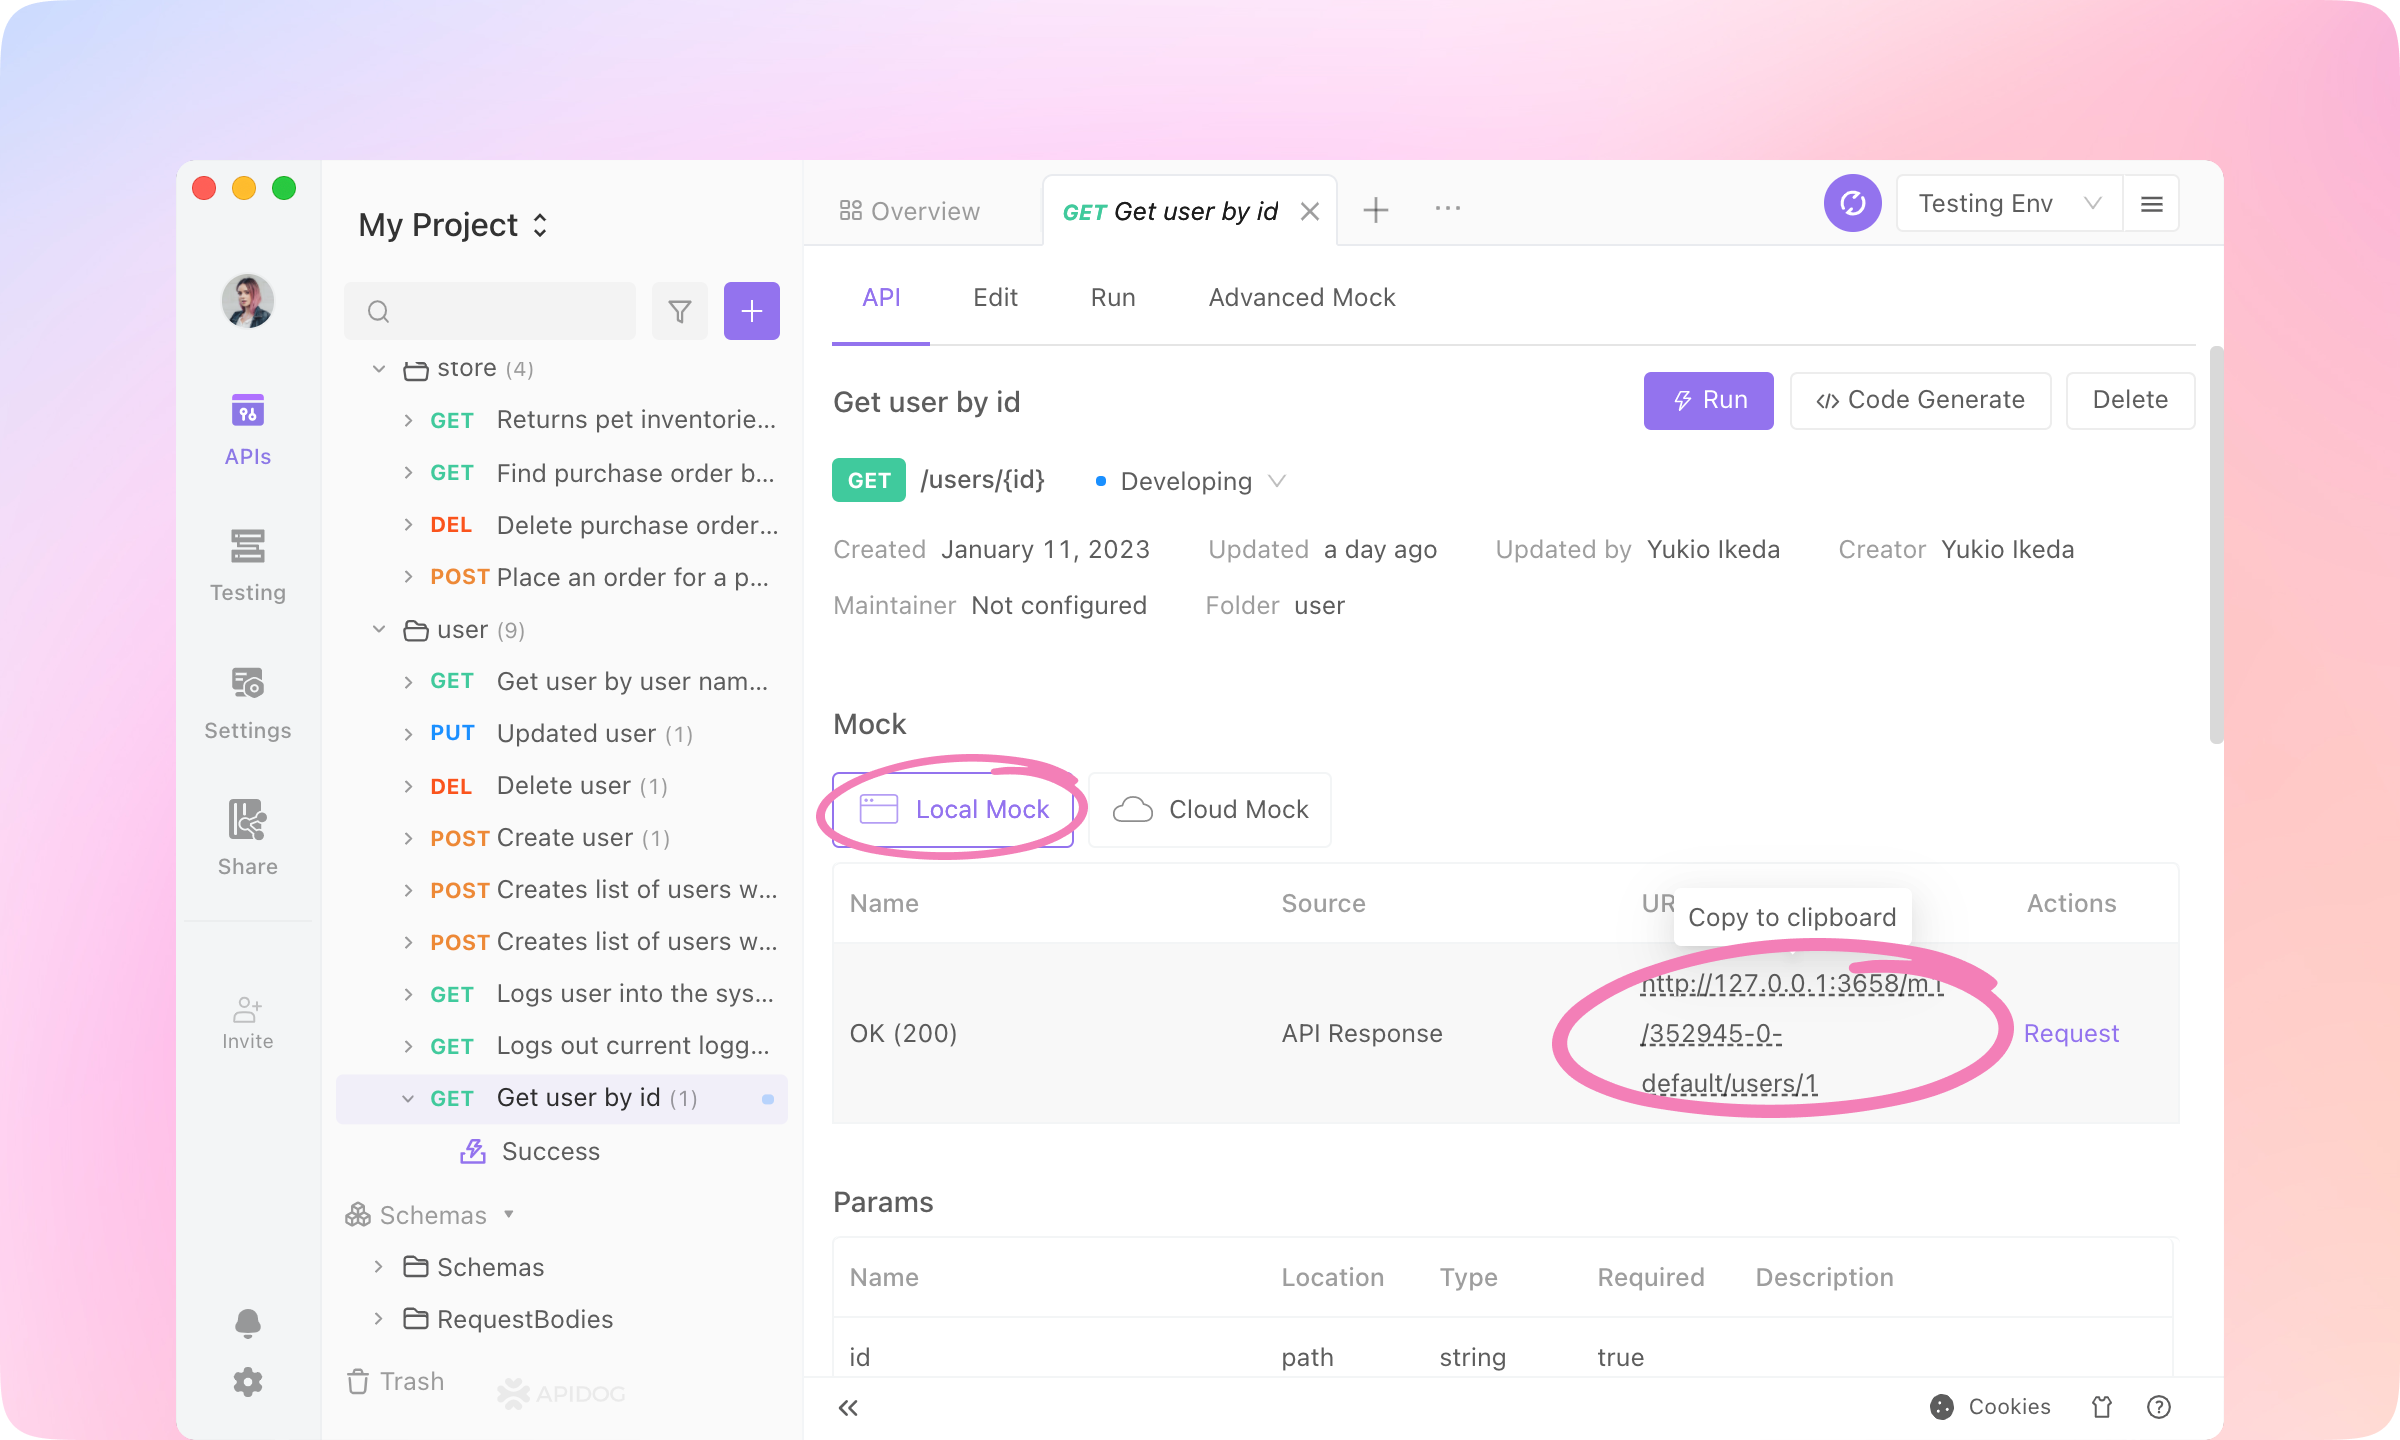
2.
Smart Mock feature of Apidog.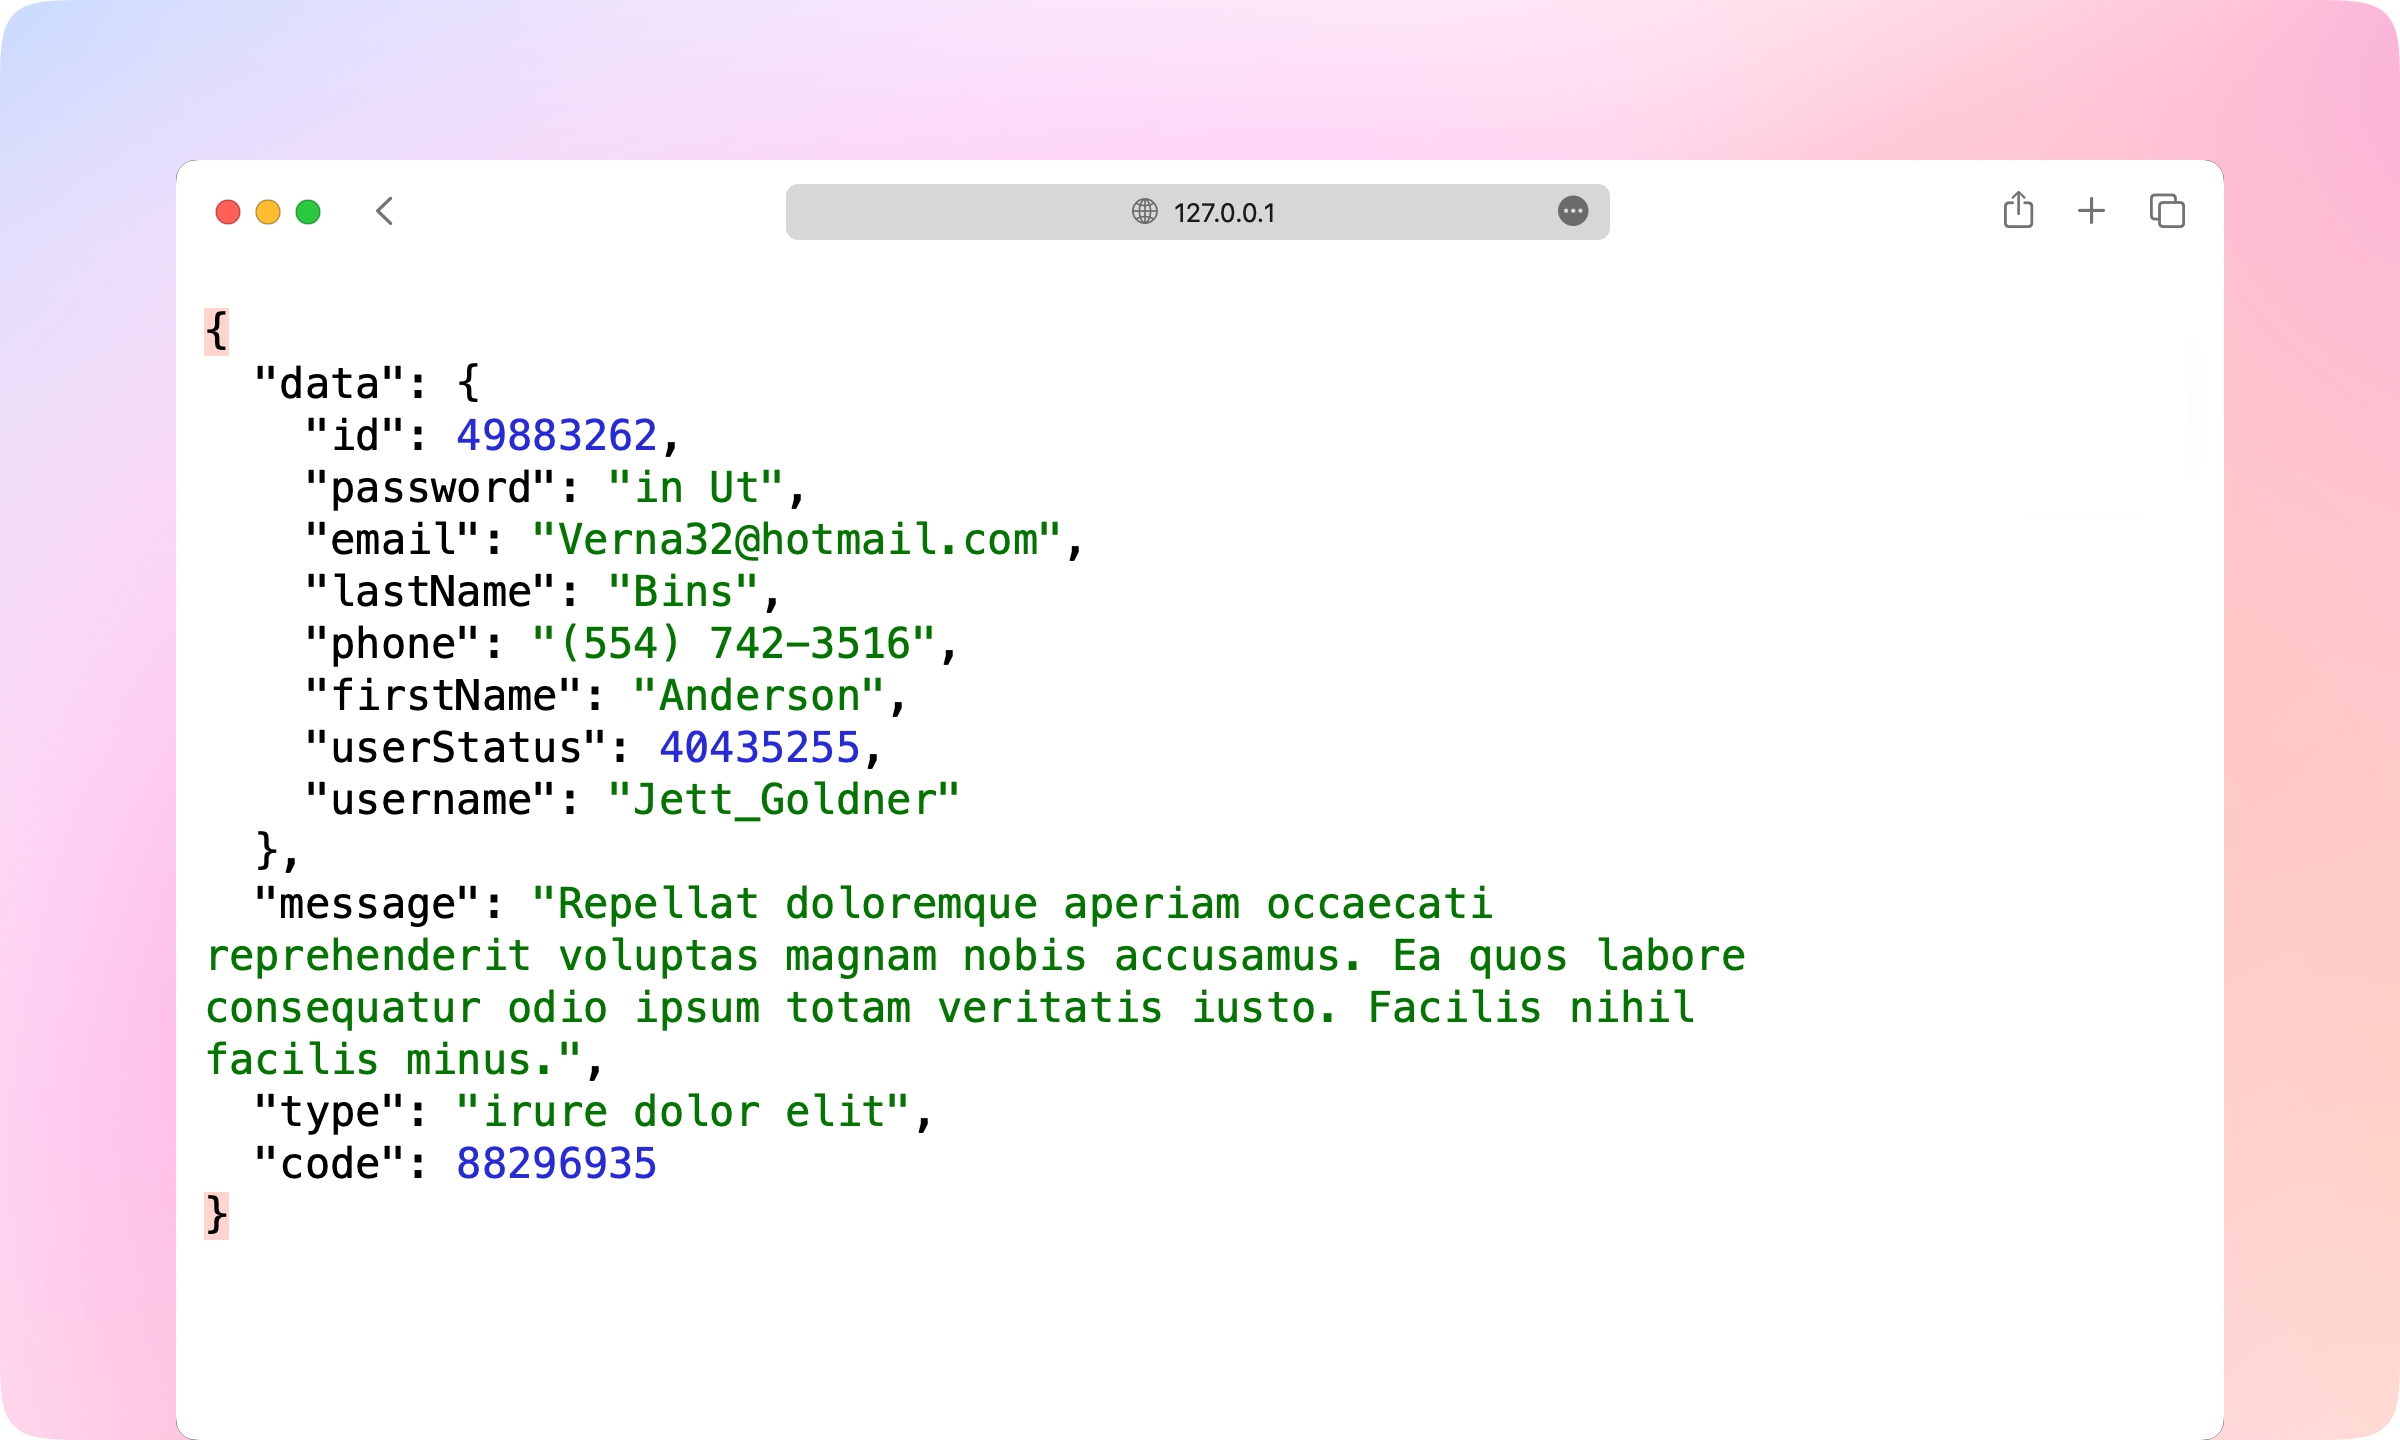
3.
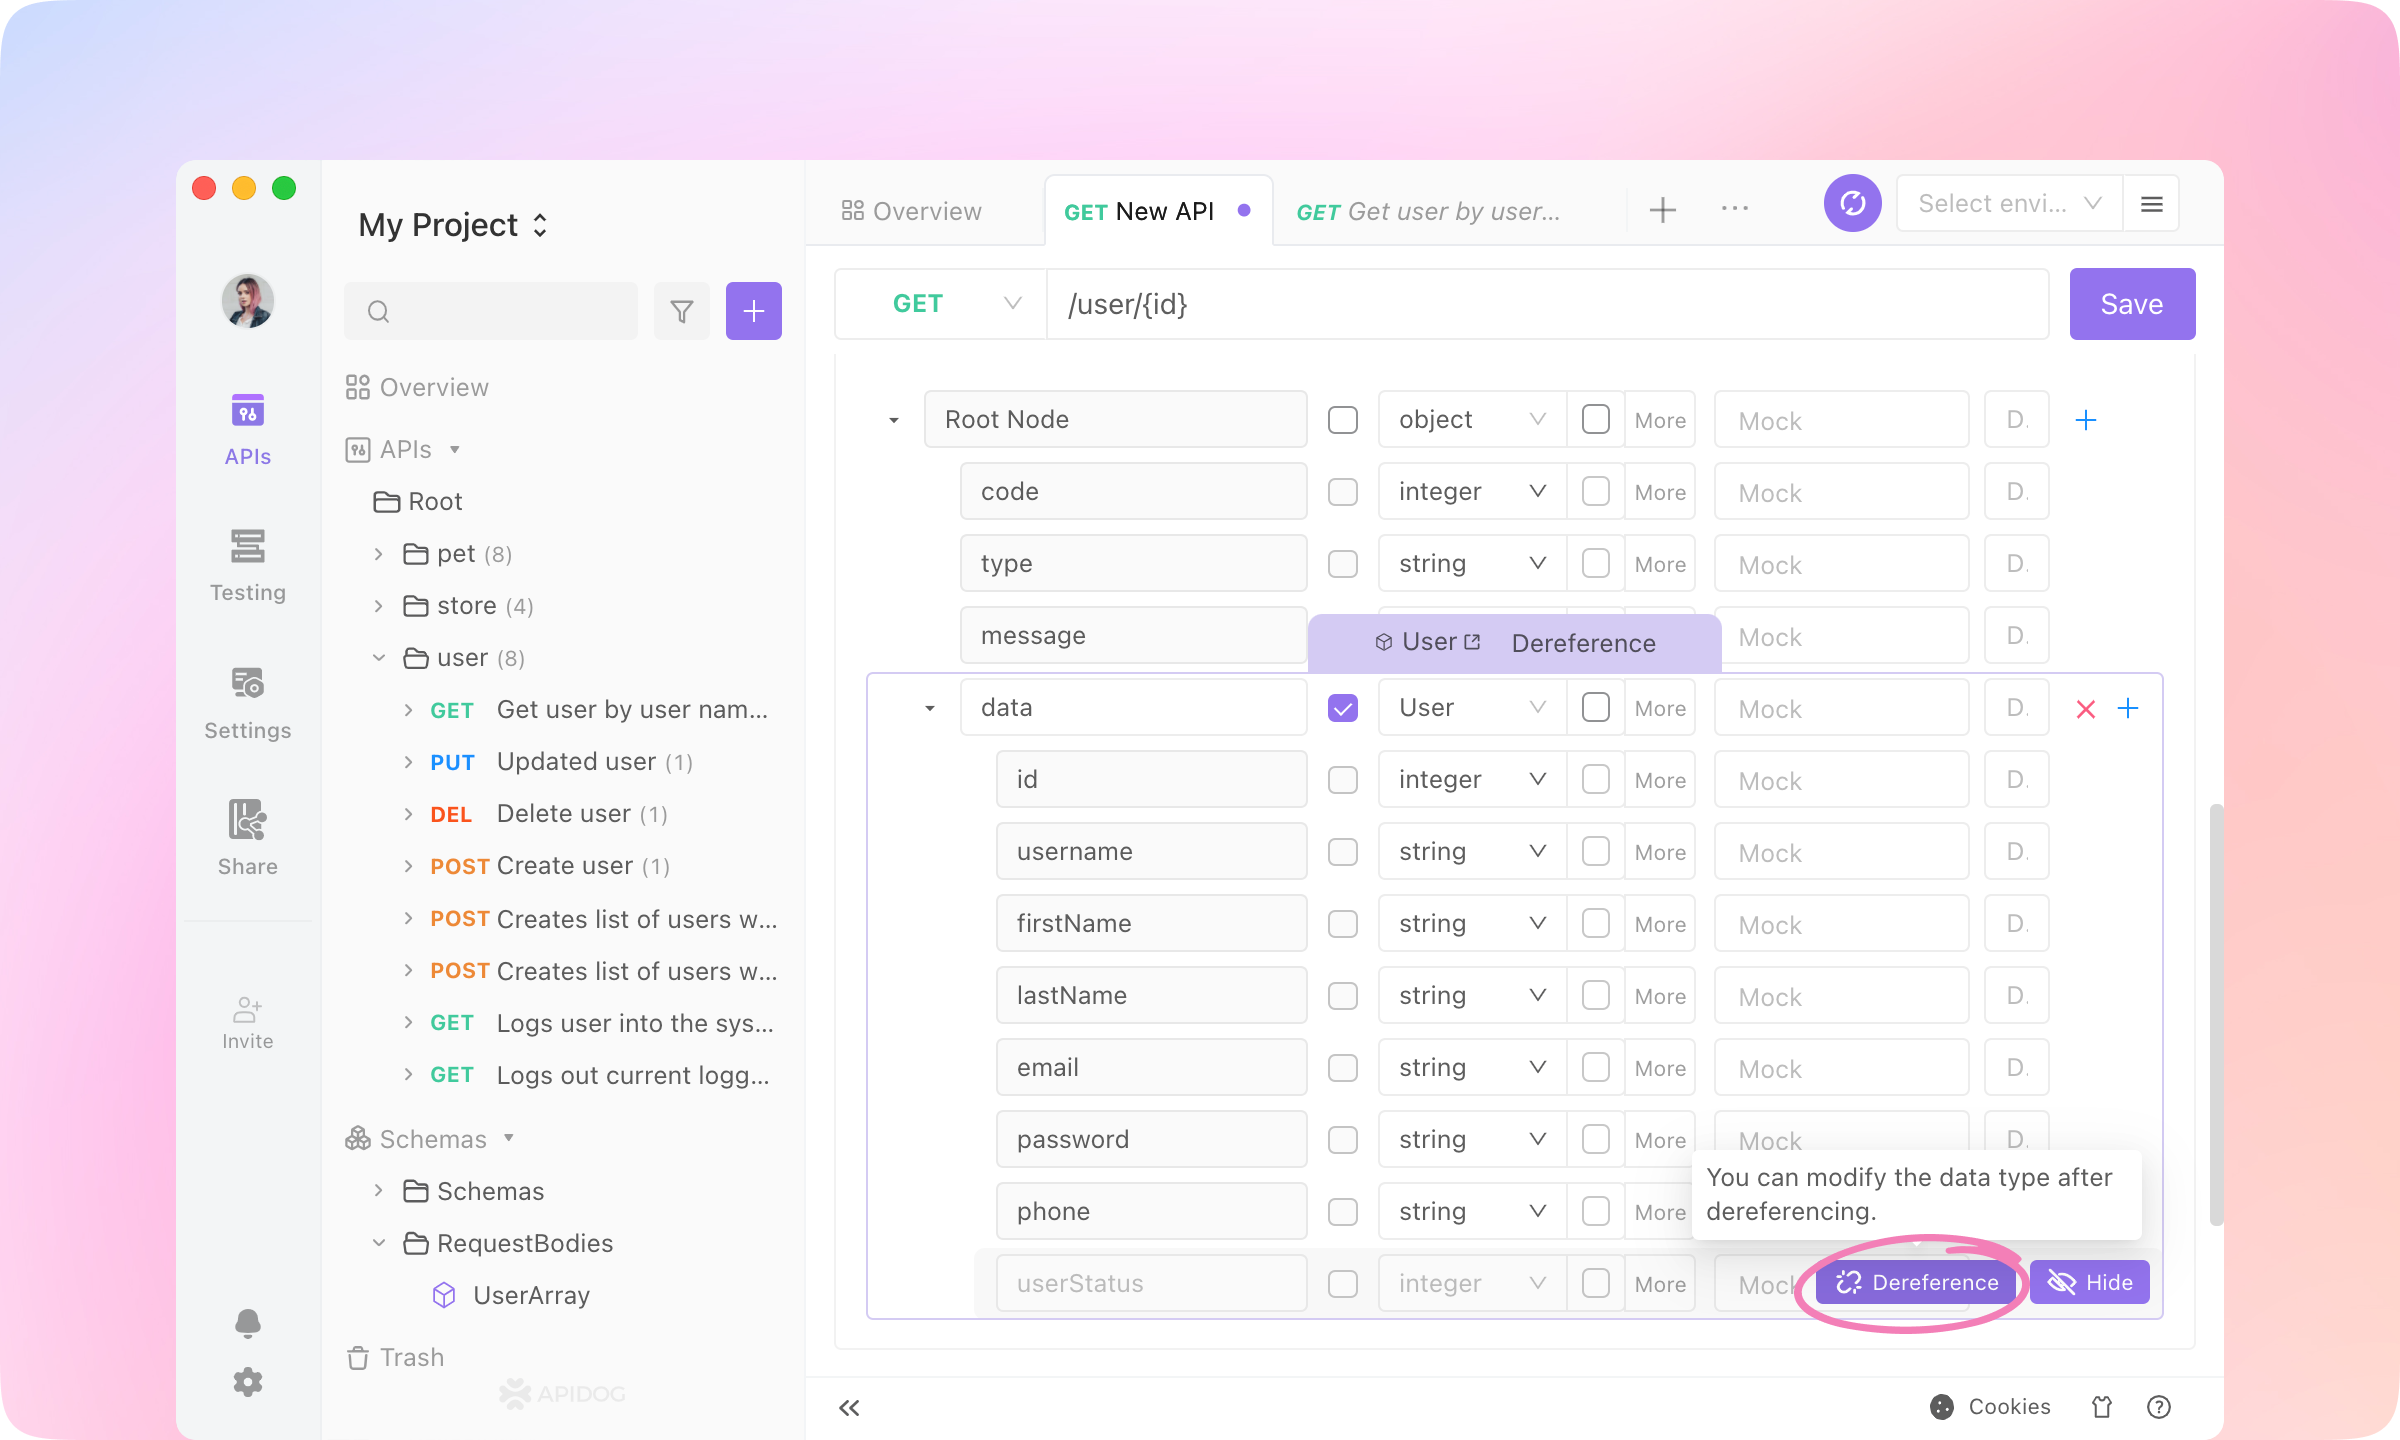
Edit tab and Dereference the 'ApiResponse' Schema in the Response Part.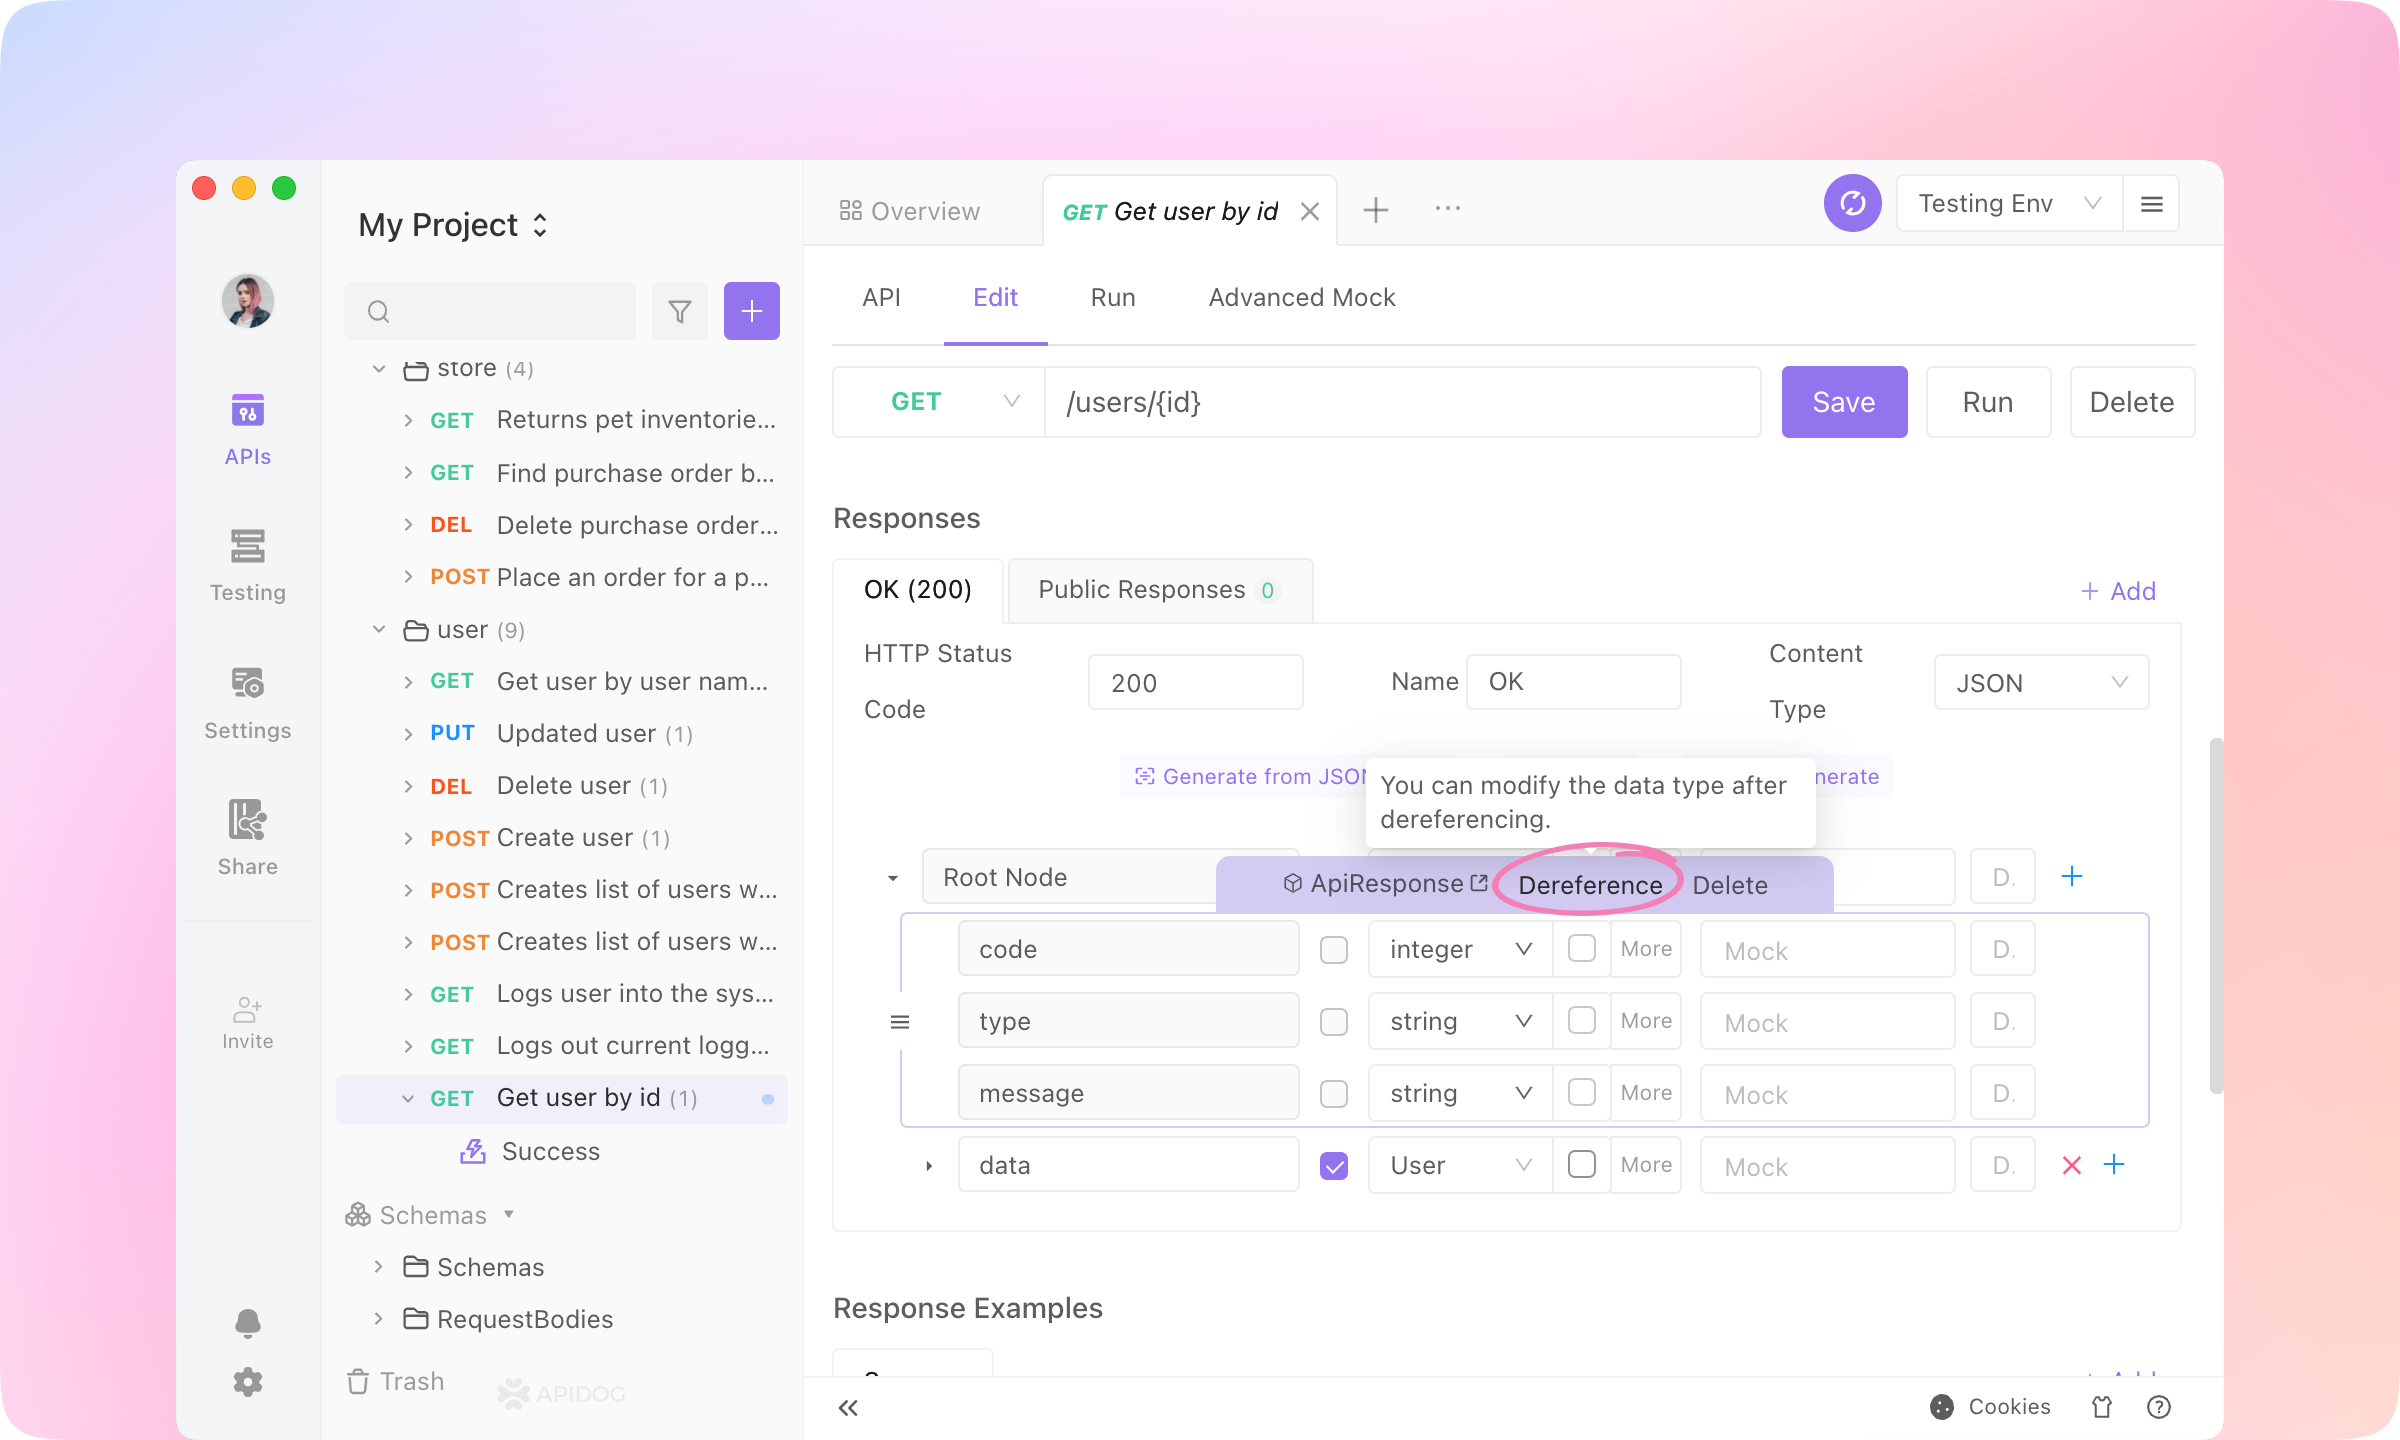
4.
Mock value into the nodes, and Save the API.200JSONSuccess
5.
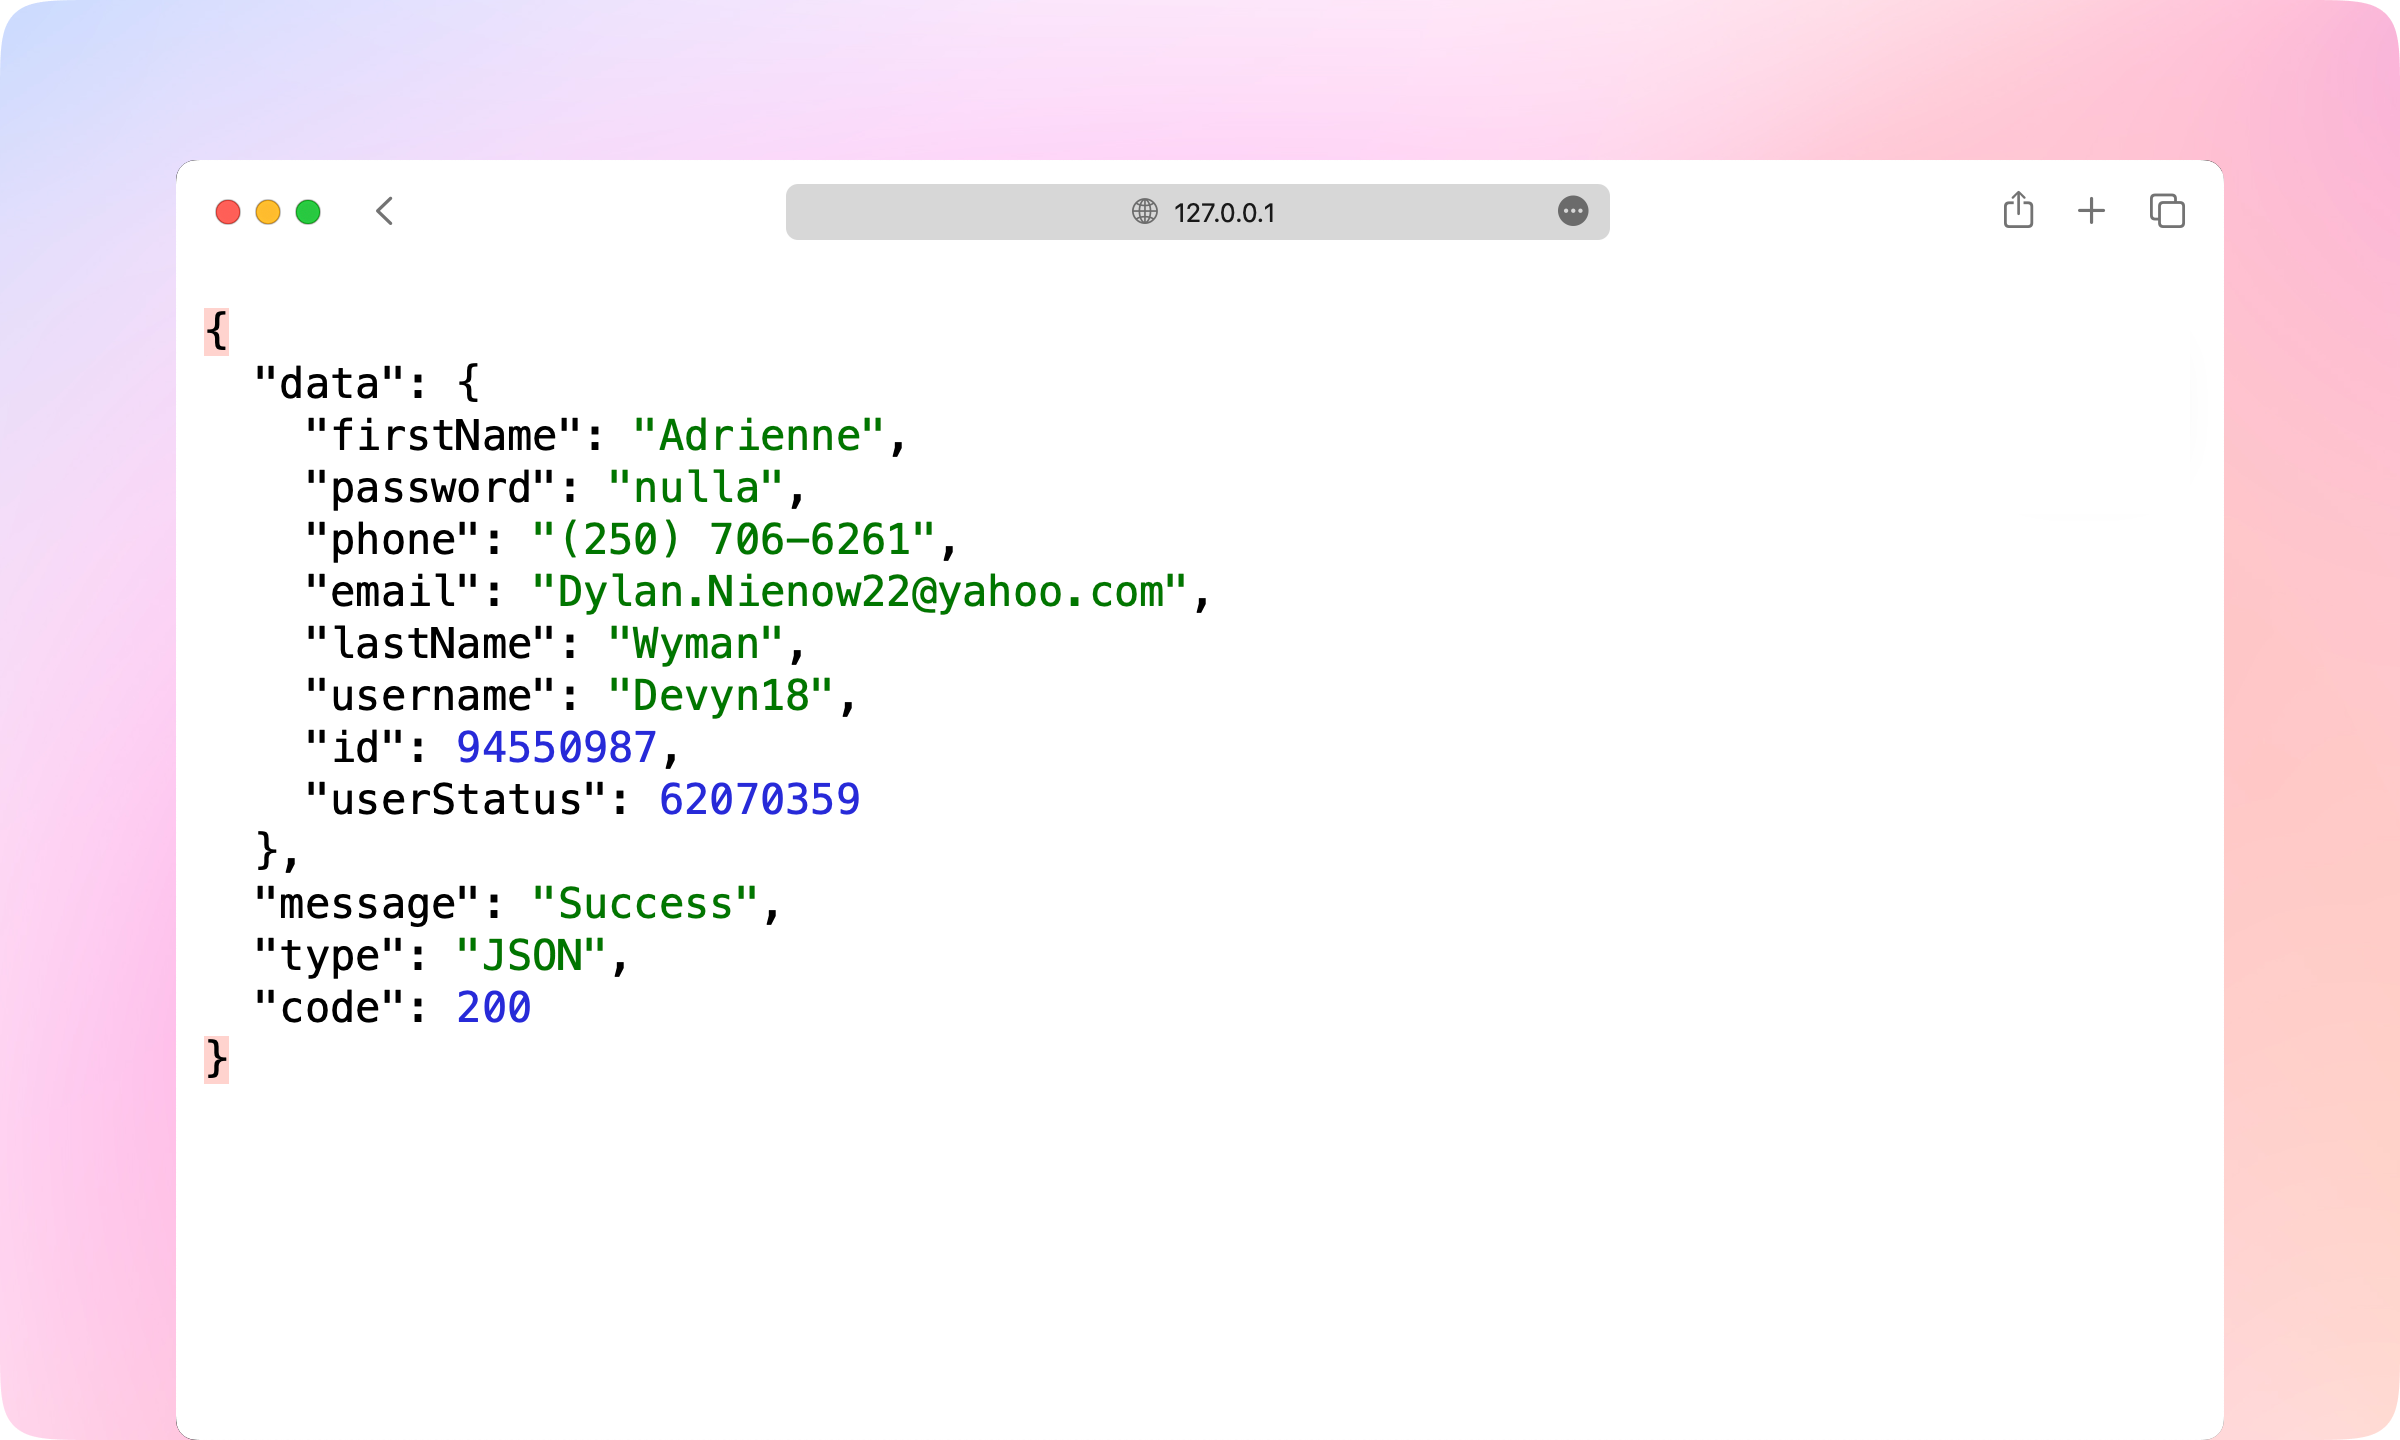
6.
Faker.js is also supported in the mock settings. You can select any Faker.js grammar to generate dynamic mock data.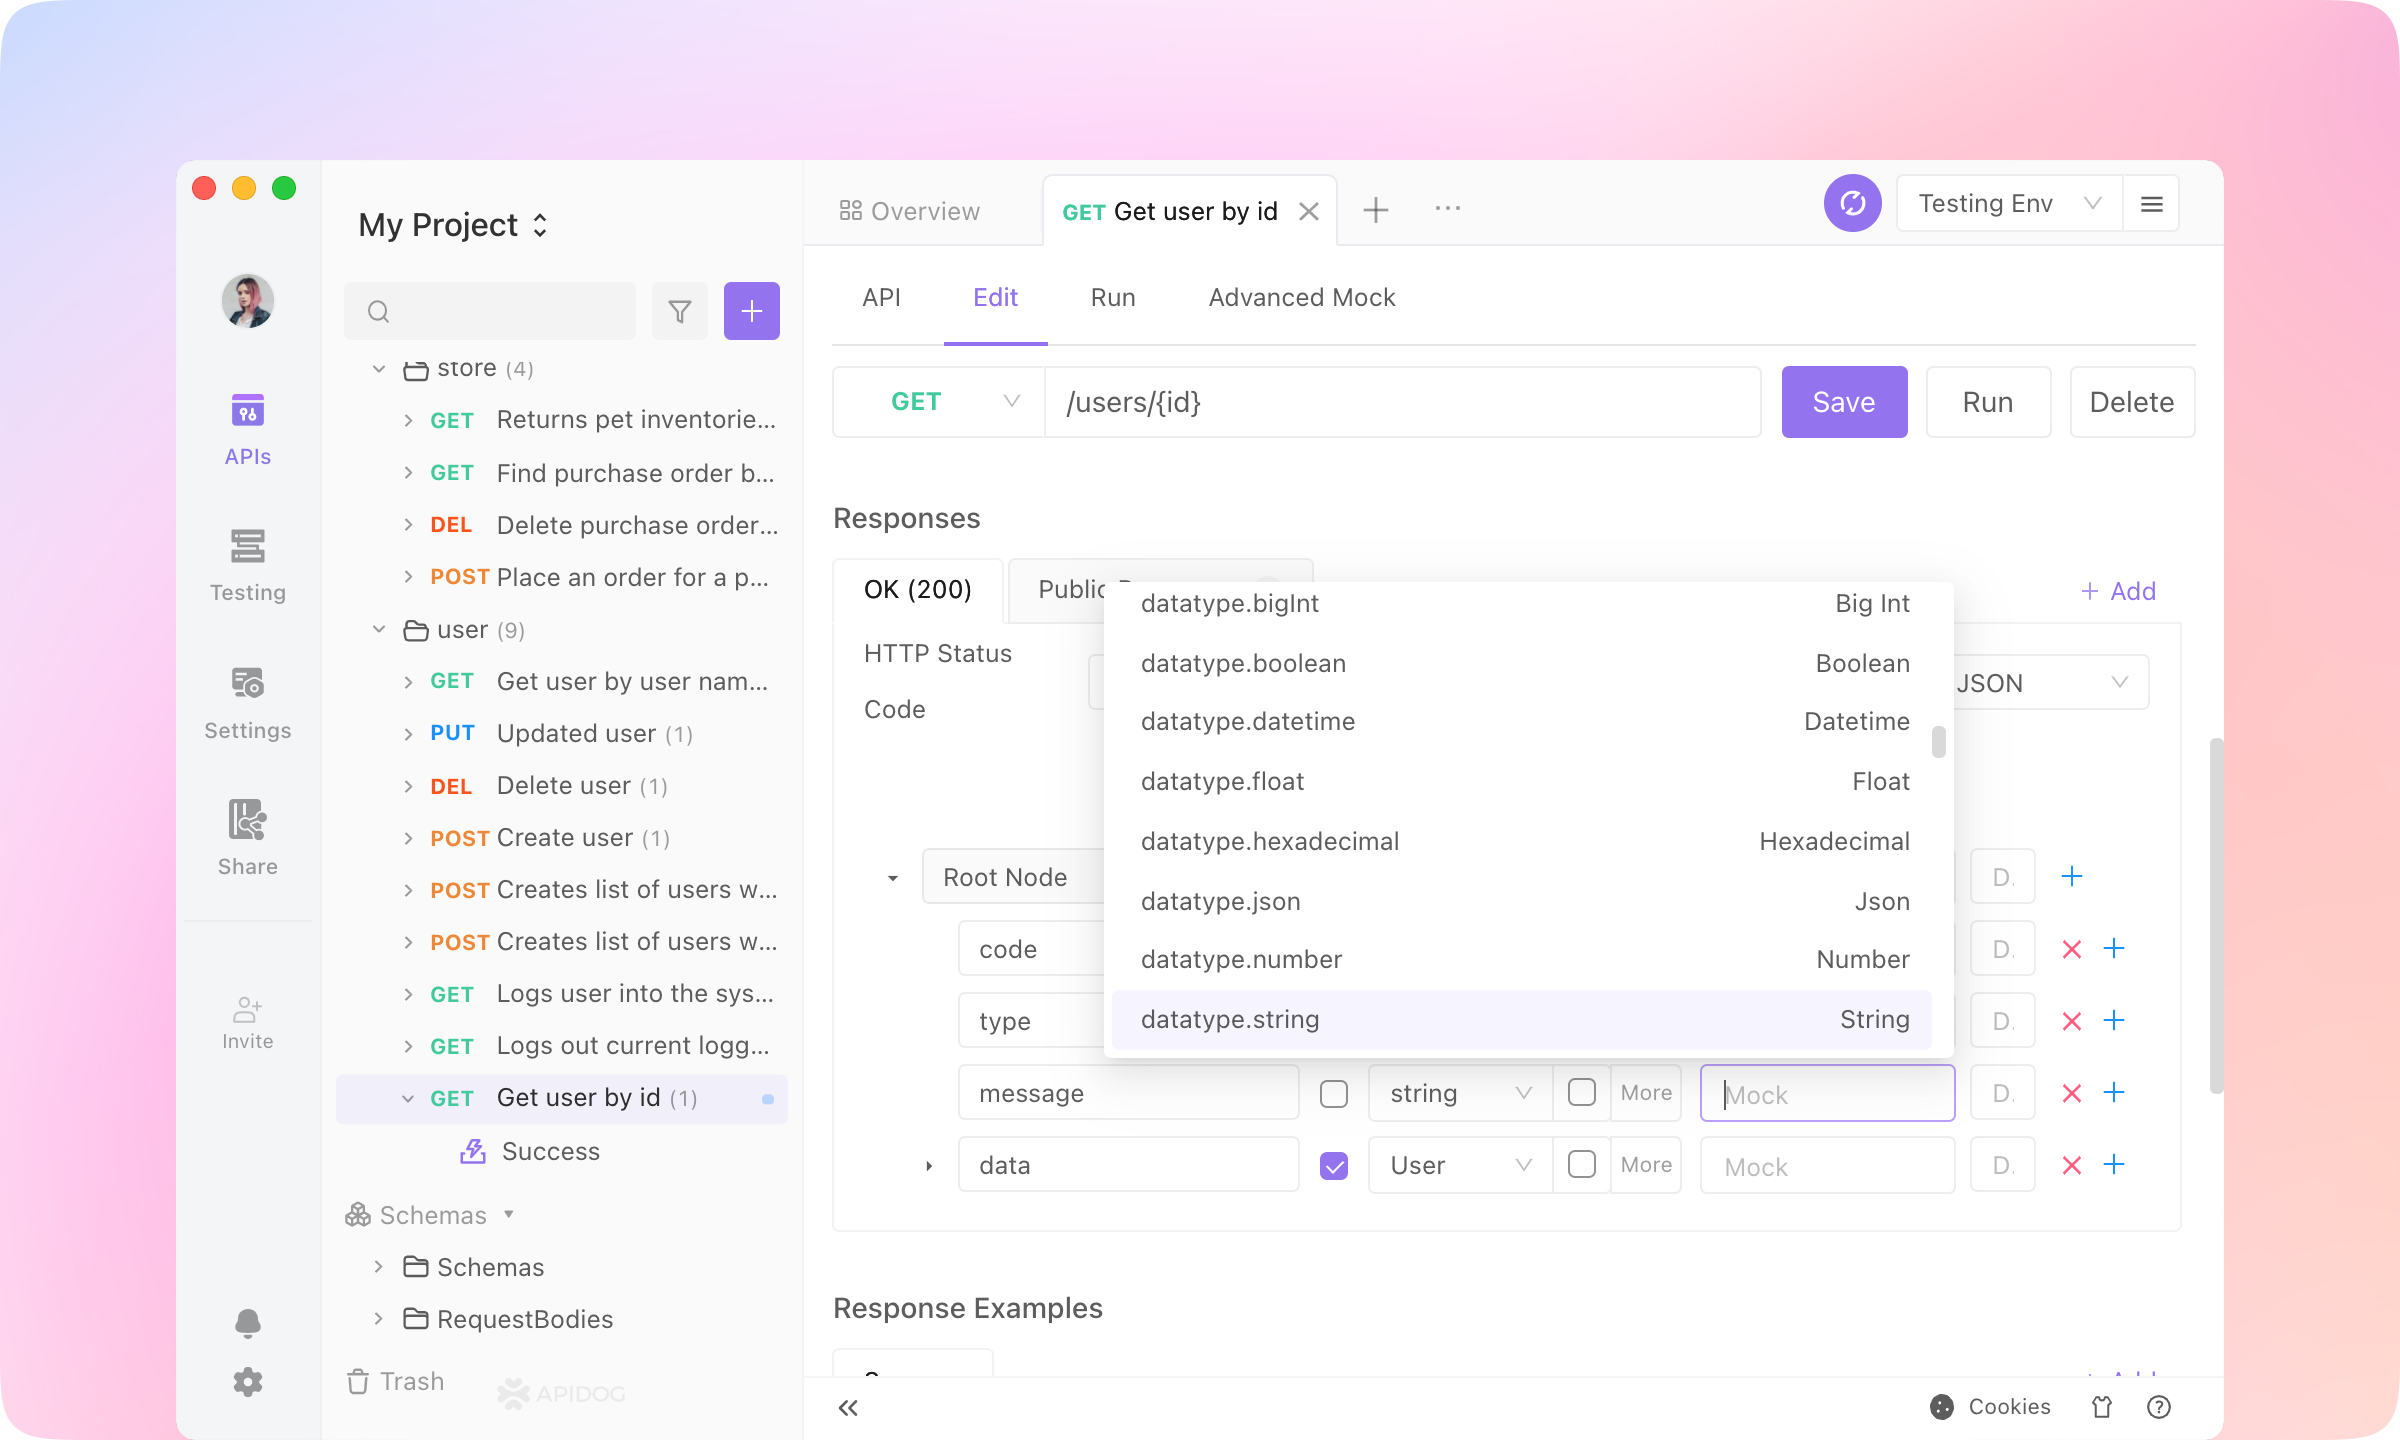
7.
Settings - Feature Settings - Mock Settings - Default Mock Type, and switch to Response Example First. Then Apidog mock engine will use the API response example as the mock response.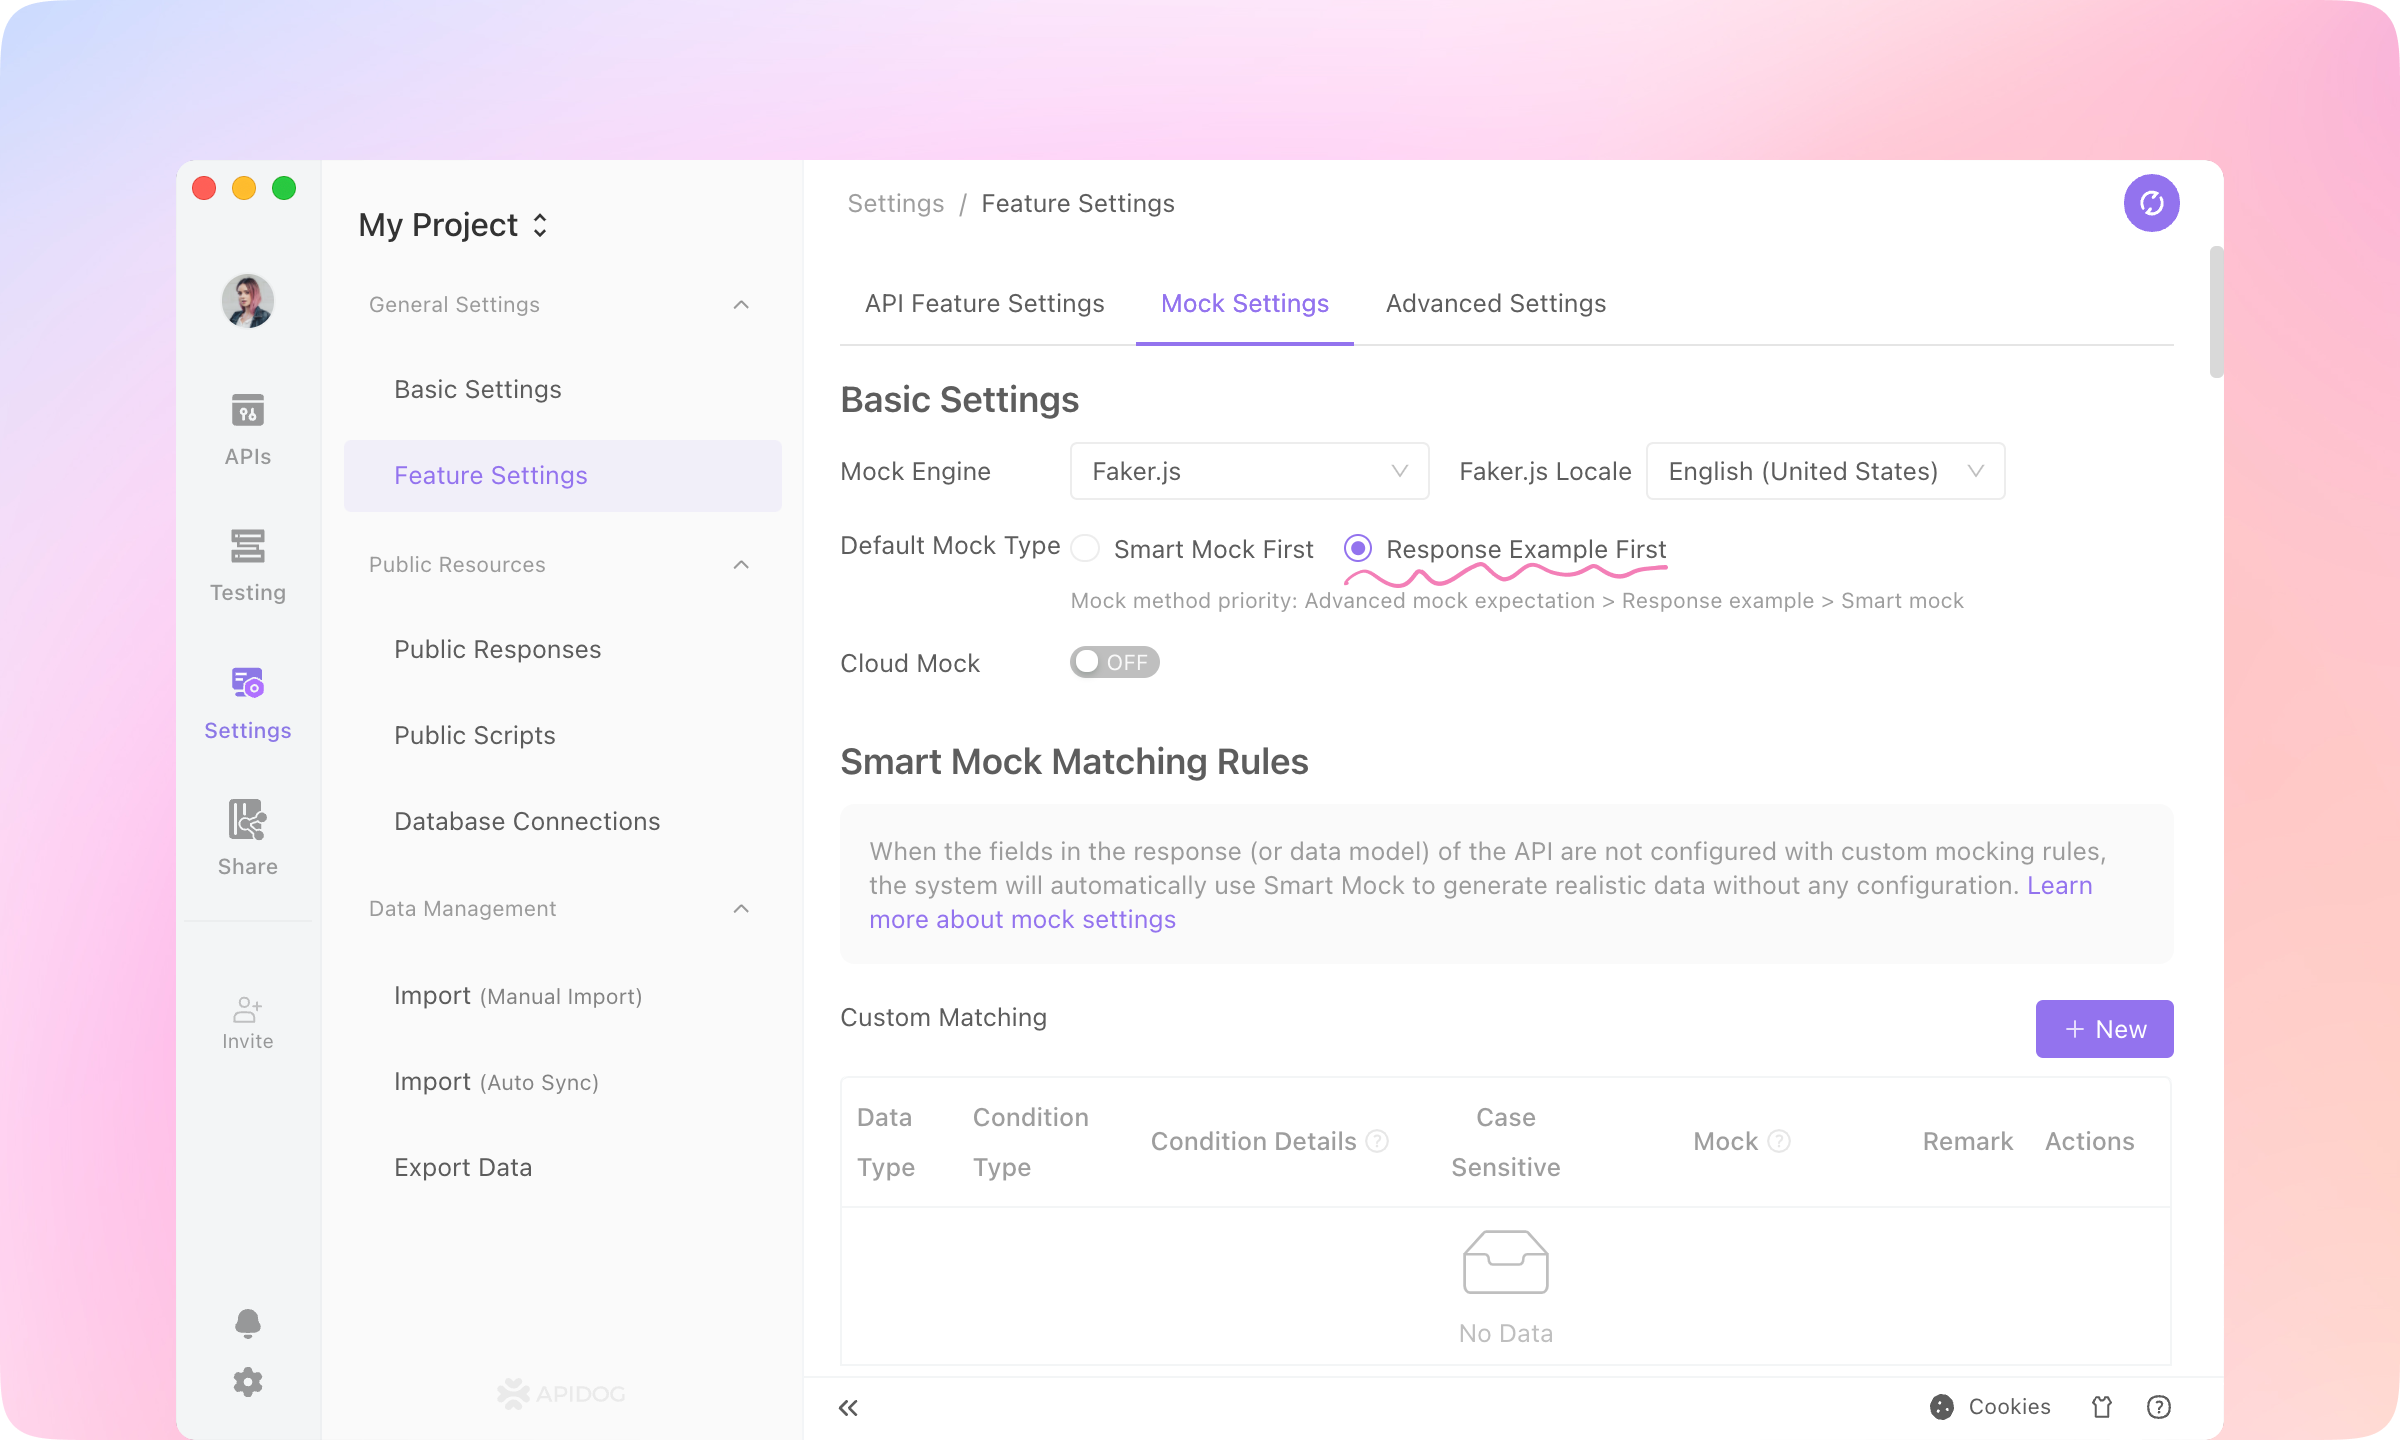
TIP
QA Engineers: API Testing
Assertions
1.
Get user by id - Success, switch to Post Processors and Add PostProcessor - Assertion.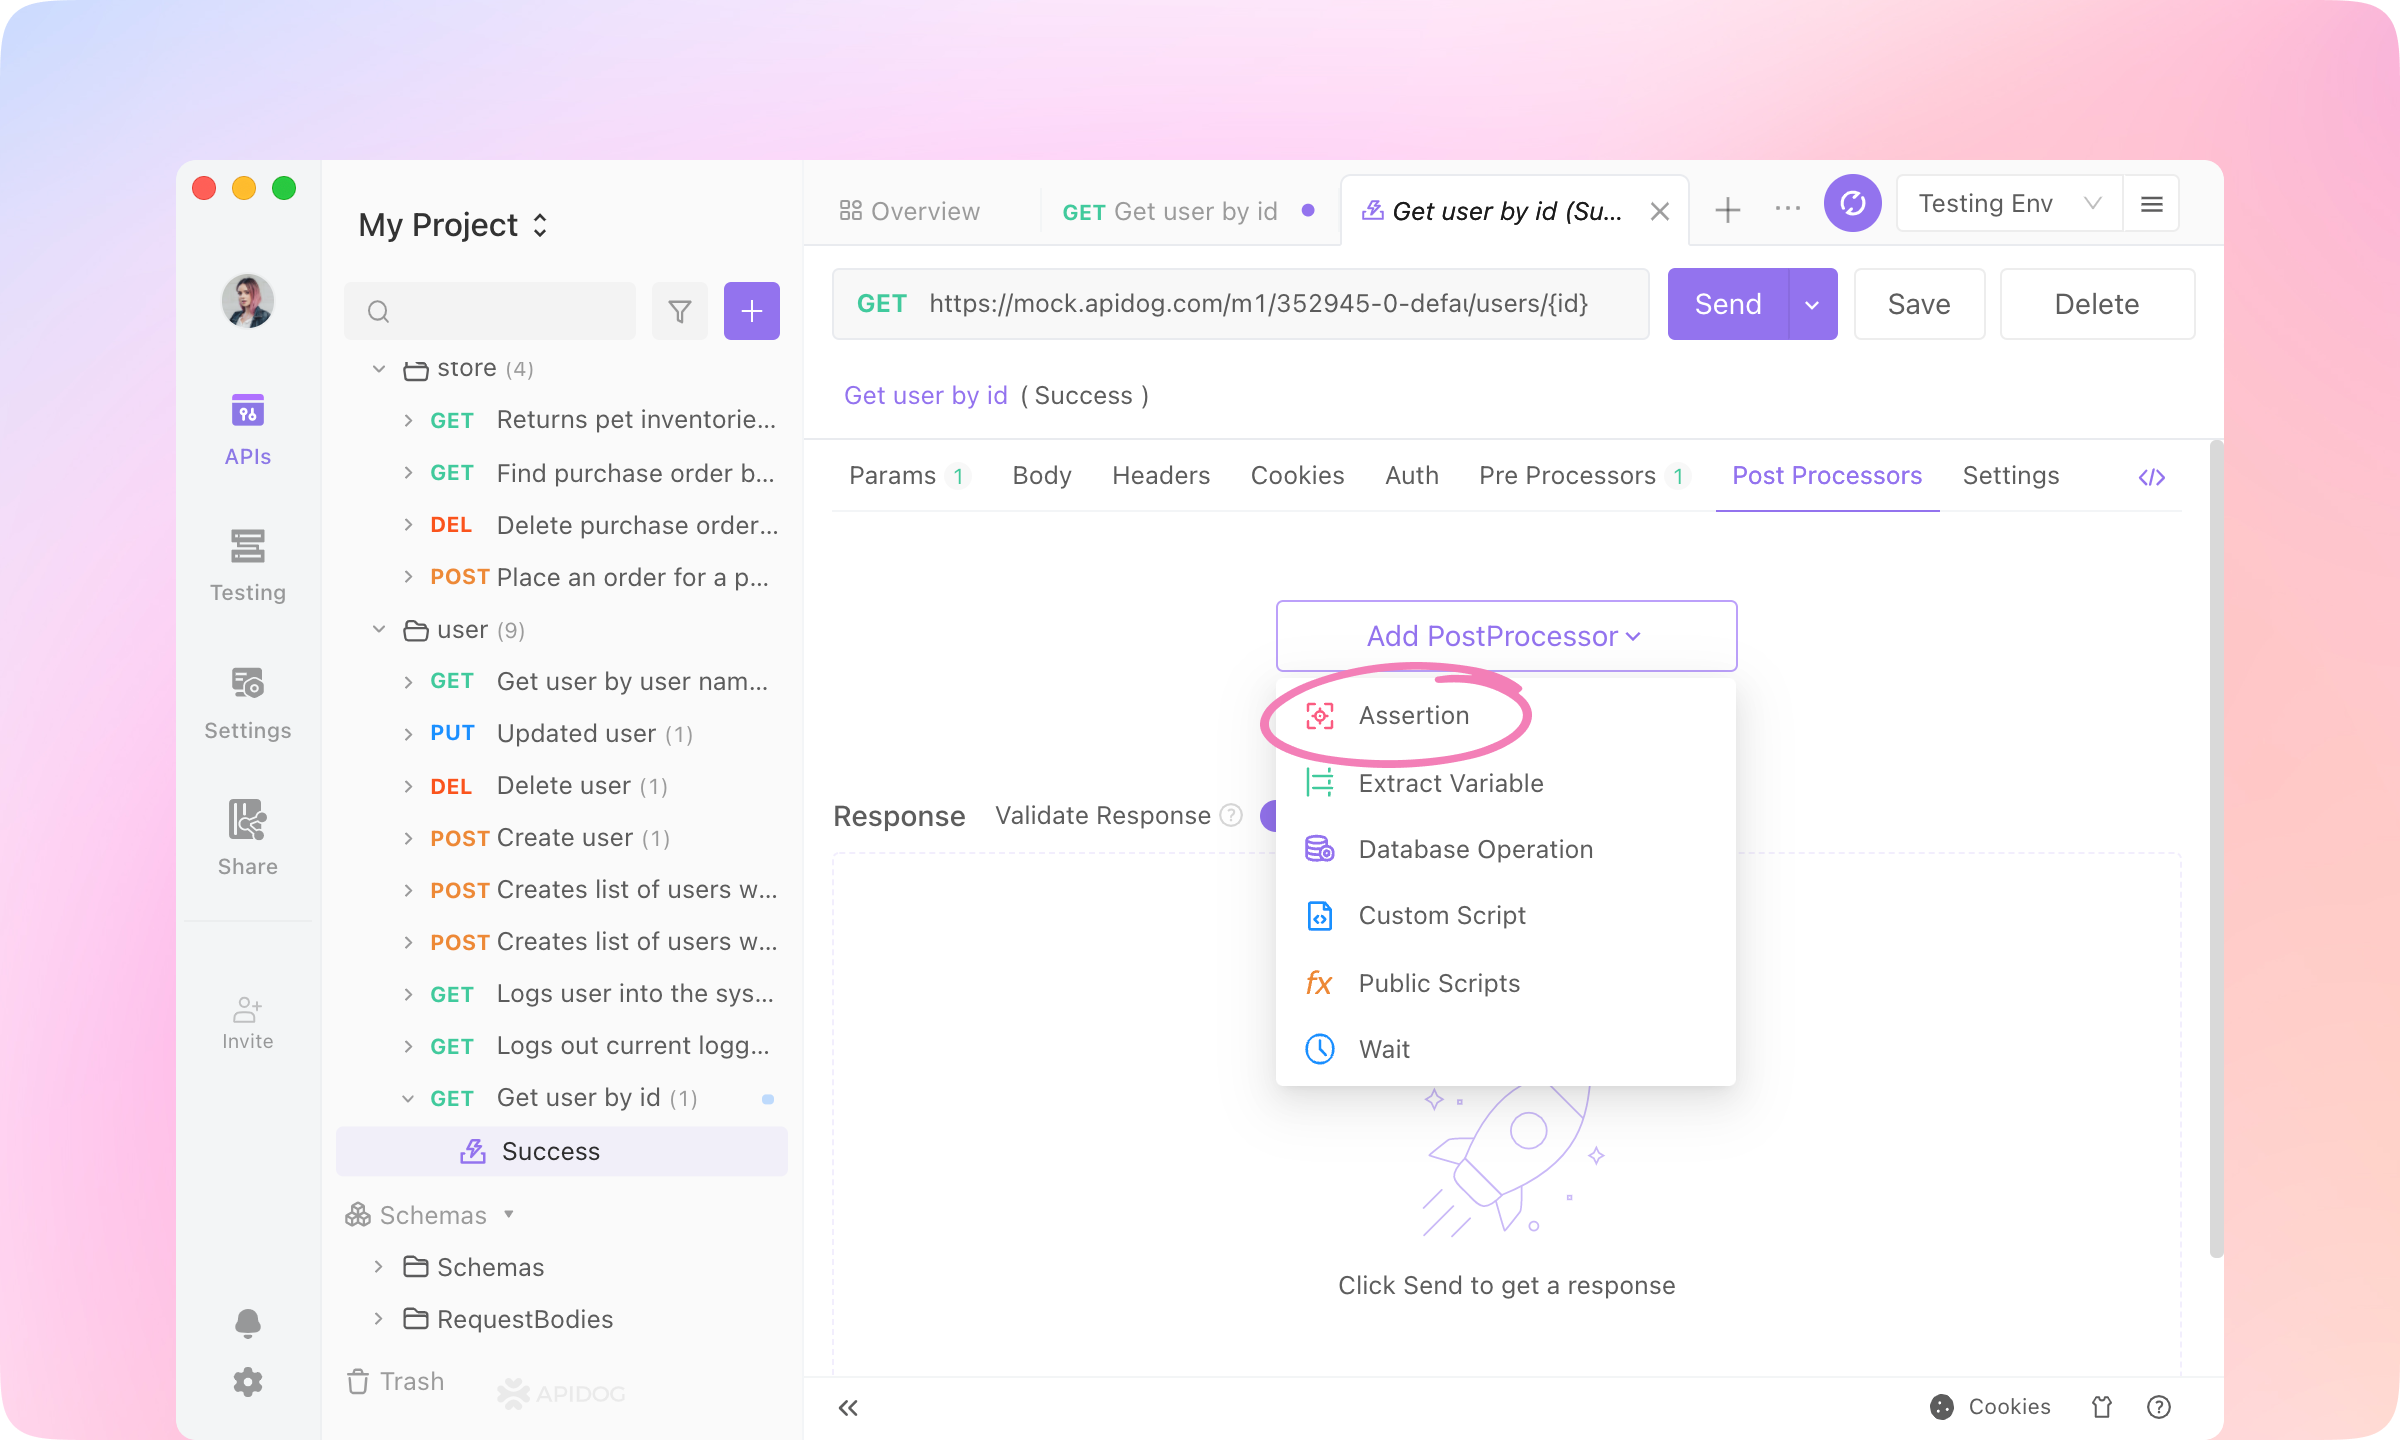
2.
TIP
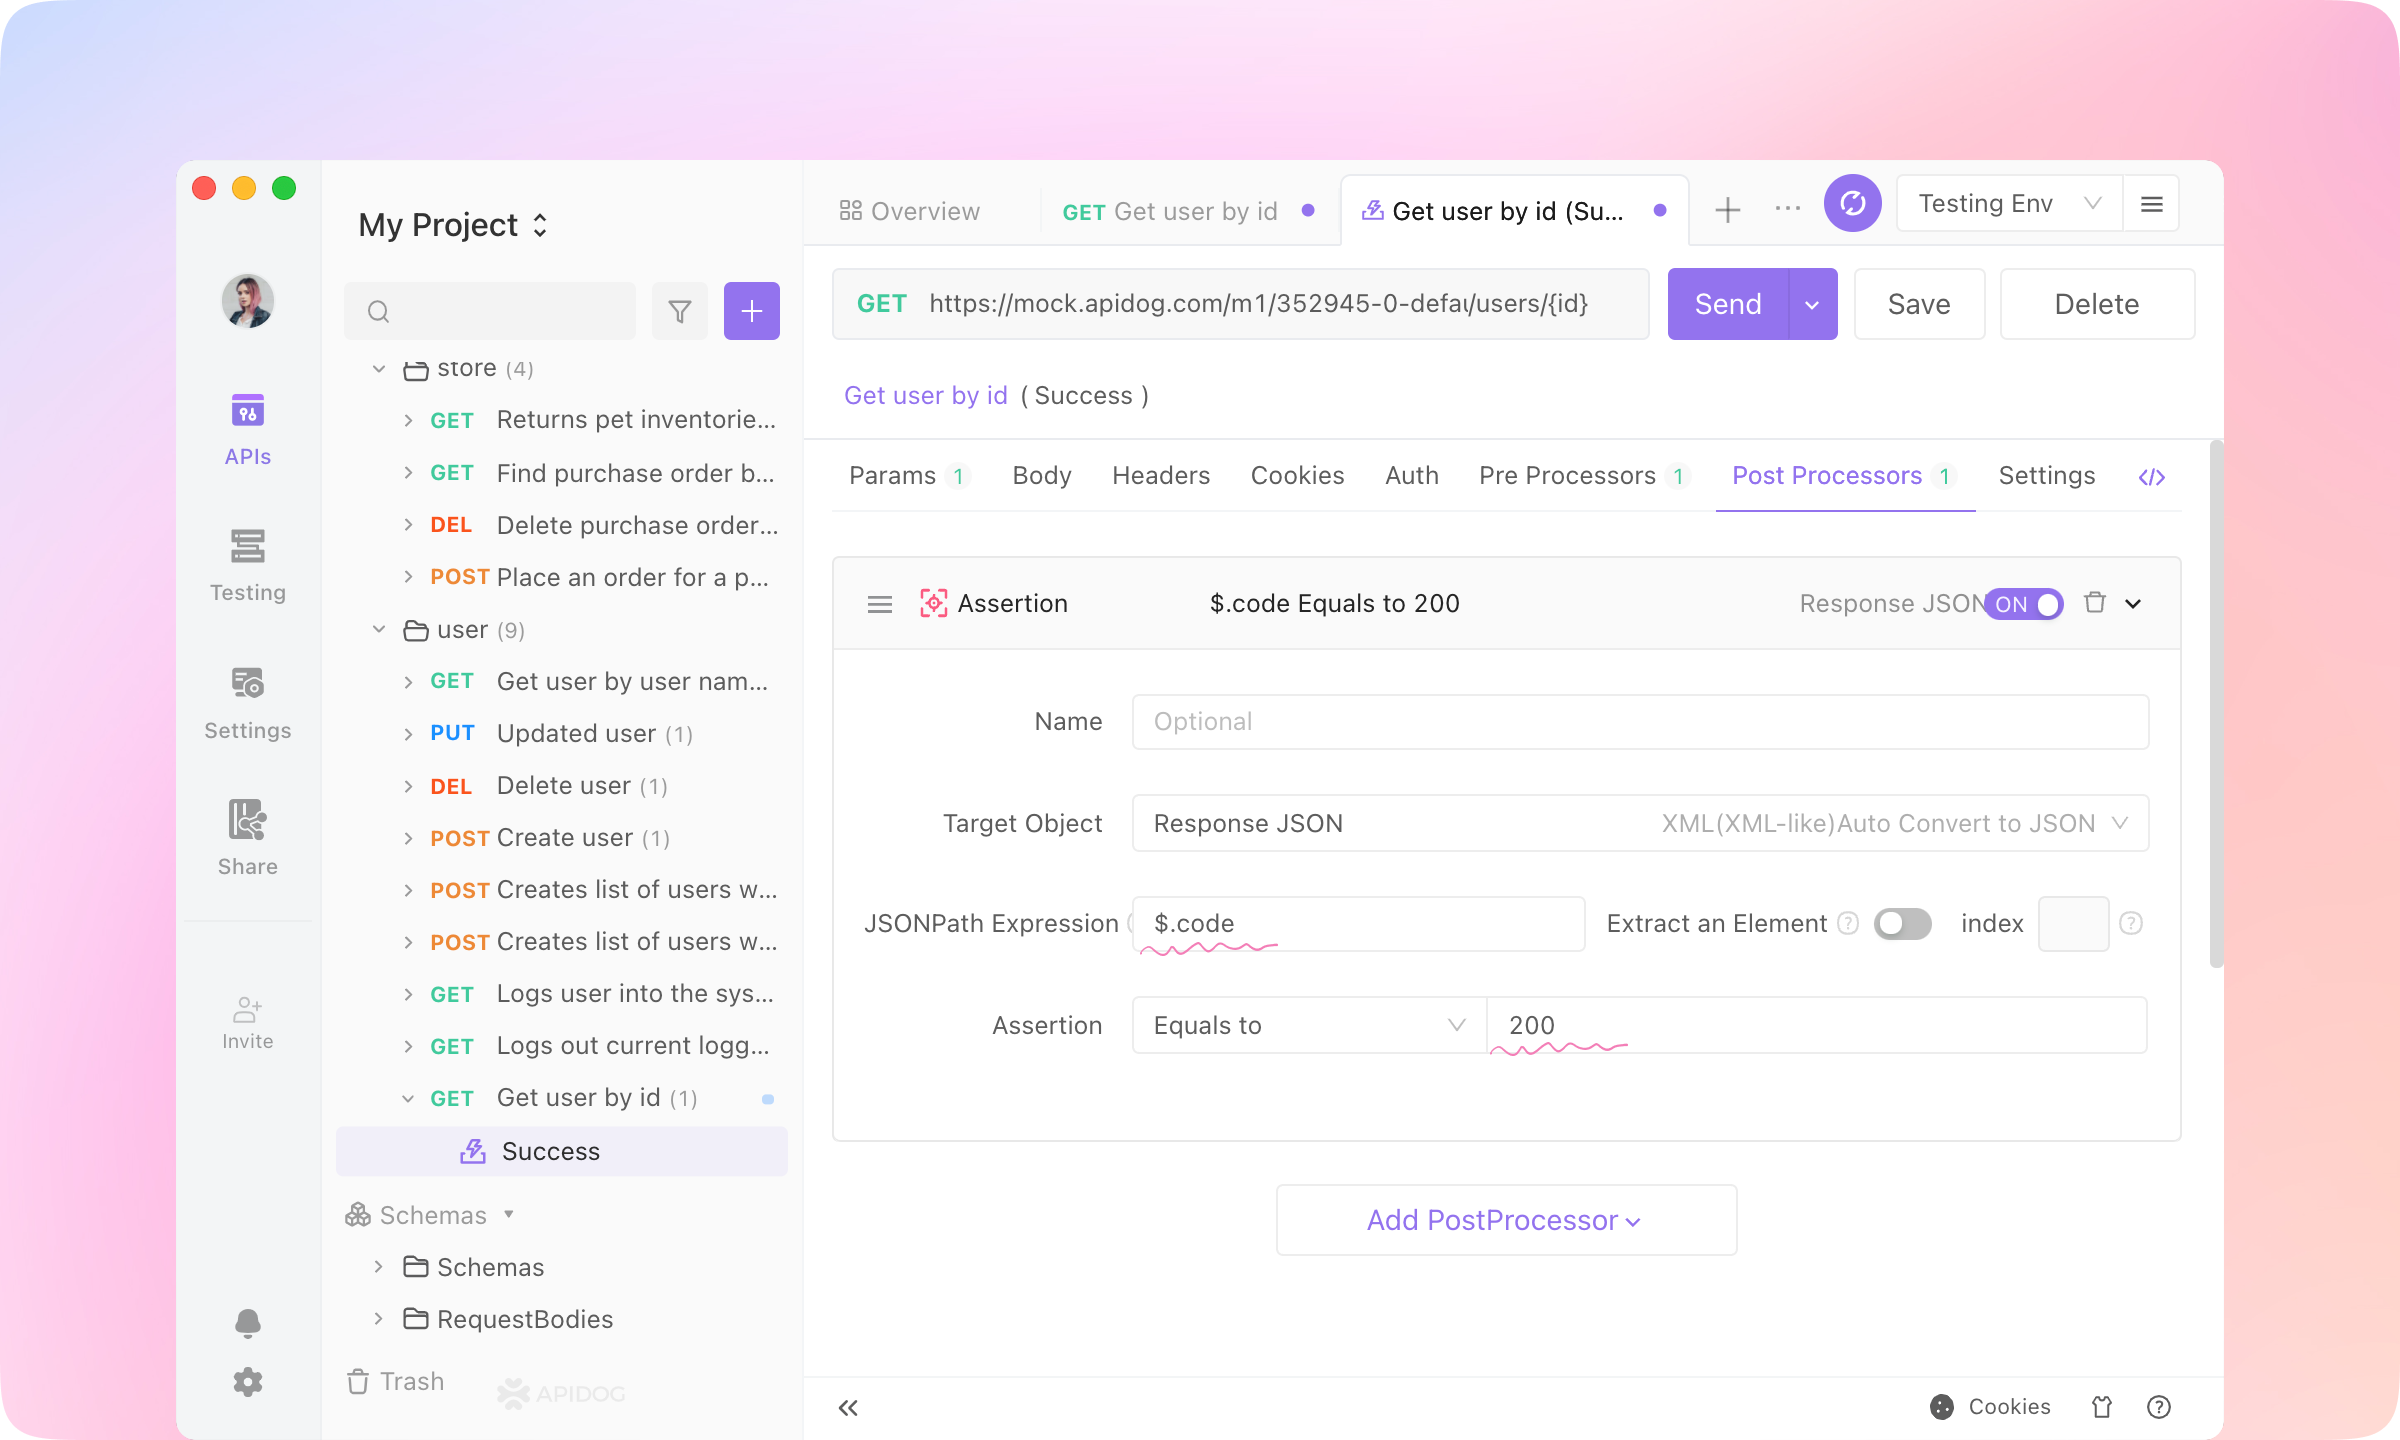
3.
Send the request, and you'll see the Assertion Result.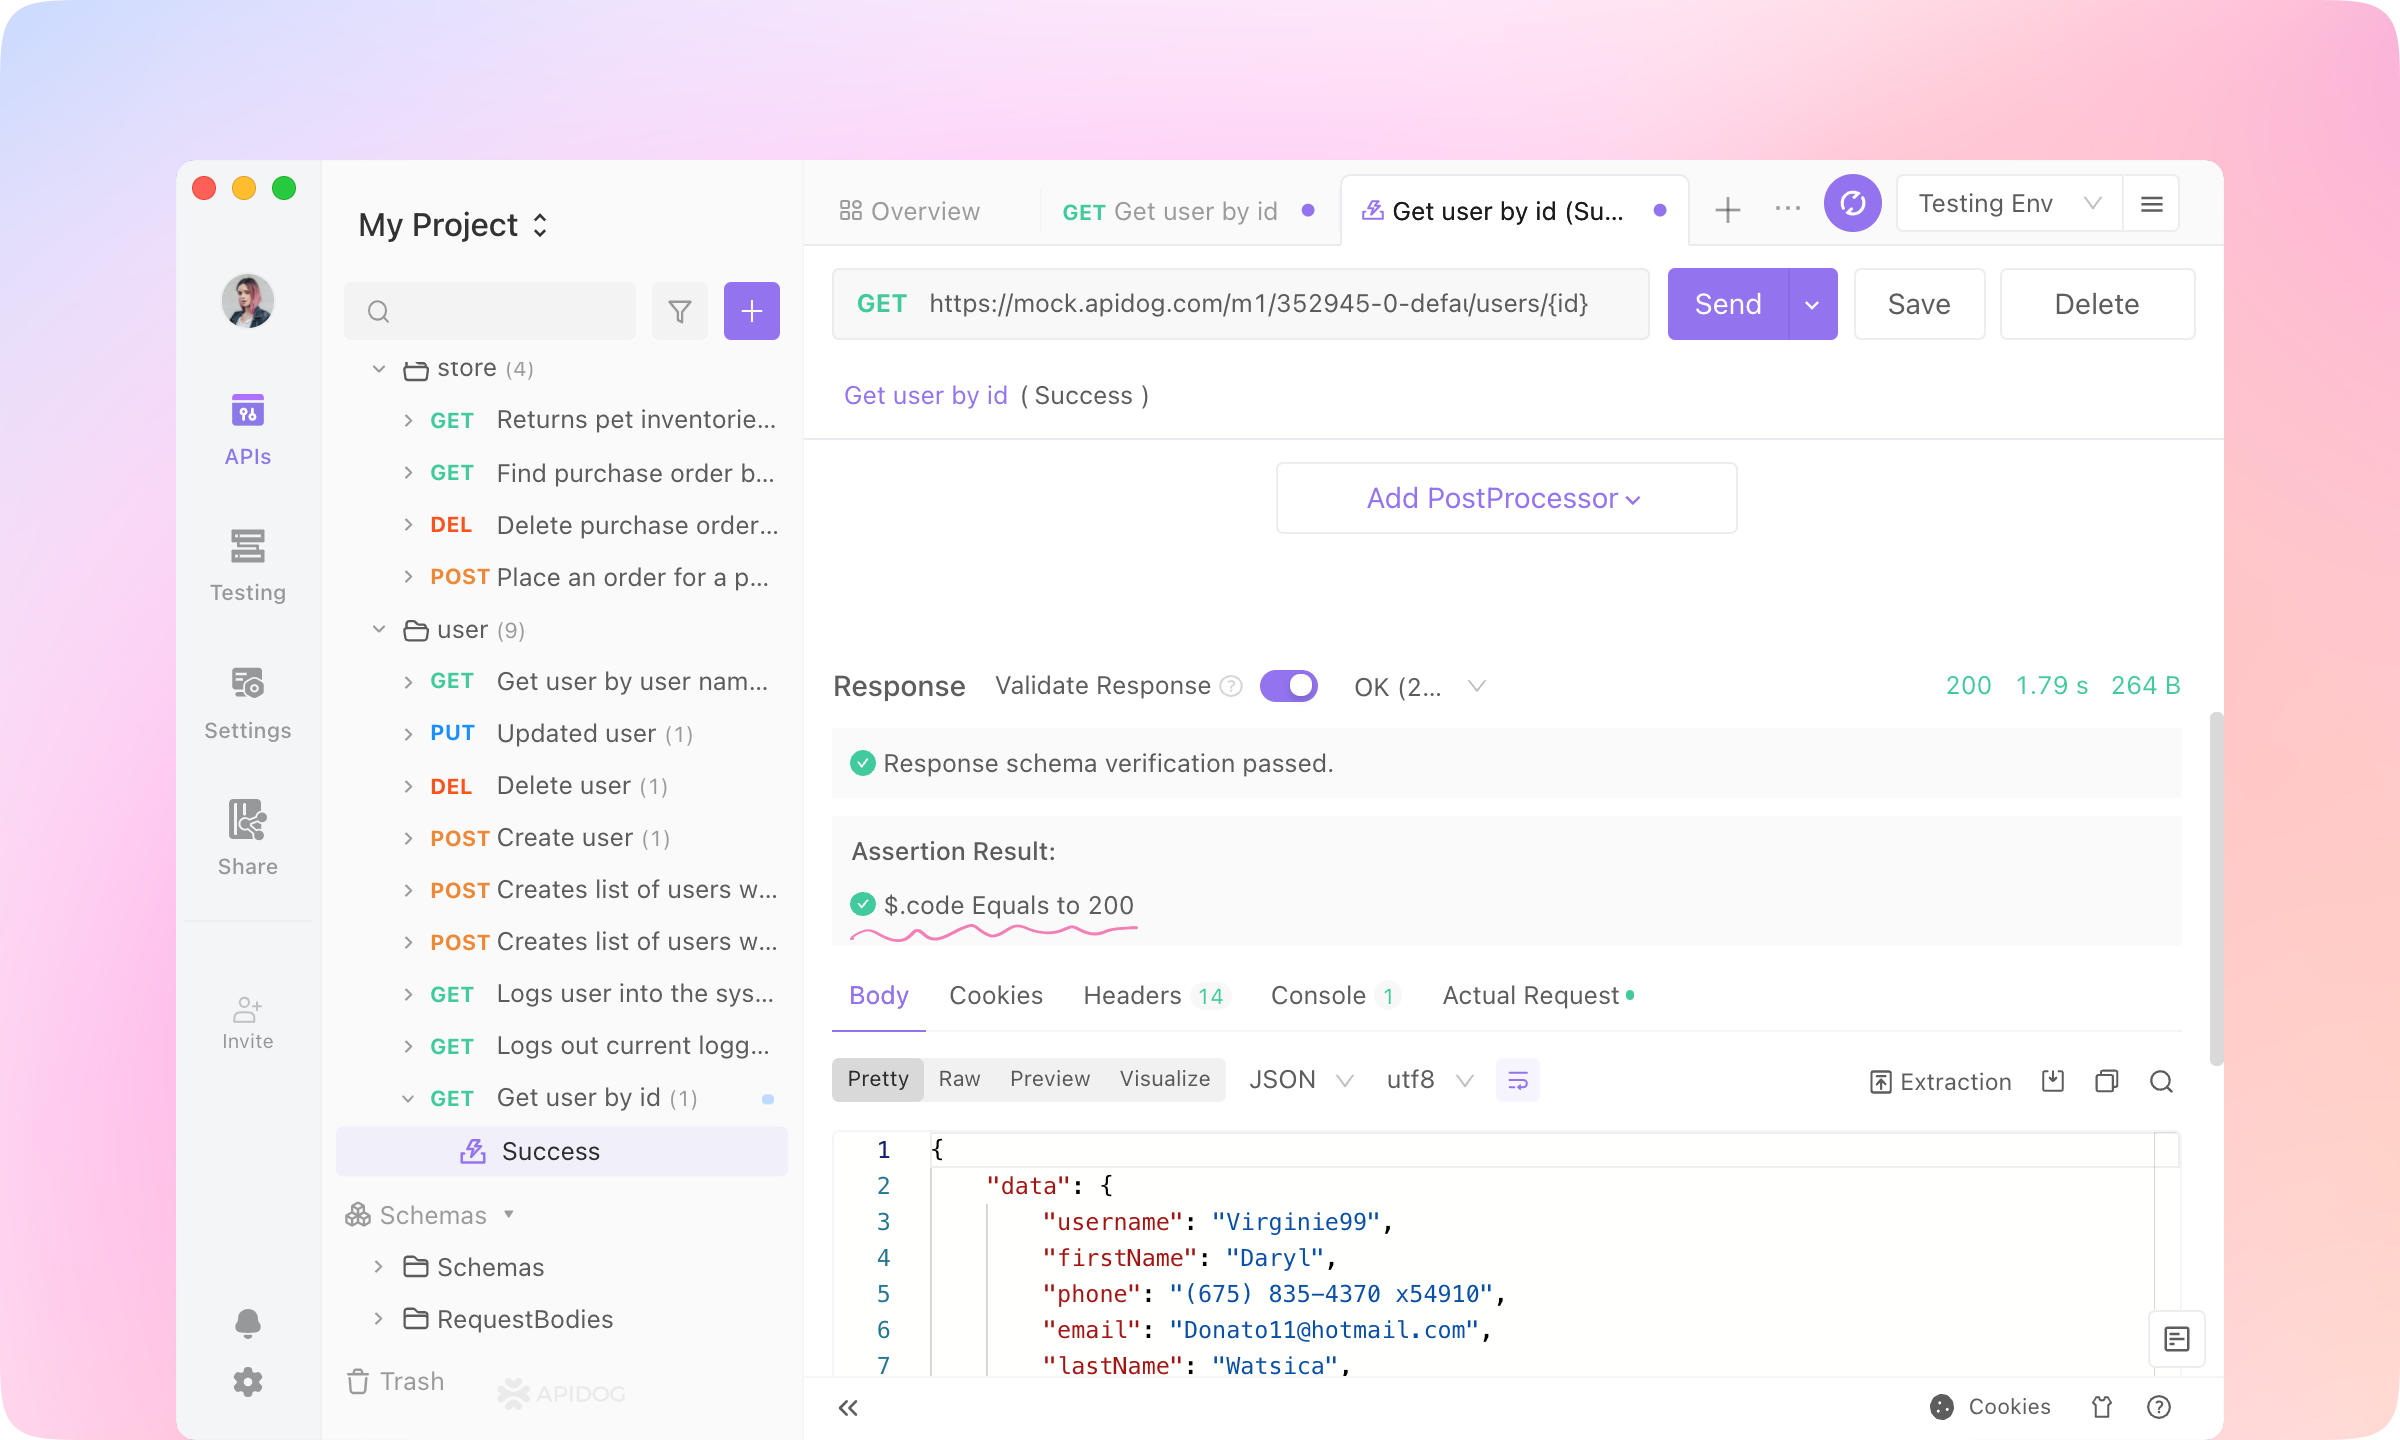
4.
Extract Variable, Custom Script, Public Script, Database Operation, and Wait can also be added to Post Processors.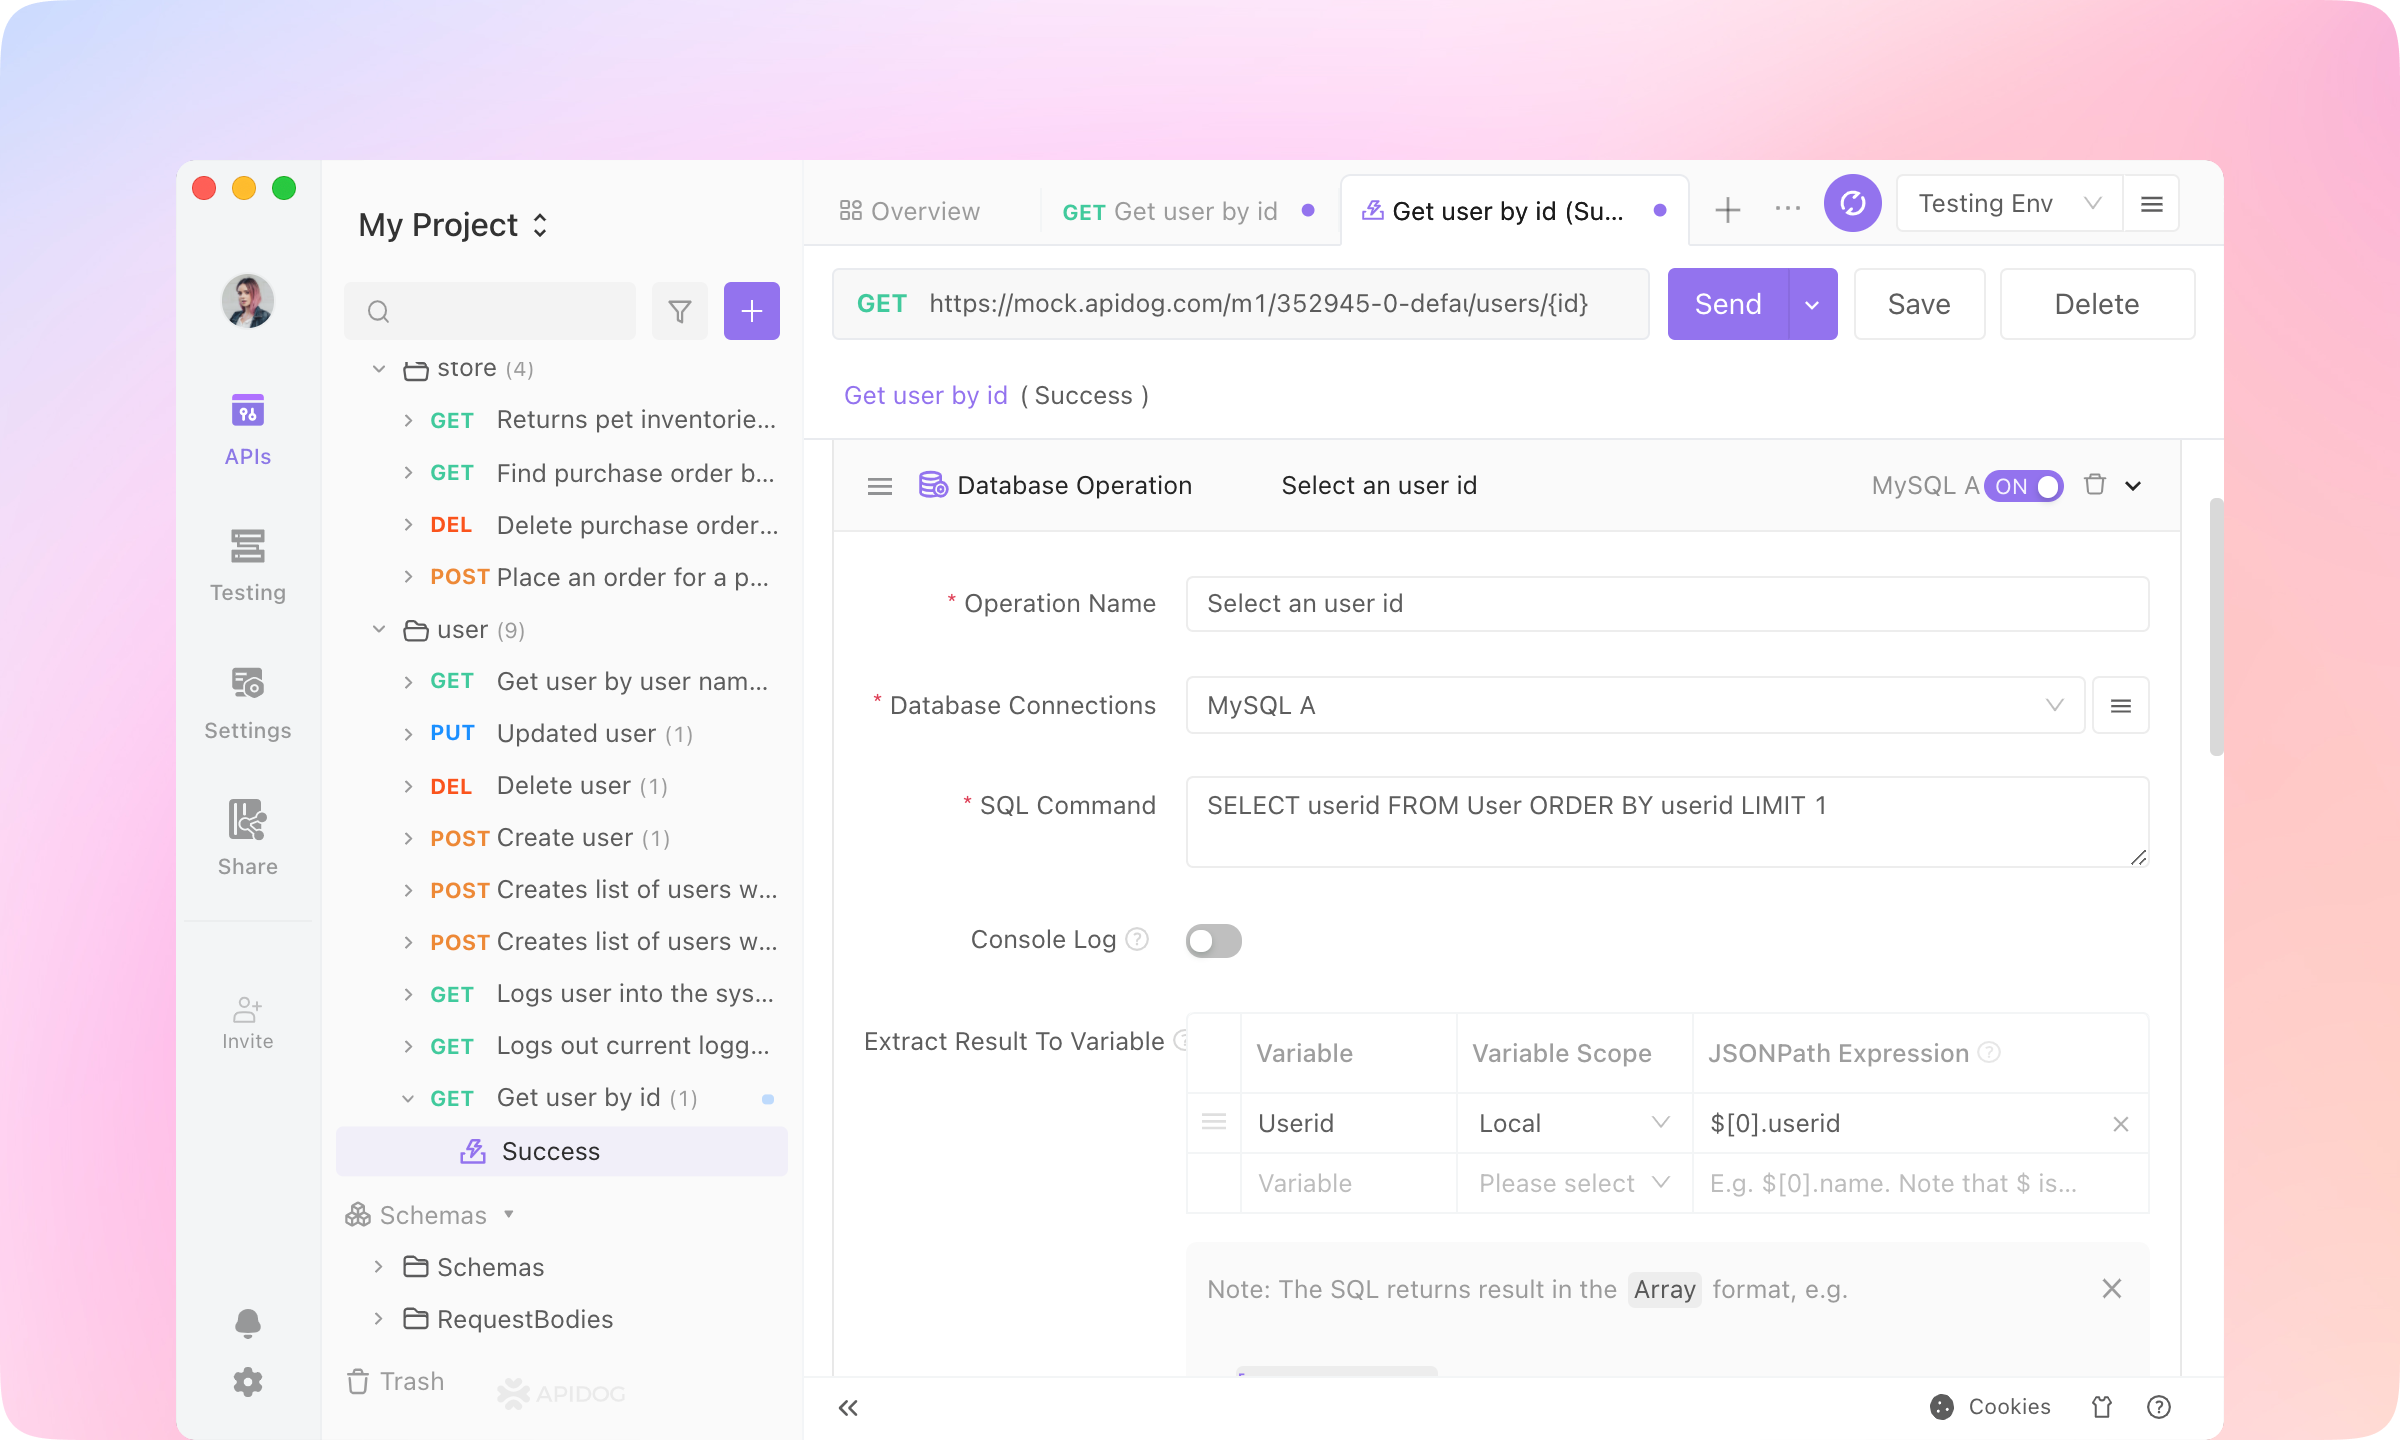
TIP
Test Scenarios
1.
Testing module. Create a New Test Case.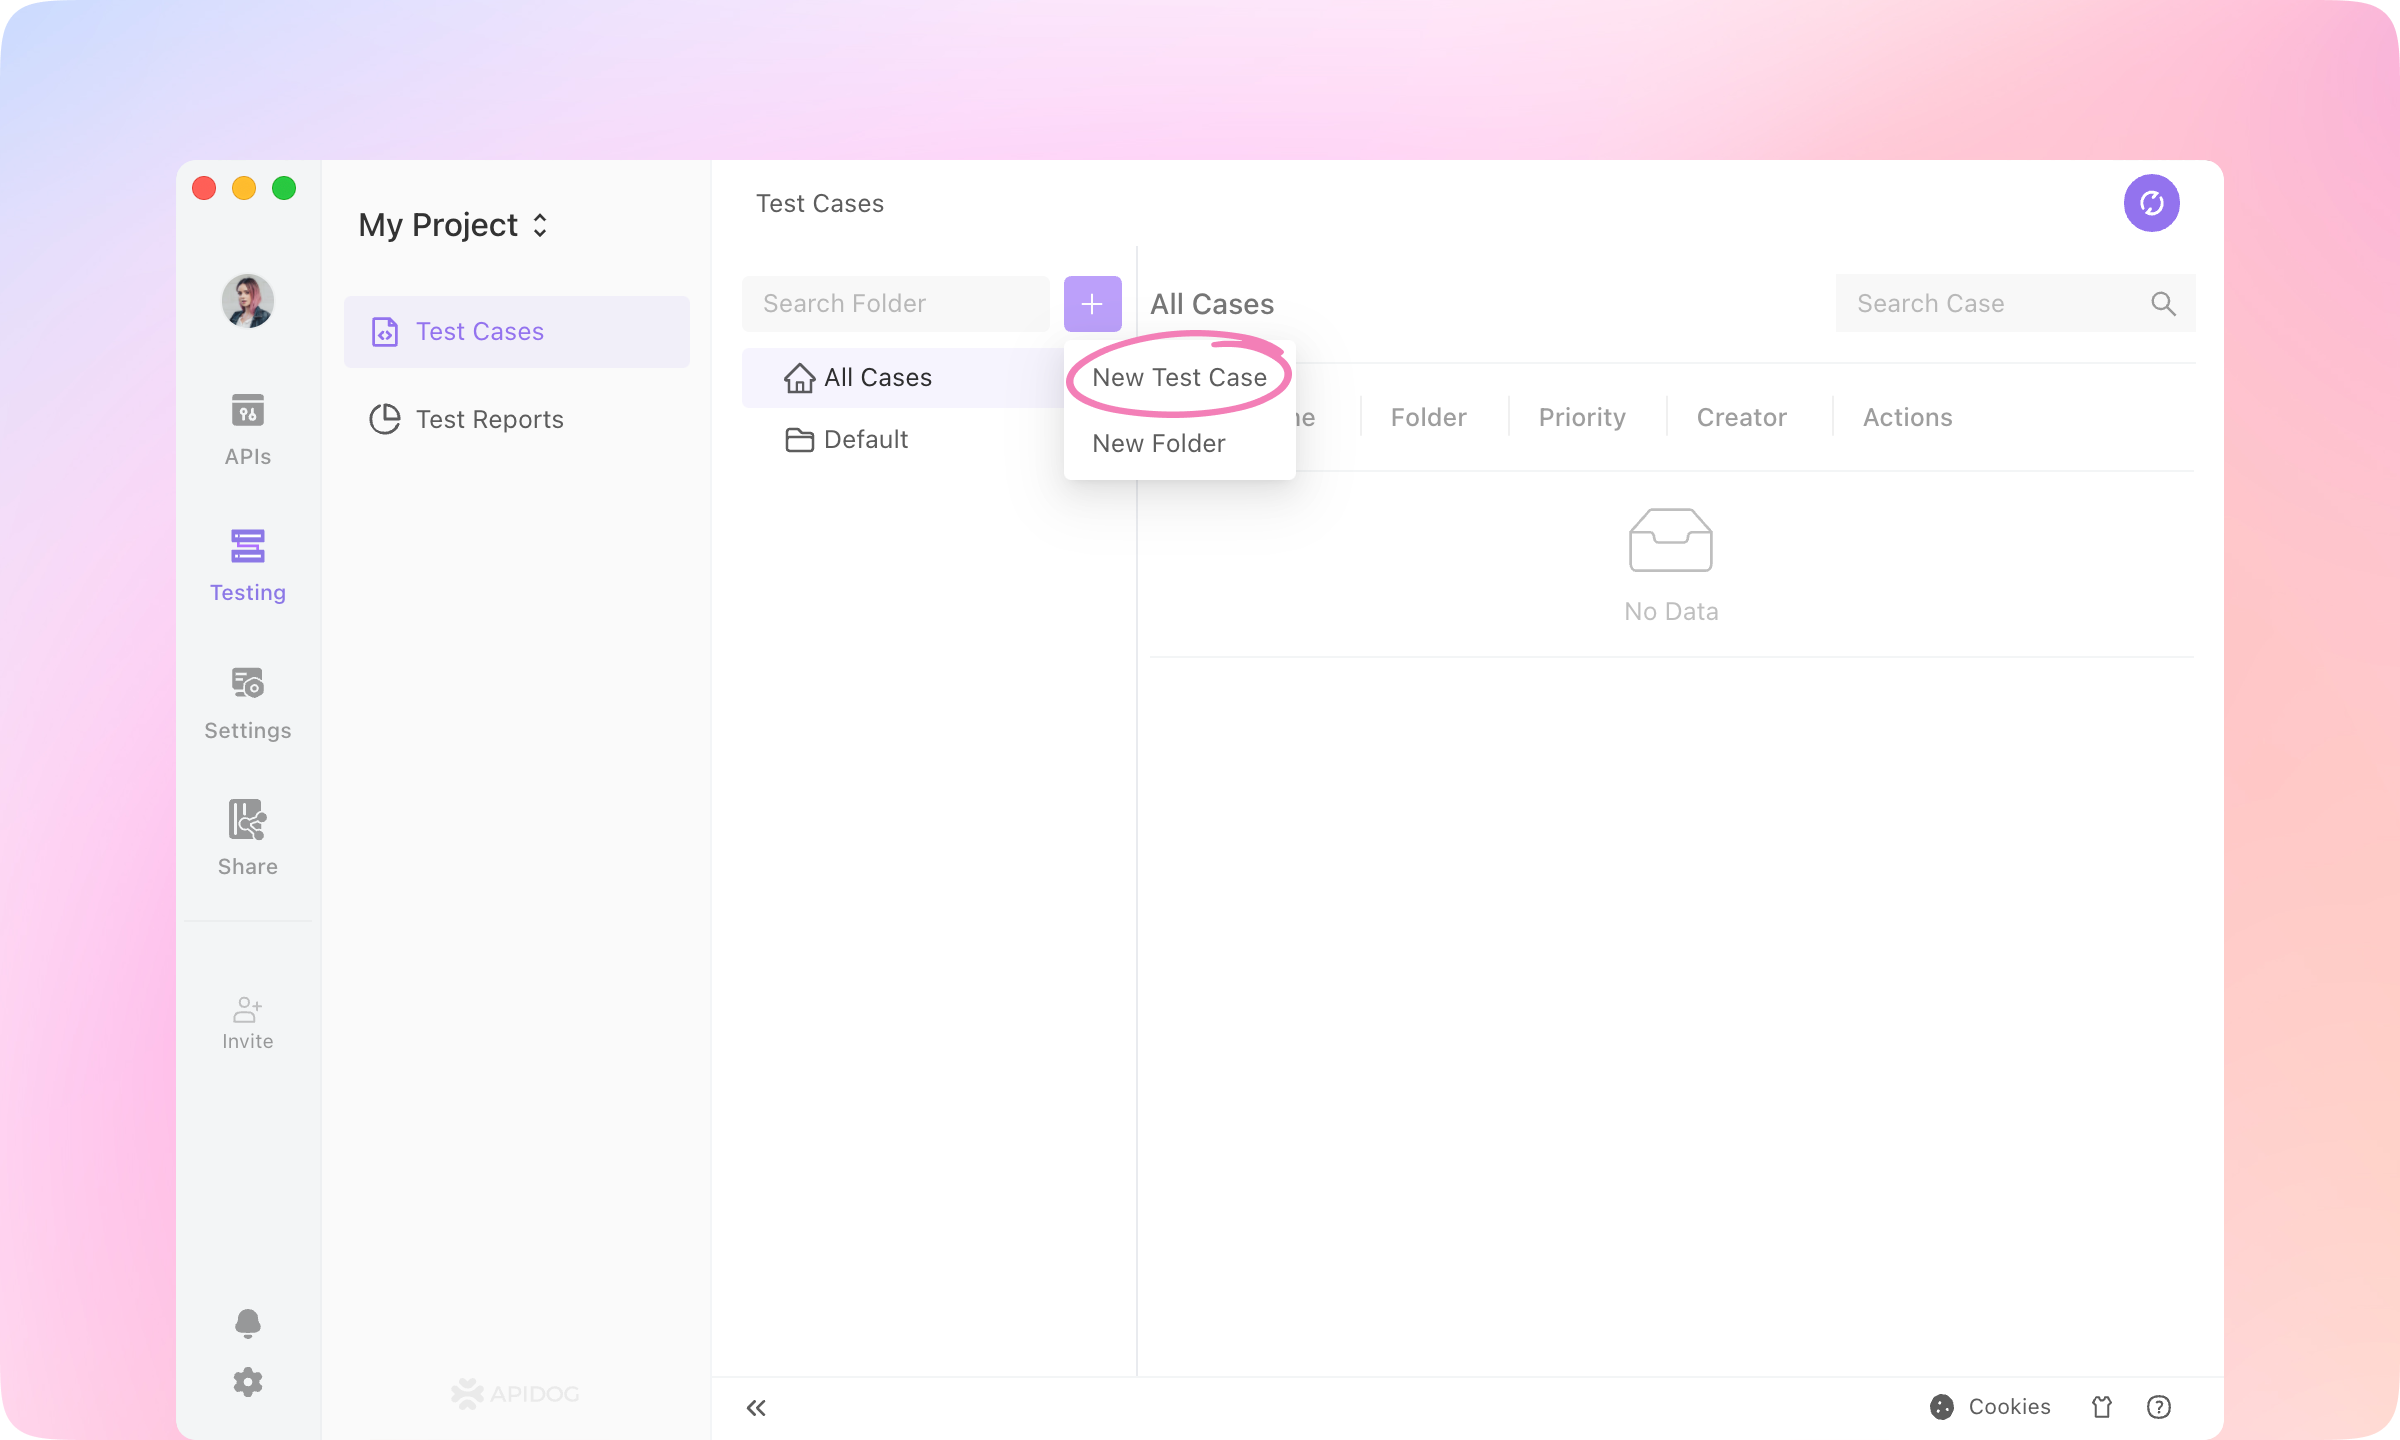

2.
Add Step and select Import from API Cases.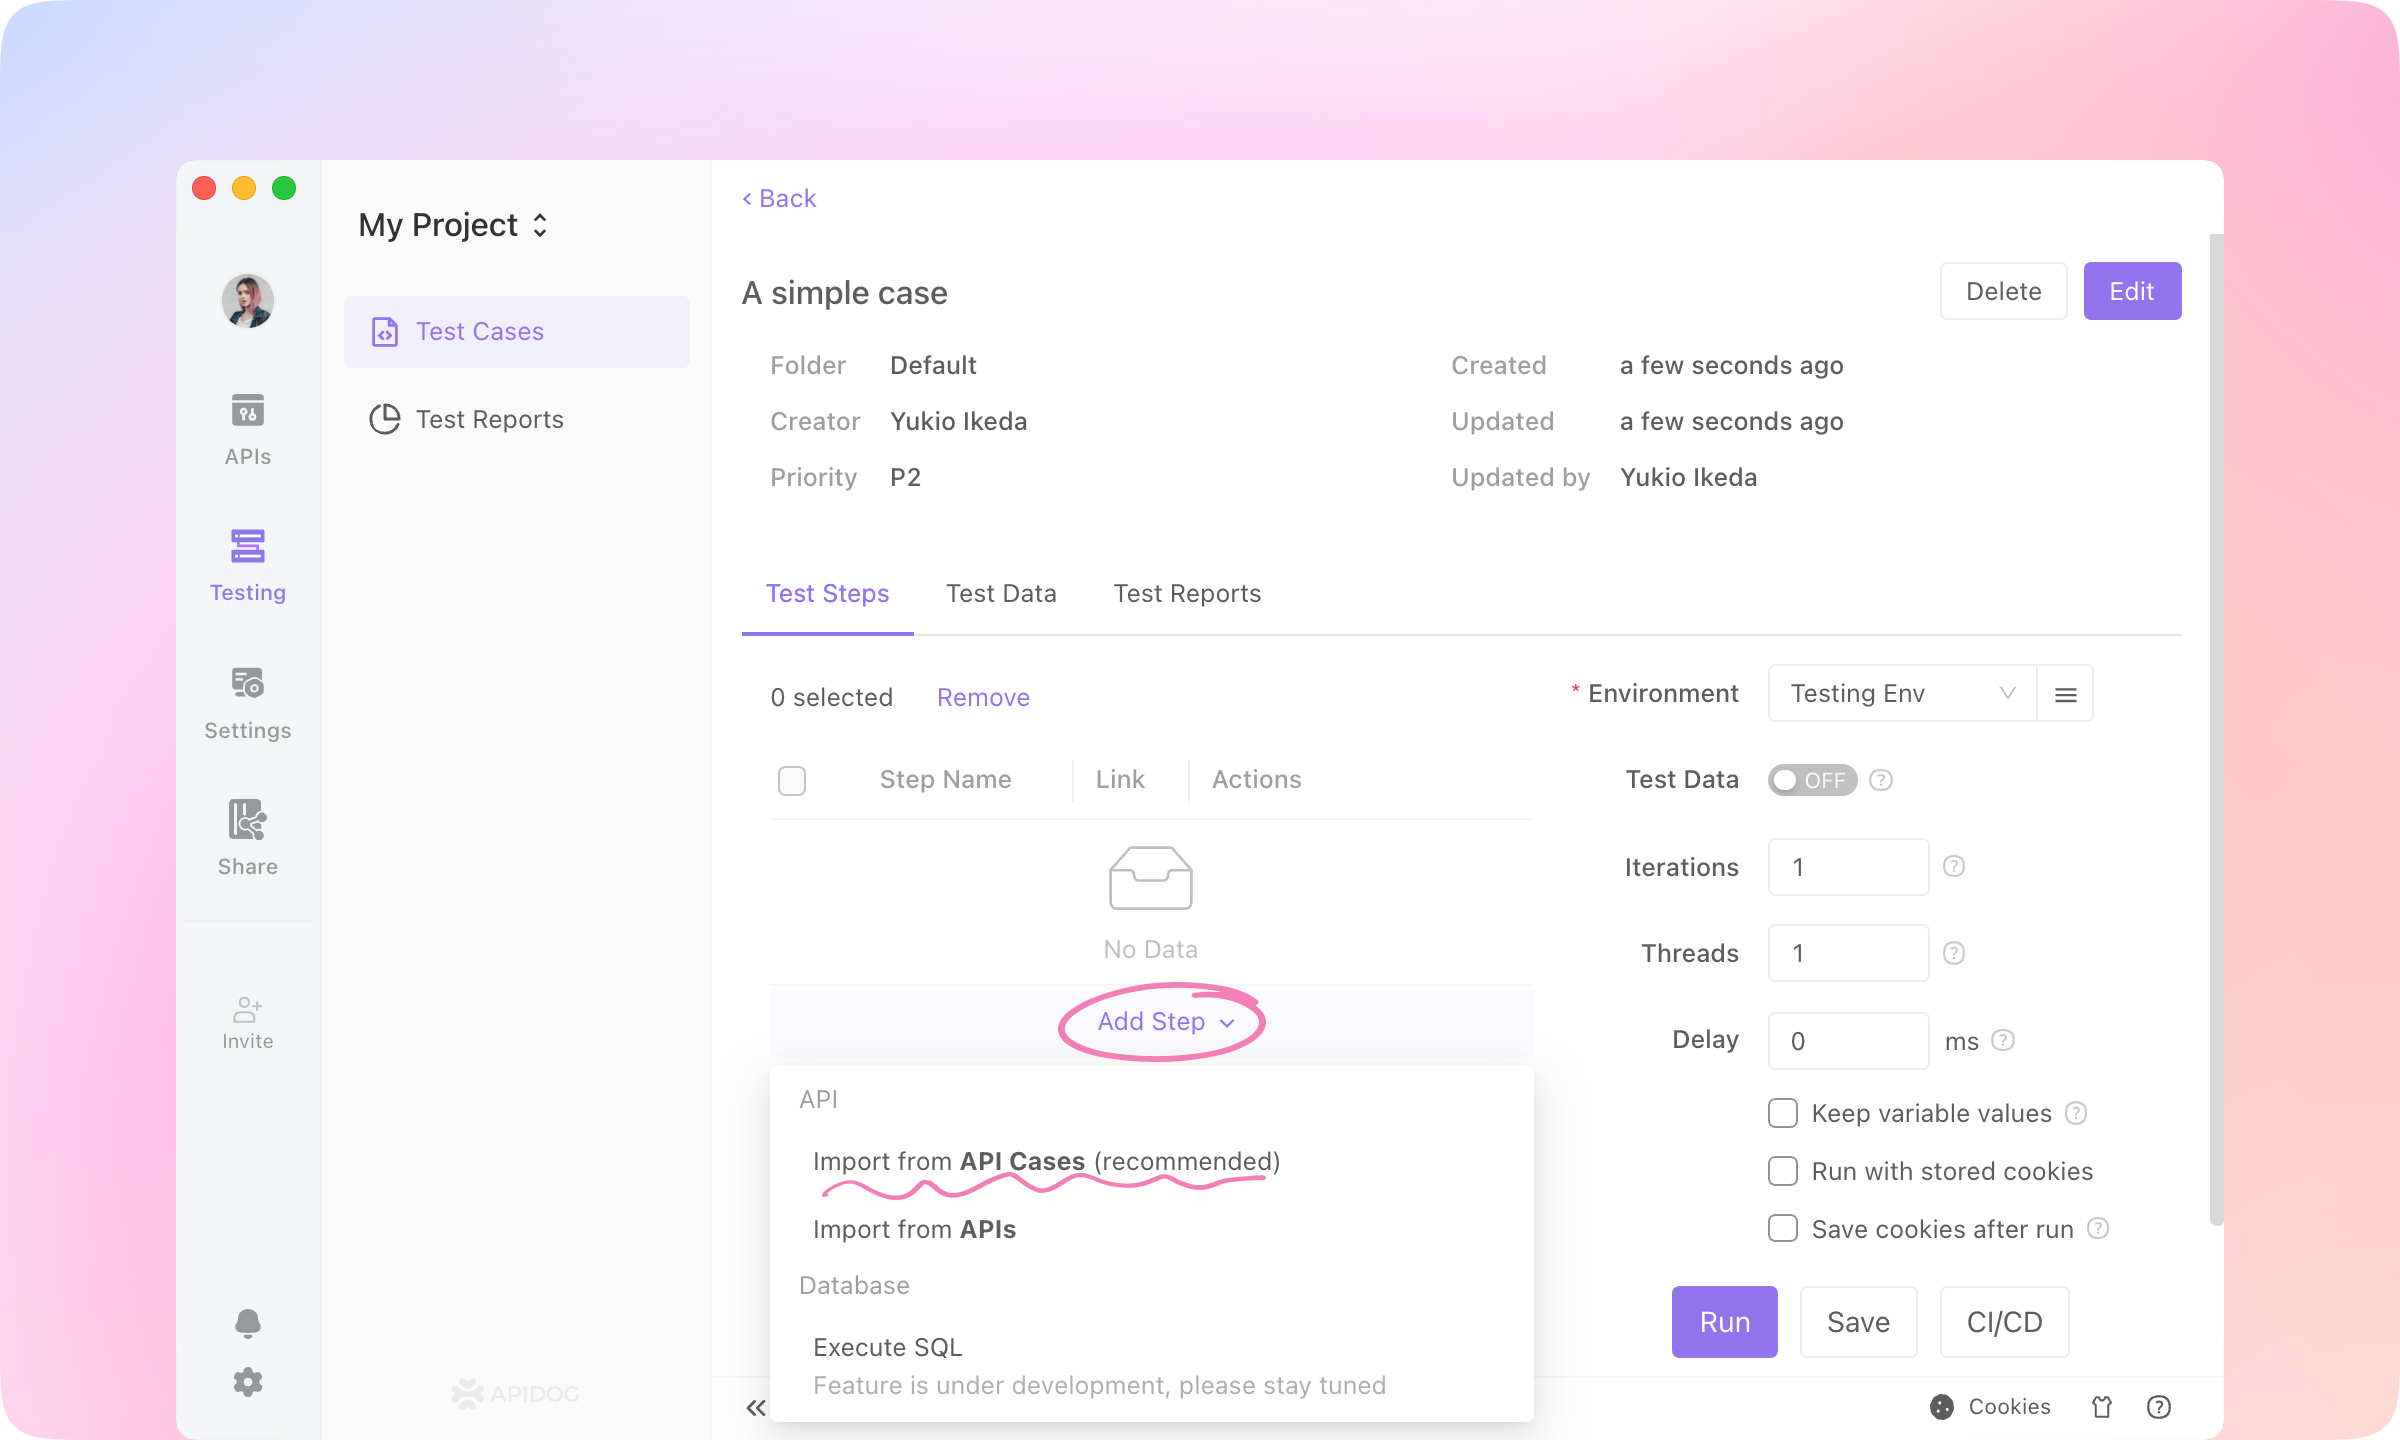
3.
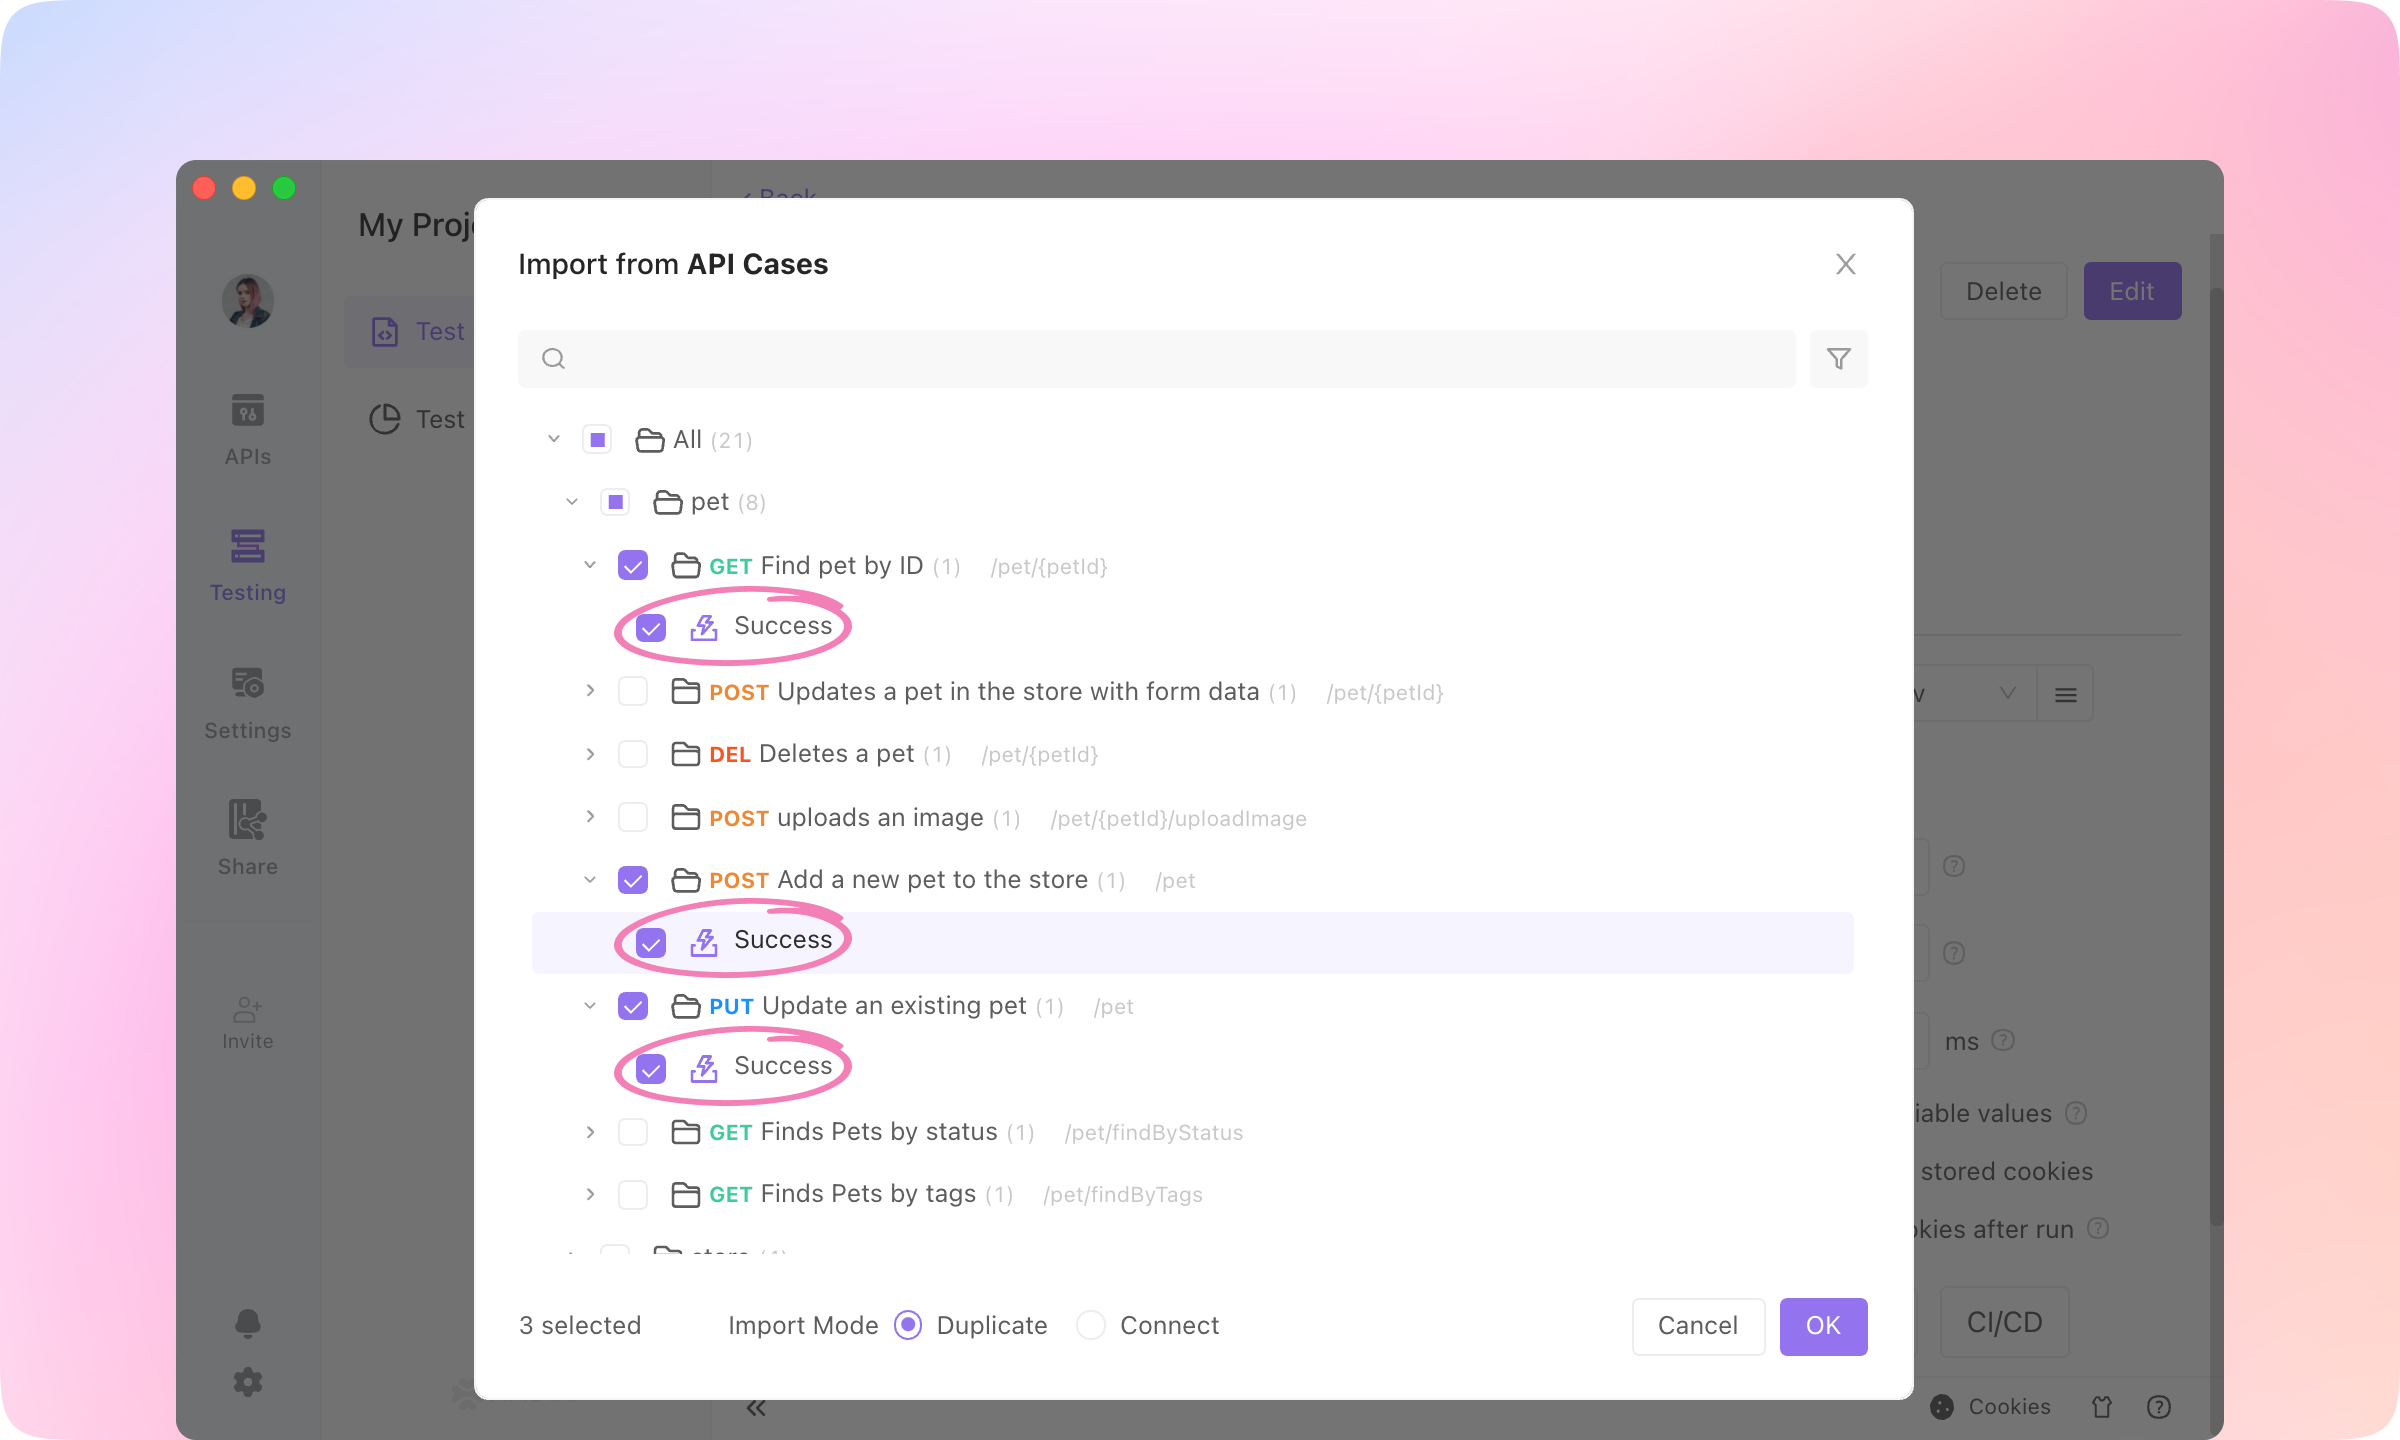
4.
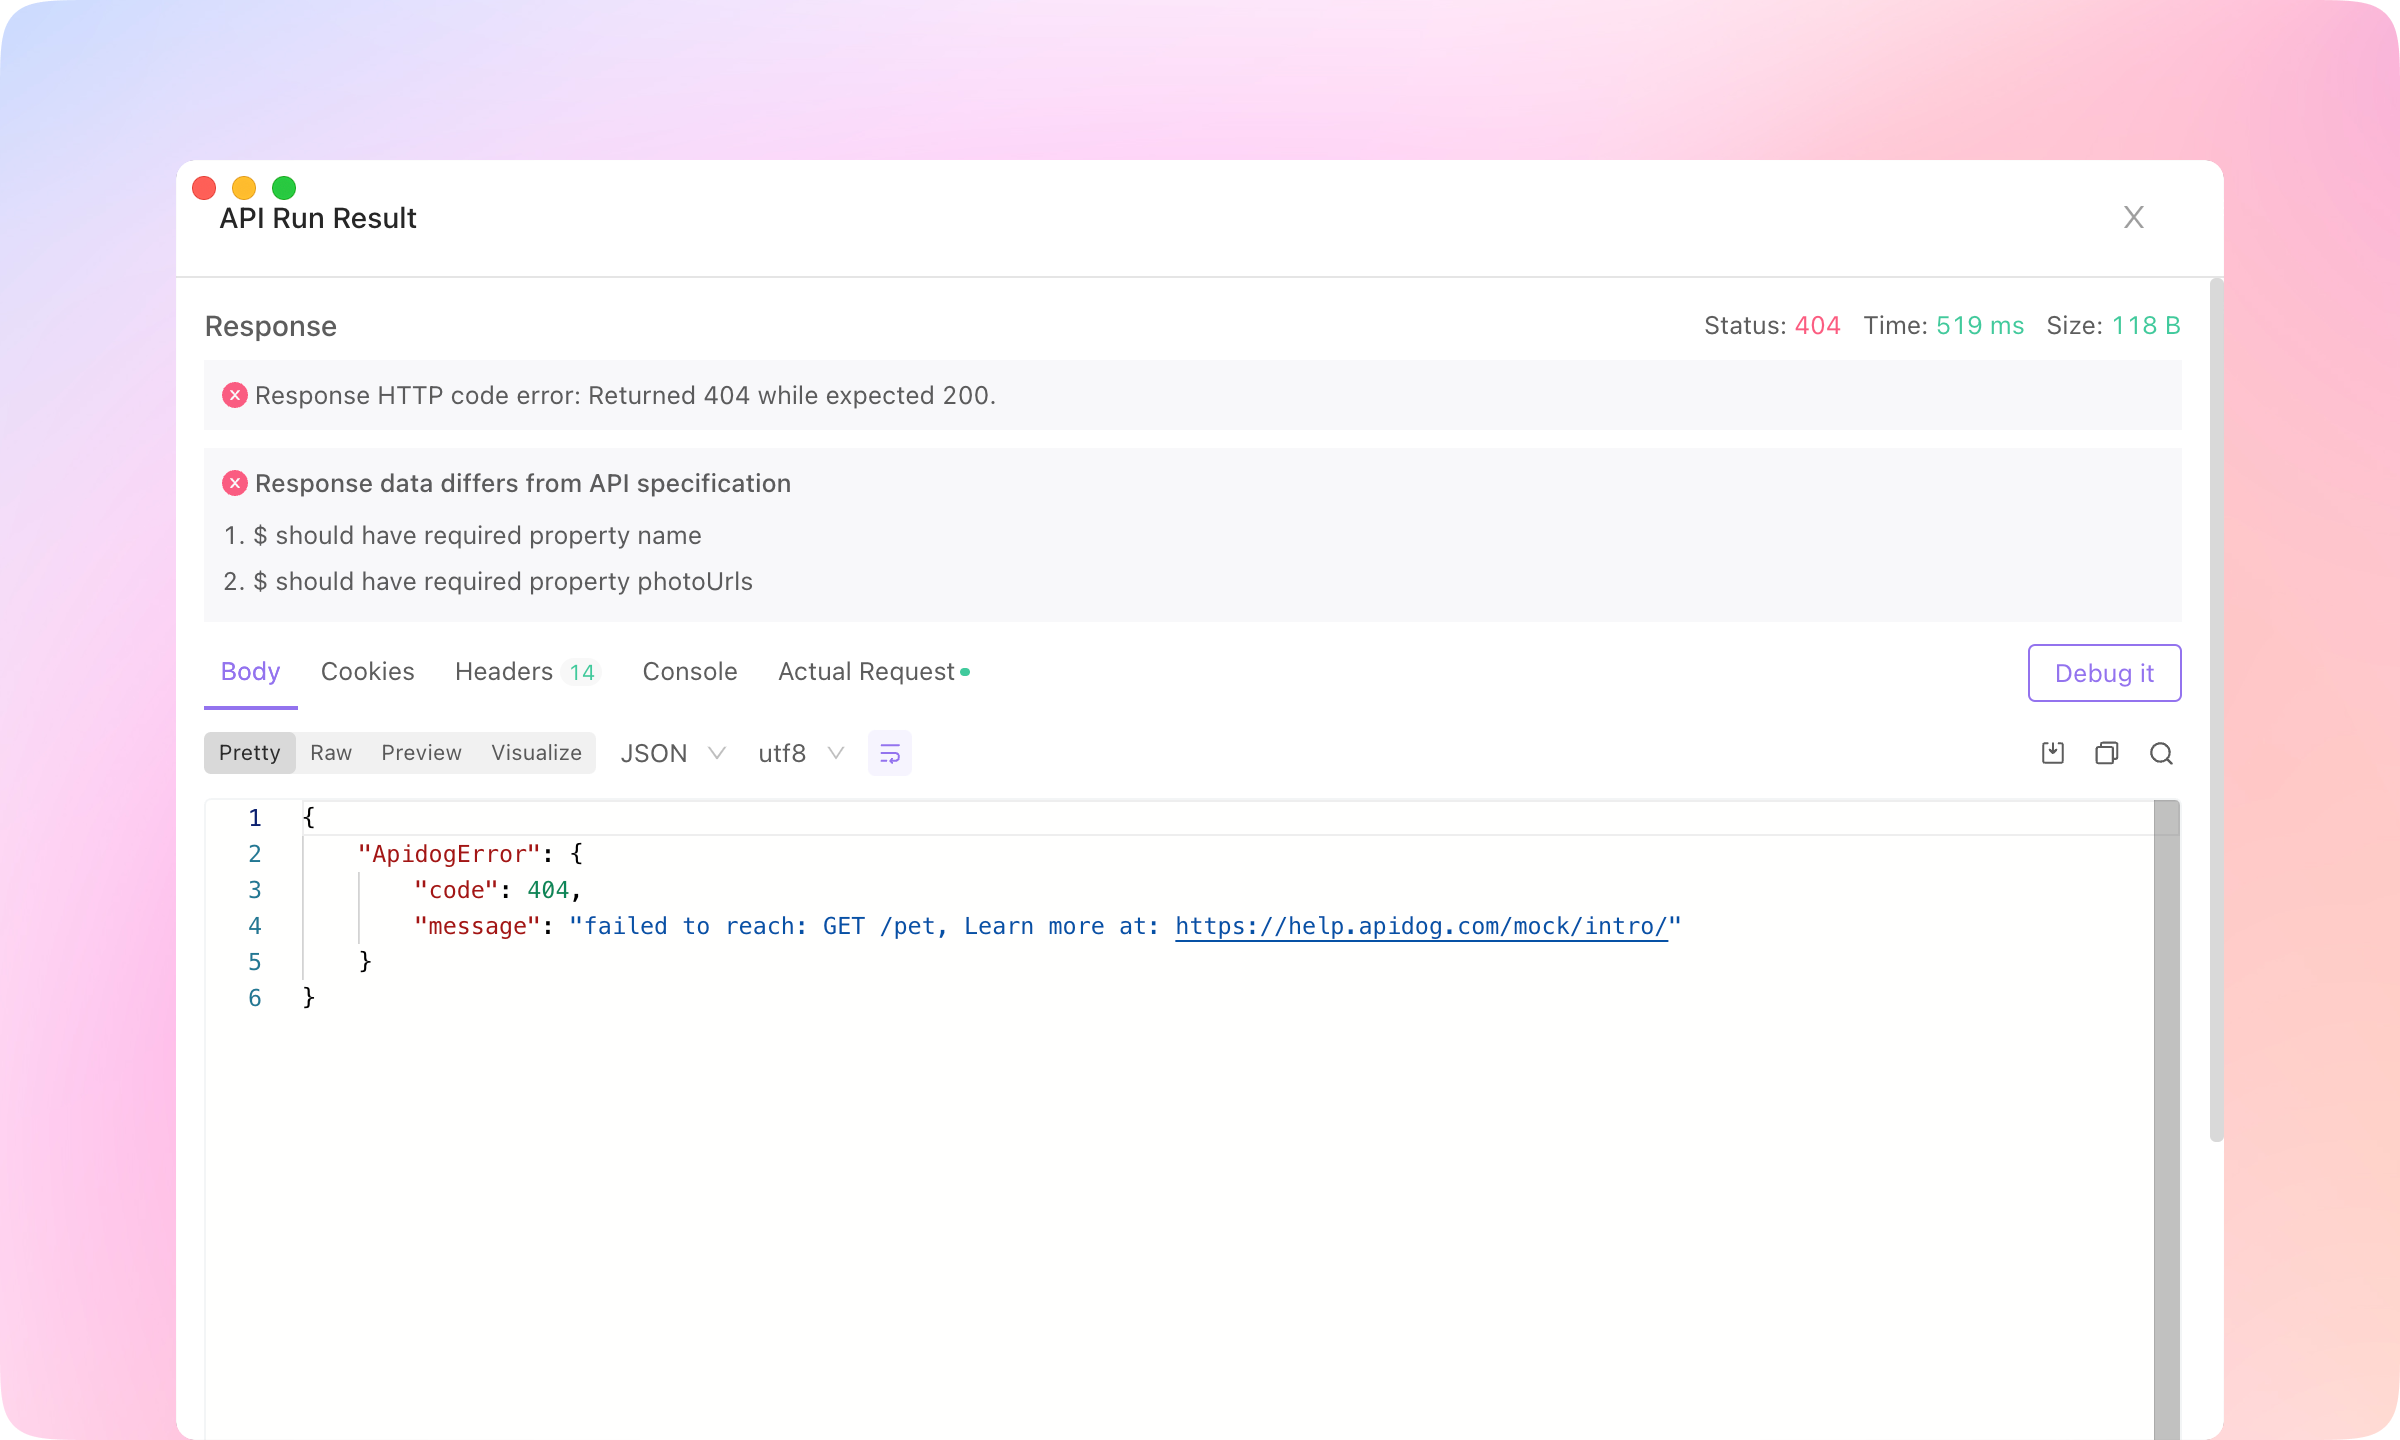
Run to execute the test case. Then you'll see a test report, and the details of each request.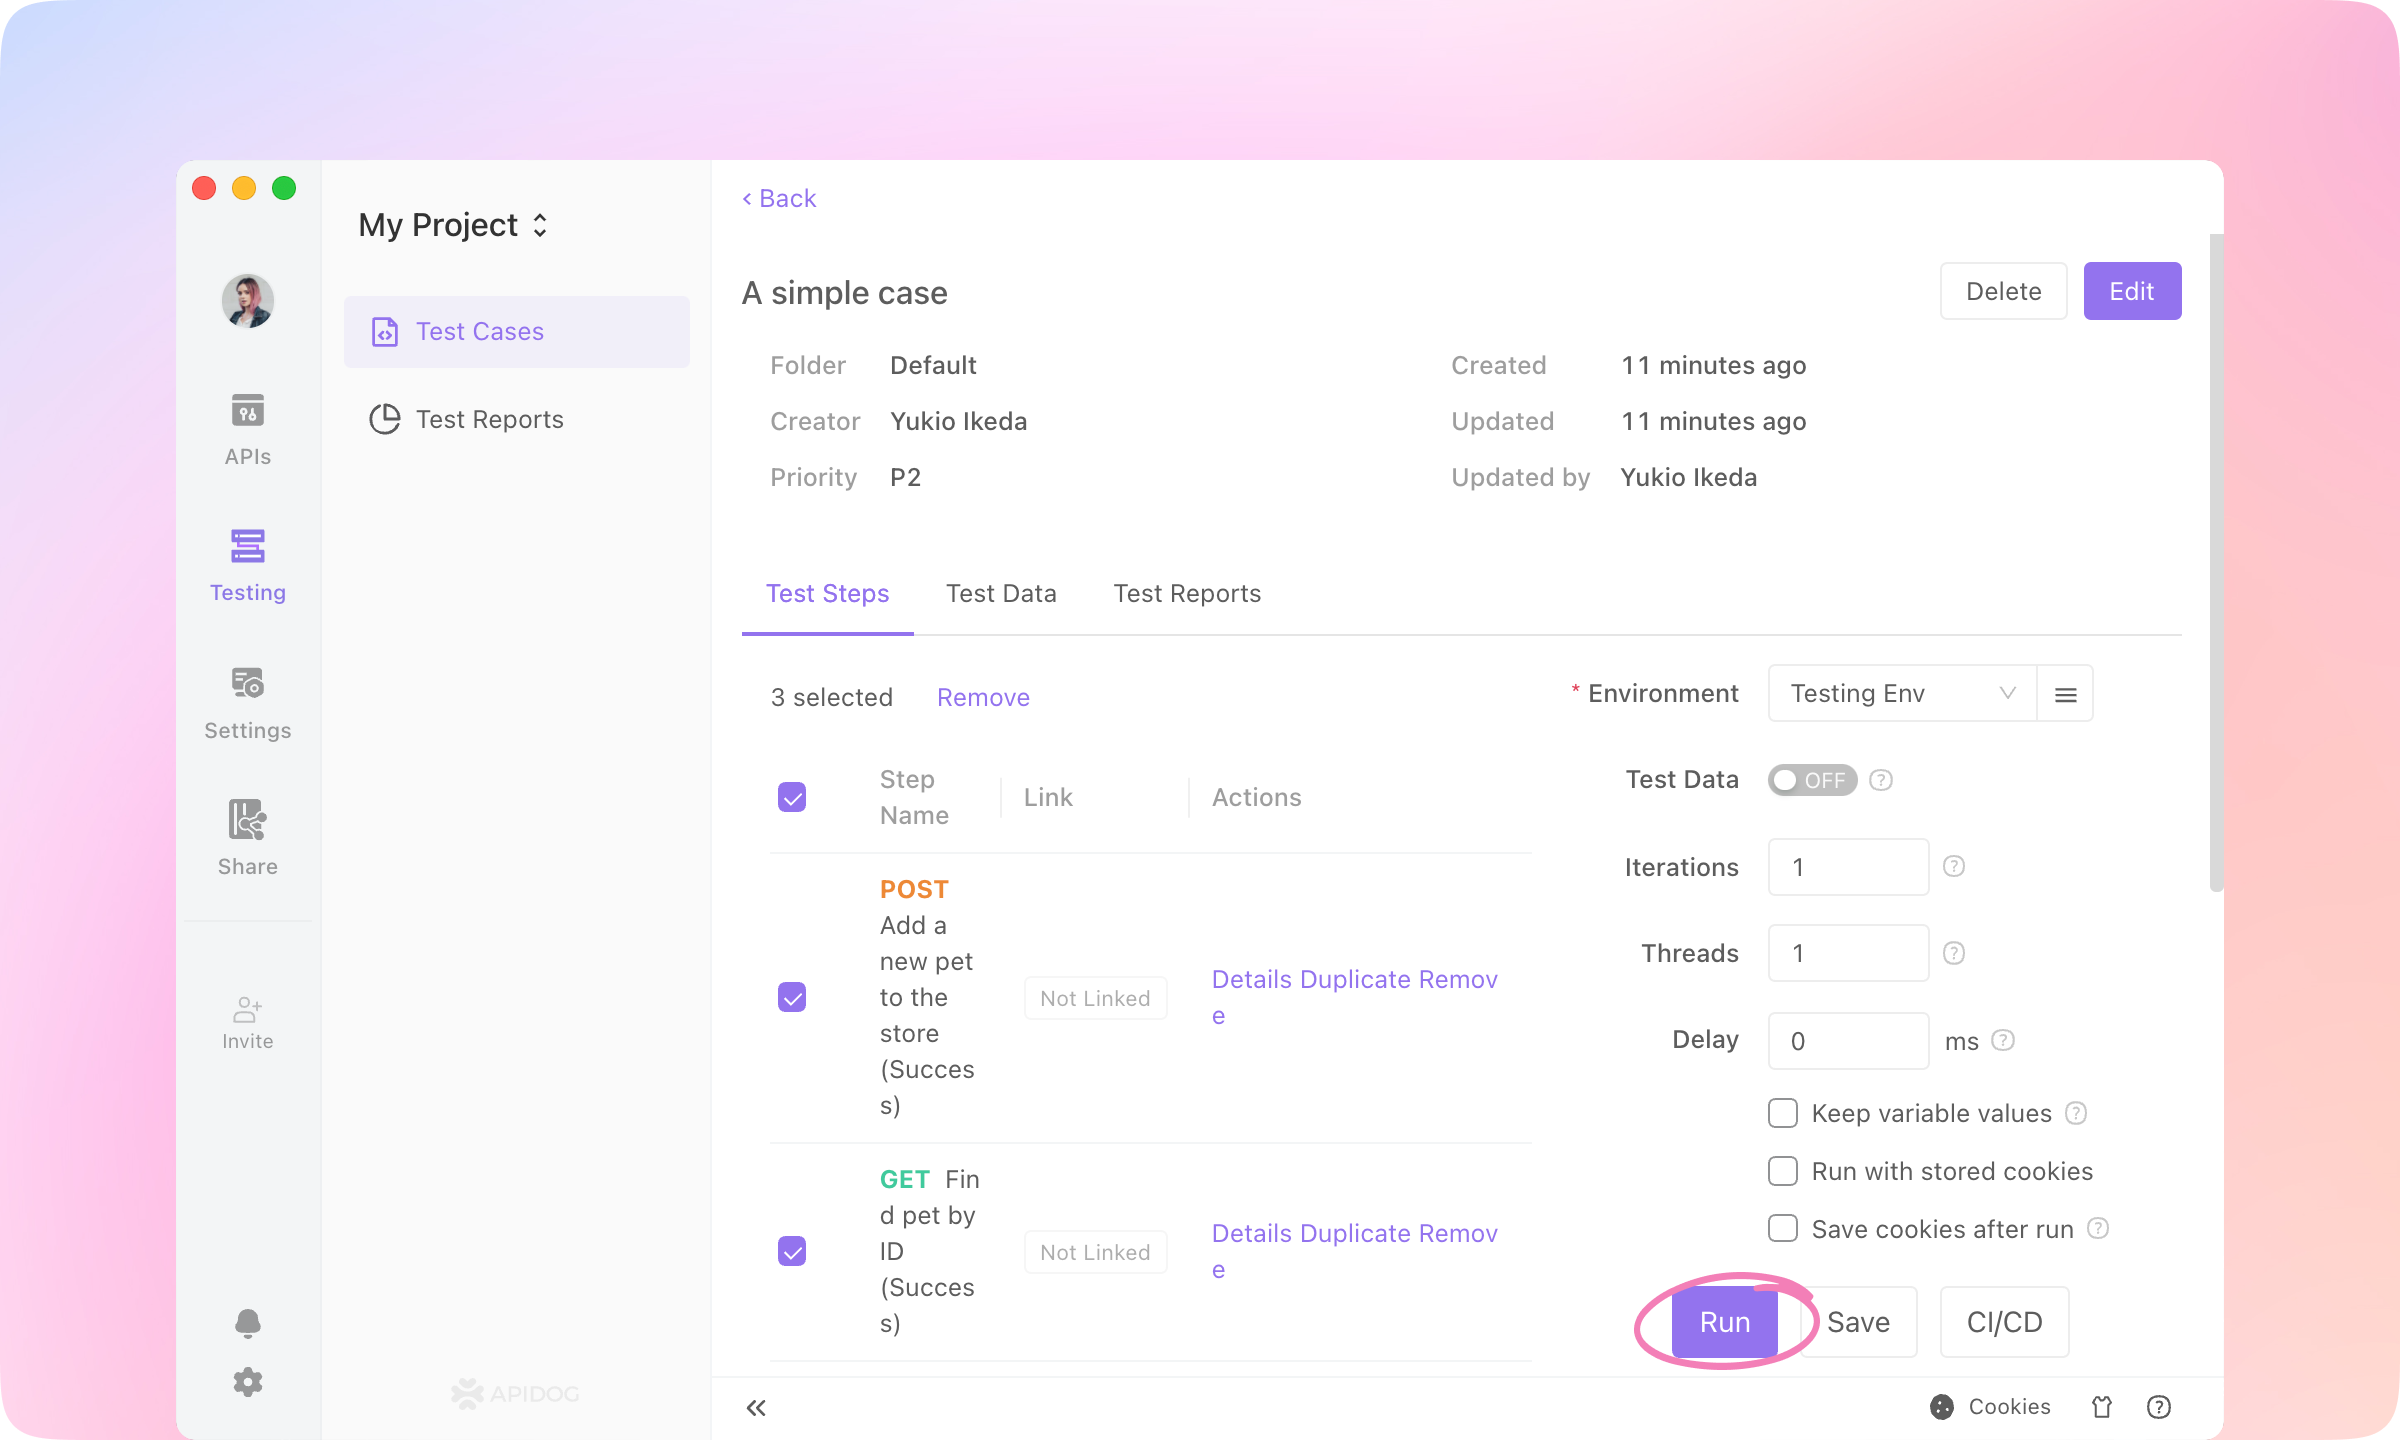
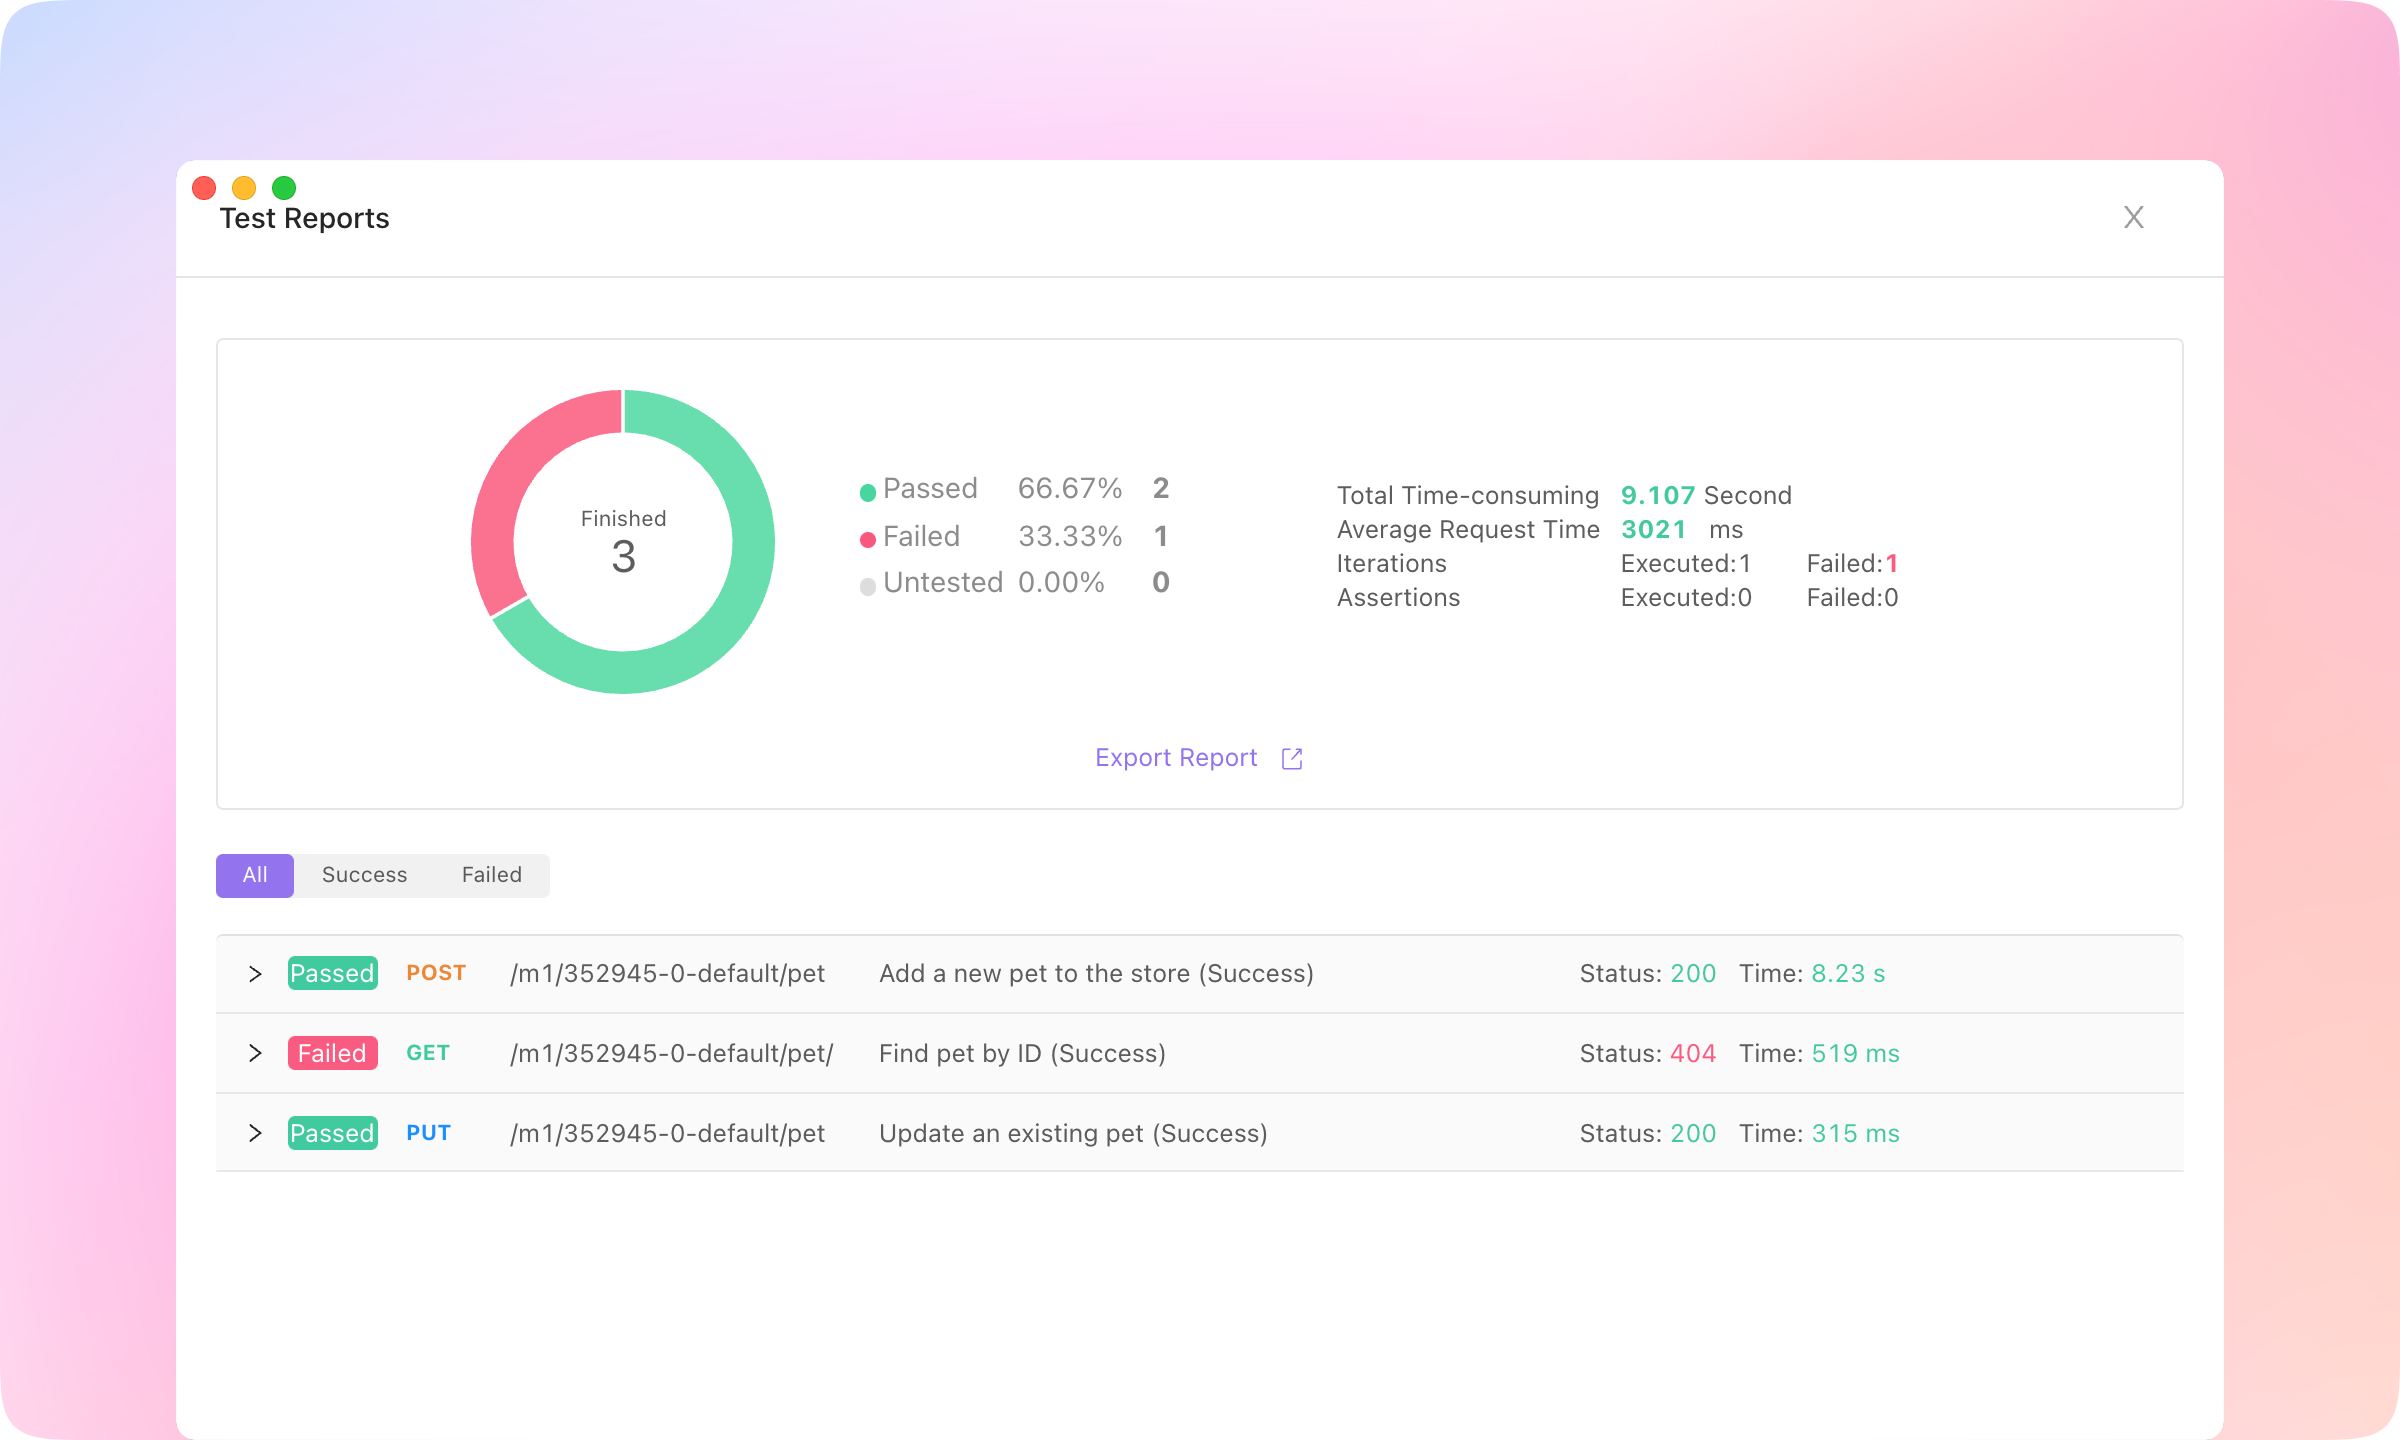
5.
More to see what went wrong with the failed API and compare the response with the assertions to locate the problem.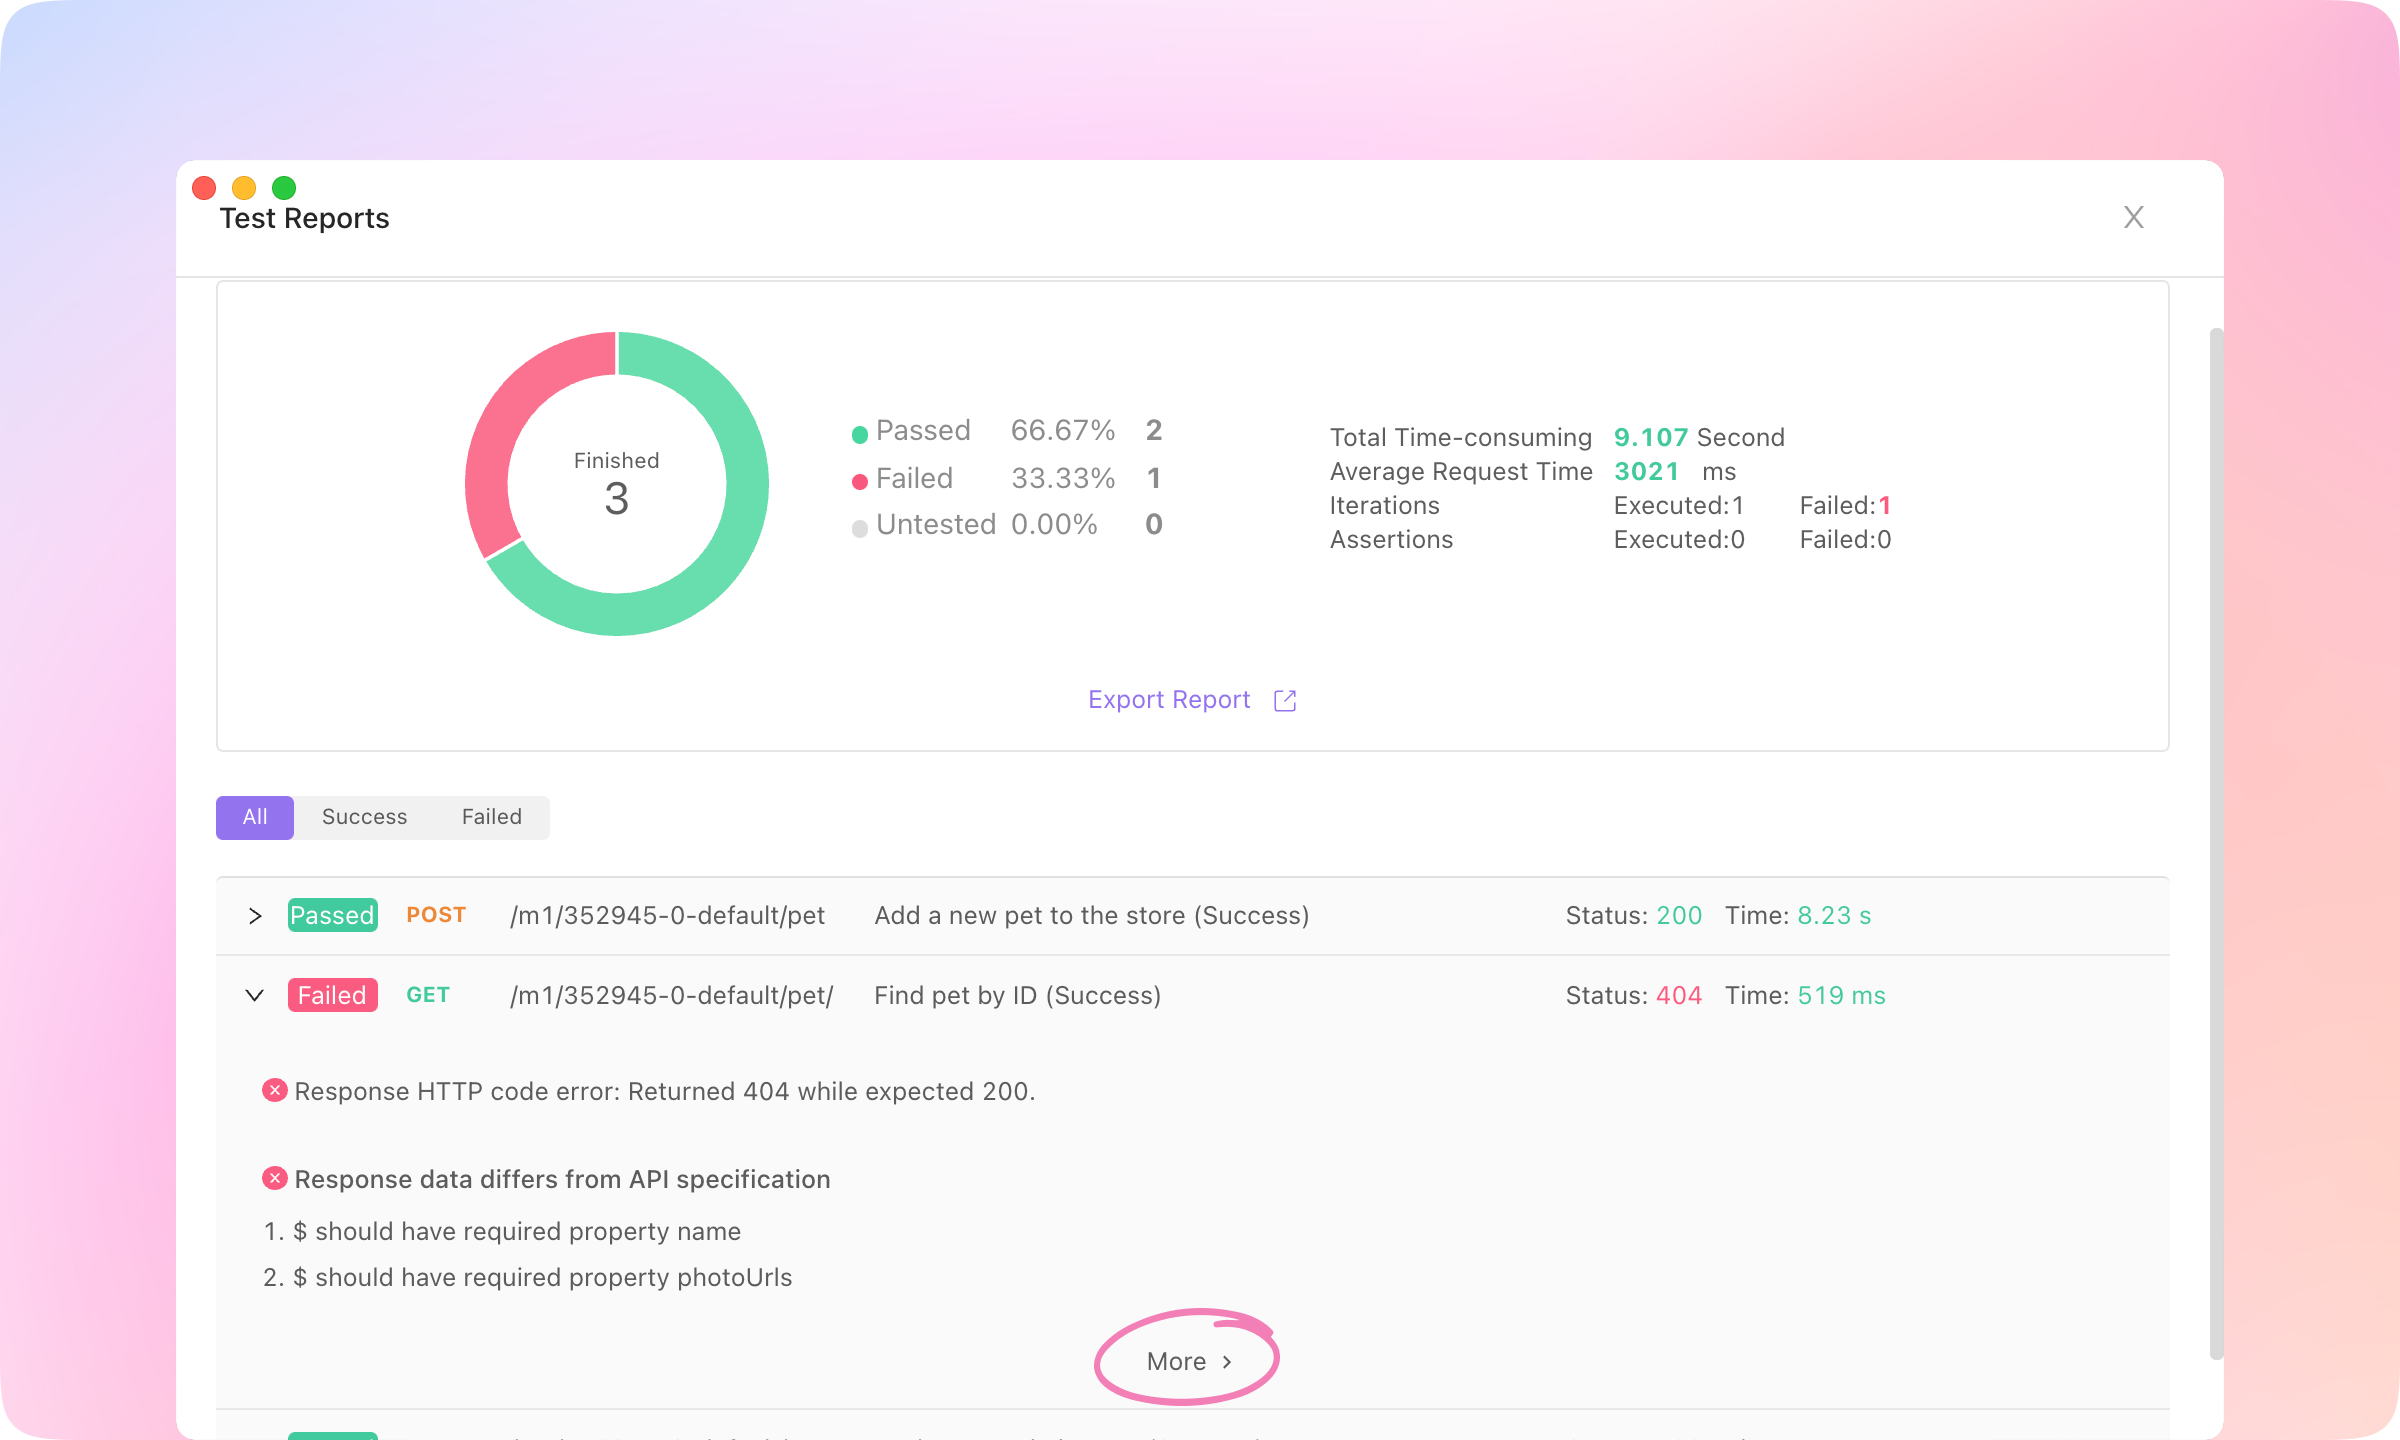
TIP
Data-Driven Testing
Dynamic Value feature to automatically generate variable values.1.
Test Data switch, and click Manage Data.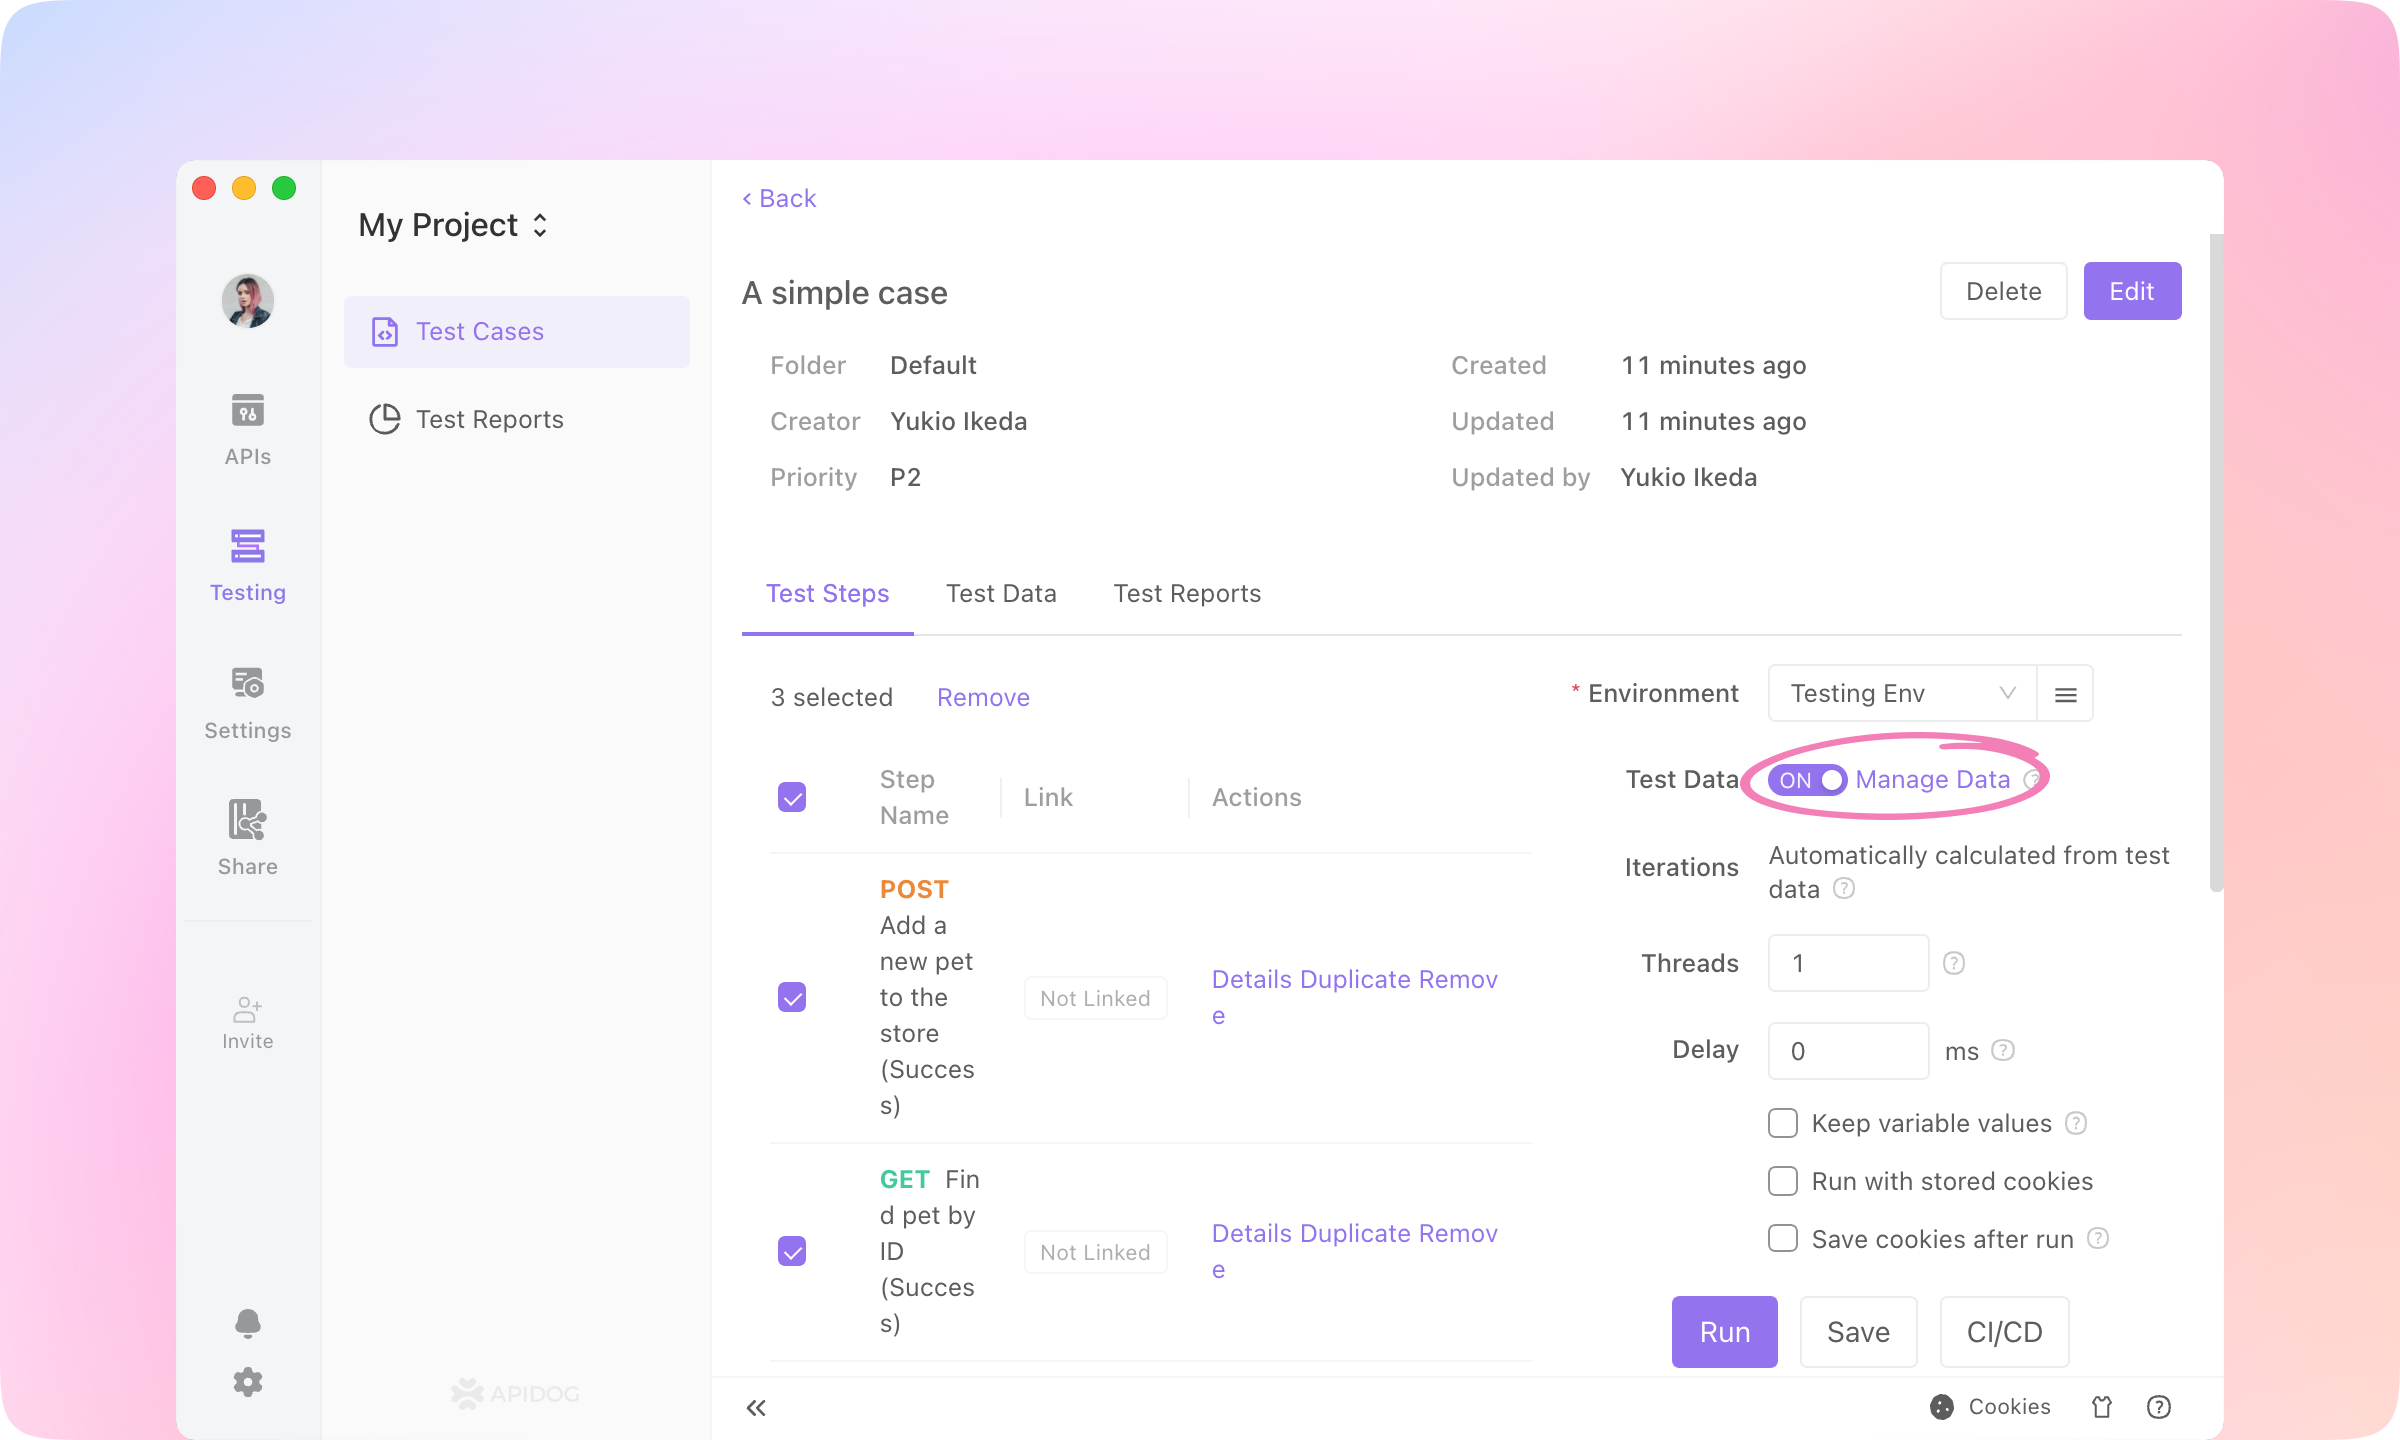
2.
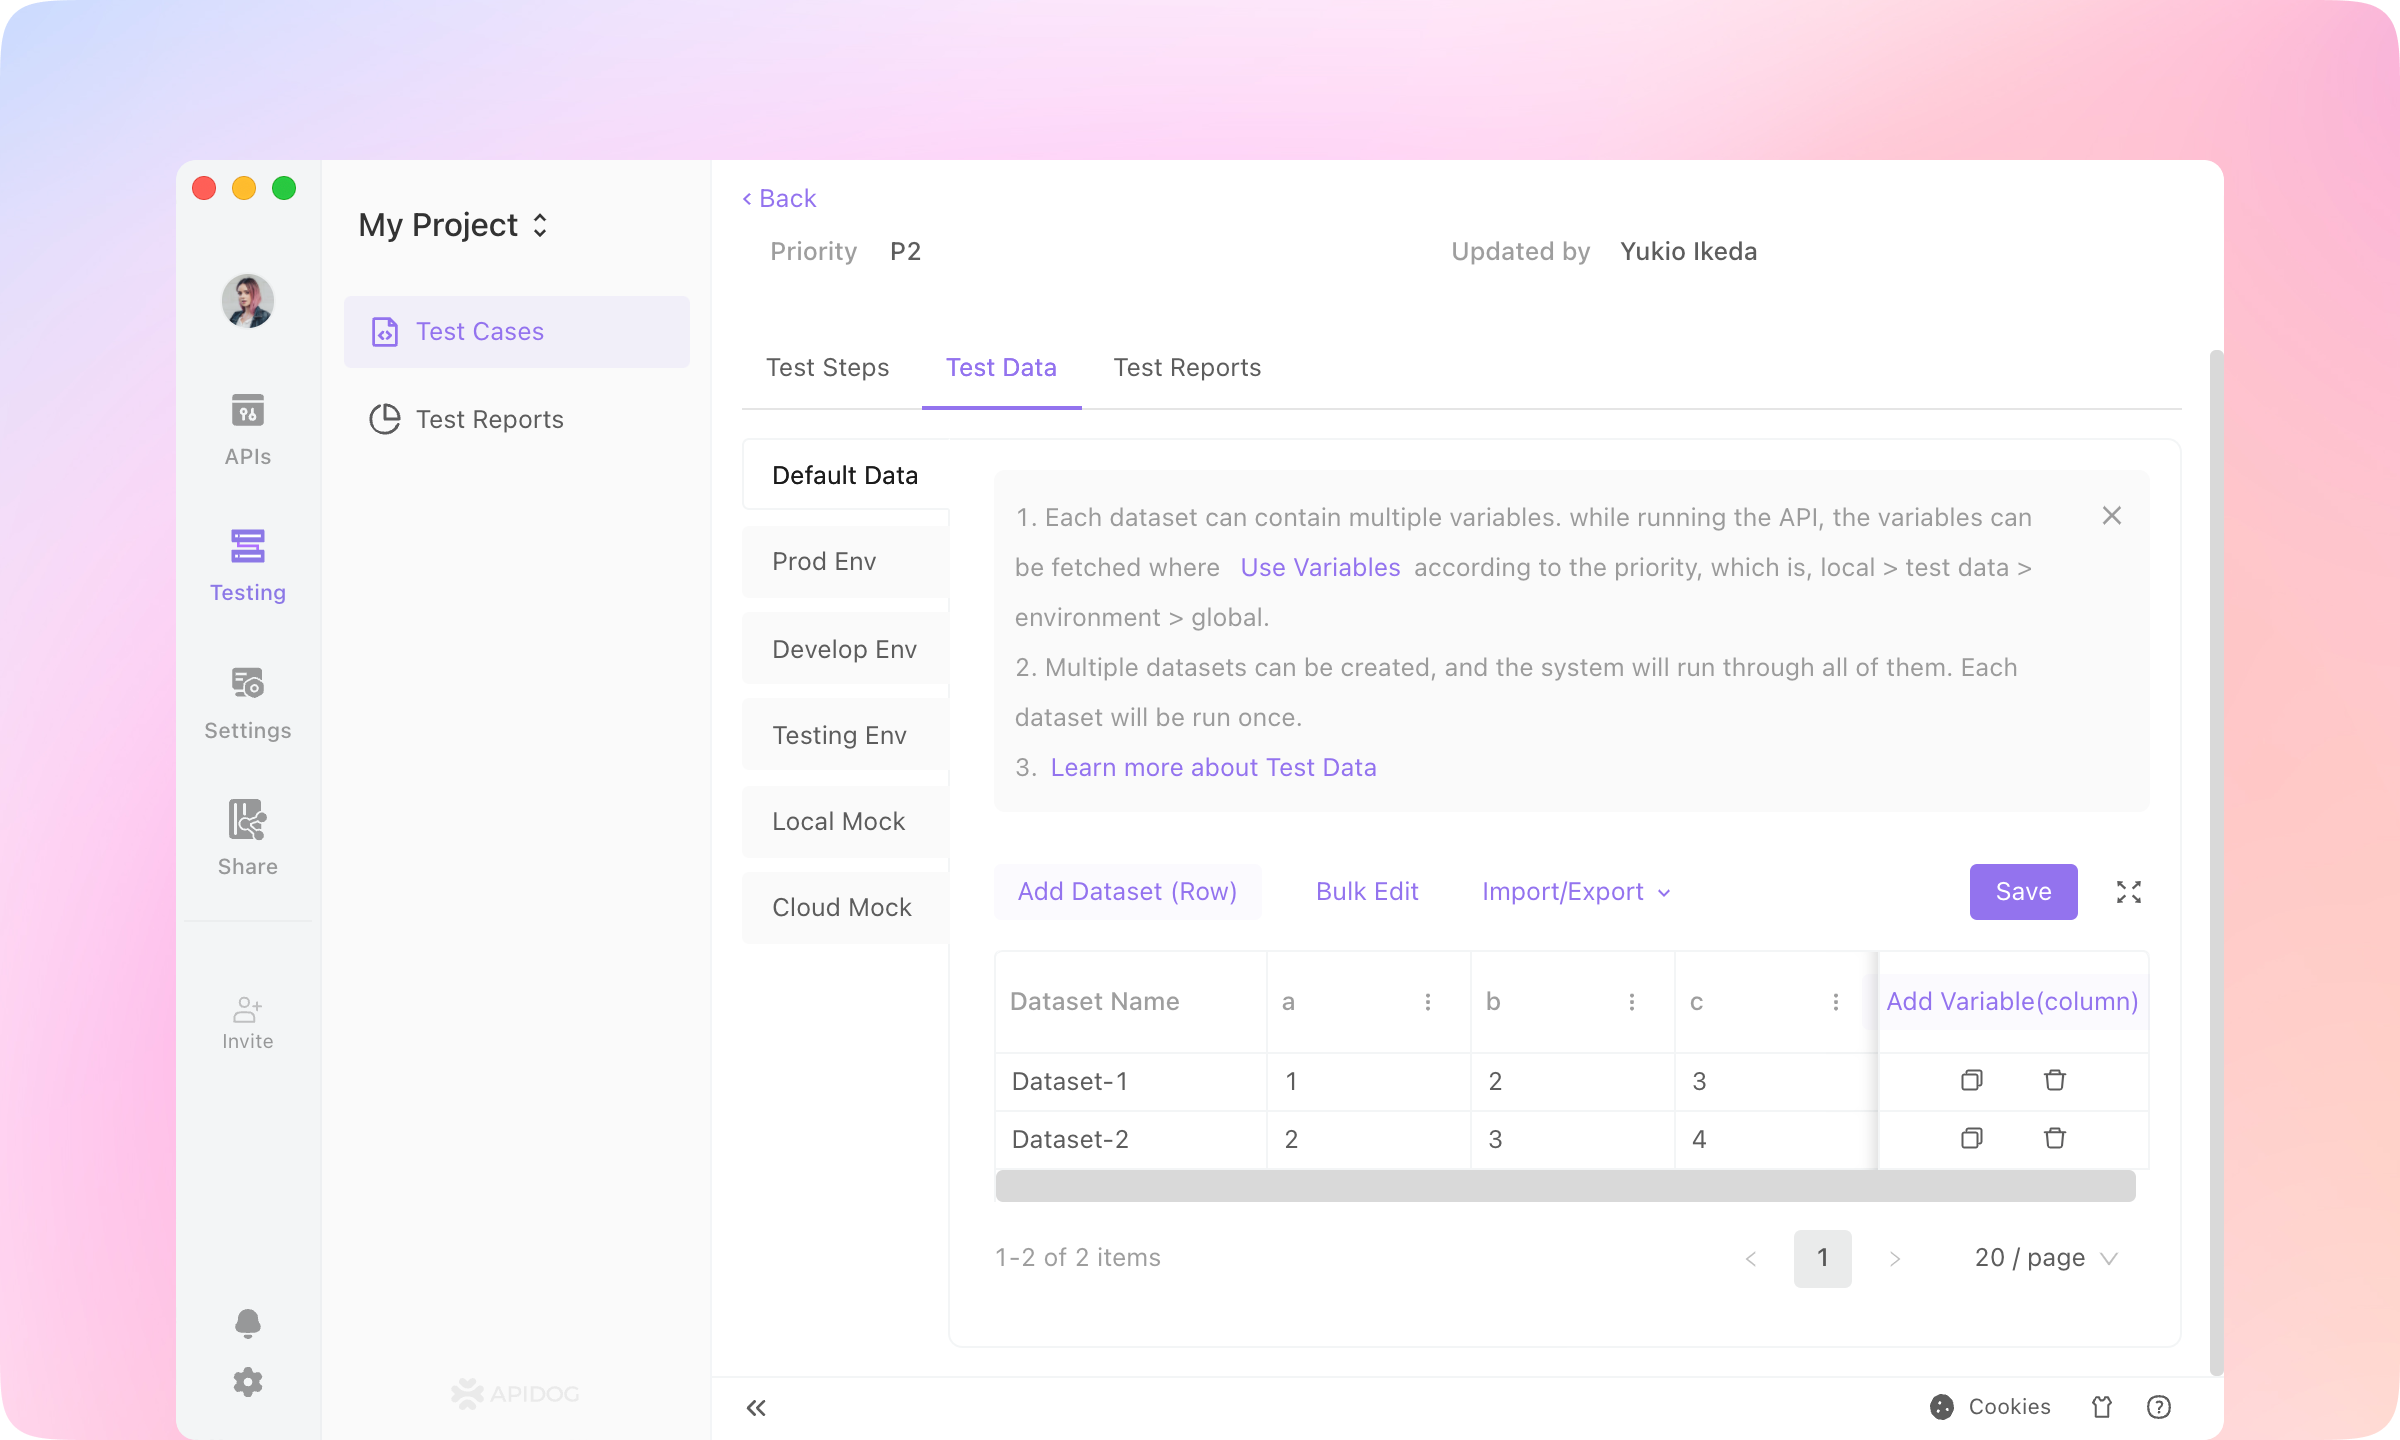
3.
Save and Run, and the values of the variables will be used in the iterations of the test case.
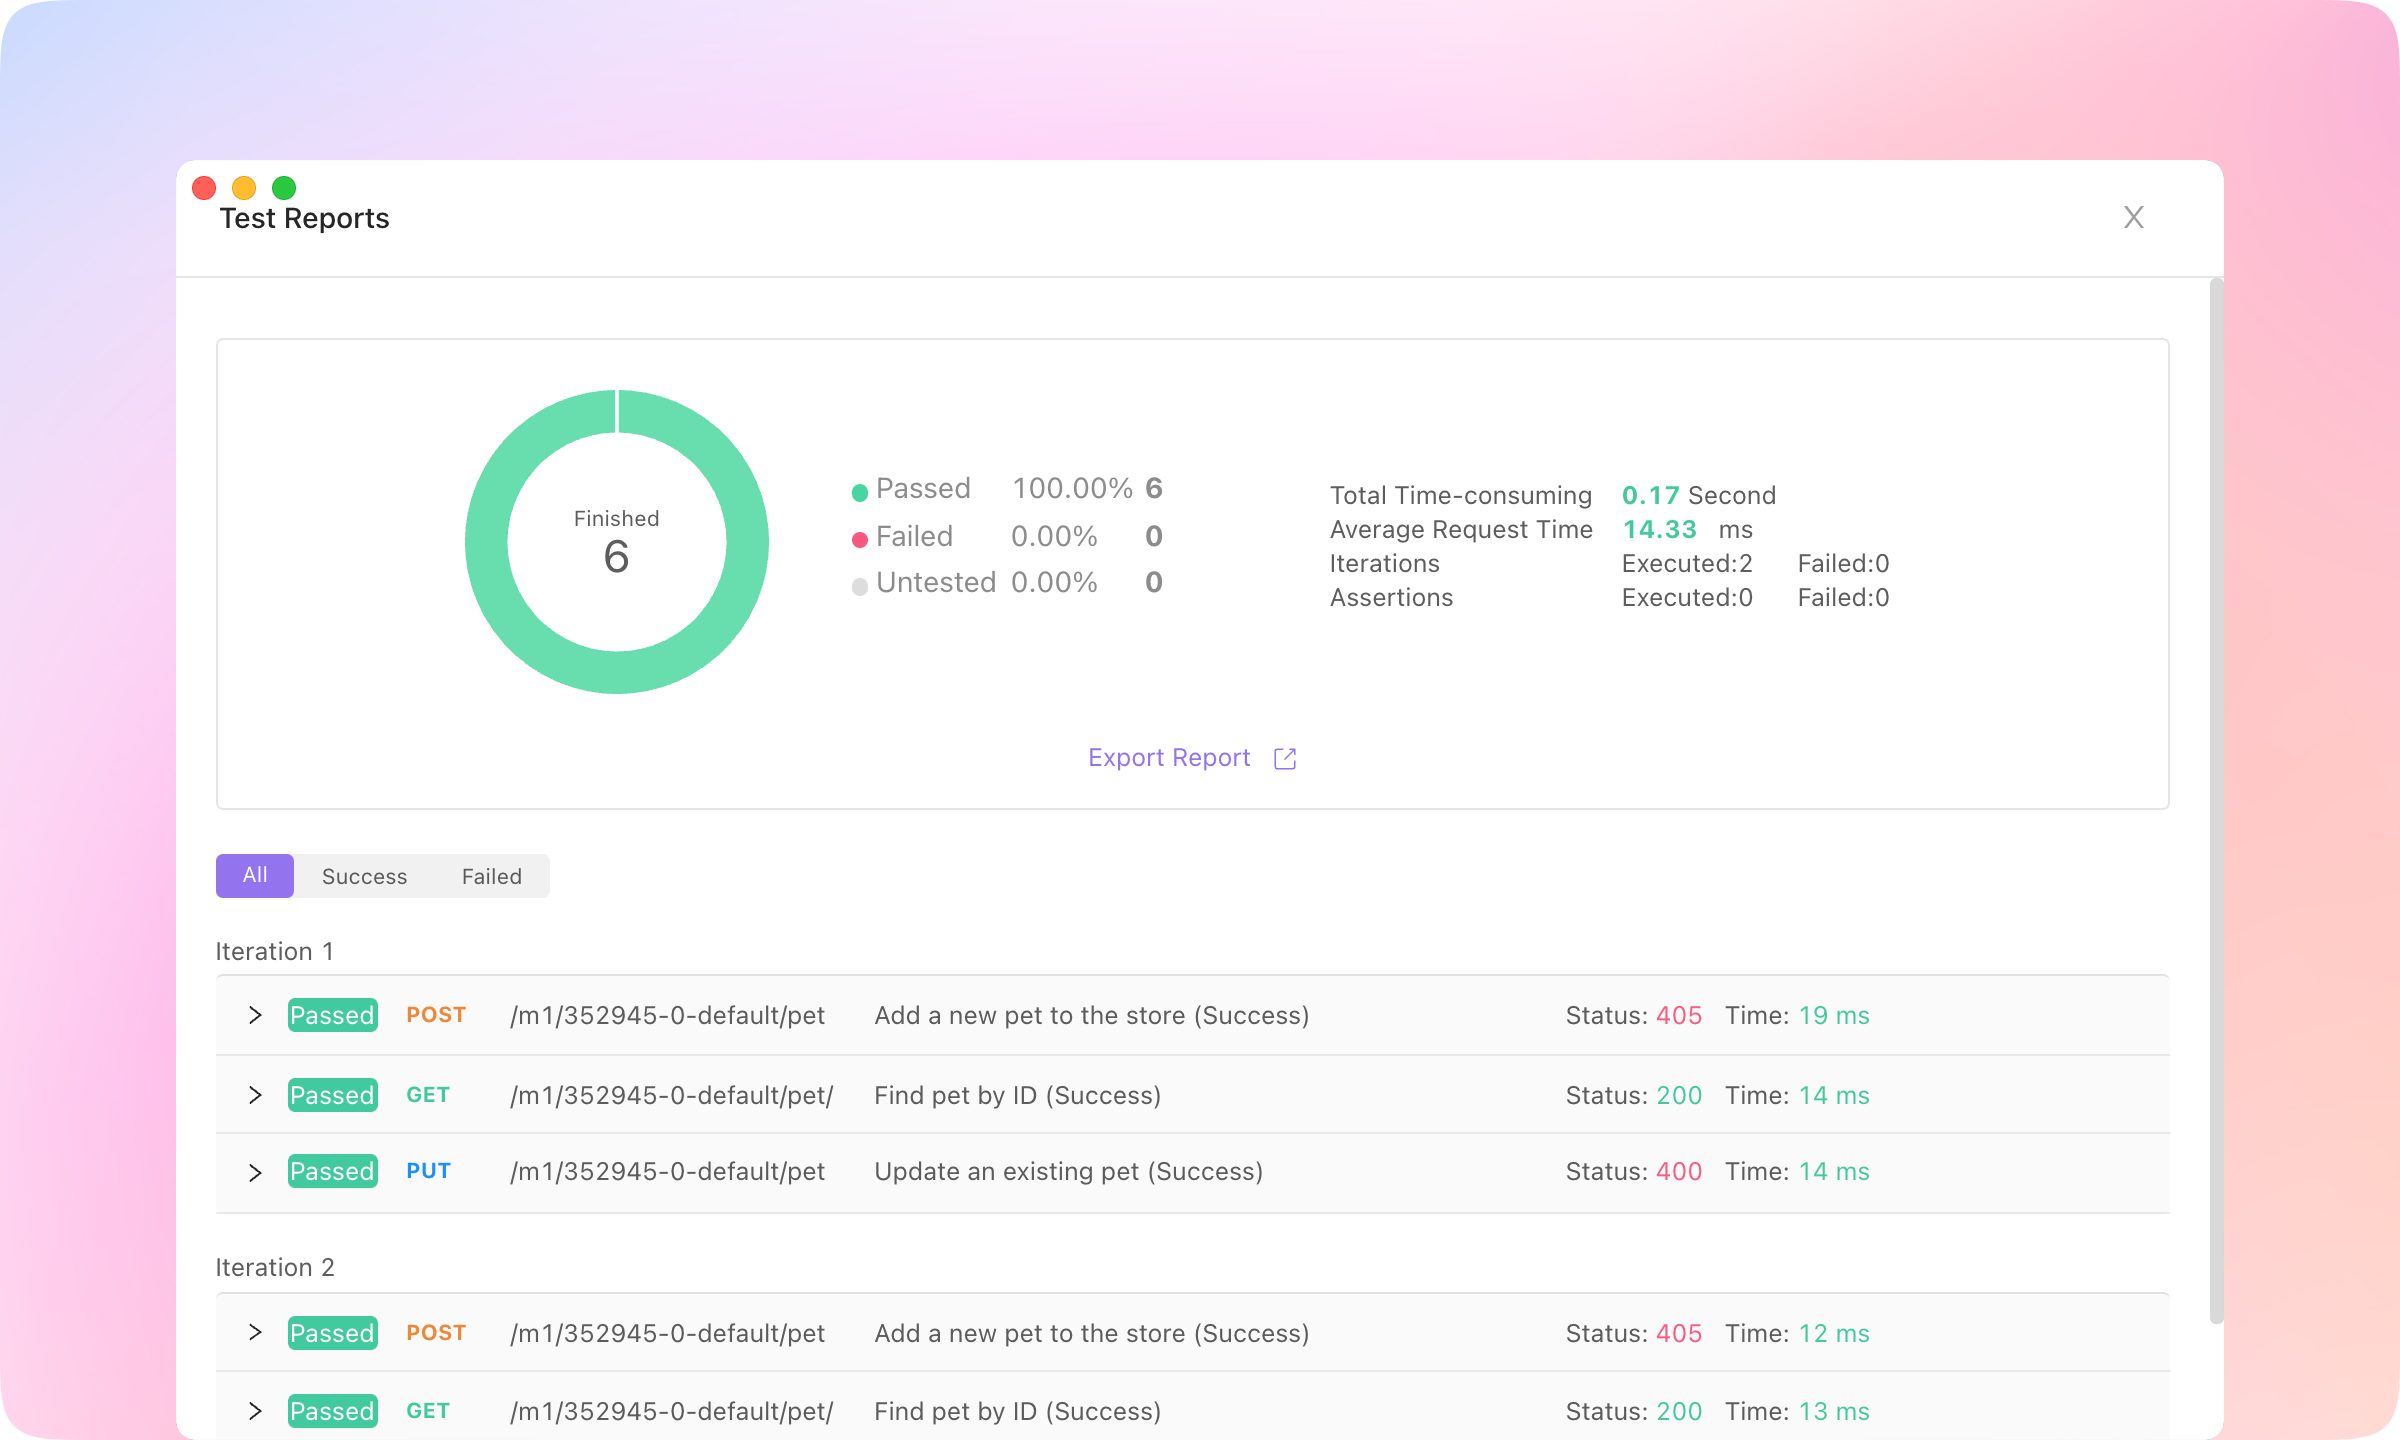
TIP
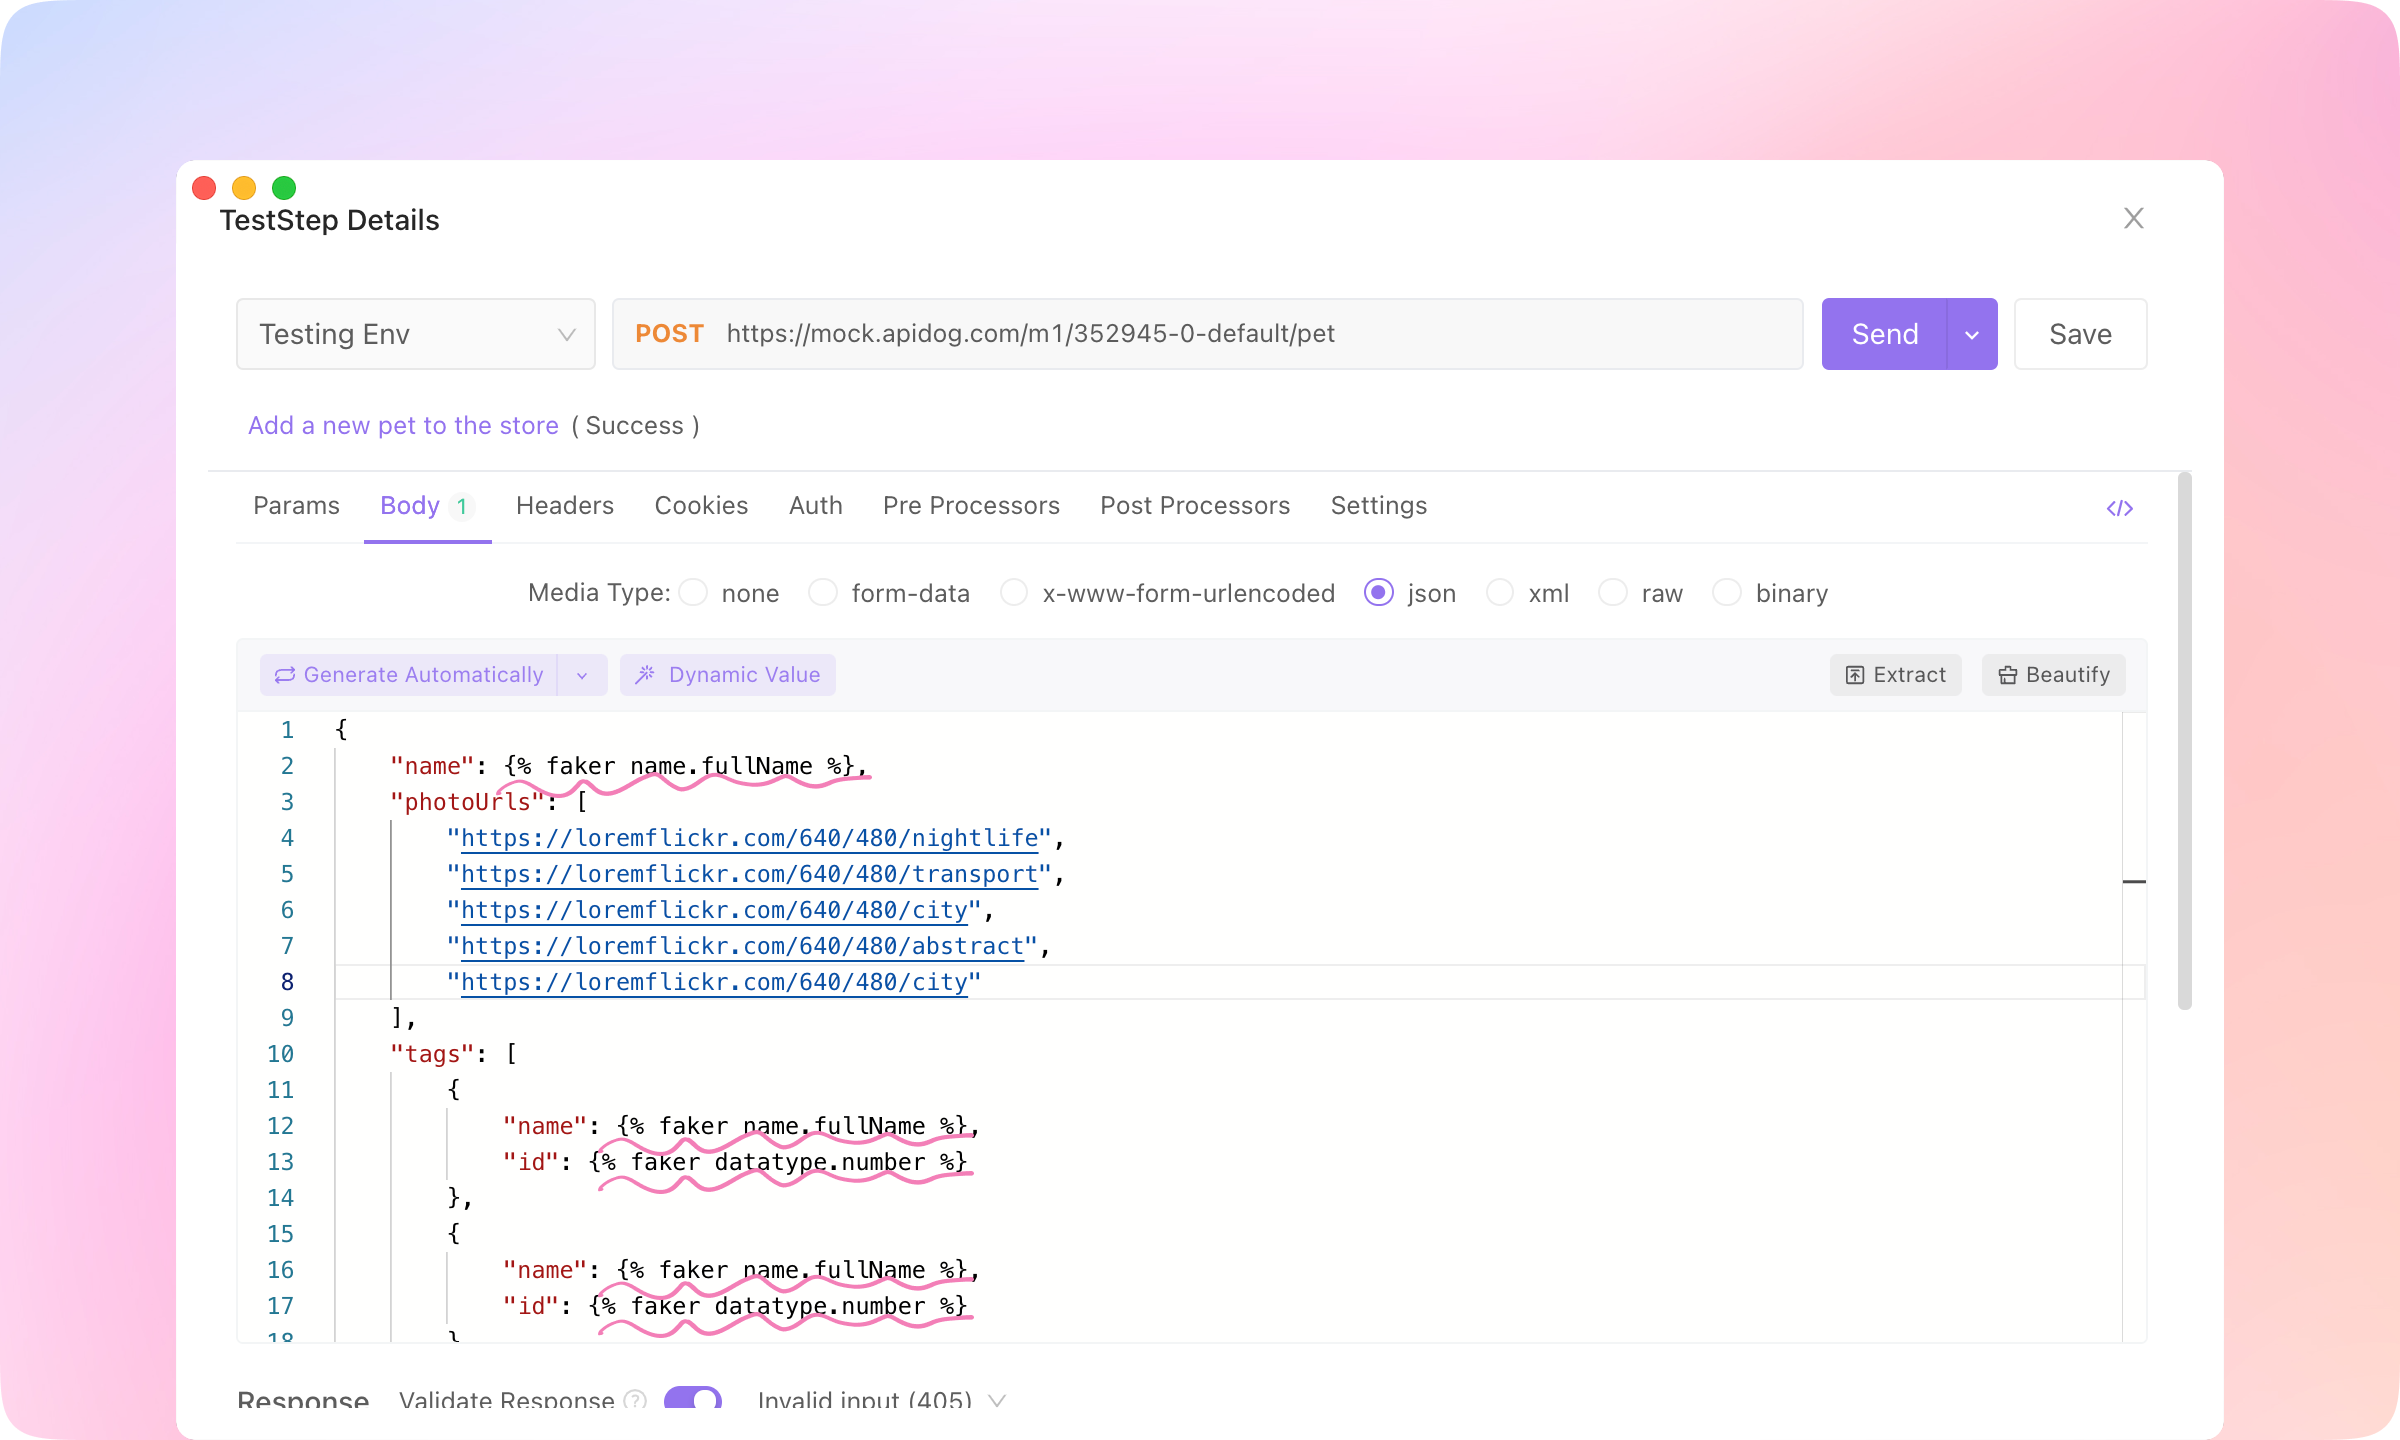
Dynamic Values
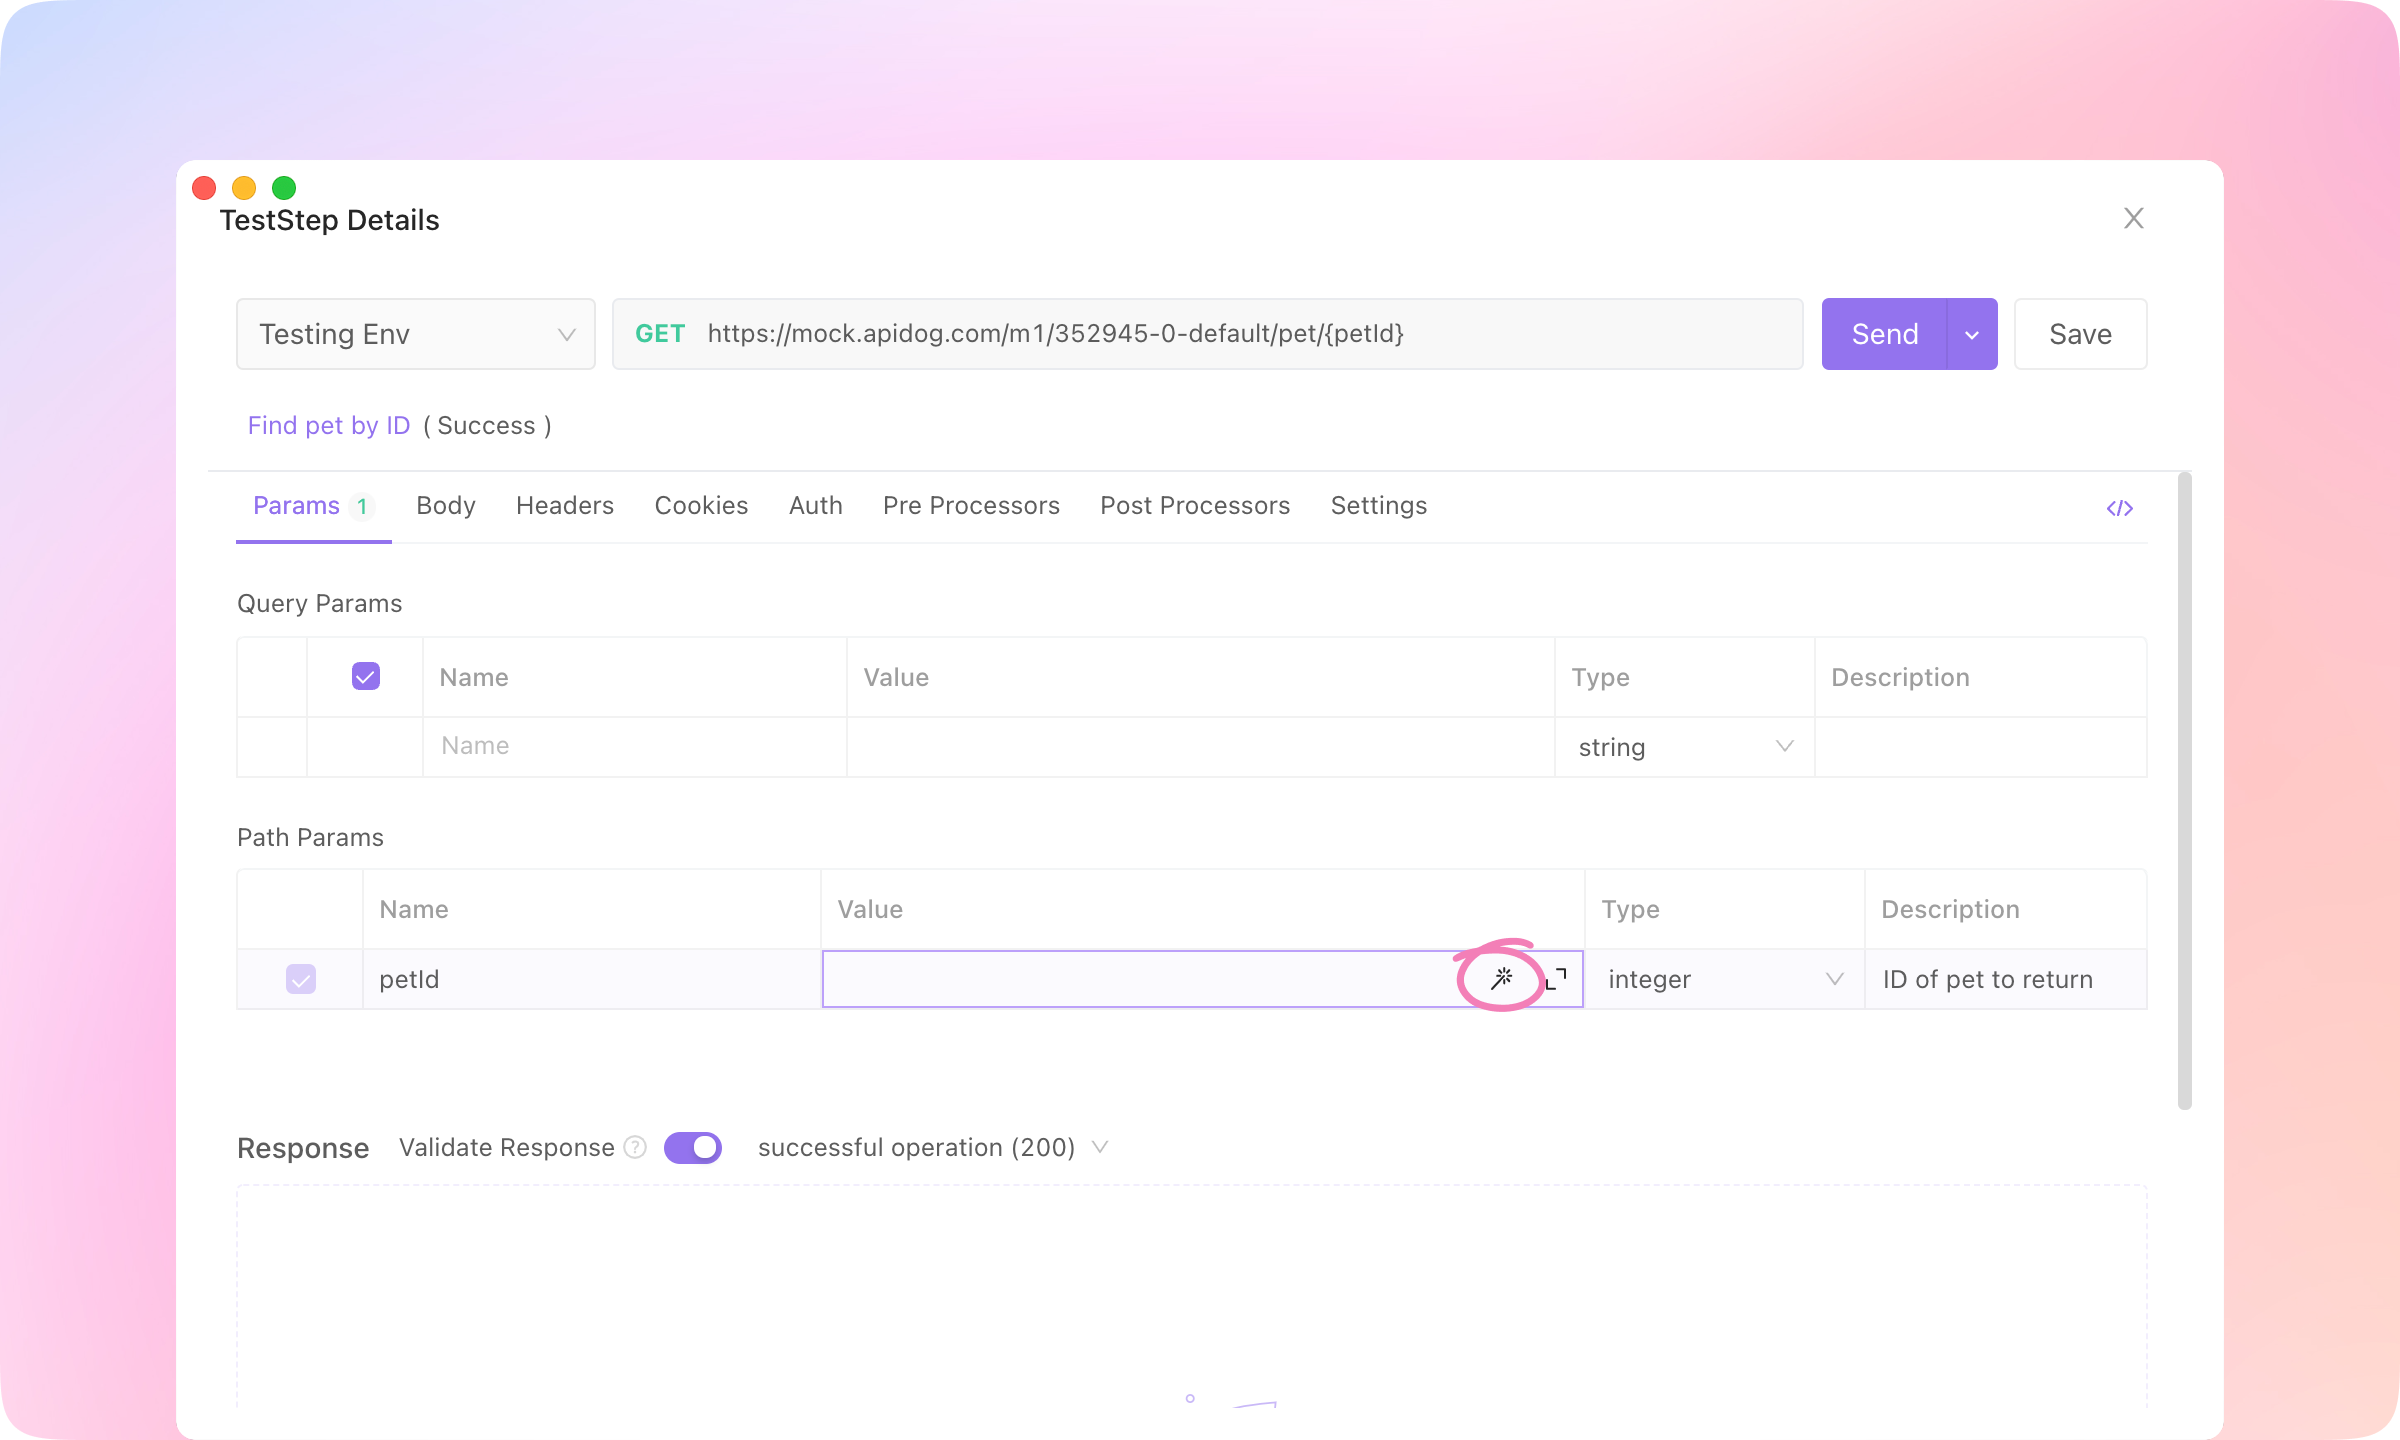
1.
Detail of the API case, and click the 🪄(magic wand) button to open the Dynamic Value dialogue.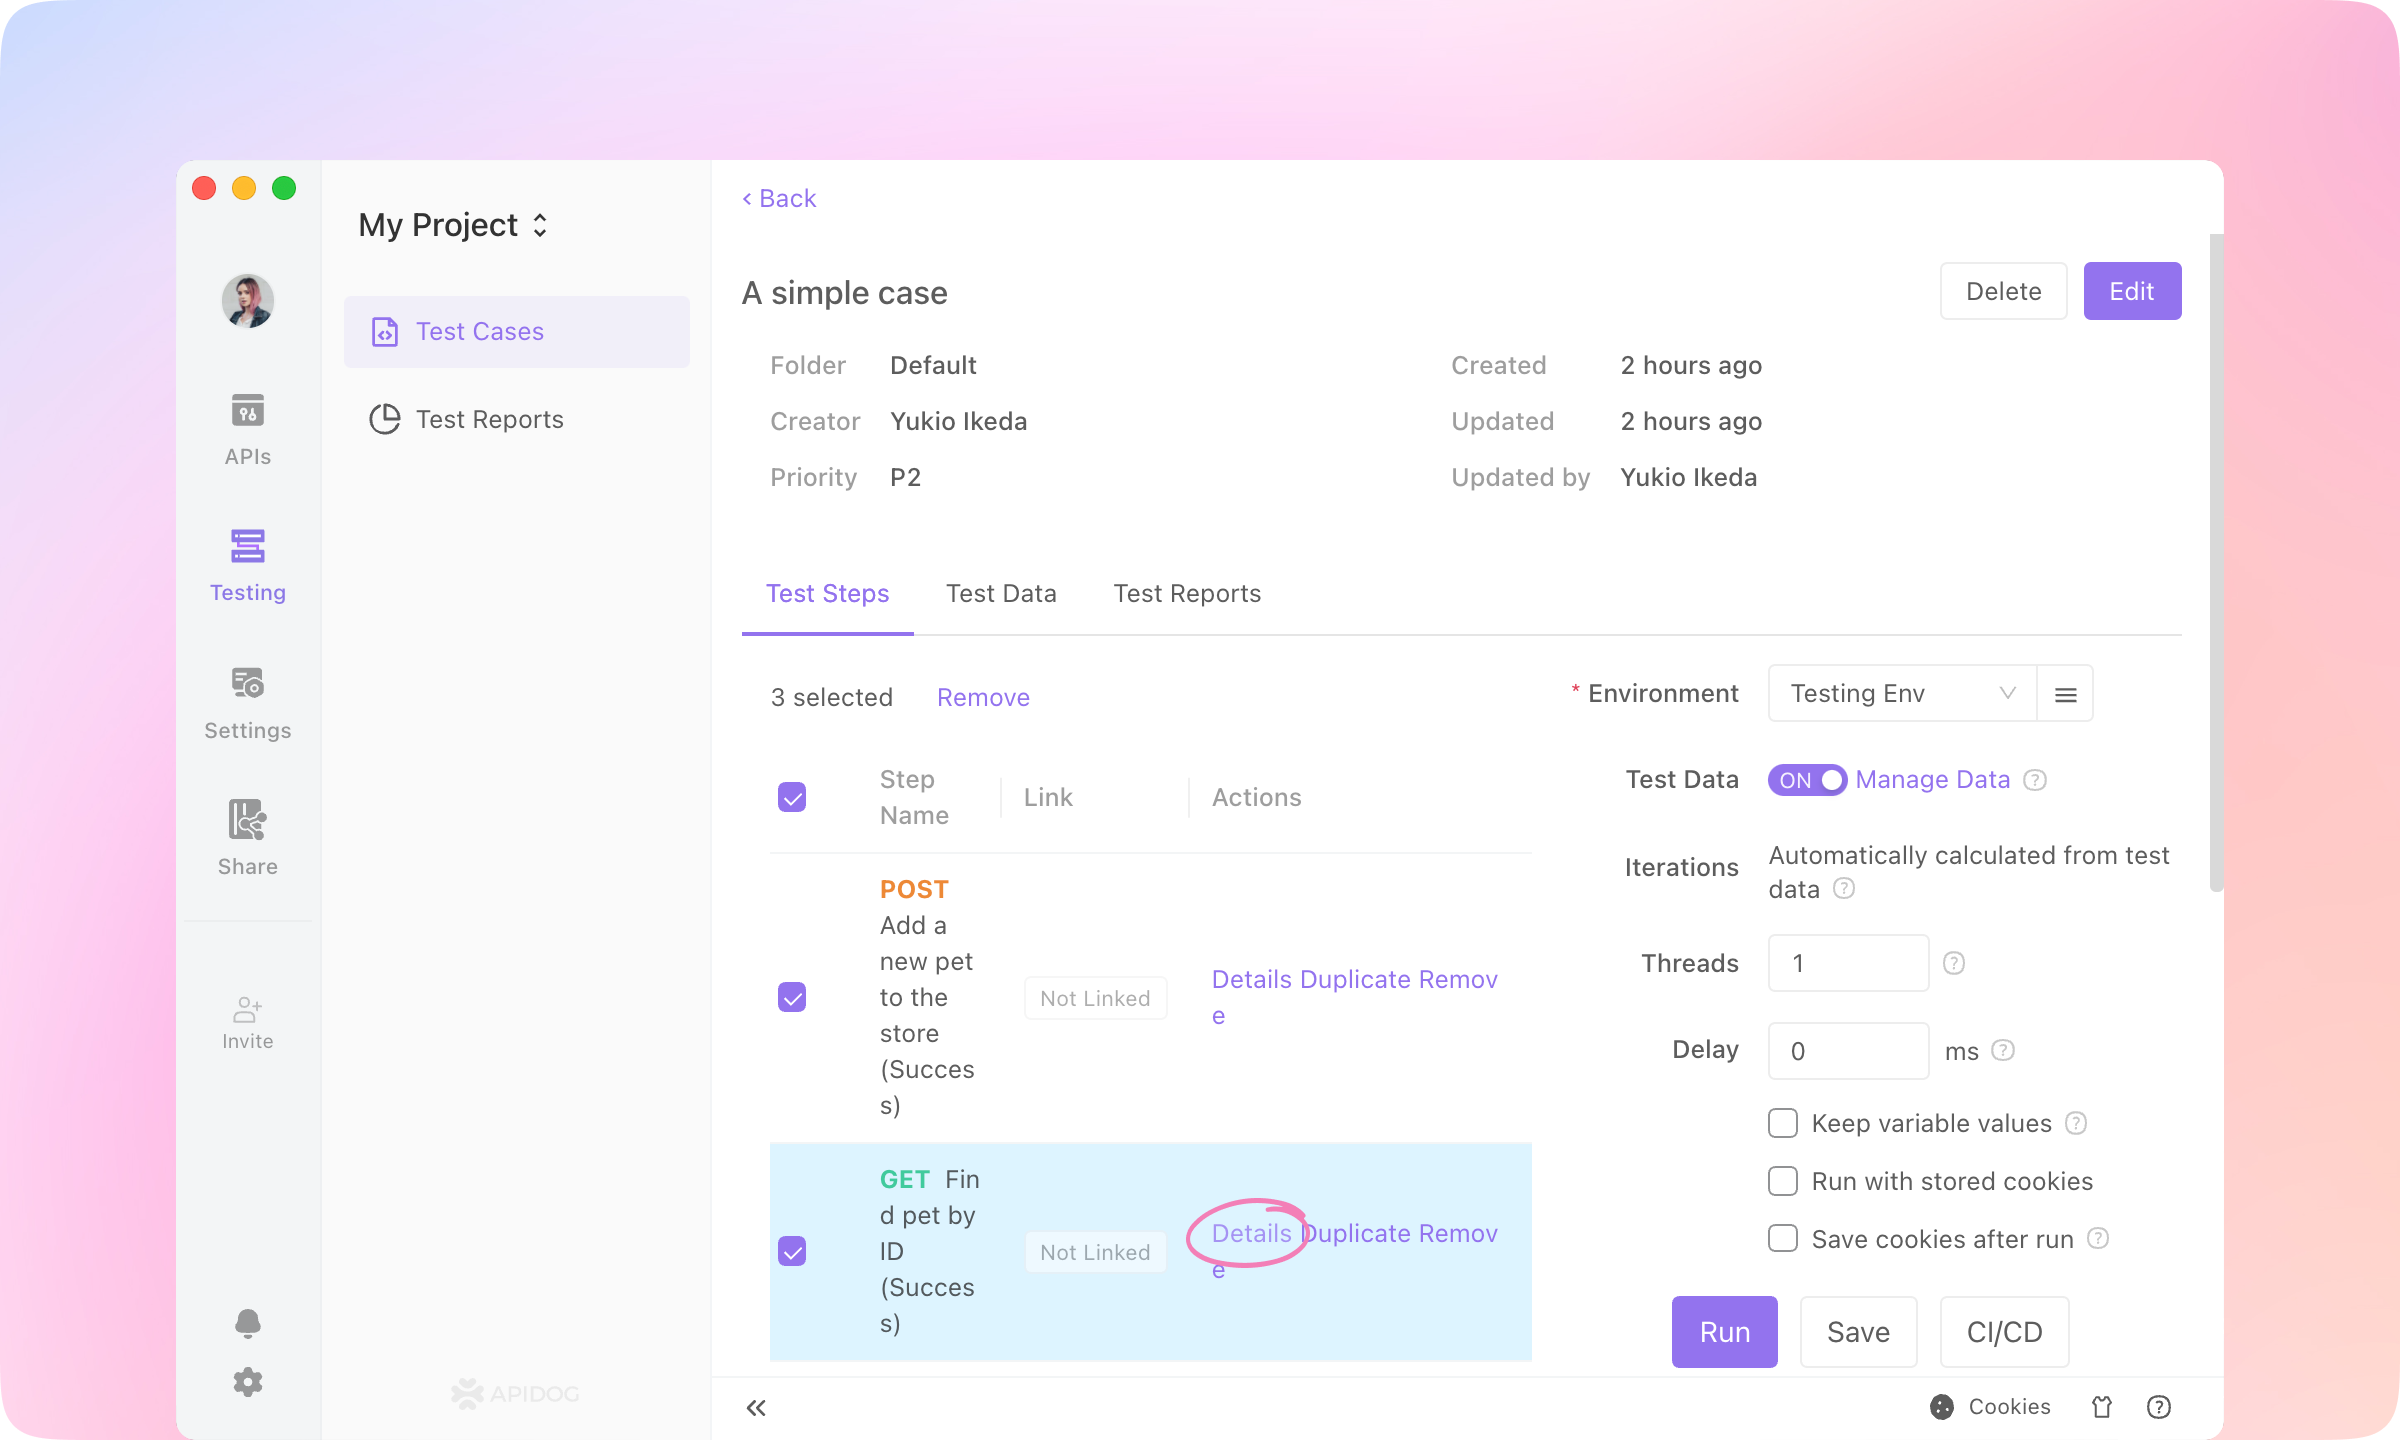
2.
Datatype - number, and you'll see a preview of the dynamic value. Click Insert to apply the dynamic value.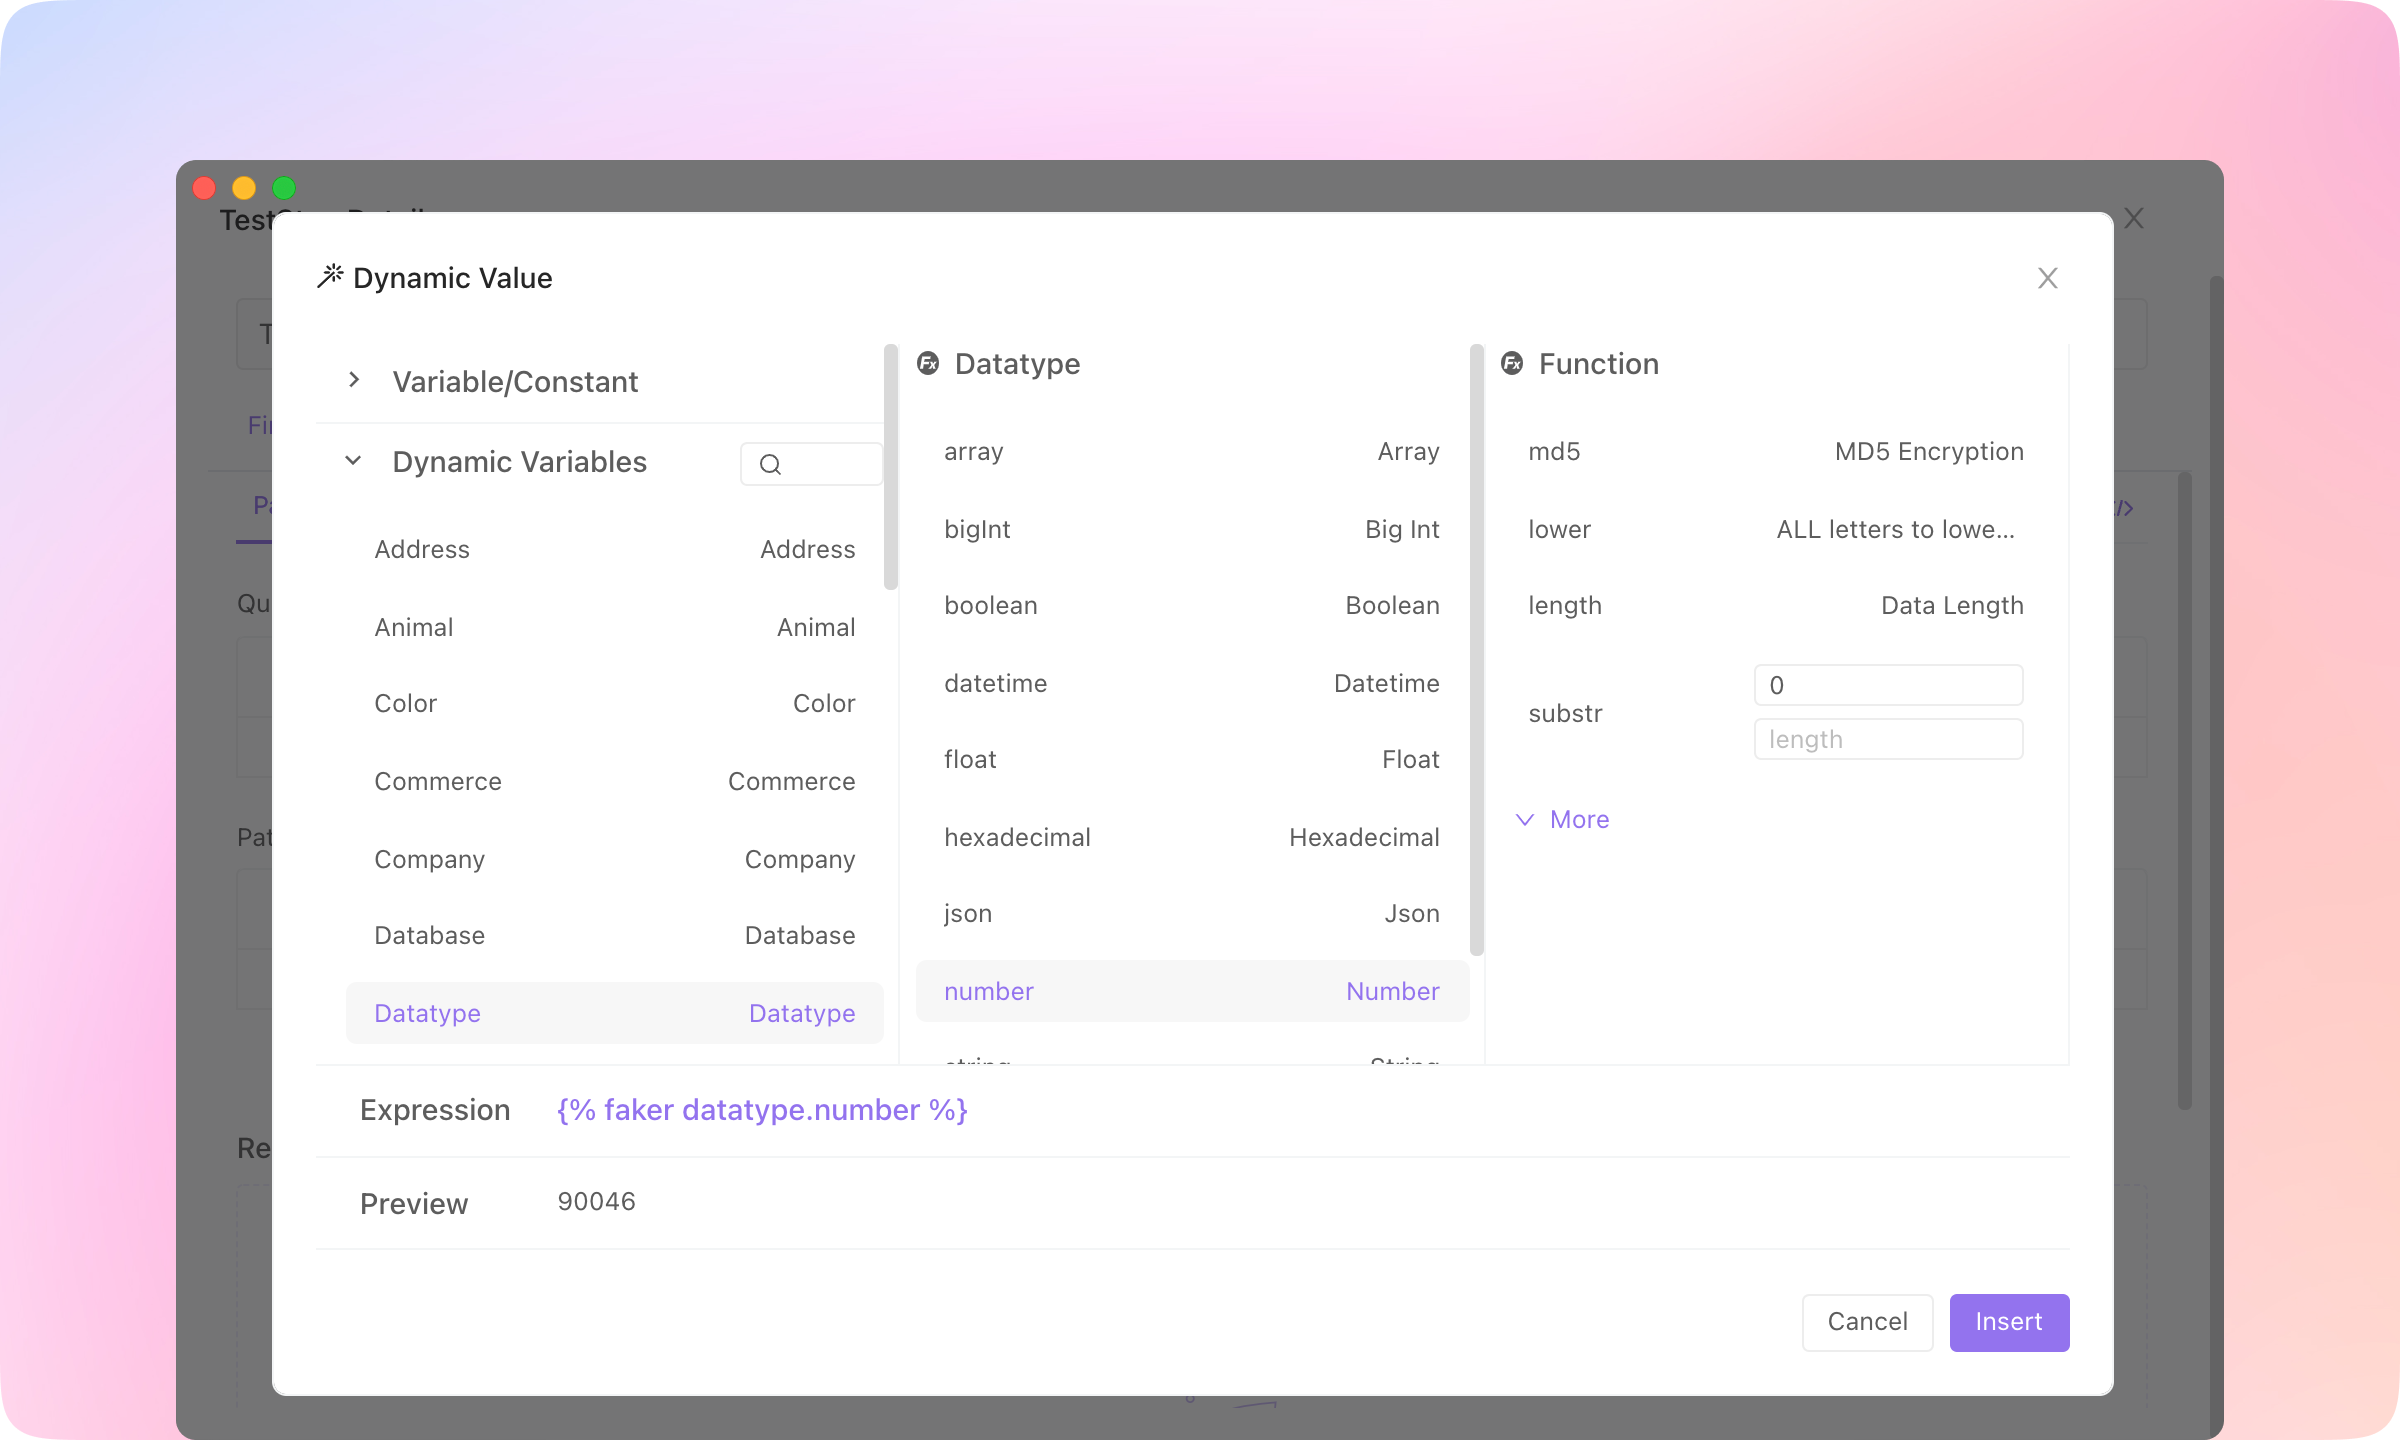
3.
Actual Request. Each time the request is sent, the dynamic value will generate a new value.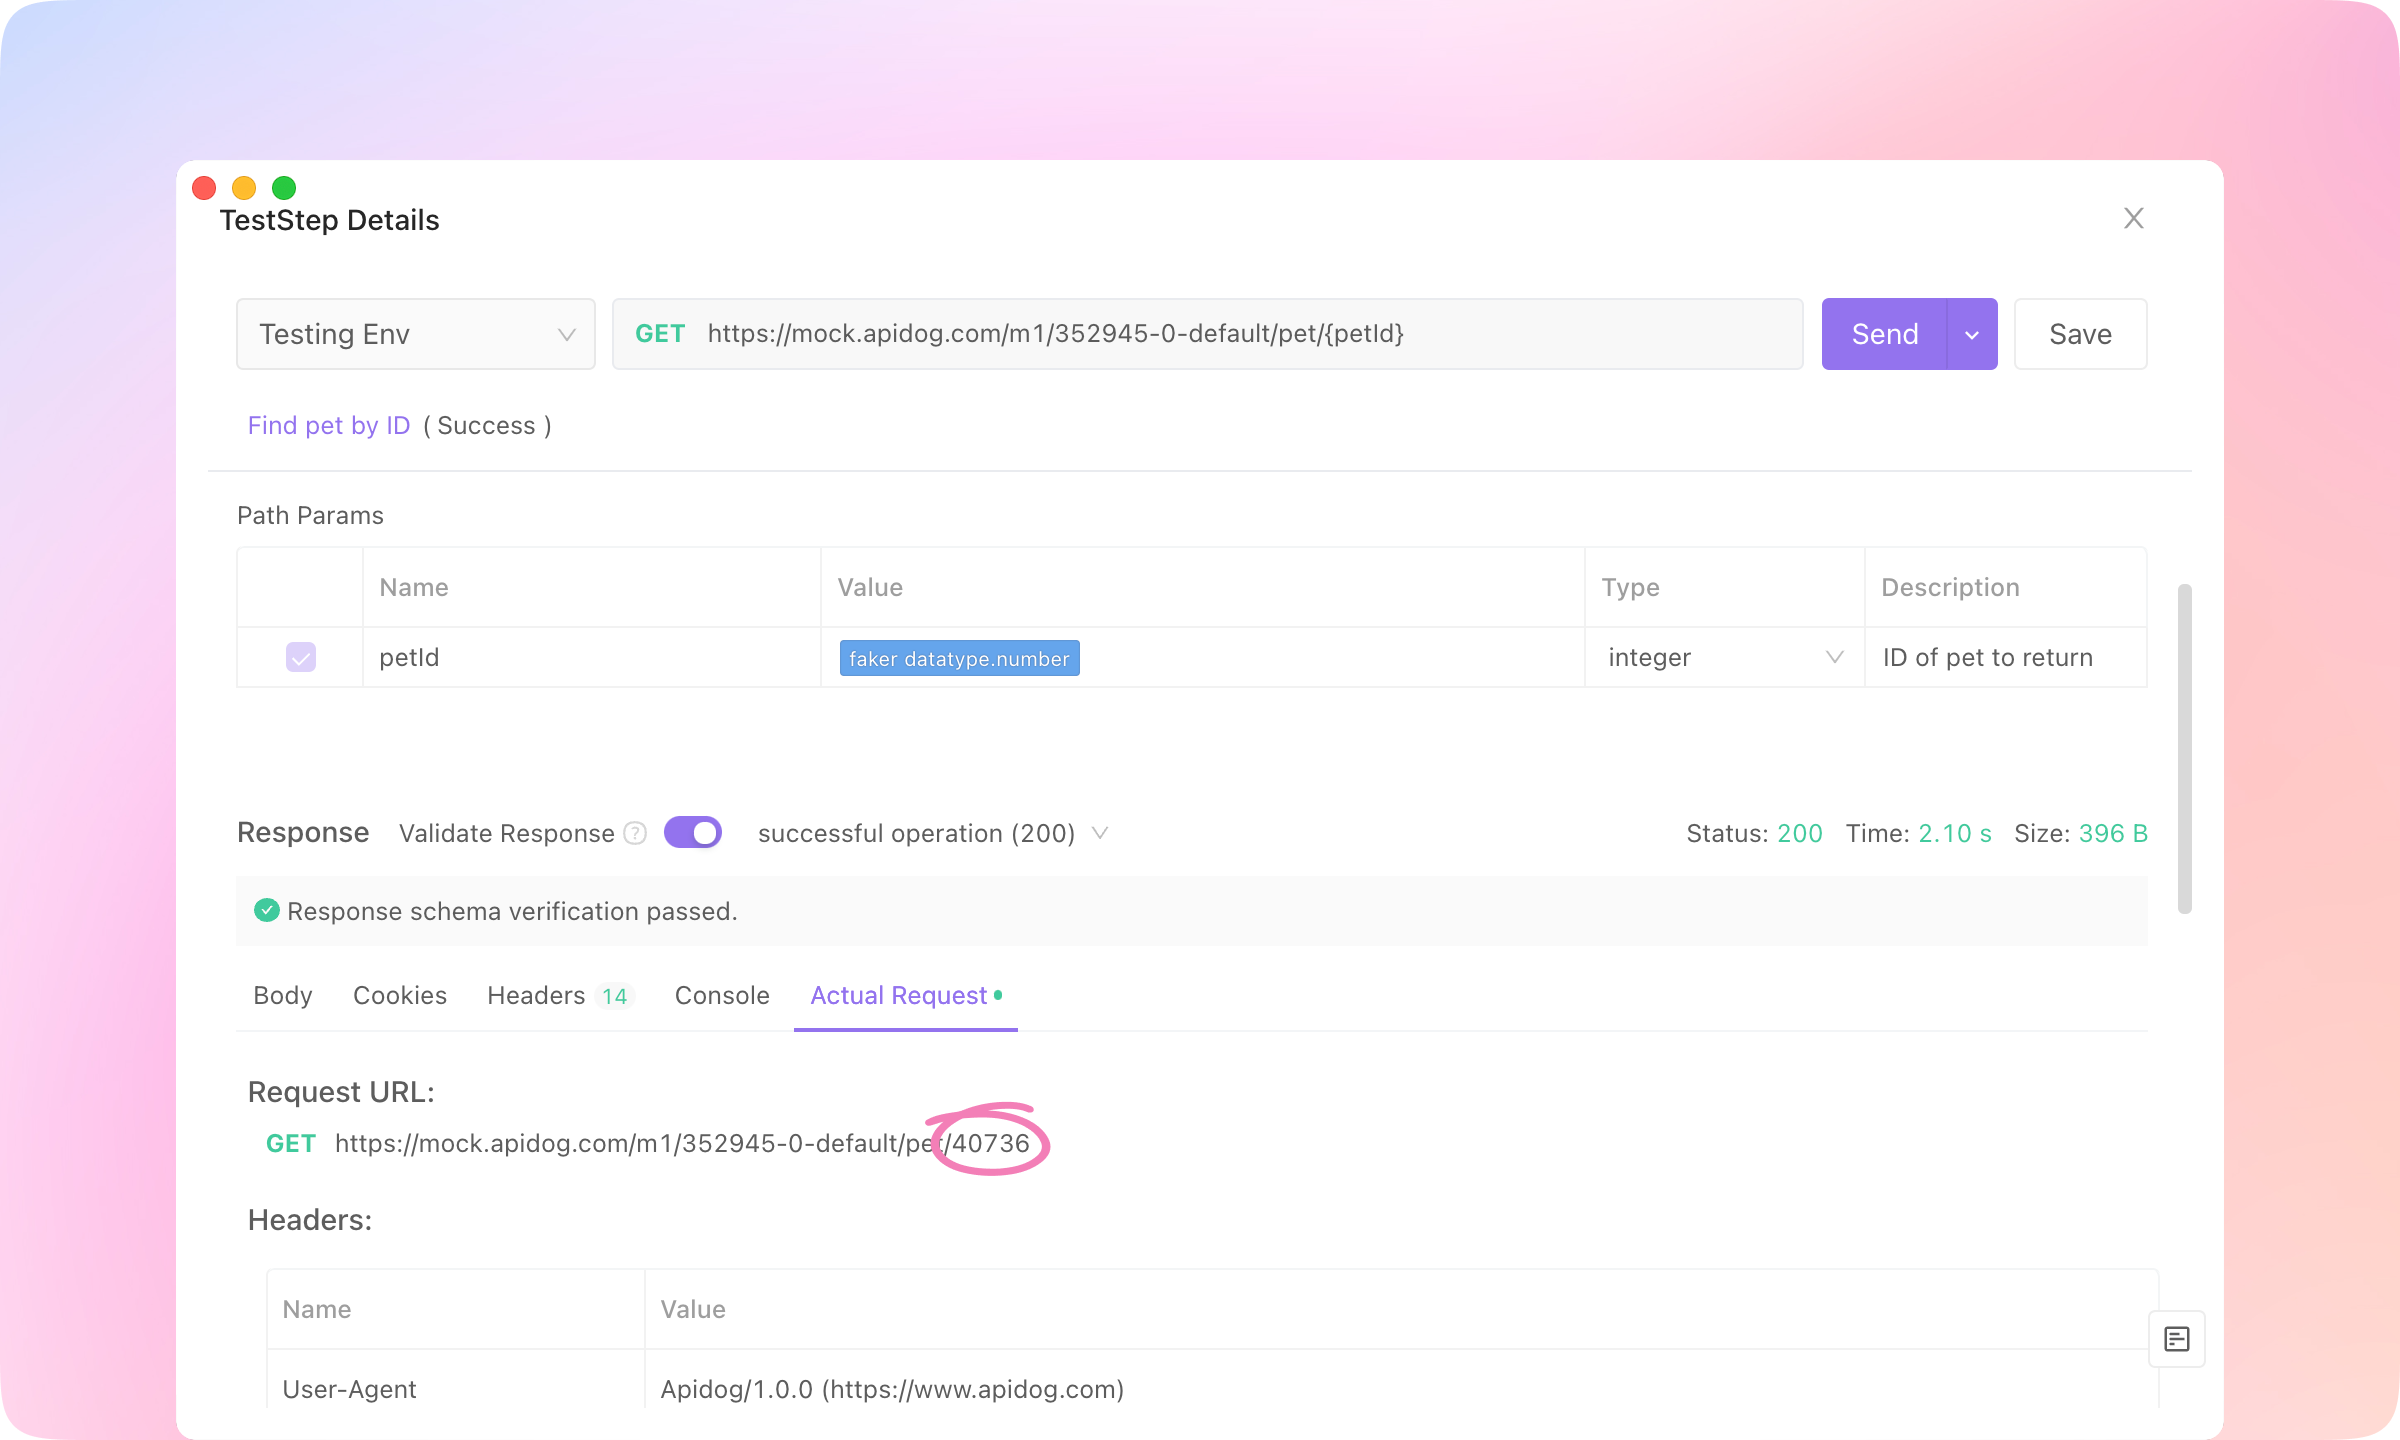
4.
TIP
CI / CD
apidog run to get a command line test report. This command can also be used in Jenkins for implementing CI/CD.1.
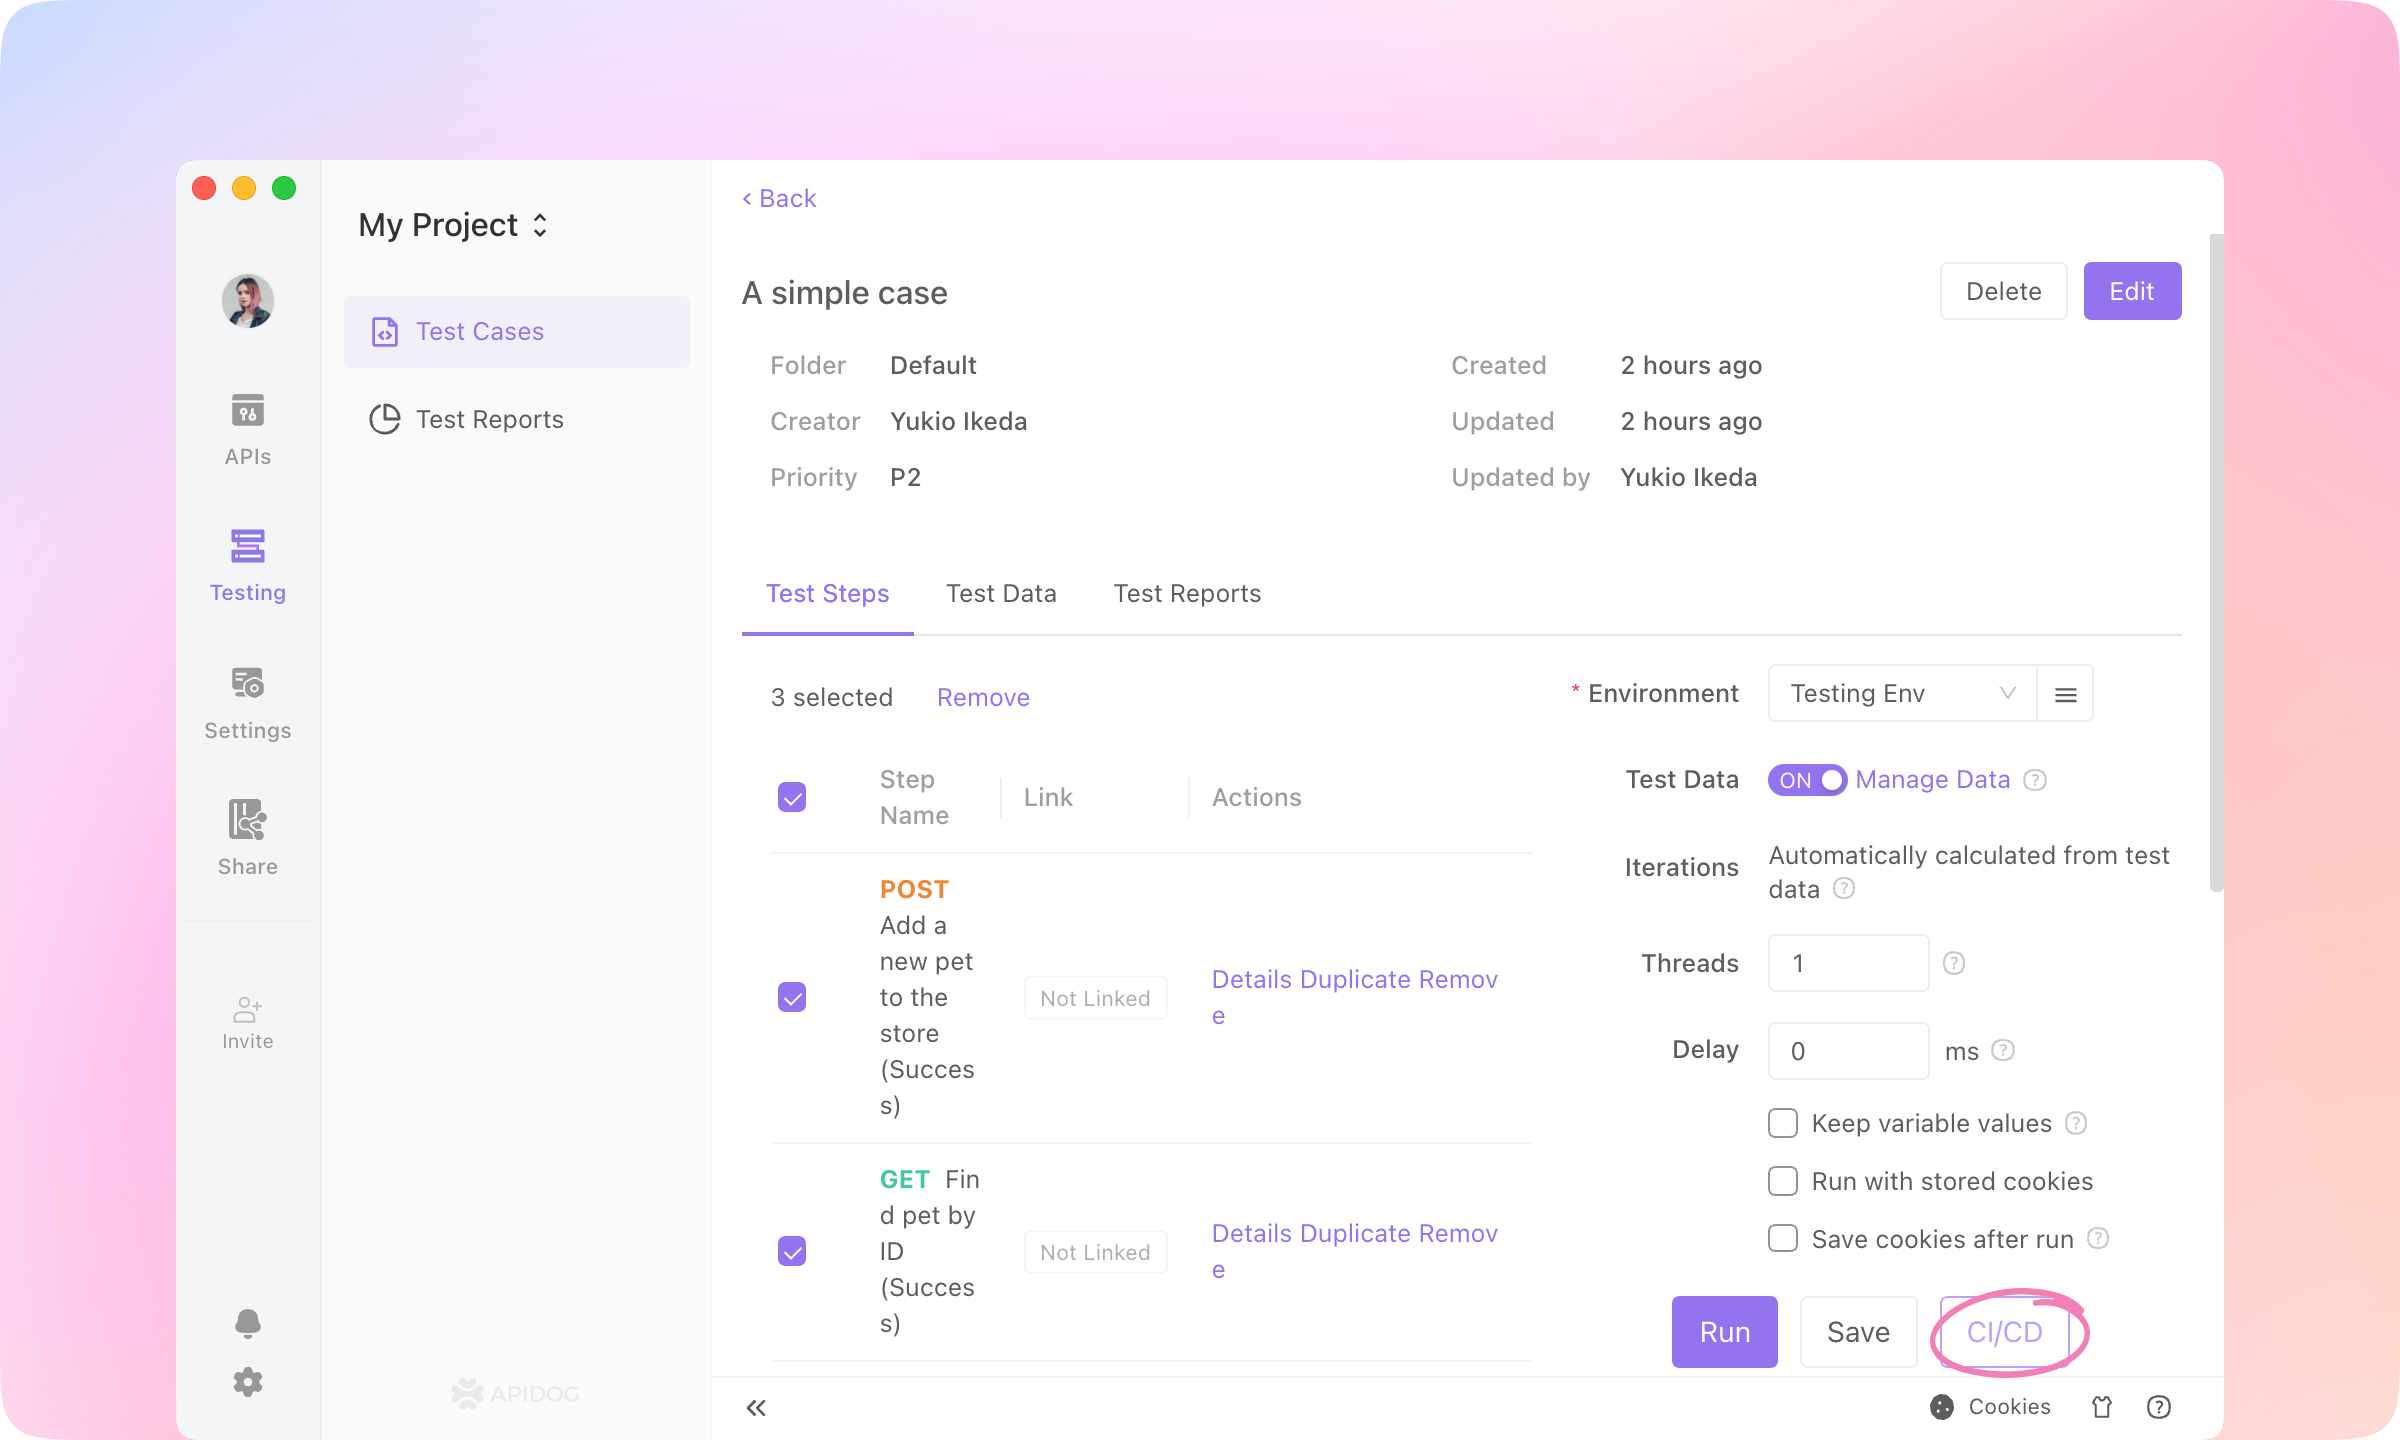
2.
Learn More to install Apidog CLI.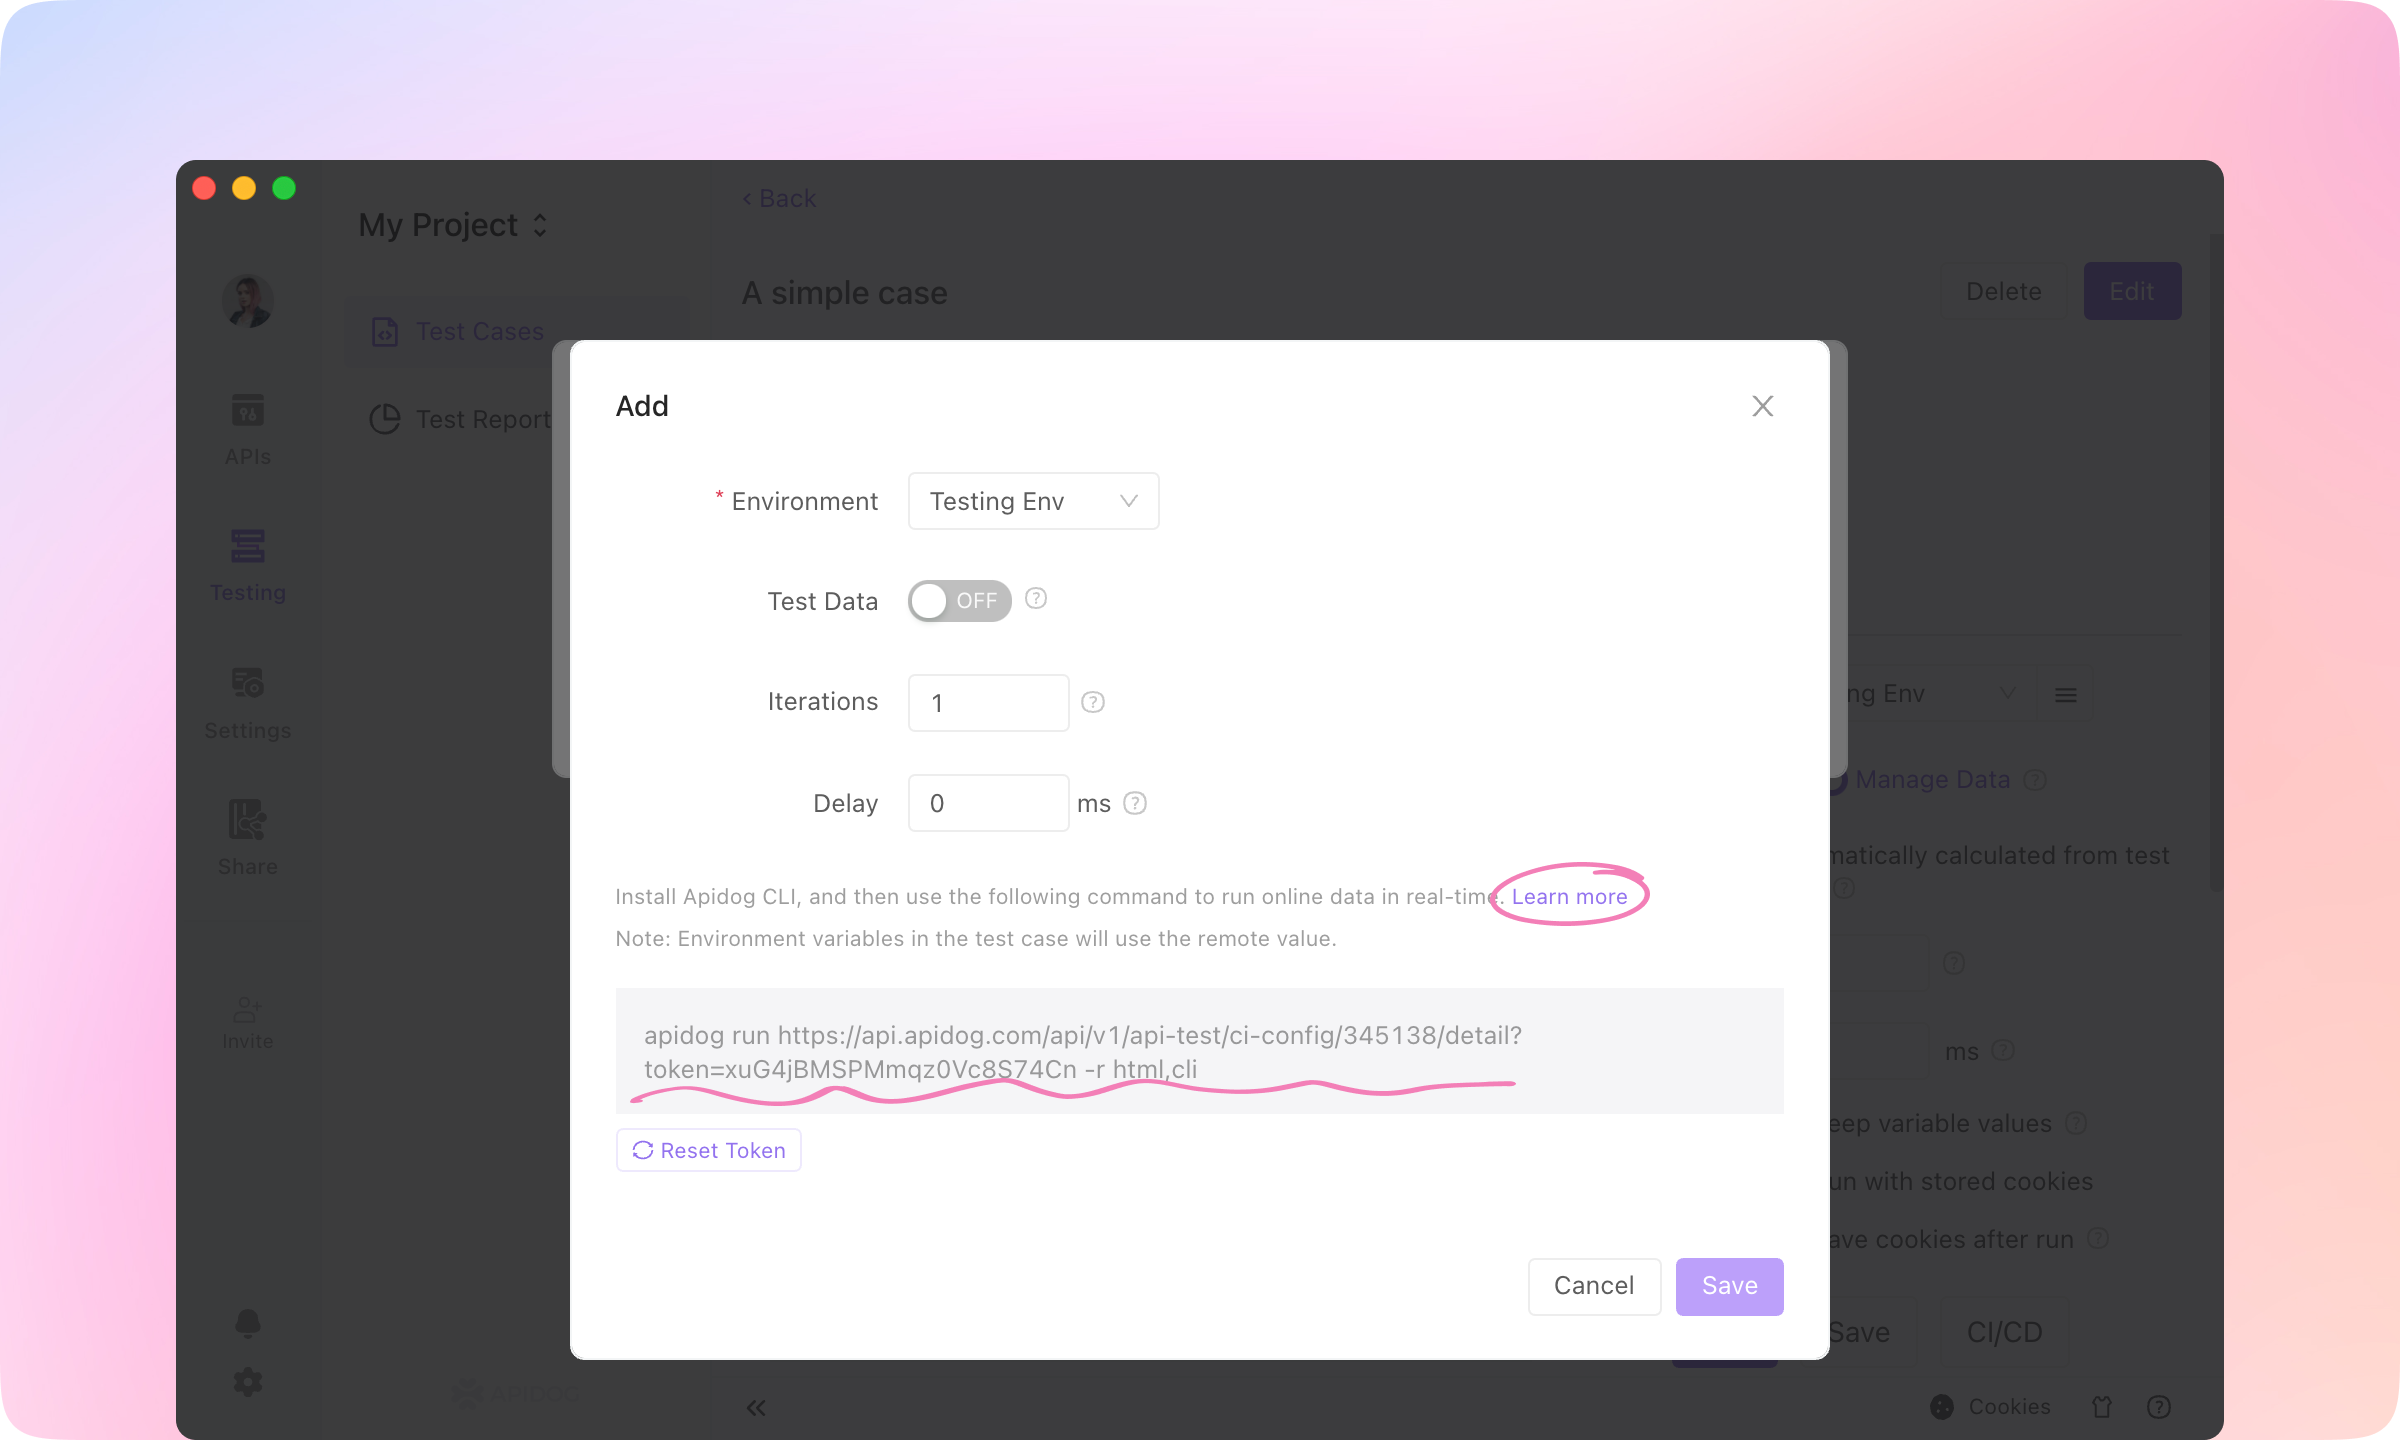
TIP
API Designers & API Consumers: API Documentations
1.
Share module, and +New a share.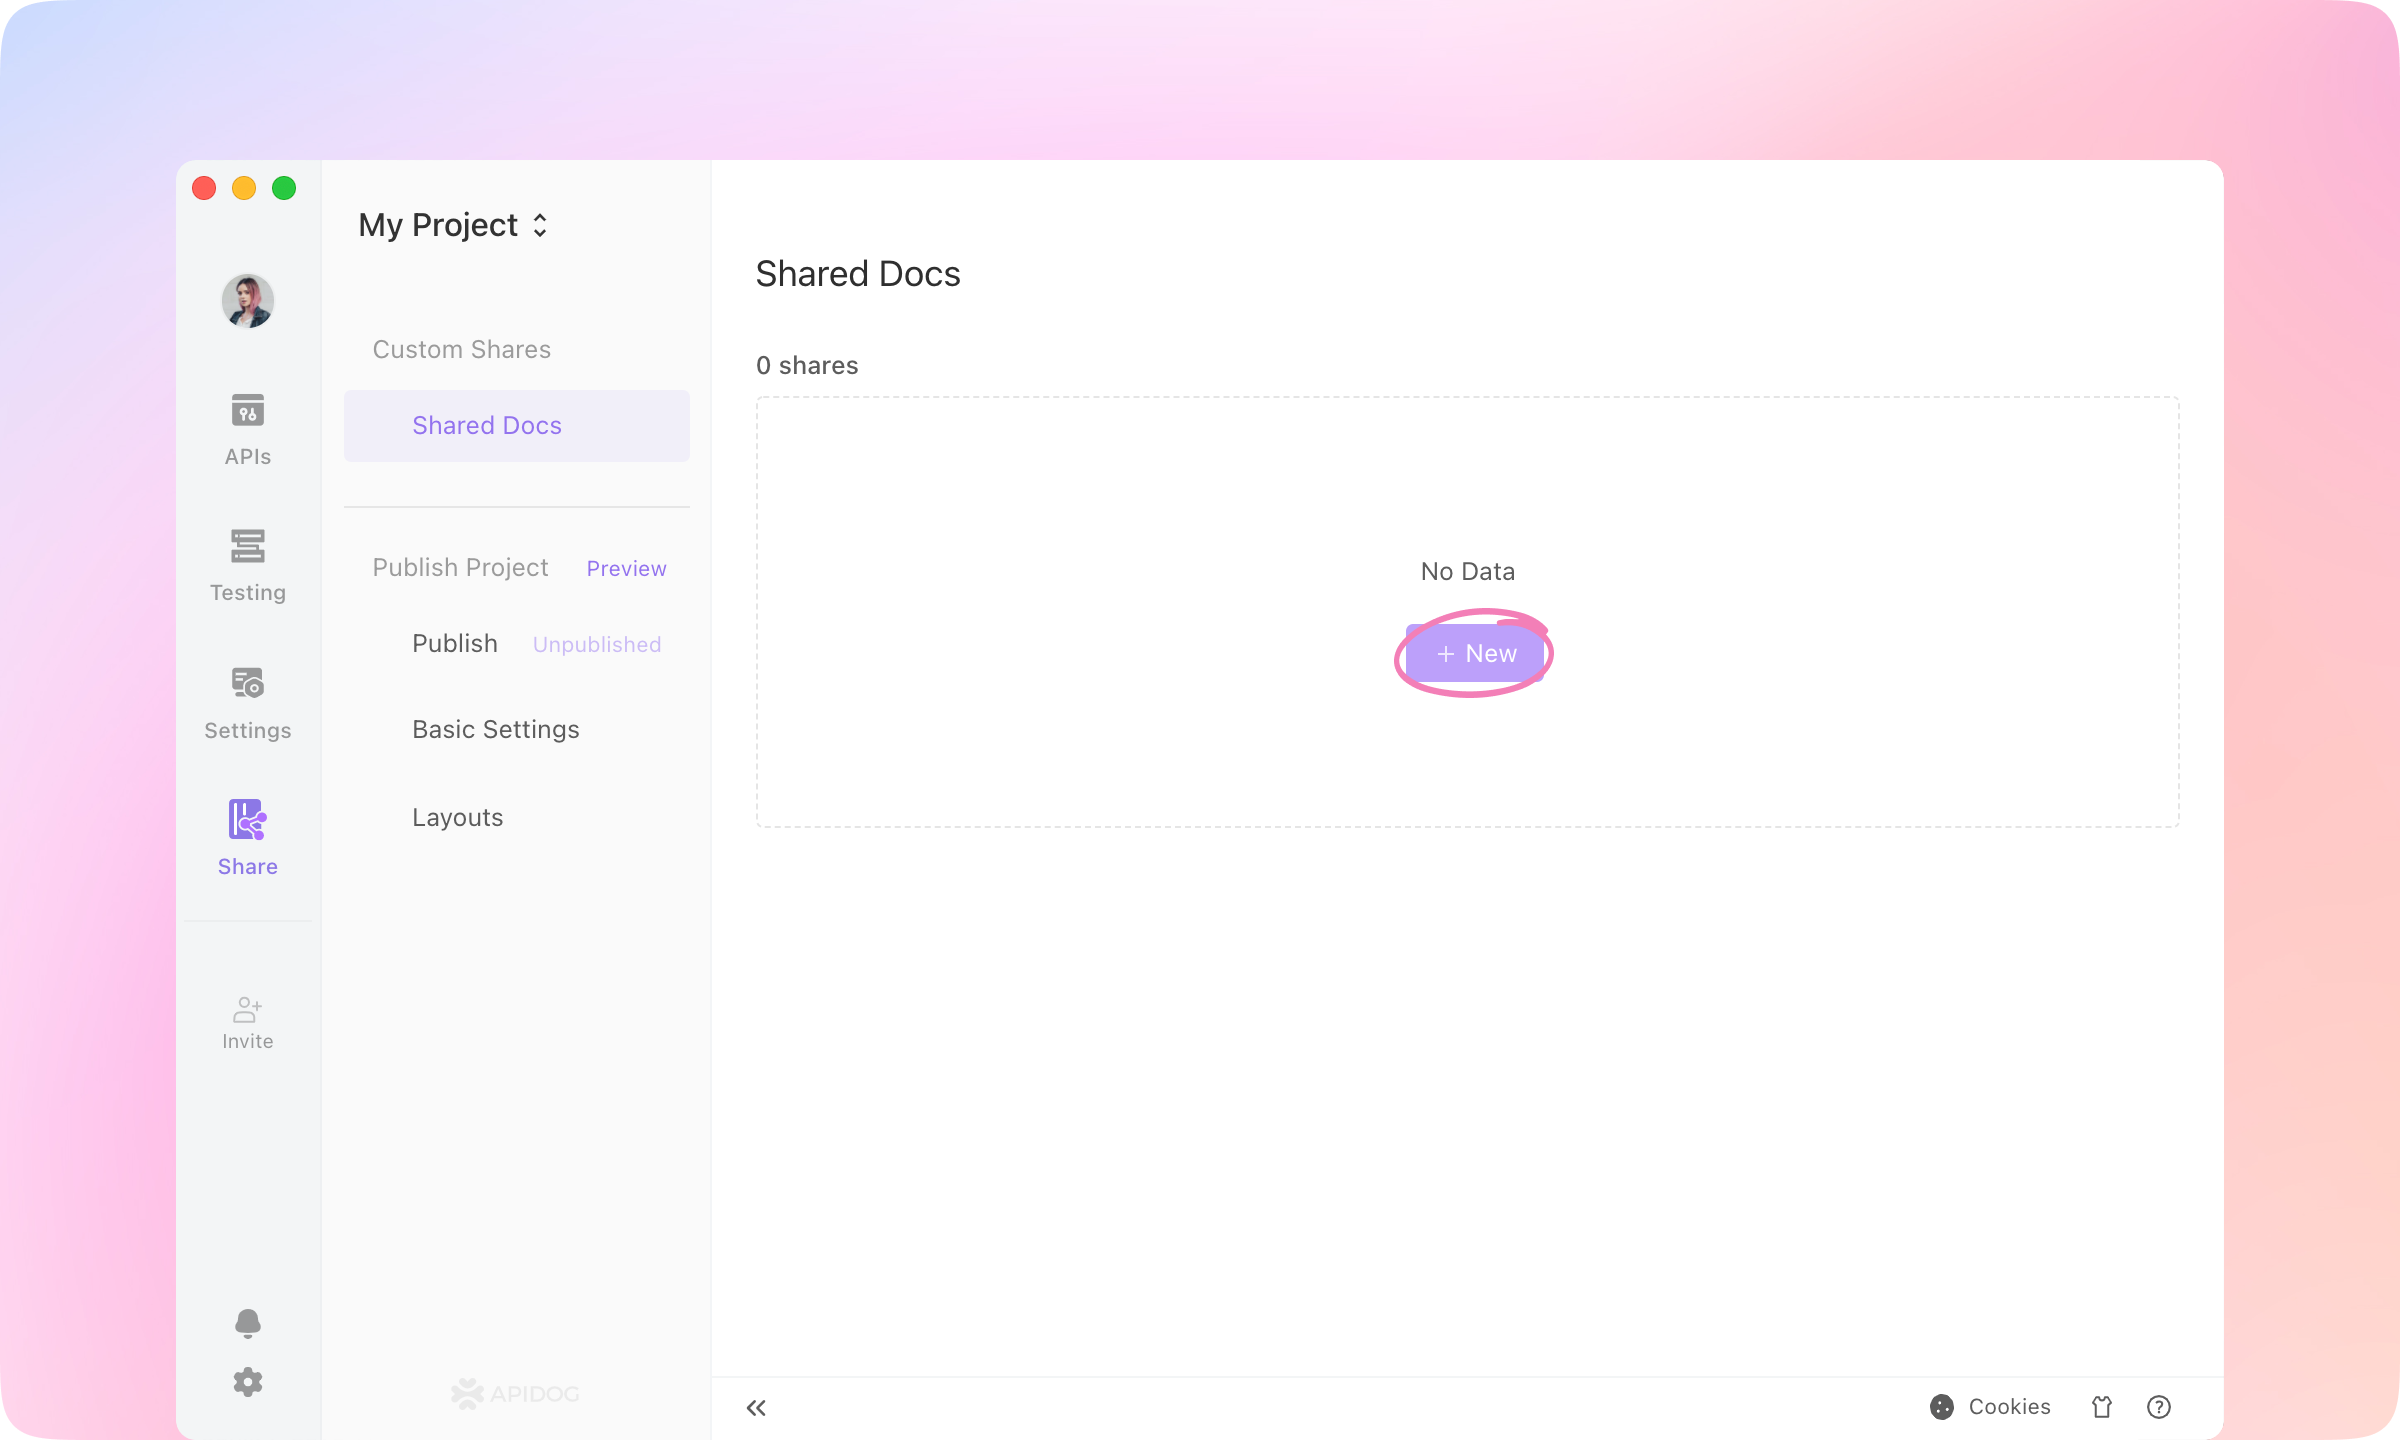
2.
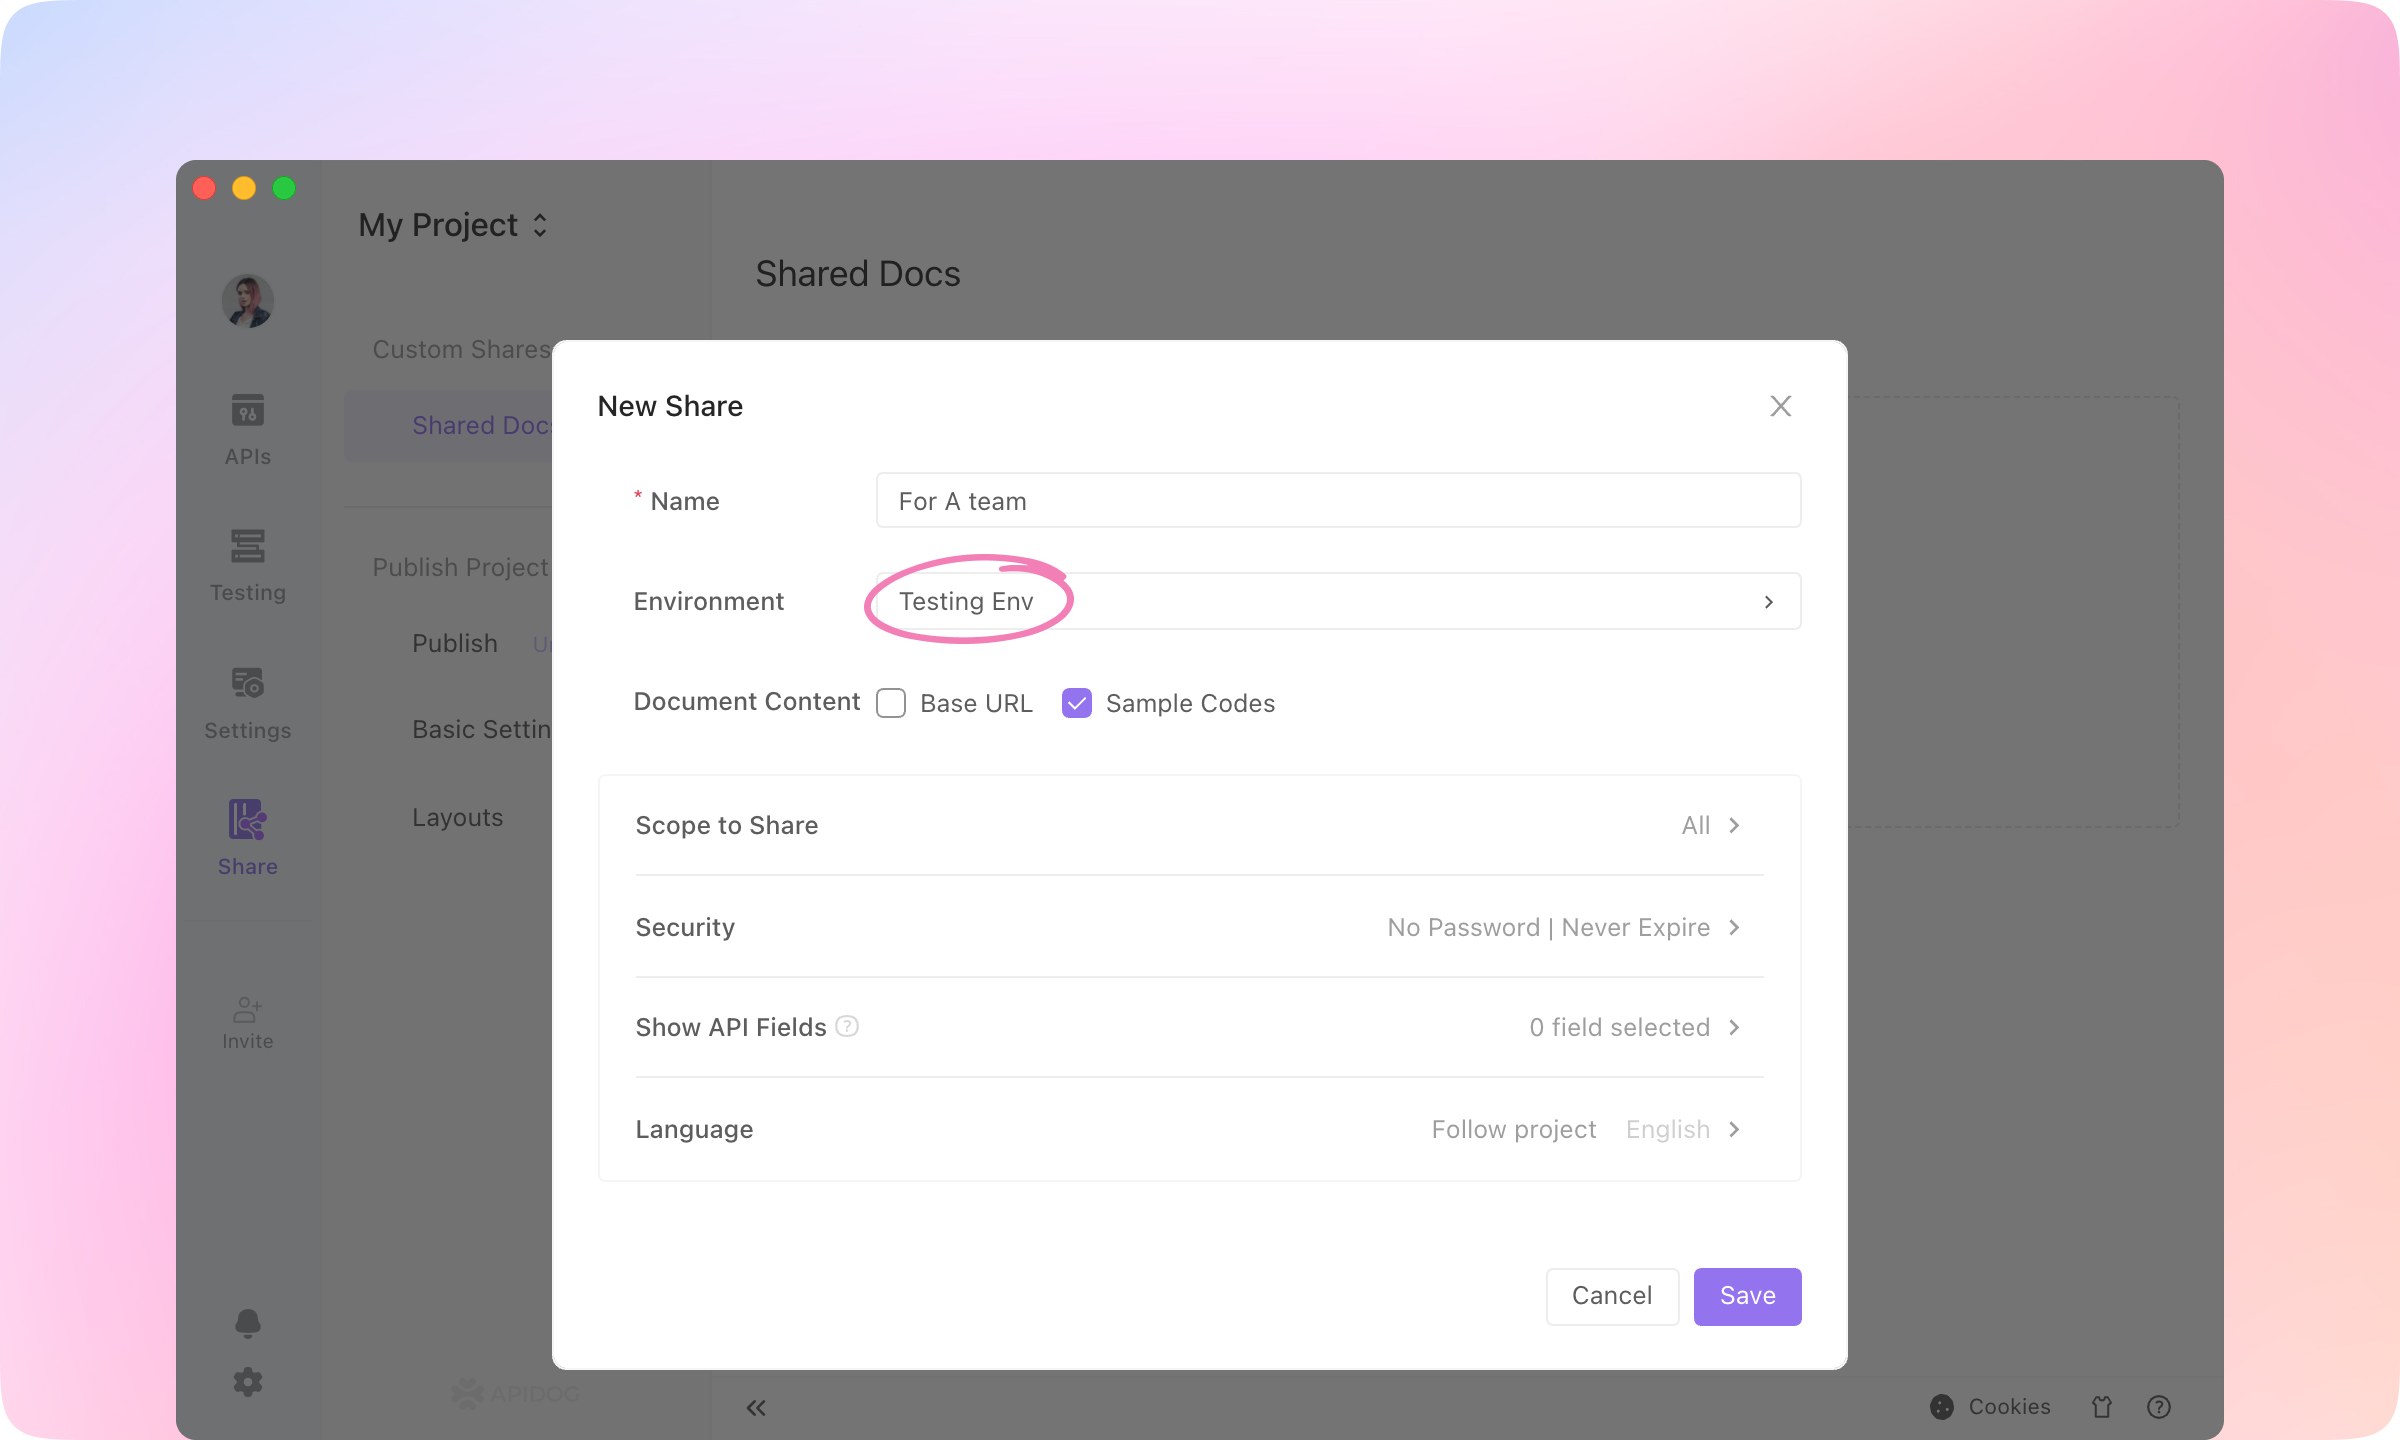
3.
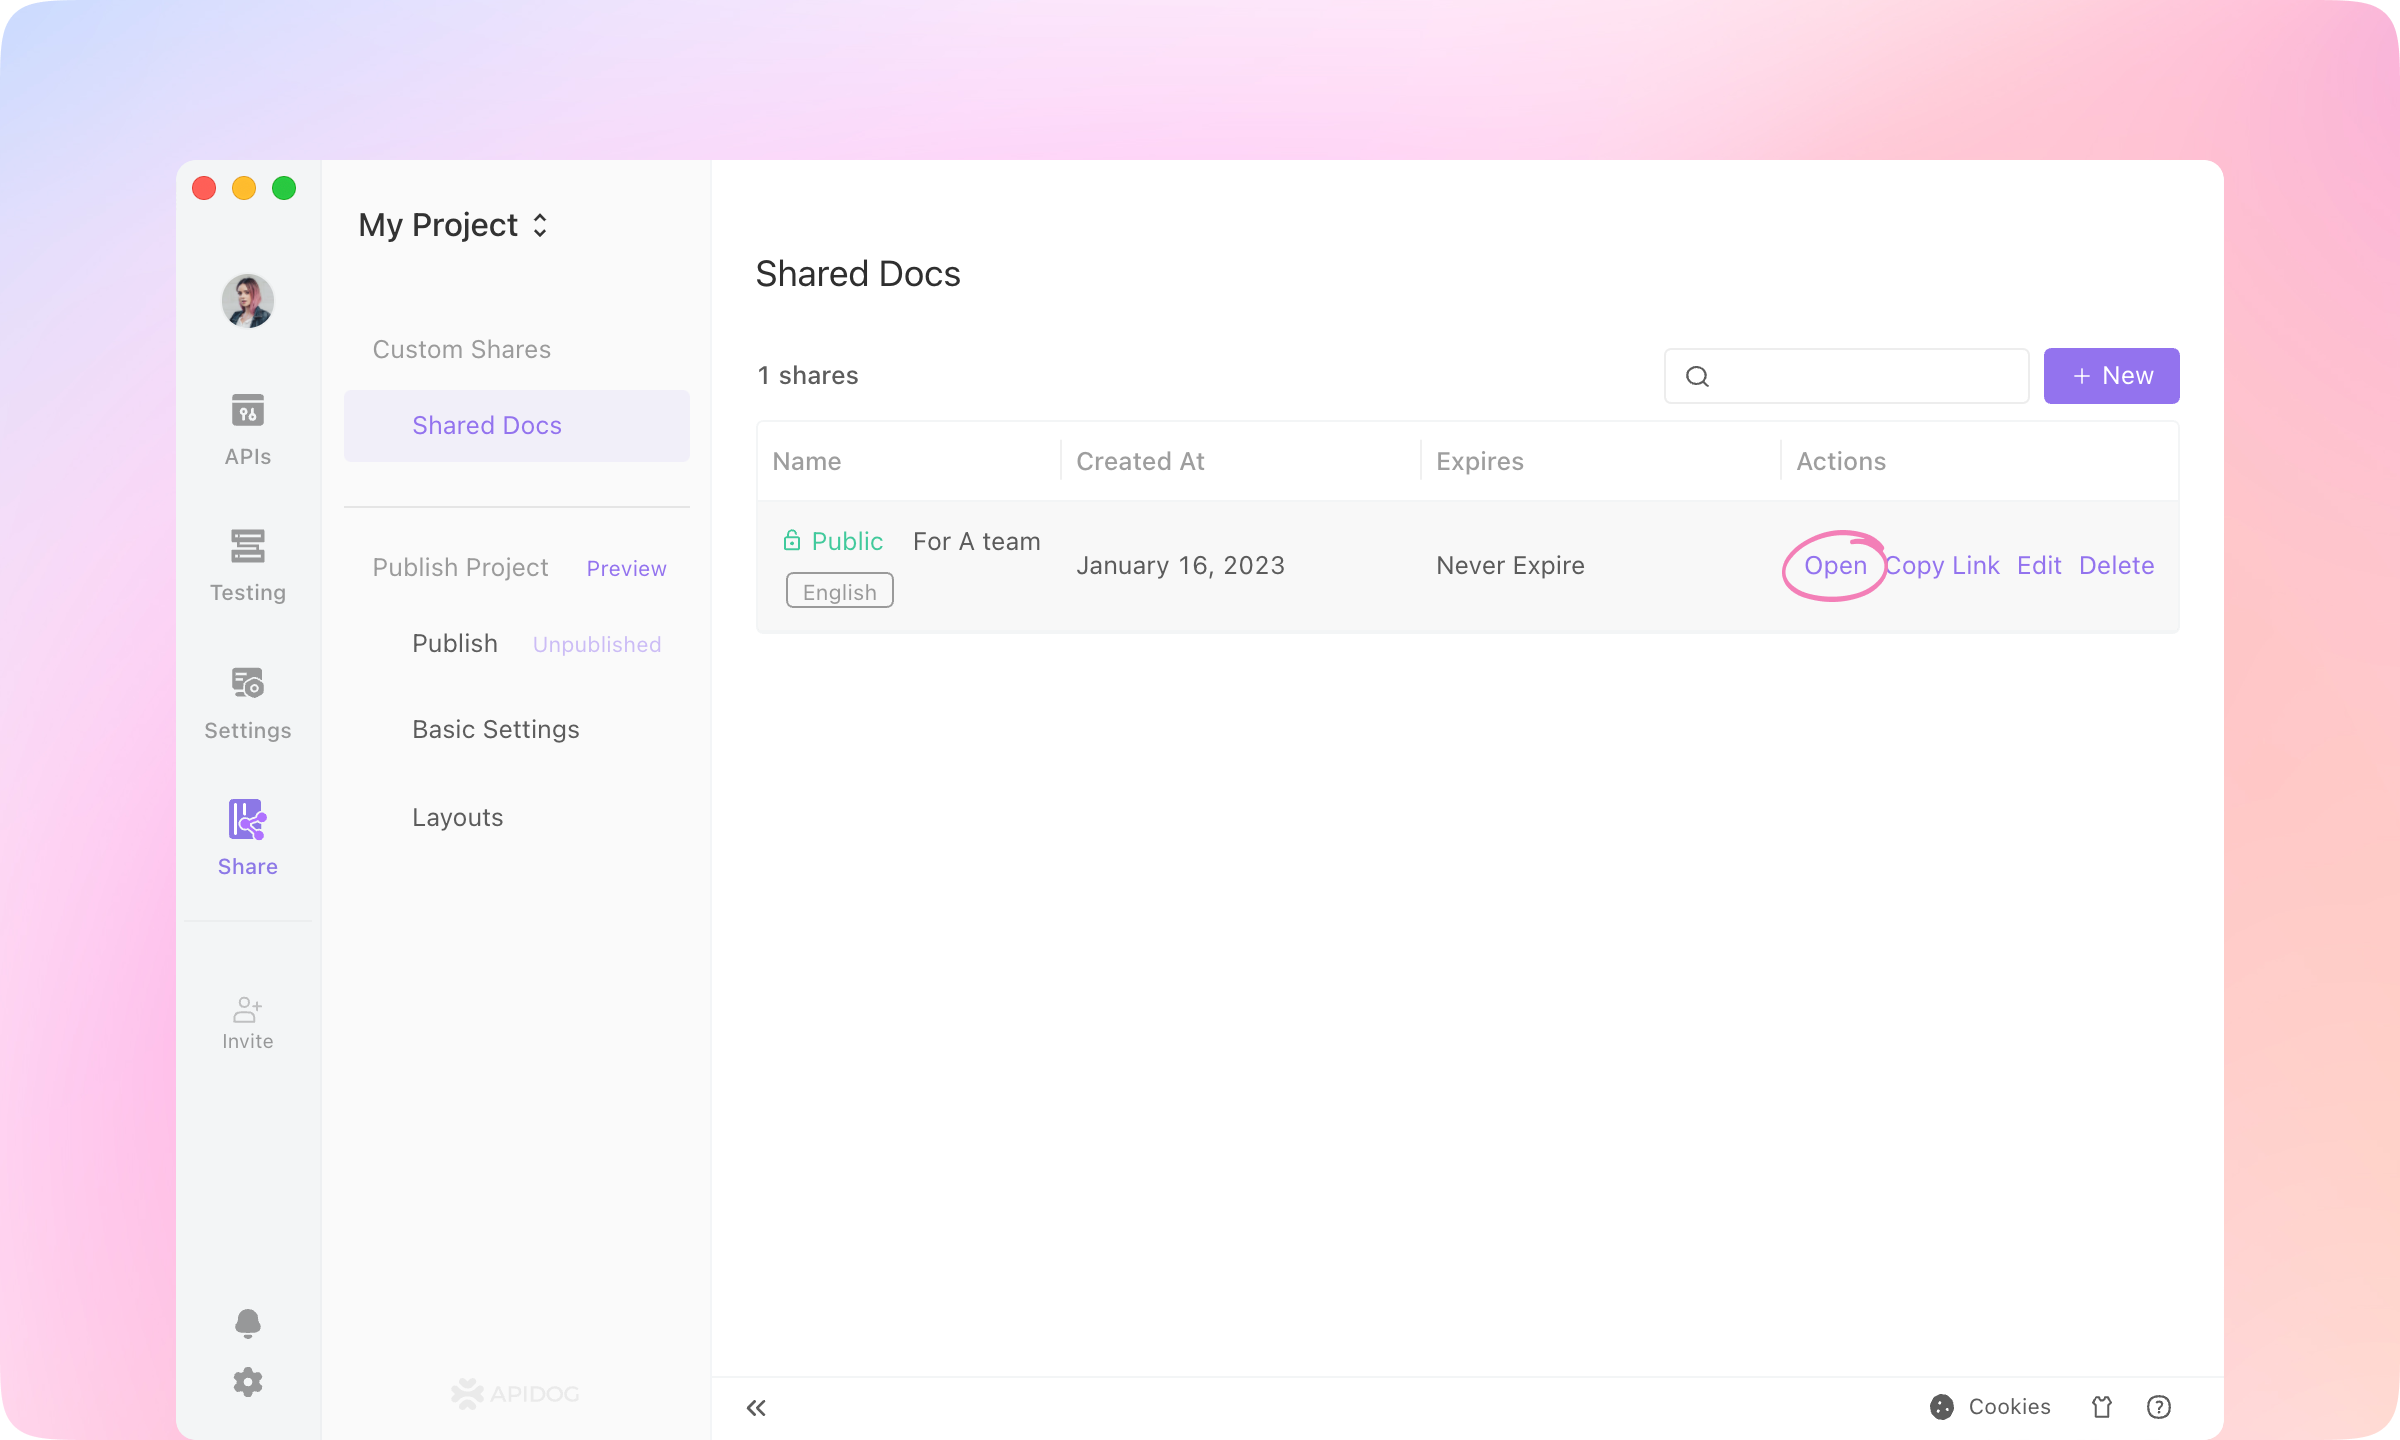
4.
Try it out on the shared website.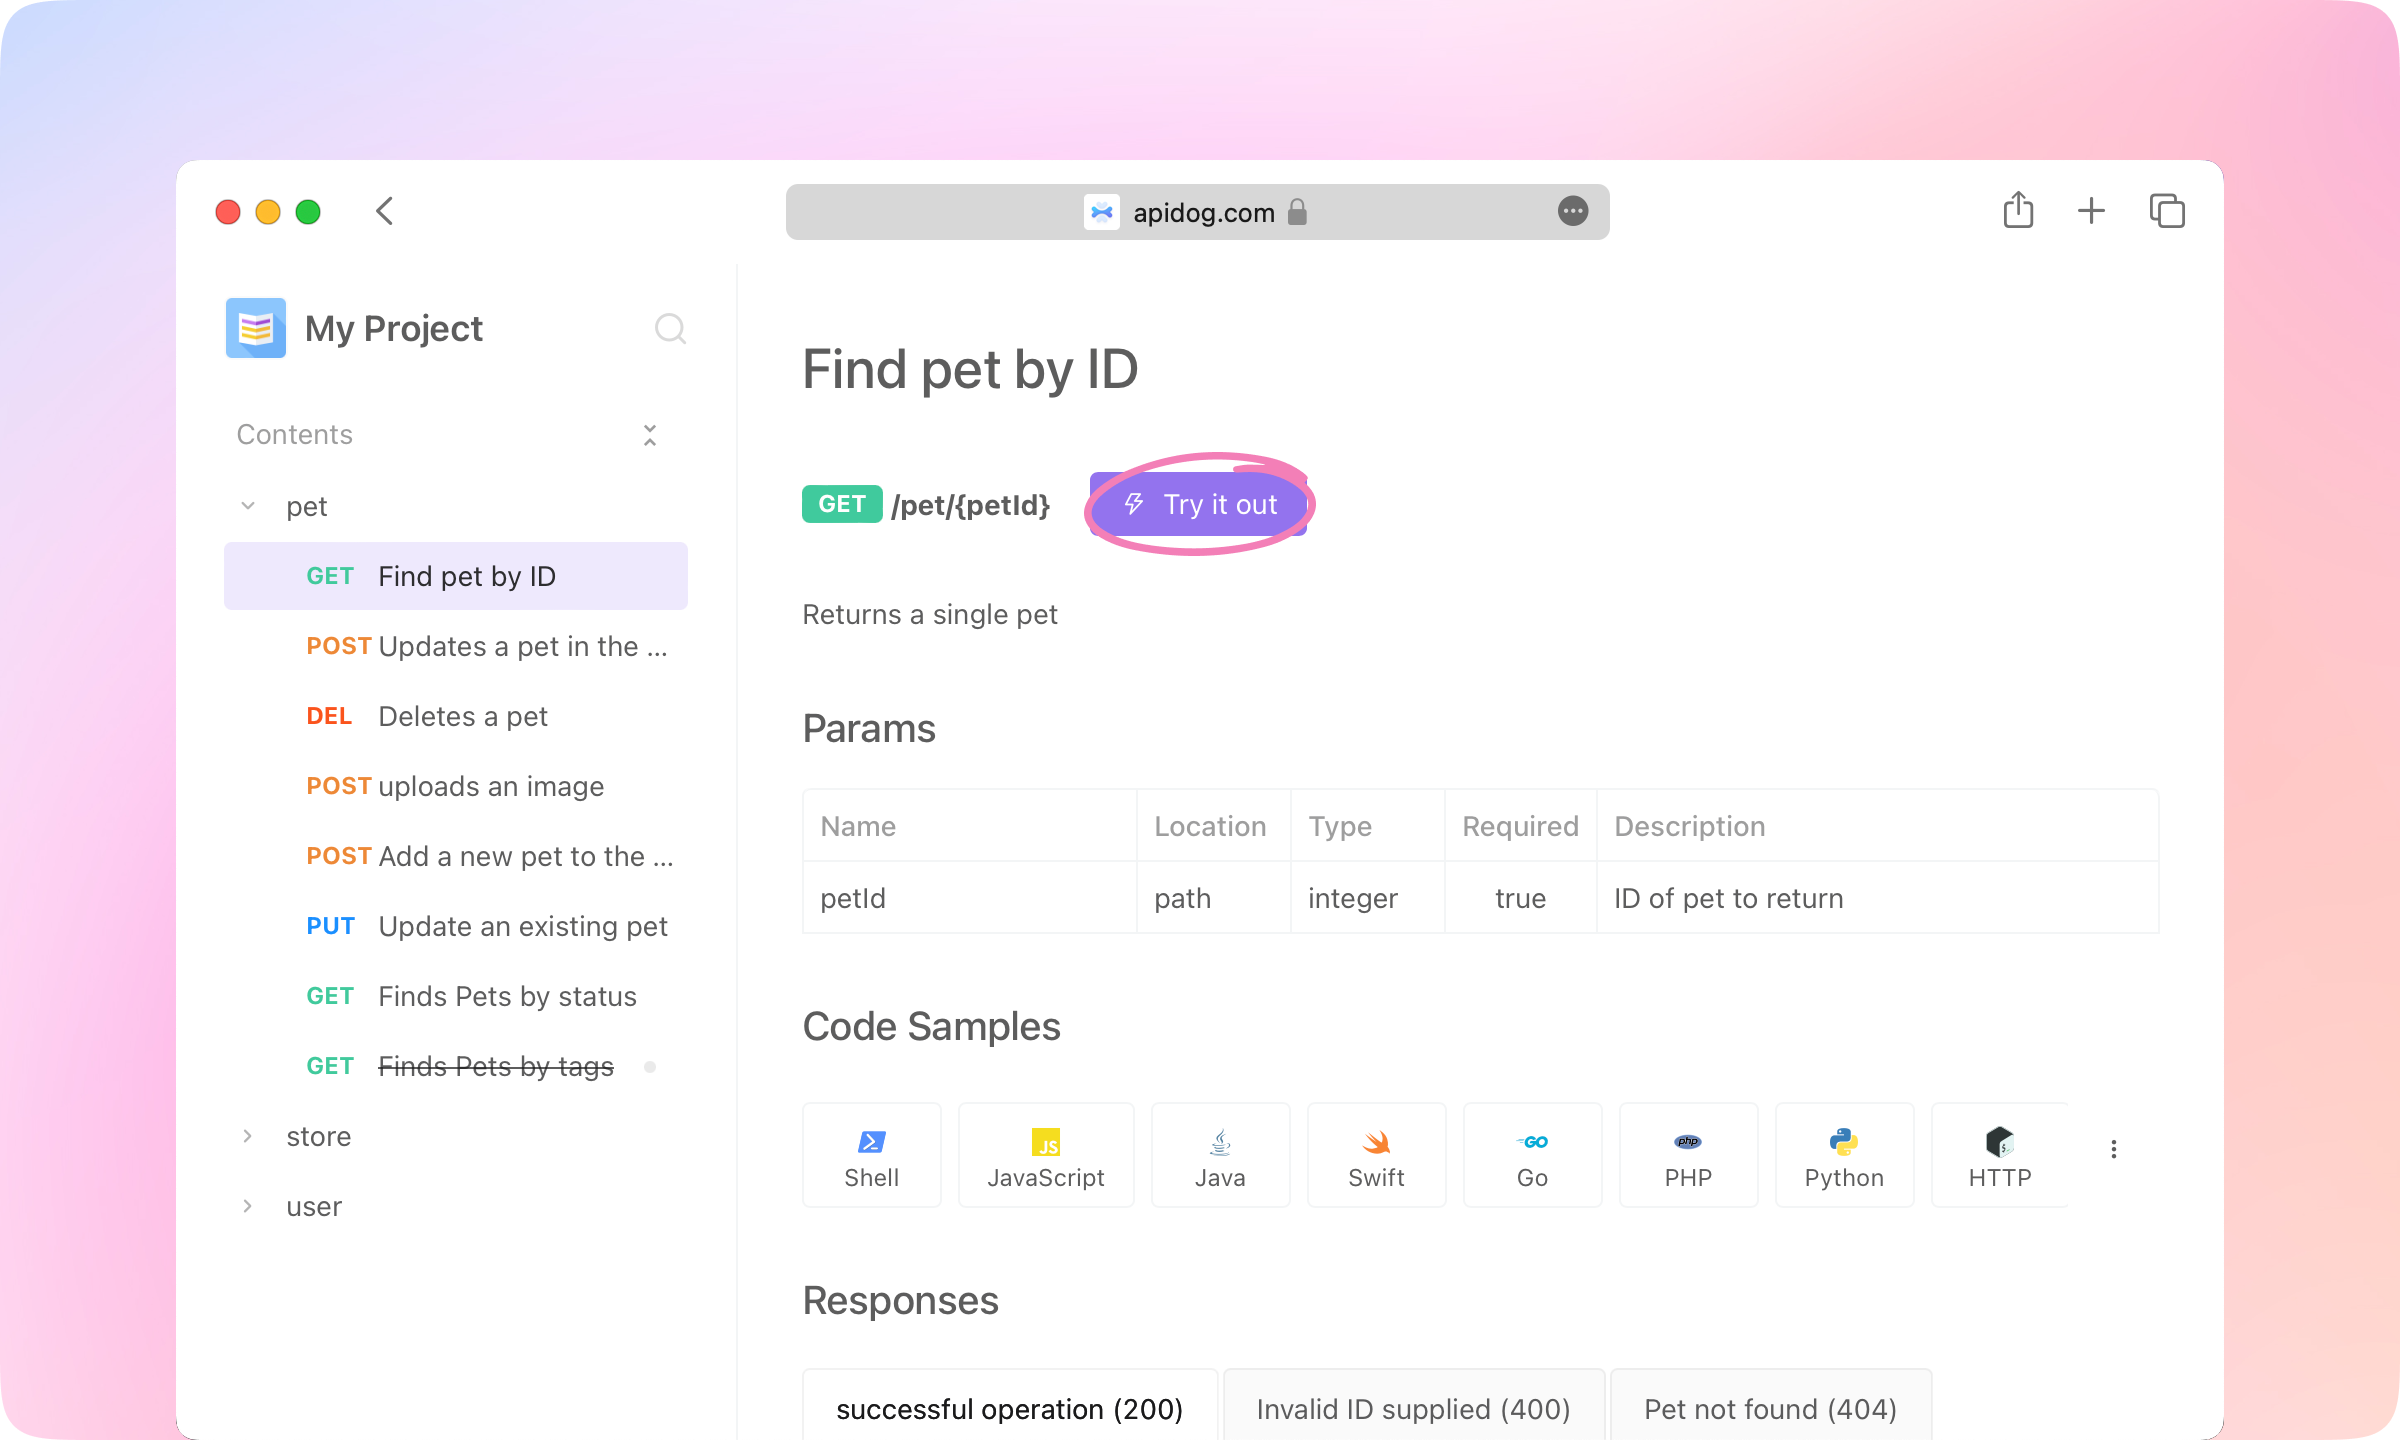
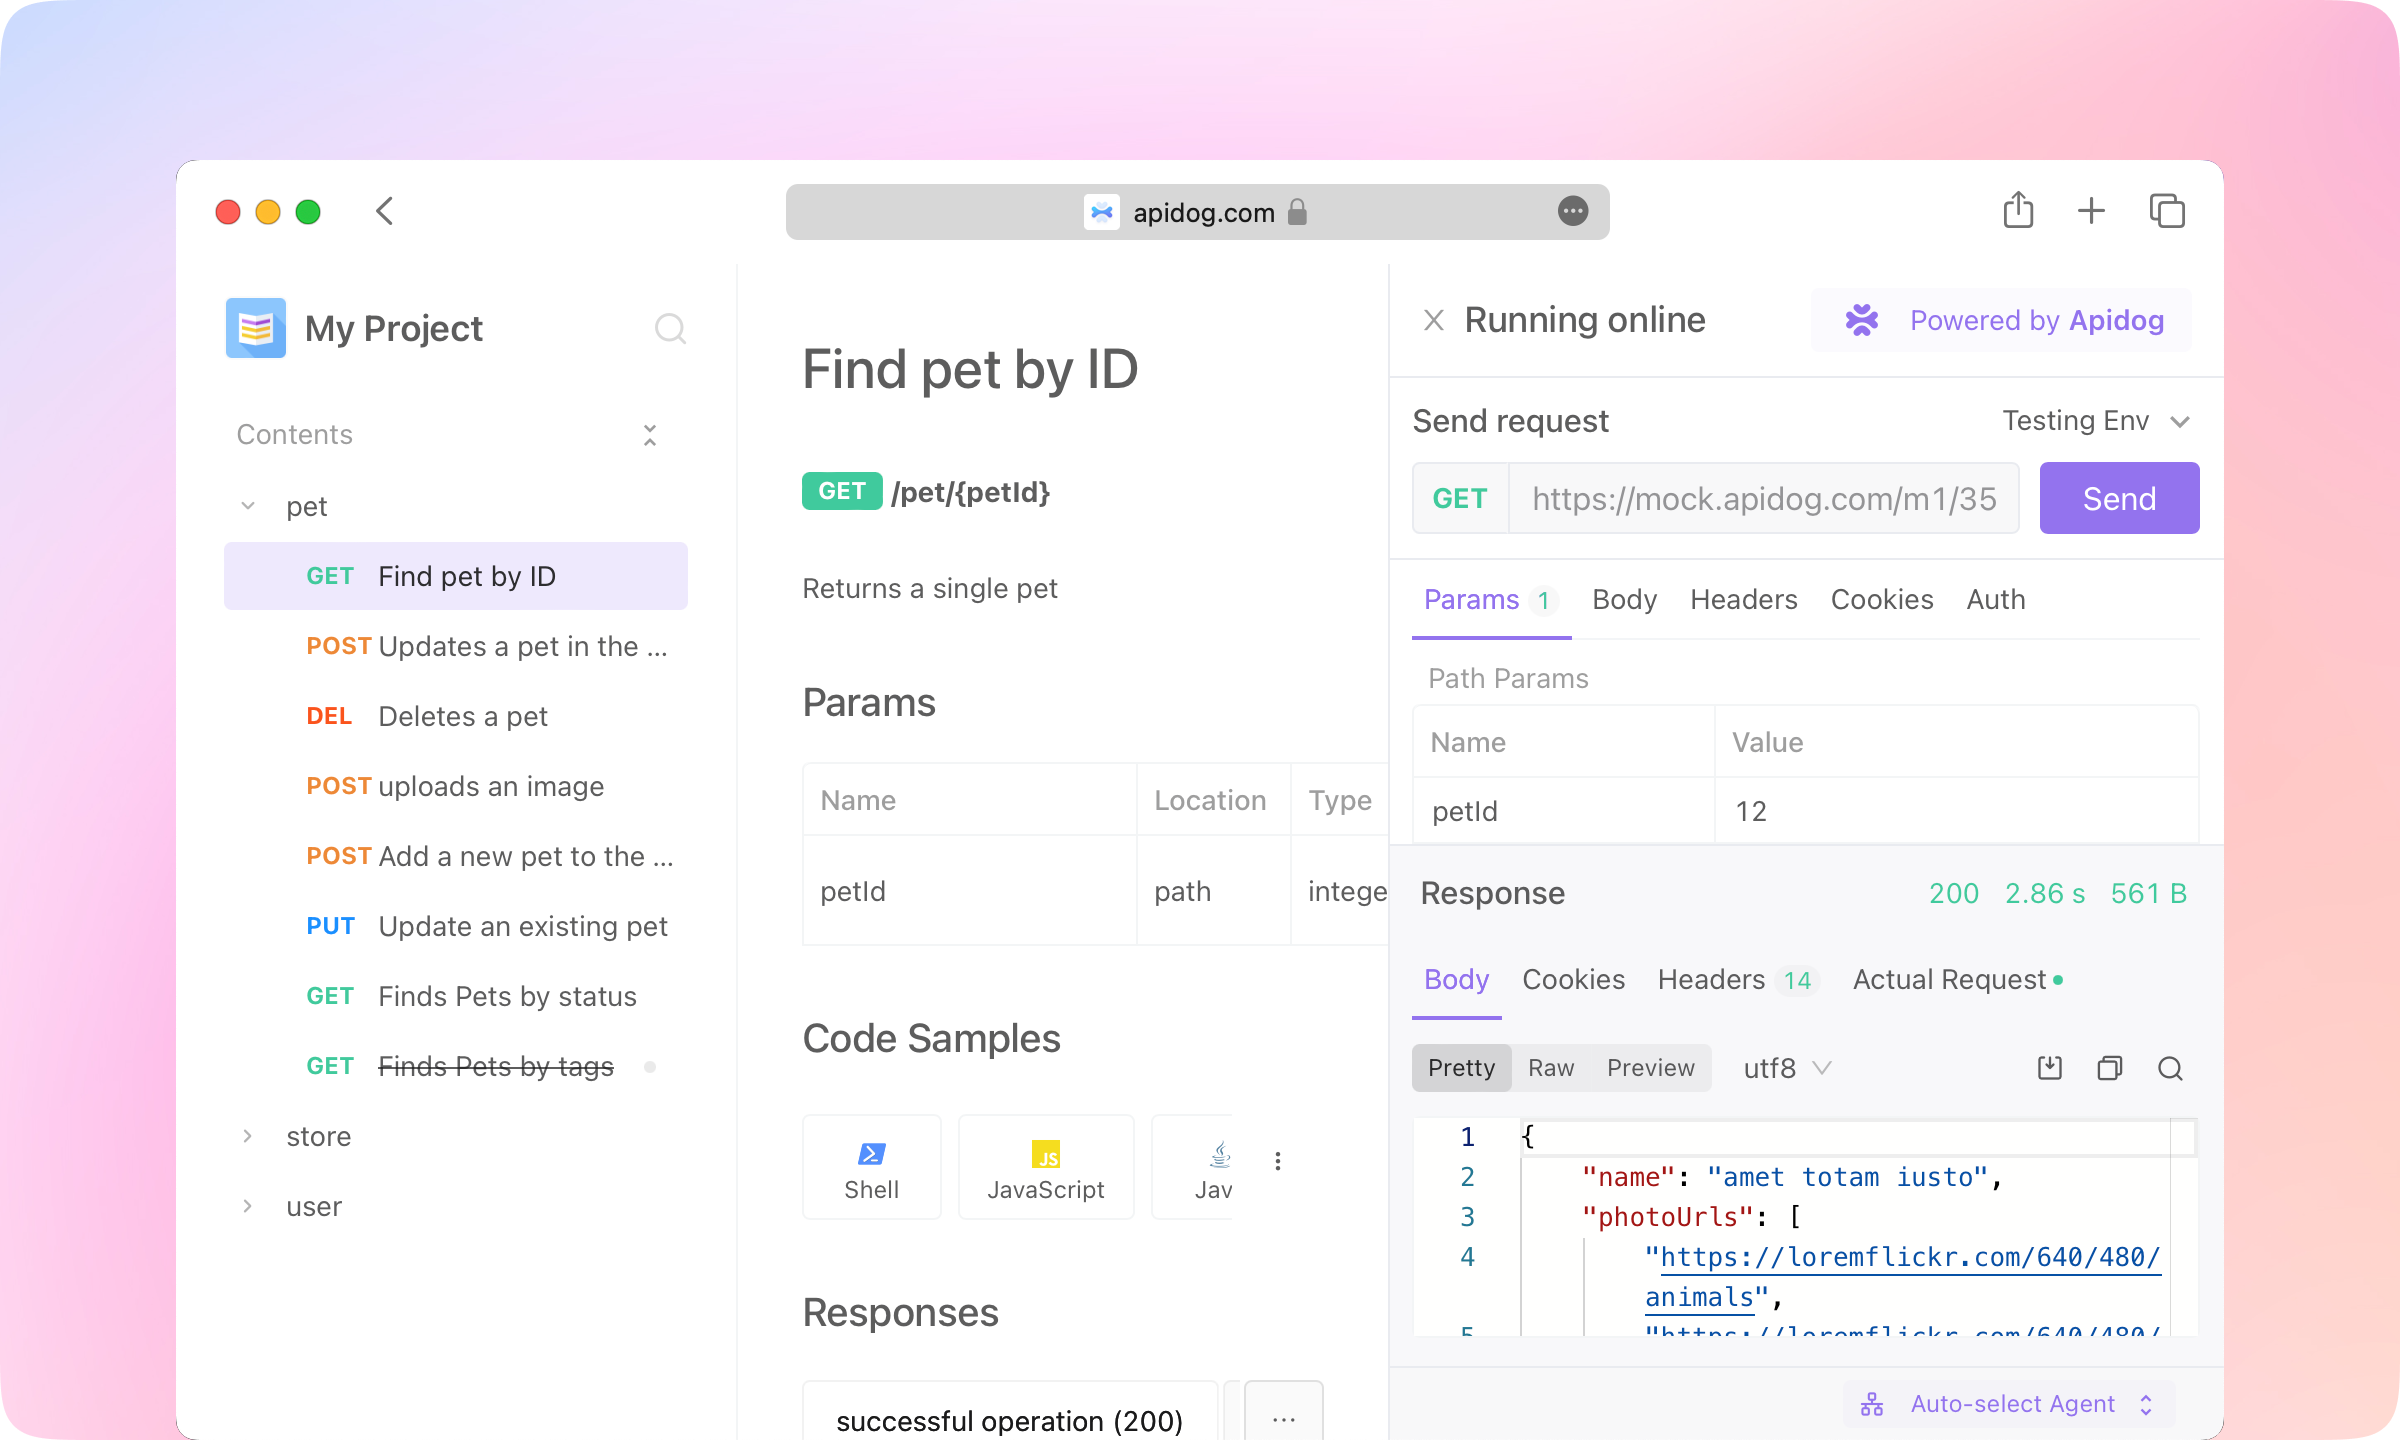
5.
Code Samples feature supports generating API request code in dozens of languages, allowing API readers to directly call the API with the generated code.
6.
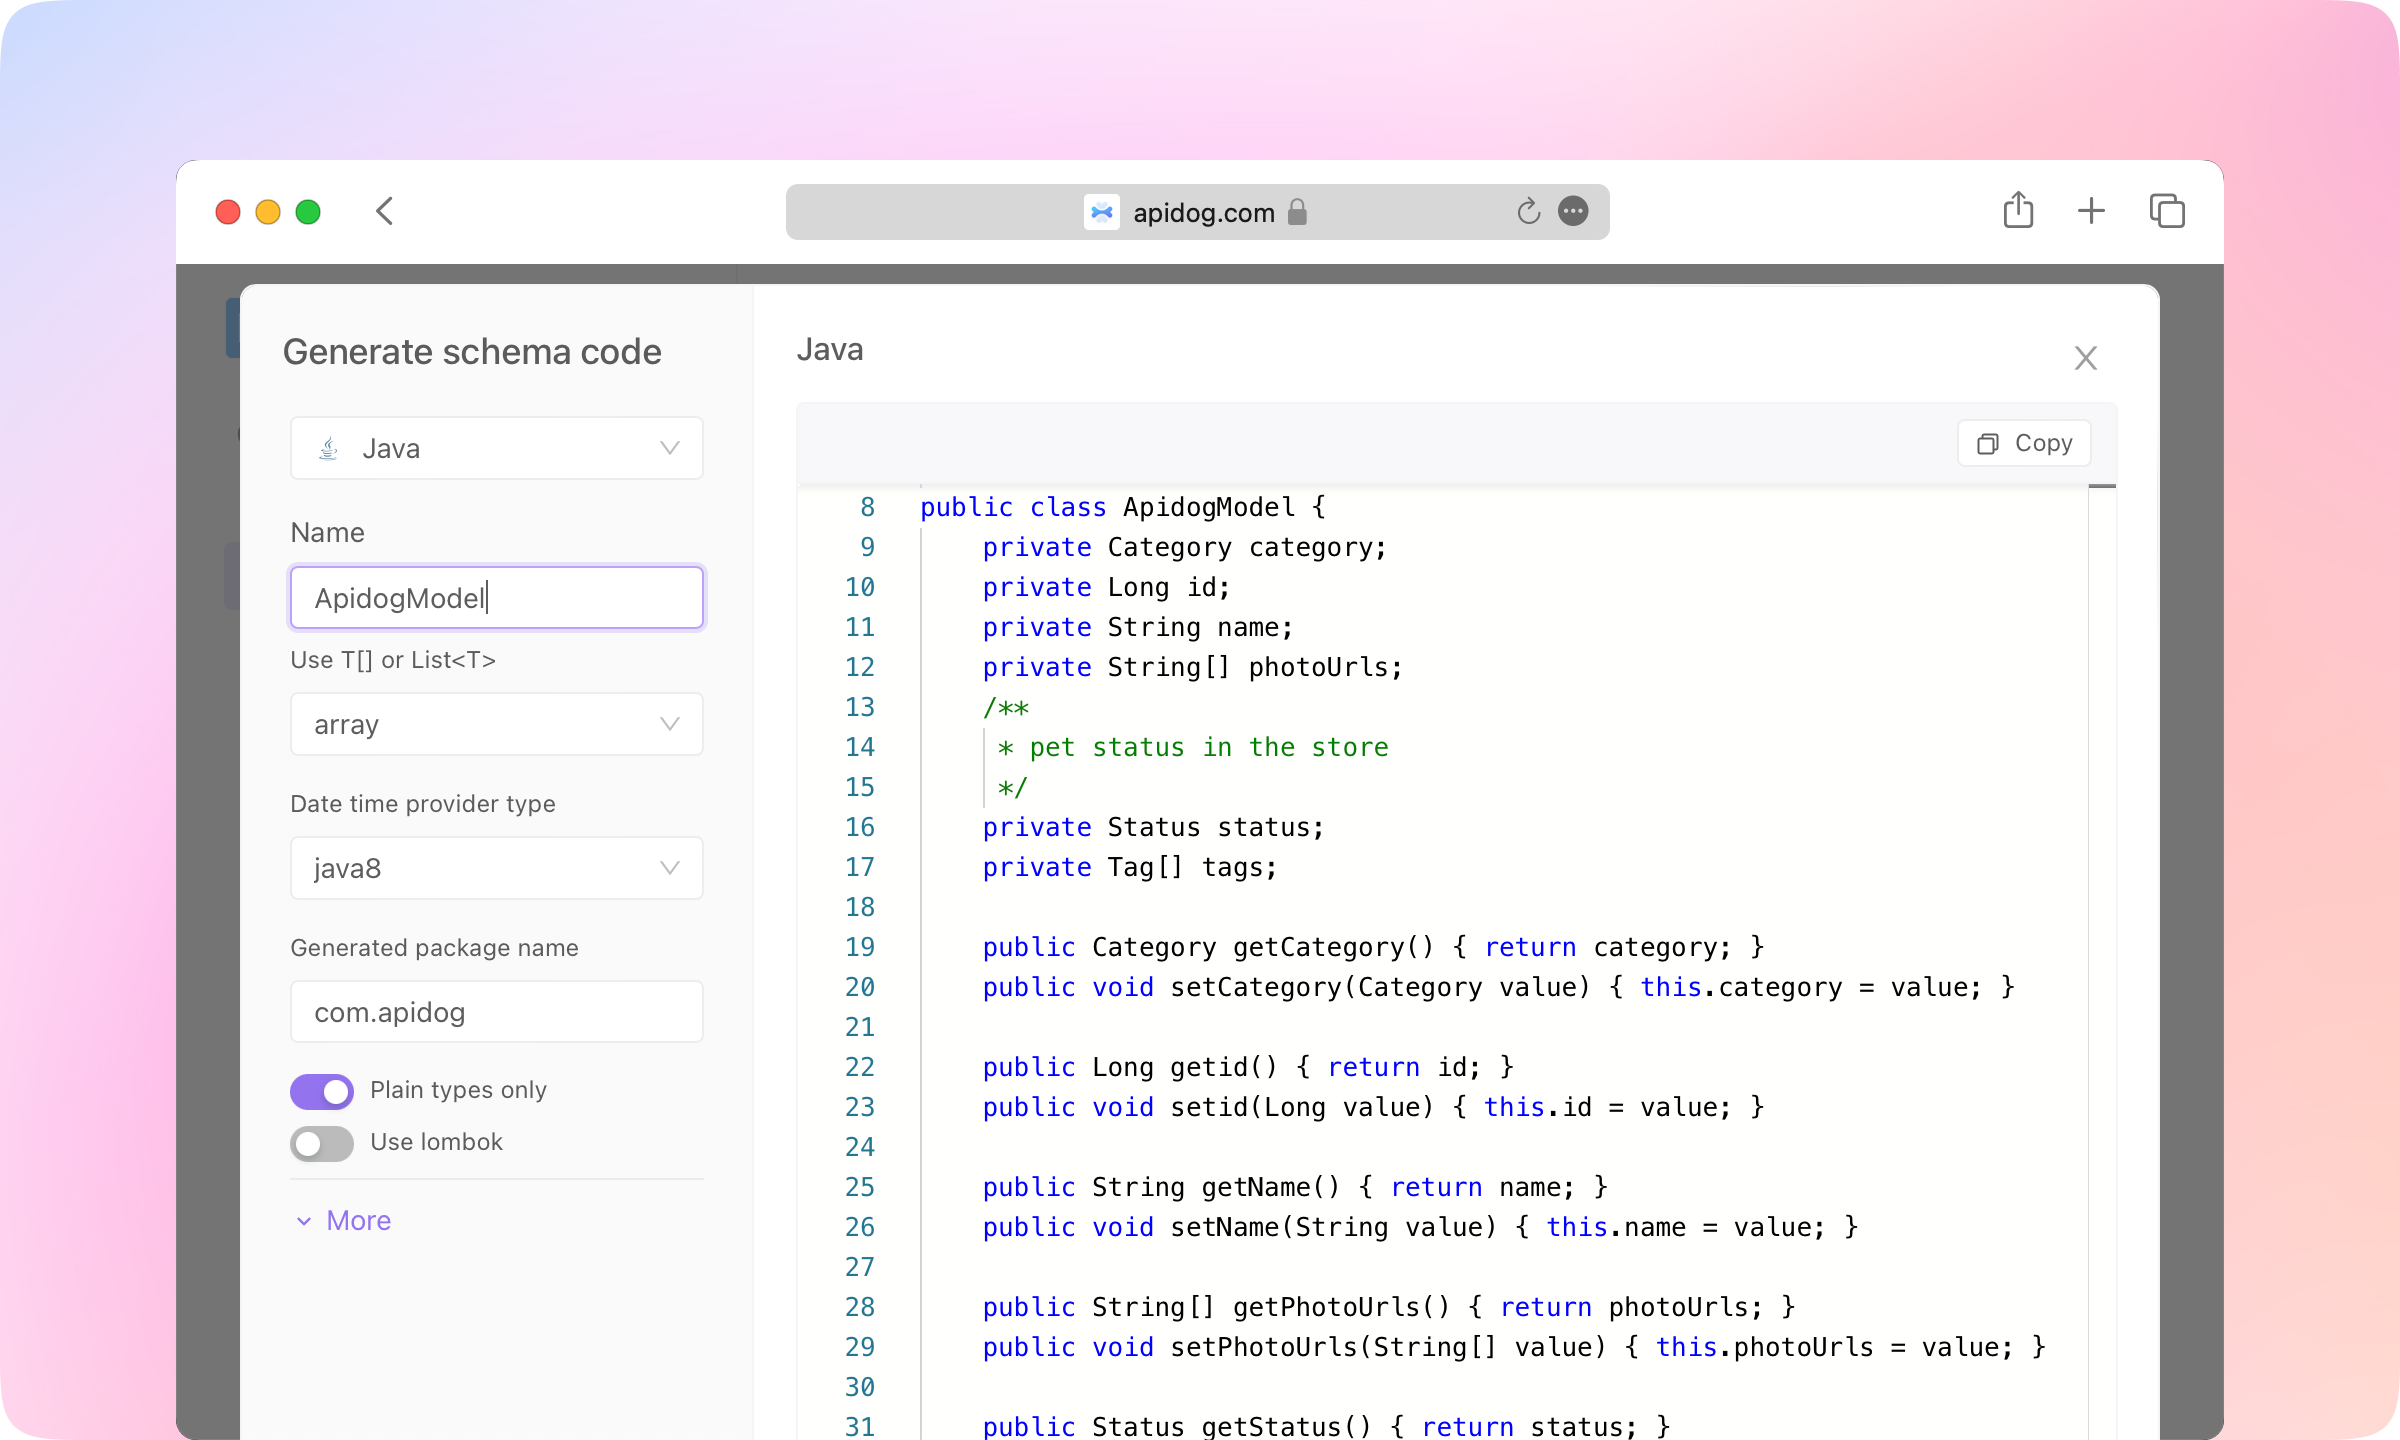
Code Generation in the Responses also supports generating code for the structure of the response data, supporting several dozens of languages. API consumers can use the generated code in their implementation.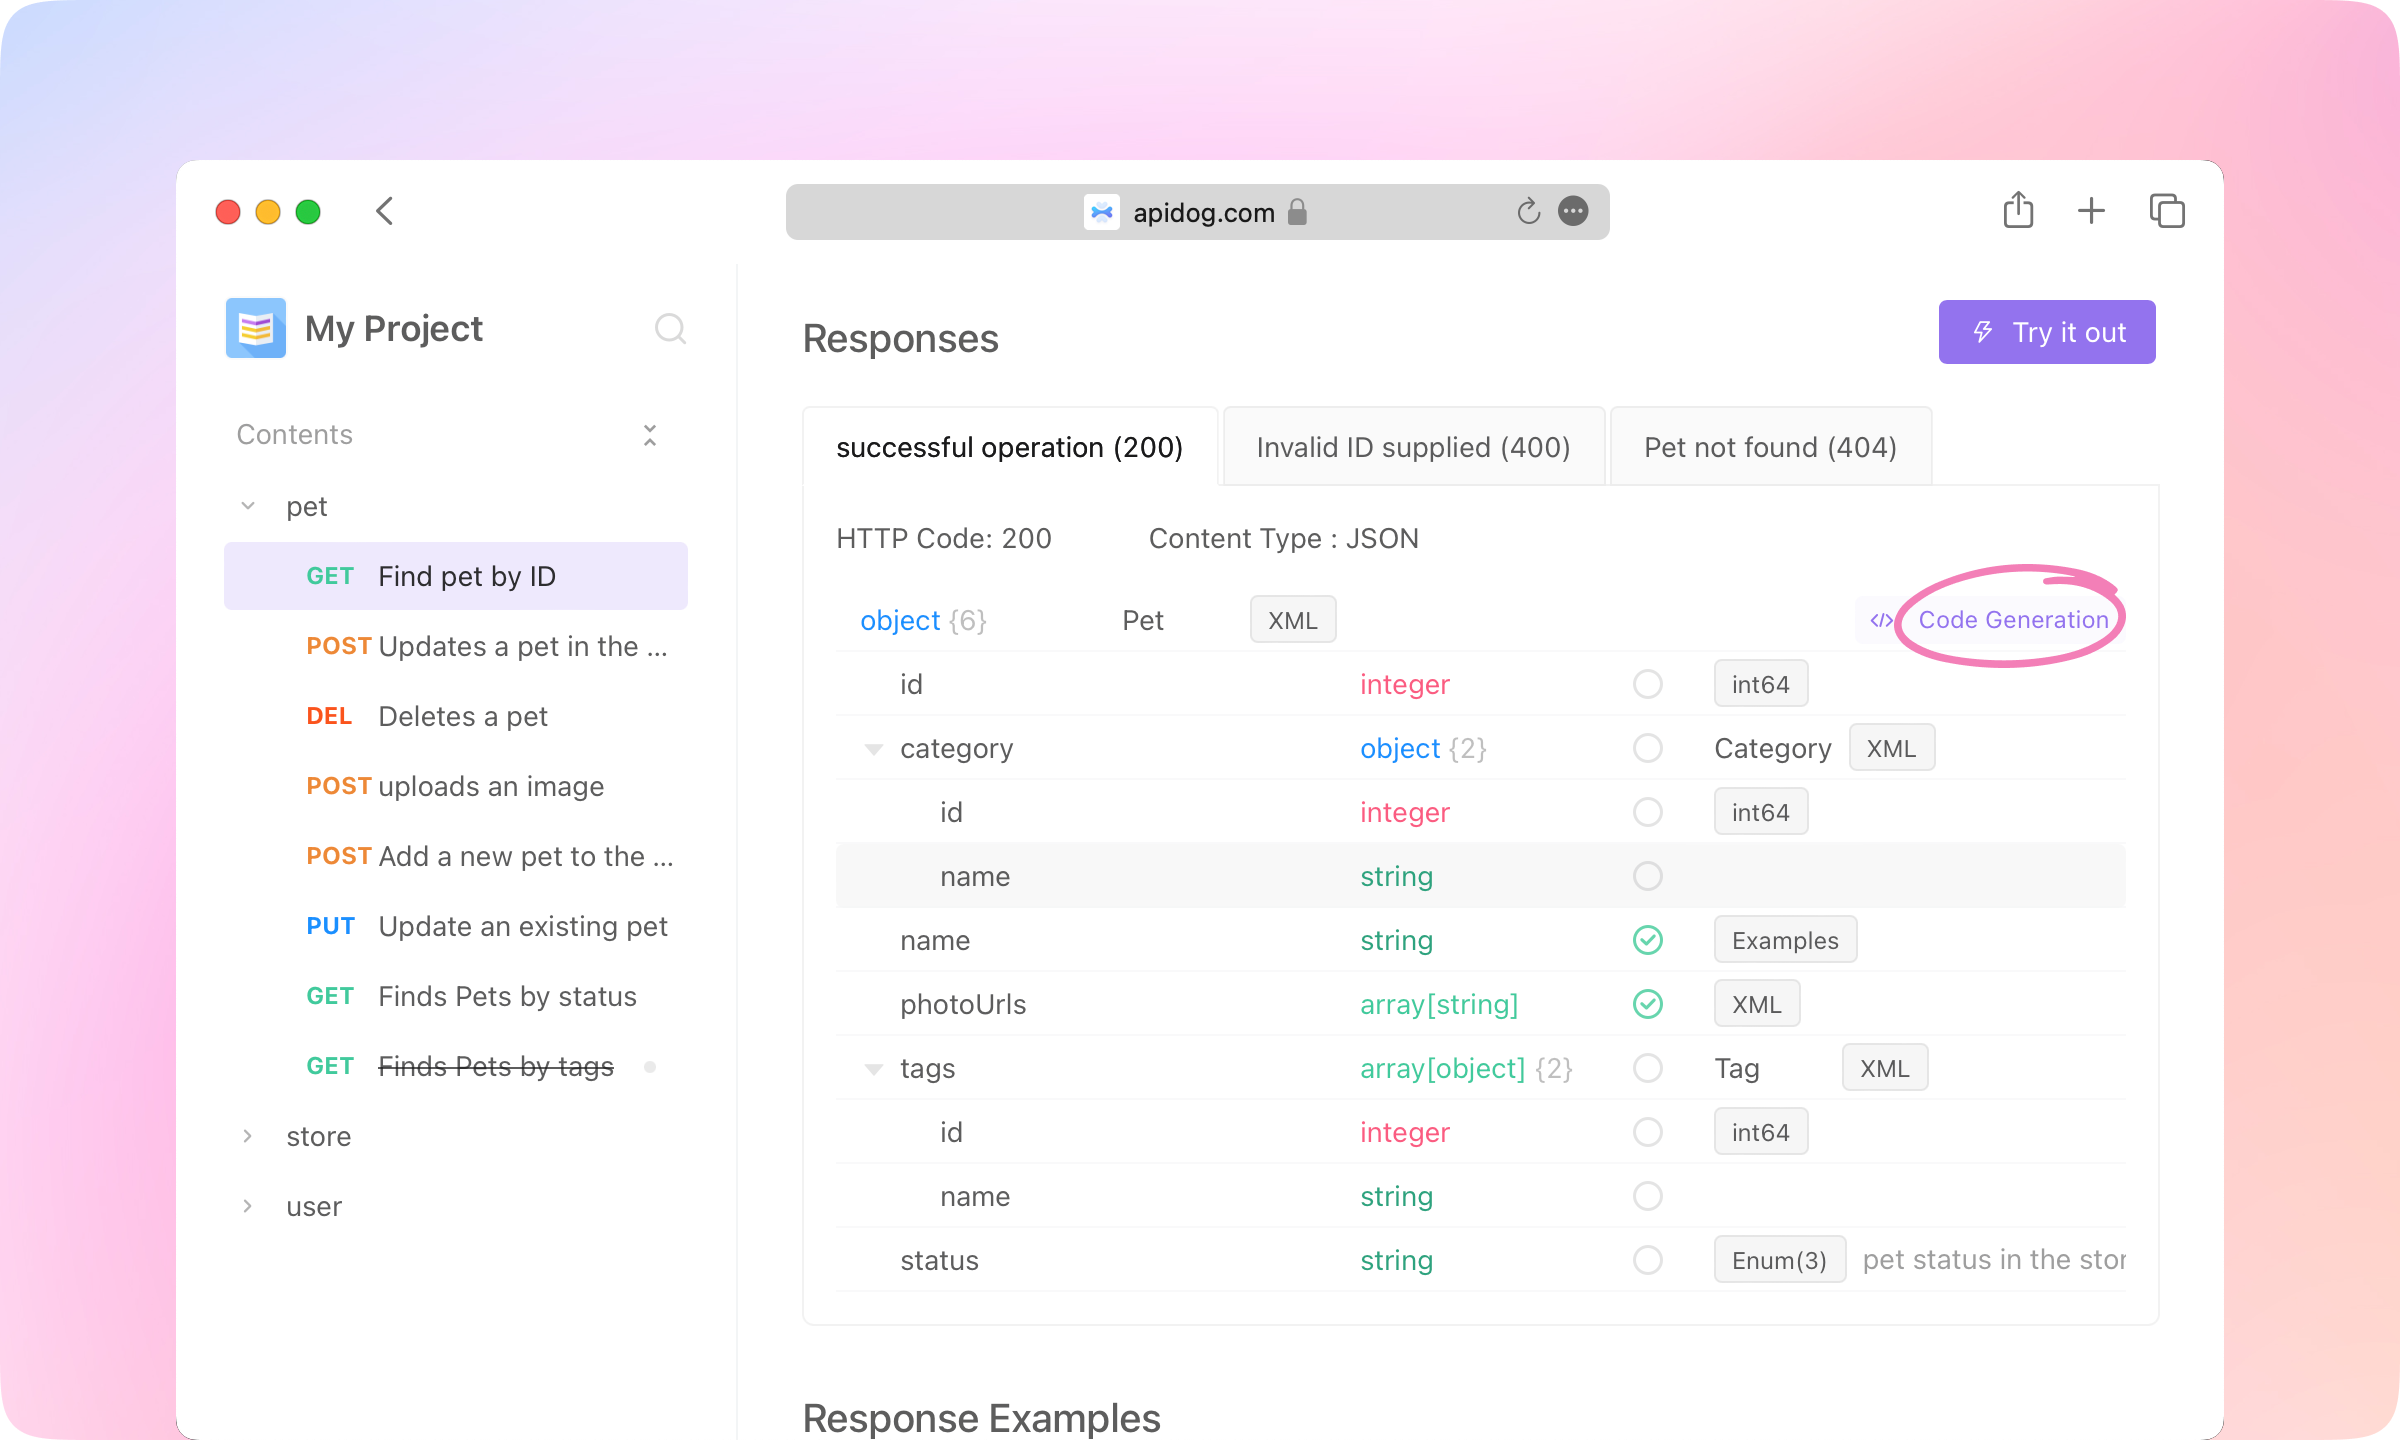
7.
Custom domain, Top Navigation, Catalog Style, Content Footer, and more custom features are also supported in the documentation.
Best Practice
1.
2.
3.
4.
5.
6.
7.
8.
9.